> ## Documentation Index
> Fetch the complete documentation index at: https://help.hoopai.com/llms.txt
> Use this file to discover all available pages before exploring further.
# Workflow Triggers
> Reference for all workflow triggers available in the HoopAI Platform — contacts, appointments, orders, social, and more.
Triggers determine when a workflow starts. The HoopAI Platform includes over 100 triggers organized by category. Select a category to see configuration options, filters, and use cases.
### contact-created-trigger
The ****Contact Created trigger**** enables workflows to automatically activate when a new contact is added to your CRM. With customizable filters, such as tags or custom field data, this trigger provides the flexibility to tailor workflows based on specific criteria.
## Adding the Contact Created Trigger
Start by clicking the ****Add New Trigger**** button and selecting ****Contact Created**** from the options. This trigger is especially useful for automating actions like adding tags to contacts or sending welcome messages.
 ***
## Add Filters
### Contact Type
Use this filter to choose whether the workflow should be activated for only customers or leads.
***
## Add Filters
### Contact Type
Use this filter to choose whether the workflow should be activated for only customers or leads.
 ### Email / Phone
This filter allows you to locate a particular contact to perform specific actions on by entering their email address or phone number in the value field.
### Email / Phone
This filter allows you to locate a particular contact to perform specific actions on by entering their email address or phone number in the value field.
 ### Has Tag
Use this filter to activate workflows only when a contact is assigned a specific tag. Simply select the desired tag(s) from the dropdown, and the workflow will run when a contact matches this tag.
### Has Tag
Use this filter to activate workflows only when a contact is assigned a specific tag. Simply select the desired tag(s) from the dropdown, and the workflow will run when a contact matches this tag.
 ### Custom Field
Click ****Add Filters****,\*\*\*\* ****and**** \*\*\*\*select the relevant ****Custom field**** to trigger the workflow when a contact submits data through a form on your website that collects information via a custom field. This will ensure that the workflow only fires when a contact completes the custom field with the required data.
### Custom Field
Click ****Add Filters****,\*\*\*\* ****and**** \*\*\*\*select the relevant ****Custom field**** to trigger the workflow when a contact submits data through a form on your website that collects information via a custom field. This will ensure that the workflow only fires when a contact completes the custom field with the required data.
 Once you’ve saved and added your trigger, you can add workflow steps such as sending SMS and/or email and assigning users. Then Publish and save the workflow.
The ****Contact Created trigger**** is a great way to automate engagement with new contacts while maintaining efficiency. By using filters like tags and custom fields, you can ensure workflows are personalized and actionable.
### contact-changed-trigger
The Contact Changed workflow trigger activates whenever details of a contact are updated. Using it with filters allows you to narrow it down to specific details, such as Tags, Do Not Disturb status, or Custom Fields. This feature automates actions or notifications to keep your team informed and ensure efficient contact management. Let's learn how to use it to its full potential.
***
## Adding the Contact Changed Trigger
To get started, click on Add New Trigger and select Contact Changed. This trigger allows you to stay on top of contact updates and automate responses based on specific changes.
Once you’ve saved and added your trigger, you can add workflow steps such as sending SMS and/or email and assigning users. Then Publish and save the workflow.
The ****Contact Created trigger**** is a great way to automate engagement with new contacts while maintaining efficiency. By using filters like tags and custom fields, you can ensure workflows are personalized and actionable.
### contact-changed-trigger
The Contact Changed workflow trigger activates whenever details of a contact are updated. Using it with filters allows you to narrow it down to specific details, such as Tags, Do Not Disturb status, or Custom Fields. This feature automates actions or notifications to keep your team informed and ensure efficient contact management. Let's learn how to use it to its full potential.
***
## Adding the Contact Changed Trigger
To get started, click on Add New Trigger and select Contact Changed. This trigger allows you to stay on top of contact updates and automate responses based on specific changes.
 ***
## Adding Filters
To begin, click on "Add Filters". Within the Standard Fields, you can choose between Assigned User, Contact Details, DND, and Tag, so we'll cover the details about them.
***
## Adding Filters
To begin, click on "Add Filters". Within the Standard Fields, you can choose between Assigned User, Contact Details, DND, and Tag, so we'll cover the details about them.
 ### Assigned User
Use the Assigned User filter to select contacts who've been attributed to a specific team member as their main responsible. Once selected, you'll need to pick an operator, either “Has Changed” for any changes or “Has Changed To” if you want to specify a user.
### Assigned User
Use the Assigned User filter to select contacts who've been attributed to a specific team member as their main responsible. Once selected, you'll need to pick an operator, either “Has Changed” for any changes or “Has Changed To” if you want to specify a user.
 ### DND
The DND feature is an opt-out for contacts who want to be removed from all communication services. This occurs when a customer requests to unsubscribe from such services. Once selected, you'll need to pick an operator, either “Has Changed” for any changes or “Has Changed To” so the workflow will trigger when the DND status of a customer changes to the specific DND option.
### DND
The DND feature is an opt-out for contacts who want to be removed from all communication services. This occurs when a customer requests to unsubscribe from such services. Once selected, you'll need to pick an operator, either “Has Changed” for any changes or “Has Changed To” so the workflow will trigger when the DND status of a customer changes to the specific DND option.
 ### Tags
The Tags feature enables you to trigger a workflow only when you add or remove a tag from a contact. Selecting this filter will prompt you to pick either Added or Removed, then you will see a dropdown where you can select the specific tag.
### Tags
The Tags feature enables you to trigger a workflow only when you add or remove a tag from a contact. Selecting this filter will prompt you to pick either Added or Removed, then you will see a dropdown where you can select the specific tag.
 ### Contact Details
A few filters can be grouped under this category; they are all details that change the communications with contacts and consist of these three main groups:
* ****Contact Type****: This defines the relationship of the contact in your system, for example, if they are a lead or a repeat customer.
* ****Contact Details****: This group contains your lead's phone and email, also known as the channels you will contact them.
* ****Contact Address****: These filters help you manage changes to the contact's set address, which contains the country, state, city, street address, and postal code that the customer has provided.
Once you've added any of them, select the operator, either “Has Changed” for any changes or “Has Changed To” if you want to specify a new value.
### Contact Details
A few filters can be grouped under this category; they are all details that change the communications with contacts and consist of these three main groups:
* ****Contact Type****: This defines the relationship of the contact in your system, for example, if they are a lead or a repeat customer.
* ****Contact Details****: This group contains your lead's phone and email, also known as the channels you will contact them.
* ****Contact Address****: These filters help you manage changes to the contact's set address, which contains the country, state, city, street address, and postal code that the customer has provided.
Once you've added any of them, select the operator, either “Has Changed” for any changes or “Has Changed To” if you want to specify a new value.
 After specifying your filters, remember to Save the Trigger.
 The Contact Changed workflow trigger simplifies contact management by automating actions based on updates to contact details. By leveraging filters like Assigned Users, DND, and Tags, you can enhance your workflows, improve team communication, and maintain accurate contact records.
### contact-tag-trigger
The Contact Tag workflow activates when a tag is added or removed from a contact within the CRM. Tags are highly beneficial for organizing customer information and tracking which customers need follow-up. This feature also lets you move customers from one list/step to another based on activities or actions linked with the customer.
To begin setup, click Add New Workflow Trigger, then select Contact Tag under the Choose a Workflow Trigger dropdown.
The Contact Changed workflow trigger simplifies contact management by automating actions based on updates to contact details. By leveraging filters like Assigned Users, DND, and Tags, you can enhance your workflows, improve team communication, and maintain accurate contact records.
### contact-tag-trigger
The Contact Tag workflow activates when a tag is added or removed from a contact within the CRM. Tags are highly beneficial for organizing customer information and tracking which customers need follow-up. This feature also lets you move customers from one list/step to another based on activities or actions linked with the customer.
To begin setup, click Add New Workflow Trigger, then select Contact Tag under the Choose a Workflow Trigger dropdown.
 ***
## Add Filters
***
## Add Filters
 ### Tag Added
To trigger the workflow when a tag is added to a contact, click the filters dropdown and select Tag Added.
### Tag Added
To trigger the workflow when a tag is added to a contact, click the filters dropdown and select Tag Added.
 Next, select the tag you want to use as a trigger. For Example, when a "Contact" tag is added to a contact, the workflow is automatically triggered, and the next action is taken, i.e., sending them a "Thank you" SMS.
 ### Tag Removed
You can also trigger a workflow when a tag is removed from a contact by selecting the Tag Removed filter and selecting the tag.
### Tag Removed
You can also trigger a workflow when a tag is removed from a contact by selecting the Tag Removed filter and selecting the tag.
 For example, if a tag for a mailing list was removed, you can send a follow-up message to ensure they meant to unsubscribe, such as: “Hey John! We received your request to unsubscribe from our weekly updates. Your request has been approved! If you want to re-subscribe, click on the link below.”
 You can add multiple filters as needed by clicking + Add filters.
 Once satisfied, click Save Trigger to set your changes. After this, you can configure the rest of your workflow as needed. Make sure to publish your workflow once ready to start capturing audiences.
### contact-dnd-trigger
The Contact DND (Do Not Disturb) trigger enables workflows to activate whenever a contact's DND status is modified. DND allows contacts to opt out of communication they no longer wish to receive, offering control over preferences for emails, phone calls, SMS messages, Google My Business (GMB), and Facebook messages. This trigger helps you respect customer preferences while maintaining efficient workflows.
***
## Add the Contact DND Trigger
To begin, click the Add New Trigger button and select Contact DND.
Once satisfied, click Save Trigger to set your changes. After this, you can configure the rest of your workflow as needed. Make sure to publish your workflow once ready to start capturing audiences.
### contact-dnd-trigger
The Contact DND (Do Not Disturb) trigger enables workflows to activate whenever a contact's DND status is modified. DND allows contacts to opt out of communication they no longer wish to receive, offering control over preferences for emails, phone calls, SMS messages, Google My Business (GMB), and Facebook messages. This trigger helps you respect customer preferences while maintaining efficient workflows.
***
## Add the Contact DND Trigger
To begin, click the Add New Trigger button and select Contact DND.
 ****📌Note:**** Remember, a workflow requires both a trigger and an action to be published. Without both, you can only save the workflow for later edits.
***
## Add Filters
### DND Direction Is
Filters help refine when the Contact DND trigger activates. You can use the following options to tailor workflows based on contact preferences. The DND Direction filter allows you to configure DND preferences for both inbound and outbound communication.
****📌Note:**** Remember, a workflow requires both a trigger and an action to be published. Without both, you can only save the workflow for later edits.
***
## Add Filters
### DND Direction Is
Filters help refine when the Contact DND trigger activates. You can use the following options to tailor workflows based on contact preferences. The DND Direction filter allows you to configure DND preferences for both inbound and outbound communication.
 ### DND Flag Is
Use the DND Flag Is filter to determine if the workflow triggers when the DND flag is enabled or disabled. Add the filter by clicking + Add Filters and selecting DND Flag Is. Choose one of the following:
* Disabled DND for all channels.
* Disabled DND for specific channels.
* Enabled DND for all channels.
* Enabled DND for specific channels.
****Note****: DND status is displayed as a single Enabled or Disabled filter that applies to all inbound channels.
### DND Flag Is
Use the DND Flag Is filter to determine if the workflow triggers when the DND flag is enabled or disabled. Add the filter by clicking + Add Filters and selecting DND Flag Is. Choose one of the following:
* Disabled DND for all channels.
* Disabled DND for specific channels.
* Enabled DND for all channels.
* Enabled DND for specific channels.
****Note****: DND status is displayed as a single Enabled or Disabled filter that applies to all inbound channels.
 ### DND Channel Is
When you select the Disabled DND for specific channels or Enabled DND for specific channels trigger, you must further define the channel. Add the DND Channel Is filter and select the desired channel from the dropdown menu (e.g., SMS, email, GMB).
### DND Channel Is
When you select the Disabled DND for specific channels or Enabled DND for specific channels trigger, you must further define the channel. Add the DND Channel Is filter and select the desired channel from the dropdown menu (e.g., SMS, email, GMB).
 Remember to Save the trigger.
 The Contact DND trigger is a valuable feature for respecting customer preferences and automating workflows accordingly. By using filters to customize triggers, you ensure efficient communication management while prioritizing customer satisfaction.
### birthday-reminder-trigger
The birthday reminder trigger is an automated feature designed to celebrate a customer’s special day by initiating a personalized notification. This tool not only creates memorable interactions but also helps you build stronger, lasting relationships with your customers. By leveraging these reminders, your brand demonstrates appreciation and thoughtfulness, enhancing customer loyalty and satisfaction.
***
## Adding the Birthday Reminder Trigger
Start by clicking the ****"Add New Trigger"**** button and selecting Birthday Reminder from the options.
The Contact DND trigger is a valuable feature for respecting customer preferences and automating workflows accordingly. By using filters to customize triggers, you ensure efficient communication management while prioritizing customer satisfaction.
### birthday-reminder-trigger
The birthday reminder trigger is an automated feature designed to celebrate a customer’s special day by initiating a personalized notification. This tool not only creates memorable interactions but also helps you build stronger, lasting relationships with your customers. By leveraging these reminders, your brand demonstrates appreciation and thoughtfulness, enhancing customer loyalty and satisfaction.
***
## Adding the Birthday Reminder Trigger
Start by clicking the ****"Add New Trigger"**** button and selecting Birthday Reminder from the options.
 📌\*\*\*\*NOTE: \*\*\*\*To publish a workflow after adding a trigger, you must establish both triggers and actions. Without both, you can only save the workflow and not publish it.
***
## Add Filters
Click the ****"Add Filters"**** button to customize your birthday reminders by choosing from various available filters.
📌\*\*\*\*NOTE: \*\*\*\*To publish a workflow after adding a trigger, you must establish both triggers and actions. Without both, you can only save the workflow and not publish it.
***
## Add Filters
Click the ****"Add Filters"**** button to customize your birthday reminders by choosing from various available filters.
 ### After No. of Days
The \*\*\*\*"After a Specific Number of Days" ****filter allows you to set reminders a certain number of days after a customer's birthday. This is ideal for follow-up messages or post-birthday greetings. For example, if you’d like to send a message five days after the celebration, simply input**** "5" \*\*\*\*as the number of days, and the workflow will trigger the reminder accordingly.
### After No. of Days
The \*\*\*\*"After a Specific Number of Days" ****filter allows you to set reminders a certain number of days after a customer's birthday. This is ideal for follow-up messages or post-birthday greetings. For example, if you’d like to send a message five days after the celebration, simply input**** "5" \*\*\*\*as the number of days, and the workflow will trigger the reminder accordingly.
 ### Before No. of Days
With the ****"Before a Specific Number of Days"**** filter, you can send a notification a few days before a customer or team member's birthday. For instance, if someone’s birthday is on August 3rd, you could set the reminder to go out on August 2nd. The workflow would then send a message on the 2nd and allow you to use the "Wait" action to follow up with a birthday SMS on the exact day, August 3rd.
### Before No. of Days
With the ****"Before a Specific Number of Days"**** filter, you can send a notification a few days before a customer or team member's birthday. For instance, if someone’s birthday is on August 3rd, you could set the reminder to go out on August 2nd. The workflow would then send a message on the 2nd and allow you to use the "Wait" action to follow up with a birthday SMS on the exact day, August 3rd.
 ### Day Is
The\*\*\*\* "Day Is"\*\*\*\* filter triggers a workflow on the exact date of the customer’s birthday. Use this option to ensure timely and celebratory messages are delivered right on their special day.
### Day Is
The\*\*\*\* "Day Is"\*\*\*\* filter triggers a workflow on the exact date of the customer’s birthday. Use this option to ensure timely and celebratory messages are delivered right on their special day.
 ### Month Is
The \*\*\*\*"Month Is" \*\*\*\*filter enables you to send bulk birthday messages to all celebrants for a specific month. For example, you can choose to send a message on the 1st of every month to all customers or team members whose birthdays fall within that month. This filter allows you to efficiently manage and celebrate multiple birthdays at once.
### Month Is
The \*\*\*\*"Month Is" \*\*\*\*filter enables you to send bulk birthday messages to all celebrants for a specific month. For example, you can choose to send a message on the 1st of every month to all customers or team members whose birthdays fall within that month. This filter allows you to efficiently manage and celebrate multiple birthdays at once.
 Once you’ve set up your filters and reminders, click ****"Save Trigger"**** to finalize your birthday reminder workflow.
 Automating birthday reminders is a thoughtful and efficient way to foster meaningful connections with your customers. By using filters like \*\*\*\*“Before a Specific Number of Days”, "Day Is," or “Month Is”, \*\*\*\*you can ensure timely and personalized messages that leave a lasting impression. Whether it’s an individual notification or a bulk monthly greeting, these workflows help you show appreciation and create moments that matter to your customers and team members alike.
### custom-date-reminder
The Custom Date Reminder trigger will start the workflow on any specific date you select. This is perfect for sending account review reminders or appointment reminders before a meeting or event.
To begin, click on Add New Workflow Trigger, and select Custom Date Reminder from the dropdown menu under Choose a Workflow Trigger.
Automating birthday reminders is a thoughtful and efficient way to foster meaningful connections with your customers. By using filters like \*\*\*\*“Before a Specific Number of Days”, "Day Is," or “Month Is”, \*\*\*\*you can ensure timely and personalized messages that leave a lasting impression. Whether it’s an individual notification or a bulk monthly greeting, these workflows help you show appreciation and create moments that matter to your customers and team members alike.
### custom-date-reminder
The Custom Date Reminder trigger will start the workflow on any specific date you select. This is perfect for sending account review reminders or appointment reminders before a meeting or event.
To begin, click on Add New Workflow Trigger, and select Custom Date Reminder from the dropdown menu under Choose a Workflow Trigger.
 ***
## Custom Date Field
You will need to add a filter with the Custom Date Field, as this will only trigger if a date has already been established in your CRM, for example, a signature day for a contract.
***
## Custom Date Field
You will need to add a filter with the Custom Date Field, as this will only trigger if a date has already been established in your CRM, for example, a signature day for a contract.
 Once you've selected a custom date, you can include additional filters by clicking + Add Filter.
 ### After No. of Days
The After No. of Days filter allows you to set the reminder after a specific number of days since the selected date.
### After No. of Days
The After No. of Days filter allows you to set the reminder after a specific number of days since the selected date.
 ### Before No. of Days
With the Before No. of Days filter, you can send a notification a few days before the selected date. For example, you can select an event's start date and use this to send reminders on the days leading up to it.
### Before No. of Days
With the Before No. of Days filter, you can send a notification a few days before the selected date. For example, you can select an event's start date and use this to send reminders on the days leading up to it.
 ### Day Is
Selecting the Day Is filter lets you select a specific day in the month, like the 15th or the 1st to trigger your workflow. Perfect for monthly subscriptions!
### Day Is
Selecting the Day Is filter lets you select a specific day in the month, like the 15th or the 1st to trigger your workflow. Perfect for monthly subscriptions!
 ### Month Is
This triggers the workflow on the selected month. You can use it in conjunction with the Day is filter or simply keep it alone to trigger on the first of the month.
### Month Is
This triggers the workflow on the selected month. You can use it in conjunction with the Day is filter or simply keep it alone to trigger on the first of the month.
 ### Has Tag
Select a tag from the CRM. When a tag is allocated to the contact's workflow, the workflow will only be triggered on the selected date for customers who have the tag.
### Has Tag
Select a tag from the CRM. When a tag is allocated to the contact's workflow, the workflow will only be triggered on the selected date for customers who have the tag.
 Start using the Custom Date Reminder trigger to ensure your workflows activate exactly when they should—keeping communication timely, consistent, and operationally efficient.
### contact-engagement-score-trigger
The Contact Engagement score gives a numerical value to the level of activity of a contact. If they are interested in your business and respond to your campaigns, the number rises; if they are not as active, the number lowers. With the Contact Engagement Score Trigger, you can easily separate your contacts based on that number and market to the group that needs it the most.
This trigger in the contact section will start your workflow when a contact's engagement score changes.
Start using the Custom Date Reminder trigger to ensure your workflows activate exactly when they should—keeping communication timely, consistent, and operationally efficient.
### contact-engagement-score-trigger
The Contact Engagement score gives a numerical value to the level of activity of a contact. If they are interested in your business and respond to your campaigns, the number rises; if they are not as active, the number lowers. With the Contact Engagement Score Trigger, you can easily separate your contacts based on that number and market to the group that needs it the most.
This trigger in the contact section will start your workflow when a contact's engagement score changes.
 By setting a filter, you can make it trigger on specific values. The parameters you can set are:
1. Equal to a score: Adds all contacts whose score gets or drops to that number.
2. Not equal to a score: Adds all contacts whose score passes or drops from that number.
3. Greater than a score: Adds all contacts who score higher than the specified number.
4. Greater than or equal to a score: Contacts with the specified number and up get added.
5. Less than a score: Adds all contacts who score lower than the specified number.
6. Less than or equal to a score: Contacts with the specified number and below get added.
7. Is empty
8. Is not empty
By setting a filter, you can make it trigger on specific values. The parameters you can set are:
1. Equal to a score: Adds all contacts whose score gets or drops to that number.
2. Not equal to a score: Adds all contacts whose score passes or drops from that number.
3. Greater than a score: Adds all contacts who score higher than the specified number.
4. Greater than or equal to a score: Contacts with the specified number and up get added.
5. Less than a score: Adds all contacts who score lower than the specified number.
6. Less than or equal to a score: Contacts with the specified number and below get added.
7. Is empty
8. Is not empty
 Let's focus on options 1 through 6, since they allow you to set the base number. Please note that the lowest available number is 0.
 With that set, you can start building your workflow and efficiently reward customers who are engaging with your business, nurture those who might be losing interest, and clean up your lists. We hope that this guide helps you achieve whatever that goal might be!
### overview-contact-triggers
When exploring Workflow Triggers, you'll find a category titled Contact. This particular category consists of an array of triggers related to managing and engaging with contacts.
With that set, you can start building your workflow and efficiently reward customers who are engaging with your business, nurture those who might be losing interest, and clean up your lists. We hope that this guide helps you achieve whatever that goal might be!
### overview-contact-triggers
When exploring Workflow Triggers, you'll find a category titled Contact. This particular category consists of an array of triggers related to managing and engaging with contacts.
 These diverse triggers facilitate better organization and interaction with your contacts, ensuring timely responses and more personalized communication, ultimately improving relationship management and fostering business growth.
### Birthday Reminder
The birthday reminder trigger operates on a customer's birthday, activating a birthday reminder for the specified customer or team member. Utilize this workflow trigger to send an SMS or email before or on a customer’s birthday.
These diverse triggers facilitate better organization and interaction with your contacts, ensuring timely responses and more personalized communication, ultimately improving relationship management and fostering business growth.
### Birthday Reminder
The birthday reminder trigger operates on a customer's birthday, activating a birthday reminder for the specified customer or team member. Utilize this workflow trigger to send an SMS or email before or on a customer’s birthday.
 ### Contact Changed
The Contact Changed trigger initiates when contact information is updated, specifically for changes in Tags, Assigned Users, DND (Do Not Disturb), and Custom Fields (such as their address or phone number).
### Contact Changed
The Contact Changed trigger initiates when contact information is updated, specifically for changes in Tags, Assigned Users, DND (Do Not Disturb), and Custom Fields (such as their address or phone number).
 ### Contact Created
The Contact Created trigger enables the workflow to activate when a new contact is created, allowing customization through filters such as tags or custom field data.
### Contact Created
The Contact Created trigger enables the workflow to activate when a new contact is created, allowing customization through filters such as tags or custom field data.
 ### Contact DND
The Contact DND trigger comes into play when a contact's Do Not Disturb changes. This status can be toggled on or off for various channels, such as emails or SMS. And, with this trigger, you can follow up on customers when the status changes.
### Contact DND
The Contact DND trigger comes into play when a contact's Do Not Disturb changes. This status can be toggled on or off for various channels, such as emails or SMS. And, with this trigger, you can follow up on customers when the status changes.
 ### Contact Tag
The Contact Tag workflow initiates when a customer is added or removed from a tag within the system. Tags play a crucial role in organizing customer information and tracking which customers require follow-up. This also enables you to transfer customers between lists or steps based on activities or actions associated with them.
### Contact Tag
The Contact Tag workflow initiates when a customer is added or removed from a tag within the system. Tags play a crucial role in organizing customer information and tracking which customers require follow-up. This also enables you to transfer customers between lists or steps based on activities or actions associated with them.
 ### Custom Date Reminder
The Custom Date Reminder trigger activates the workflow on a predetermined date you have set up, making it ideal for sending account review reminders or appointment notifications before meetings or events.
### Custom Date Reminder
The Custom Date Reminder trigger activates the workflow on a predetermined date you have set up, making it ideal for sending account review reminders or appointment notifications before meetings or events.
 ### Note Added
The Note Added trigger initiates the workflow when a note is added to a contact. Use this to alert a team member and take further action when a note is added to a contact.
### Note Added
The Note Added trigger initiates the workflow when a note is added to a contact. Use this to alert a team member and take further action when a note is added to a contact.
 ### Note Changed
The Note Changed trigger activates a workflow when a note within a contact is modified. You can use this workflow trigger to notify team members of updates to a contact when necessary.
### Note Changed
The Note Changed trigger activates a workflow when a note within a contact is modified. You can use this workflow trigger to notify team members of updates to a contact when necessary.
 ### Task Added
The Task Added trigger comes into play when one or more actions must be executed after creating a task in the system, and additional filters can be incorporated based on the task's requirements.
### Task Added
The Task Added trigger comes into play when one or more actions must be executed after creating a task in the system, and additional filters can be incorporated based on the task's requirements.
 ### Task Reminder
The Task Reminder workflow trigger enables you to activate a workflow based on a previously created task in your CRM. This functionality assists in generating task reminders tailored to your work's nature.
### Task Reminder
The Task Reminder workflow trigger enables you to activate a workflow based on a previously created task in your CRM. This functionality assists in generating task reminders tailored to your work's nature.
 ### Task Completed
The Task Completed Trigger will start your workflow when a task is marked as completed by a user, it helps manage internal processes and notify supervisors of progress.
### Task Completed
The Task Completed Trigger will start your workflow when a task is marked as completed by a user, it helps manage internal processes and notify supervisors of progress.
 ### Contact Engagement Score
This trigger will start your workflow when a contact's engagement score changes. This allows you to leverage interest in your business and follow up with customers when their score is higher, or disengage inactive contacts and save resources when their score is lowered.
### Contact Engagement Score
This trigger will start your workflow when a contact's engagement score changes. This allows you to leverage interest in your business and follow up with customers when their score is higher, or disengage inactive contacts and save resources when their score is lowered.
 All these triggers allow you to manage customer engagement easily by creating workflows that help you handle requests and interactions. If you're interested in learning more about these Triggers, please check the other articles in this category. There, you'll find an in-depth explanation of each one for you to implement in your business!
### company-created-trigger
Manage your B2B relationships, from start to finish, making it easy to power onboarding, renewals, and account management with the help of workflows by using Company-based triggers. The “Company Created” trigger will let you start the process when a contact-associated record or manual action creates a new Company. Let's learn how to use it.
***
## Creating Your Workflow
Start by navigating to the Workflows tab inside the Automation section. In there, click + Create Workflow and select Company-based workflow.
All these triggers allow you to manage customer engagement easily by creating workflows that help you handle requests and interactions. If you're interested in learning more about these Triggers, please check the other articles in this category. There, you'll find an in-depth explanation of each one for you to implement in your business!
### company-created-trigger
Manage your B2B relationships, from start to finish, making it easy to power onboarding, renewals, and account management with the help of workflows by using Company-based triggers. The “Company Created” trigger will let you start the process when a contact-associated record or manual action creates a new Company. Let's learn how to use it.
***
## Creating Your Workflow
Start by navigating to the Workflows tab inside the Automation section. In there, click + Create Workflow and select Company-based workflow.
 Click Add New Trigger and select Company Created from the Company options.
 Click + Add Filters to further limit which companies trigger the workflow.
 Pick from the standard fields to specify which phrase it should contain, or ensure the field is not empty by selecting your operator.
 Once you've set your desired filters, click Save Trigger.
 Add any actions you see fit, and you're done. This helps you automate entire company-level workflows, not just individual contacts, making it easy to keep Companies, Contacts, and Custom Objects in sync. Building workflows that affect all associated contacts when a new company is created.
### appointment-status-trigger
The ****Appointment Status**** Trigger is designed to activate when an appointment is being scheduled or the status of an appointment has changed. This will trigger your workflow based on the appointment status filter the user chooses. This feature enables businesses to create more specialized workflows with varying degrees of automation and customization based on the filters used.
***
## Add Appointment Status Trigger
To begin, click on ****Add New Trigger**** and select ****Appointment Status****.
Add any actions you see fit, and you're done. This helps you automate entire company-level workflows, not just individual contacts, making it easy to keep Companies, Contacts, and Custom Objects in sync. Building workflows that affect all associated contacts when a new company is created.
### appointment-status-trigger
The ****Appointment Status**** Trigger is designed to activate when an appointment is being scheduled or the status of an appointment has changed. This will trigger your workflow based on the appointment status filter the user chooses. This feature enables businesses to create more specialized workflows with varying degrees of automation and customization based on the filters used.
***
## Add Appointment Status Trigger
To begin, click on ****Add New Trigger**** and select ****Appointment Status****.
 ***
## Adding Filters
### Event Type
With the\*\*\*\* “Event Type” ****filter, you can select the event type you want to trigger the workflow:**** Normal, Recurring, ****or**** Any\*\*\*\* of the two to fire the trigger. This is the first trigger filter you choose from; it's set as the default.
***
## Adding Filters
### Event Type
With the\*\*\*\* “Event Type” ****filter, you can select the event type you want to trigger the workflow:**** Normal, Recurring, ****or**** Any\*\*\*\* of the two to fire the trigger. This is the first trigger filter you choose from; it's set as the default.
 ### Appointment Status Is
The ****"Appointment Status Is"**** filter lets users select specific triggers to activate based on the status of an appointment. Users can choose to trigger the workflow when:
* ****New:**** A newly scheduled appointment.
* ****Confirmed:**** The appointment is confirmed.
* ****Cancelled:**** The appointment is canceled.
* ****Showed Up:**** The client or prospect attended the appointment.
* ****No-Show:**** The client or prospect missed the appointment.
* ****Invalid:**** The appointment is marked as invalid.
### Appointment Status Is
The ****"Appointment Status Is"**** filter lets users select specific triggers to activate based on the status of an appointment. Users can choose to trigger the workflow when:
* ****New:**** A newly scheduled appointment.
* ****Confirmed:**** The appointment is confirmed.
* ****Cancelled:**** The appointment is canceled.
* ****Showed Up:**** The client or prospect attended the appointment.
* ****No-Show:**** The client or prospect missed the appointment.
* ****Invalid:**** The appointment is marked as invalid.
 ### Has Tag
You can use the\*\*\*\* “Has Tag” \*\*\*\*filter to trigger the workflow when an appointment status has changed to a contact with a specific tag. Once you've selected the Has Tag filter, you will see a dropdown appear where you can select the tag you would like to use.
### Has Tag
You can use the\*\*\*\* “Has Tag” \*\*\*\*filter to trigger the workflow when an appointment status has changed to a contact with a specific tag. Once you've selected the Has Tag filter, you will see a dropdown appear where you can select the tag you would like to use.
 ### In Calendar
You can use the ****“In Calendar filter”**** to trigger the workflow when an appointment status has changed in a specific calendar. Once you choose the In Calendar filter, you will see another dropdown appear for you to select the calendar you would like to use.
For instance, Jim John's (a sales representative) calendar has been selected in the "In calendar" filter, and if a customer confirms an appointment on this calendar, the workflow will trigger.
### In Calendar
You can use the ****“In Calendar filter”**** to trigger the workflow when an appointment status has changed in a specific calendar. Once you choose the In Calendar filter, you will see another dropdown appear for you to select the calendar you would like to use.
For instance, Jim John's (a sales representative) calendar has been selected in the "In calendar" filter, and if a customer confirms an appointment on this calendar, the workflow will trigger.
 ### In Calendar Group
You can also use the In Calendar Group filter to trigger the workflow when the appointment status has changed in a specific calendar group. Once you've selected the In Calendar Group filter, you will see a dropdown where you can select the Calendar Group you would like to use.
### In Calendar Group
You can also use the In Calendar Group filter to trigger the workflow when the appointment status has changed in a specific calendar group. Once you've selected the In Calendar Group filter, you will see a dropdown where you can select the Calendar Group you would like to use.
 ### Only For Grouped Calendars
The Only For Grouped Calendars filter allows you to choose whether the workflow should only be triggered for group calendars. Once you've selected the ****“Only For Grouped Calendars”**** filter, you can select \*\*\*\*“Yes ****or**** No” \*\*\*\*in the dropdown.
### Only For Grouped Calendars
The Only For Grouped Calendars filter allows you to choose whether the workflow should only be triggered for group calendars. Once you've selected the ****“Only For Grouped Calendars”**** filter, you can select \*\*\*\*“Yes ****or**** No” \*\*\*\*in the dropdown.
 ### Created By/Modified By
If you want the trigger to fire when a modification is made to it, you can use the Modified By filter. Once you've chosen this filter, you can select the modification that should trigger the workflow:\*\*\*\* API, Customer, User, ****or**** Workflow.\*\*\*\*
### Created By/Modified By
If you want the trigger to fire when a modification is made to it, you can use the Modified By filter. Once you've chosen this filter, you can select the modification that should trigger the workflow:\*\*\*\* API, Customer, User, ****or**** Workflow.\*\*\*\*
 Save the Trigger once you are satisfied with its configuration.
 The ****Appointment Status Trigger**** allows businesses to automate workflows efficiently by leveraging filters like appointment status, tags, calendars, and user roles. By customizing these options, you can create workflows tailored to your unique operational needs, improving team productivity and client satisfaction.
### customer-booked-appointment-trigger
Appointments with customers are the best way to create a personal connection, and you don't want to miss the opportunity to leave a good impression. So, what better way to ensure everyone has clear expectations and is taken care of than by using a workflow?
***
## Adding The Customer Booked Appointment Trigger
With this trigger, you can easily connect with customers, confirm appointments, and establish communication as soon as they book an appointment. Let's see how to use it.
To begin, click Add New Trigger and select Customer Booked Appointment.
The ****Appointment Status Trigger**** allows businesses to automate workflows efficiently by leveraging filters like appointment status, tags, calendars, and user roles. By customizing these options, you can create workflows tailored to your unique operational needs, improving team productivity and client satisfaction.
### customer-booked-appointment-trigger
Appointments with customers are the best way to create a personal connection, and you don't want to miss the opportunity to leave a good impression. So, what better way to ensure everyone has clear expectations and is taken care of than by using a workflow?
***
## Adding The Customer Booked Appointment Trigger
With this trigger, you can easily connect with customers, confirm appointments, and establish communication as soon as they book an appointment. Let's see how to use it.
To begin, click Add New Trigger and select Customer Booked Appointment.
 ***
## Adding Filters
Click “+ Add Filters” to narrow down the interactions that trigger your workflow.
***
## Adding Filters
Click “+ Add Filters” to narrow down the interactions that trigger your workflow.
 The main filters for this trigger will be:
1. ****Has Tag****: This allows you to select any of your tags as an additional requisite for the contact to trigger the appointment.
2. ****In Calendar/In Calendar Group****: Use this to select a specific calendar/calendar group as valid for triggering your workflow.
3. ****User Is****: This can be added once you're filtering for a specific Calendar Group to only trigger the workflow if the appointment belongs to a specific person.
The main filters for this trigger will be:
1. ****Has Tag****: This allows you to select any of your tags as an additional requisite for the contact to trigger the appointment.
2. ****In Calendar/In Calendar Group****: Use this to select a specific calendar/calendar group as valid for triggering your workflow.
3. ****User Is****: This can be added once you're filtering for a specific Calendar Group to only trigger the workflow if the appointment belongs to a specific person.
 Once you are satisfied with your selections, save the trigger and your workflow!
 Complete your workflow by adding actions, such as sending an Email to reach out first, internal notifications to remind your team of the upcoming appointment, or scheduling a thank you message for a few hours after the appointment. This trigger is sure to give you an effective way to automate the contact process for contacts with booked appointments.
### call-status-trigger
The Call Details Trigger is a workflow trigger that runs on both outbound and inbound calls. This trigger can be activated by call directions and statuses, either from the current workflow or from another workflow linked to it. By using this trigger, businesses can customize their workflows to automate specific actions based on call statuses, improving efficiency and streamlining their communication process.
***
## Adding the Call Details Trigger
To get started, click on ****Add New Trigger**** and select ****Call Details****. This will allow you to define call-based conditions for your automation.
Complete your workflow by adding actions, such as sending an Email to reach out first, internal notifications to remind your team of the upcoming appointment, or scheduling a thank you message for a few hours after the appointment. This trigger is sure to give you an effective way to automate the contact process for contacts with booked appointments.
### call-status-trigger
The Call Details Trigger is a workflow trigger that runs on both outbound and inbound calls. This trigger can be activated by call directions and statuses, either from the current workflow or from another workflow linked to it. By using this trigger, businesses can customize their workflows to automate specific actions based on call statuses, improving efficiency and streamlining their communication process.
***
## Adding the Call Details Trigger
To get started, click on ****Add New Trigger**** and select ****Call Details****. This will allow you to define call-based conditions for your automation.
 ***
## Adding Filters
You can filter your trigger by clicking\*\*\*\* “Add Filter”\*\*\*\* and selecting ****Call Direction, Call Status, Custom Disposition, ****or**** In Workflow.****
### Call Direction
The Call Direction filter enables users to select the direction of the call, either as an incoming or outgoing call.
* ****Incoming Call:**** Selecting the\*\*\*\* "Incoming"\*\*\*\* call, the workflow is triggered when a contact (new leads or old contacts) calls the number associated with this account.
* ****Outgoing Call:**** Selecting the \*\*\*\*"Outgoing" \*\*\*\*call can allow you to track all the different call records of your sales team.
***
## Adding Filters
You can filter your trigger by clicking\*\*\*\* “Add Filter”\*\*\*\* and selecting ****Call Direction, Call Status, Custom Disposition, ****or**** In Workflow.****
### Call Direction
The Call Direction filter enables users to select the direction of the call, either as an incoming or outgoing call.
* ****Incoming Call:**** Selecting the\*\*\*\* "Incoming"\*\*\*\* call, the workflow is triggered when a contact (new leads or old contacts) calls the number associated with this account.
* ****Outgoing Call:**** Selecting the \*\*\*\*"Outgoing" \*\*\*\*call can allow you to track all the different call records of your sales team.
 ### Call Status
The system automatically tracks the status of every call made and triggers them based on the status of the call. This filter gives you the ability to fire the automation when the call details trigger in another workflow. You can choose the workflow from the dropdown menu.
* \*\*\*\*Busy: \*\*\*\*The contact's number was engaged during the call.
* ****Canceled:**** The call was canceled before being answered.
* ****Completed:**** The call was successfully connected, and you spoke with the contact.
* \*\*\*\*Not Answered: \*\*\*\*The call went unanswered by the contact.
* ****Voicemail:**** The call was directed to the contact’s voicemail.
### Call Status
The system automatically tracks the status of every call made and triggers them based on the status of the call. This filter gives you the ability to fire the automation when the call details trigger in another workflow. You can choose the workflow from the dropdown menu.
* \*\*\*\*Busy: \*\*\*\*The contact's number was engaged during the call.
* ****Canceled:**** The call was canceled before being answered.
* ****Completed:**** The call was successfully connected, and you spoke with the contact.
* \*\*\*\*Not Answered: \*\*\*\*The call went unanswered by the contact.
* ****Voicemail:**** The call was directed to the contact’s voicemail.
 ### Custom Disposition
The Custom Disposition filter allows you to limit the automation triggering to only contacts you've assigned one of your selected dispositions at the end of the call. Choose which ones to include by checking the box next to them in the dropdown menu.
### Custom Disposition
The Custom Disposition filter allows you to limit the automation triggering to only contacts you've assigned one of your selected dispositions at the end of the call. Choose which ones to include by checking the box next to them in the dropdown menu.
 ### In Workflow
The ****In Workflow**** filter allows you to activate automation when the call details are linked to another workflow. Simply choose the desired workflow from the dropdown menu to connect the processes.
### In Workflow
The ****In Workflow**** filter allows you to activate automation when the call details are linked to another workflow. Simply choose the desired workflow from the dropdown menu to connect the processes.
 Remember to ****Save**** the Trigger.
 The ****Call Details Trigger**** empowers businesses to automate workflows based on call events, optimizing communication and saving valuable time. By customizing filters for call direction, call status, and workflow connections, you can create seamless workflows tailored to your business's operational needs.
### inbound-ivr
The Interactive Voice Response (IVR) system is a powerful workflow feature designed to streamline business communication and enhance customer experience. By automating call handling and providing tailored options, the IVR system ensures that your customers are guided efficiently to the right information or department. This guide walks you through the key features of the IVR system, offering insights into how they can optimize your operations and improve customer satisfaction.
***
## Setting up IVR Trigger
The IVR Trigger feature enables you to assign a unique phone number as the entry point to your IVR system. This personalized approach helps customers quickly initiate contact with your business in an organized and professional manner.\*\*
The ****Call Details Trigger**** empowers businesses to automate workflows based on call events, optimizing communication and saving valuable time. By customizing filters for call direction, call status, and workflow connections, you can create seamless workflows tailored to your business's operational needs.
### inbound-ivr
The Interactive Voice Response (IVR) system is a powerful workflow feature designed to streamline business communication and enhance customer experience. By automating call handling and providing tailored options, the IVR system ensures that your customers are guided efficiently to the right information or department. This guide walks you through the key features of the IVR system, offering insights into how they can optimize your operations and improve customer satisfaction.
***
## Setting up IVR Trigger
The IVR Trigger feature enables you to assign a unique phone number as the entry point to your IVR system. This personalized approach helps customers quickly initiate contact with your business in an organized and professional manner.\*\*
 Remember to add the phone number registered in your CRM, and save the trigger to activate the entry point.
 ***
## IVR Actions
### Record Voicemail Action (IVR)
By enabling callers to leave voicemails, you allow them to provide feedback, ask questions, or share their thoughts about your products or services. The configurable options, such as recording duration and stopping conditions, help ensure the quality and relevance of the voicemails you receive.
***
## IVR Actions
### Record Voicemail Action (IVR)
By enabling callers to leave voicemails, you allow them to provide feedback, ask questions, or share their thoughts about your products or services. The configurable options, such as recording duration and stopping conditions, help ensure the quality and relevance of the voicemails you receive.
 ### Say Or Play Message Action (IVR)
This feature lets you deliver professionally crafted messages or use text-to-speech technology to communicate with callers. It's a versatile tool for sharing information, promotions, or instructions, and you can control the message content and repetition to match your communication goals.
### Say Or Play Message Action (IVR)
This feature lets you deliver professionally crafted messages or use text-to-speech technology to communicate with callers. It's a versatile tool for sharing information, promotions, or instructions, and you can control the message content and repetition to match your communication goals.
 ### Gather Input On Call (IVR)
Collecting user input is essential for guiding callers to the right information or department. With IVR Gather, you can customize messages, provide options, and control the input collection process. This feature enhances engagement and ensures that callers can make informed choices.
### Gather Input On Call (IVR)
Collecting user input is essential for guiding callers to the right information or department. With IVR Gather, you can customize messages, provide options, and control the input collection process. This feature enhances engagement and ensures that callers can make informed choices.
 ### Connect To Call (IVR)
Connecting callers to the right resources promptly is crucial for customer satisfaction. This feature streamlines the call routing process, reducing wait times and ensuring that callers are directed to the appropriate department or individual efficiently.
### Connect To Call (IVR)
Connecting callers to the right resources promptly is crucial for customer satisfaction. This feature streamlines the call routing process, reducing wait times and ensuring that callers are directed to the appropriate department or individual efficiently.
 ### End Call
The last step of any IVR is ending it. Done with the “End Call” action, which will disconnect immediately by default. Alternatively, you can choose to play a message or upload custom music using the provided instructions.
### End Call
The last step of any IVR is ending it. Done with the “End Call” action, which will disconnect immediately by default. Alternatively, you can choose to play a message or upload custom music using the provided instructions.
 Your IVR system is not just a tool for managing calls—it’s an essential element of your customer service strategy. By leveraging its features, you can create a seamless, professional, and satisfying customer communication experience while simplifying your business processes.
### Important Notes
1. \*\*Workflow Publication: \*\*\*\*Ensure that you've published the workflow before customers call the designated phone number. This ensures that the IVR system functions as intended when customers initiate calls.
2. ****Workflow Handling:**** If a call ends at any point in the workflow, the contact should be appropriately moved to the next steps in the workflow. This ensures that the customer journey remains seamless.
3. \*\*\*\*Caller Exits: \*\*\*\*If a caller exits the workflow, the call should be disconnected by the workflow. This helps maintain efficient call management and ensures that customers are not left in an incomplete or confusing state within the IVR system.
### call-transcript-generated-trigger
The Transcript Generated trigger automatically launches a workflow when a recorded call is successfully transcribed. Once triggered, it passes detailed call data — including the full transcript, call duration, direction, caller location, timestamps, and more — into your automation, enabling immediate downstream actions.
### Supported Call Types
* ****Voice AI Calls:**** Transcription is enabled by default.
* ****LC Phone Calls:**** Requires transcription to be enabled in Phone Settings.
* ****IVR Calls:**** Requires transcription to be enabled in IVR Settings.
��****Note****: Transcription must be enabled for the trigger to function. If transcription is not enabled, the workflow will prompt you to go to the appropriate settings and activate it.
Your IVR system is not just a tool for managing calls—it’s an essential element of your customer service strategy. By leveraging its features, you can create a seamless, professional, and satisfying customer communication experience while simplifying your business processes.
### Important Notes
1. \*\*Workflow Publication: \*\*\*\*Ensure that you've published the workflow before customers call the designated phone number. This ensures that the IVR system functions as intended when customers initiate calls.
2. ****Workflow Handling:**** If a call ends at any point in the workflow, the contact should be appropriately moved to the next steps in the workflow. This ensures that the customer journey remains seamless.
3. \*\*\*\*Caller Exits: \*\*\*\*If a caller exits the workflow, the call should be disconnected by the workflow. This helps maintain efficient call management and ensures that customers are not left in an incomplete or confusing state within the IVR system.
### call-transcript-generated-trigger
The Transcript Generated trigger automatically launches a workflow when a recorded call is successfully transcribed. Once triggered, it passes detailed call data — including the full transcript, call duration, direction, caller location, timestamps, and more — into your automation, enabling immediate downstream actions.
### Supported Call Types
* ****Voice AI Calls:**** Transcription is enabled by default.
* ****LC Phone Calls:**** Requires transcription to be enabled in Phone Settings.
* ****IVR Calls:**** Requires transcription to be enabled in IVR Settings.
��****Note****: Transcription must be enabled for the trigger to function. If transcription is not enabled, the workflow will prompt you to go to the appropriate settings and activate it.
 ### Key Benefits
* \*\*\*\*AI-Powered Personalization: \*\*\*\*Use transcript data with AI Decision Maker or GPT Actions to customize responses based on sentiment, intent, or keywords.
* \*\*\*\*Actionable Insight Capture: \*\*\*\*Automatically log buying intent, objections, or important phrases directly into the contact record.
* \*\*\*\*Comprehensive Data Access: \*\***Leverage rich metadata — including call direction, timestamps, duration, and user details — to build precise workflow conditions.**
### Key Benefits
* \*\*\*\*AI-Powered Personalization: \*\*\*\*Use transcript data with AI Decision Maker or GPT Actions to customize responses based on sentiment, intent, or keywords.
* \*\*\*\*Actionable Insight Capture: \*\*\*\*Automatically log buying intent, objections, or important phrases directly into the contact record.
* \*\*\*\*Comprehensive Data Access: \*\***Leverage rich metadata — including call direction, timestamps, duration, and user details — to build precise workflow conditions.**
 ***
## How to Set Up the Transcript Generated Trigger
### Create or Edit a Workflow
Navigate to Automation > Workflows.
Click + Create Workflow, then select Start from Scratch or open an existing one.
***
## How to Set Up the Transcript Generated Trigger
### Create or Edit a Workflow
Navigate to Automation > Workflows.
Click + Create Workflow, then select Start from Scratch or open an existing one.
 ### Add the Transcript Generated Trigger
Click Add New Trigger, then select Transcript Generated from the trigger list.
### Add the Transcript Generated Trigger
Click Add New Trigger, then select Transcript Generated from the trigger list.
 ### Workflow Trigger Name
Once it is added, update the trigger's name if necessary.
### Workflow Trigger Name
Once it is added, update the trigger's name if necessary.
 ### Apply Filters
Narrow down when the workflow should activate by setting filters such as:
* **Call Type:**\*\* Choose Voice AI, IVR, or Normal Calls.
* ****Call Direction (Optional):**** Filter by inbound or outbound calls.
* ****Call Duration (Optional):**** Exclude short or incomplete calls (e.g., greater than 30 seconds).\*\*
### Apply Filters
Narrow down when the workflow should activate by setting filters such as:
* **Call Type:**\*\* Choose Voice AI, IVR, or Normal Calls.
* ****Call Direction (Optional):**** Filter by inbound or outbound calls.
* ****Call Duration (Optional):**** Exclude short or incomplete calls (e.g., greater than 30 seconds).\*\*
 ### Save and Publish
Click Save Trigger to add the trigger to your workflow, then configure your workflow actions.
### Save and Publish
Click Save Trigger to add the trigger to your workflow, then configure your workflow actions.
 Finally, toggle the workflow from Draft to Publish to activate it.
 The Transcript Generated workflow trigger turns real customer conversations into actionable automation. By combining transcription insights with workflow logic, your team can react instantly, personalize engagement, and eliminate manual post-call processes.
Start using the Transcript Generated trigger to unlock smarter, faster, and more efficient communication workflows across every call channel.
### Frequently Asked Questions
If a call fails to transcribe completely, the trigger will not activate. For partial transcripts, the workflow fires normally, but missing segments will appear as blank in the `{{full transcript}}` custom value.
Yes. Multiple workflows can be triggered by the same transcript event, as long as each workflow uses unique conditions. Use filters strategically to prevent duplicate or redundant actions.
Transcripts are securely stored within the system’s infrastructure and tied to the associated contact record. Access is governed by user permissions. Administrators can view, delete, or export transcripts.
No. The trigger only works for calls recorded and transcribed within the native system. Imported call logs or externally transcribed data will not activate this trigger.
Yes. Transcripts up to 16 KB can be referenced in custom fields. For longer calls, store the transcript in a note field or link to it via webhook or file URL. The workflow can still process based on the complete transcript even if it exceeds field limits.
### customer-replied
The "customer replied" workflow trigger runs when an incoming message is received from a contact. This trigger can be used to build automation that performs actions based on customers replying from a specific communication channel, such as SMS or Email.
In a new workflow, add the \*\*\*\*“Customer Replied” \*\*\*\*Trigger.
The Transcript Generated workflow trigger turns real customer conversations into actionable automation. By combining transcription insights with workflow logic, your team can react instantly, personalize engagement, and eliminate manual post-call processes.
Start using the Transcript Generated trigger to unlock smarter, faster, and more efficient communication workflows across every call channel.
### Frequently Asked Questions
If a call fails to transcribe completely, the trigger will not activate. For partial transcripts, the workflow fires normally, but missing segments will appear as blank in the `{{full transcript}}` custom value.
Yes. Multiple workflows can be triggered by the same transcript event, as long as each workflow uses unique conditions. Use filters strategically to prevent duplicate or redundant actions.
Transcripts are securely stored within the system’s infrastructure and tied to the associated contact record. Access is governed by user permissions. Administrators can view, delete, or export transcripts.
No. The trigger only works for calls recorded and transcribed within the native system. Imported call logs or externally transcribed data will not activate this trigger.
Yes. Transcripts up to 16 KB can be referenced in custom fields. For longer calls, store the transcript in a note field or link to it via webhook or file URL. The workflow can still process based on the complete transcript even if it exceeds field limits.
### customer-replied
The "customer replied" workflow trigger runs when an incoming message is received from a contact. This trigger can be used to build automation that performs actions based on customers replying from a specific communication channel, such as SMS or Email.
In a new workflow, add the \*\*\*\*“Customer Replied” \*\*\*\*Trigger.
 ***
## Adding Filters
***
## Adding Filters
 ### Contain Phrase
If you only want this workflow to trigger when a specific phrase is used by your customer or lead, you can add that phrase into the "contains phrase" filter. The workflow will trigger as long as the message contains this phrase, regardless of the other words.
Press the “Enter” key to add multiple phrases.
### Contain Phrase
If you only want this workflow to trigger when a specific phrase is used by your customer or lead, you can add that phrase into the "contains phrase" filter. The workflow will trigger as long as the message contains this phrase, regardless of the other words.
Press the “Enter” key to add multiple phrases.
 ### Doesn't Have Tag
By selecting this filter, you can decide to trigger this workflow when a customer replies and does not have the selected tag associated with their contact records.
### Doesn't Have Tag
By selecting this filter, you can decide to trigger this workflow when a customer replies and does not have the selected tag associated with their contact records.
 ### Exact Match Phrase
By clicking on the "Exact Match phrase," you can restrict the trigger action to an exact word or phrase.
### Exact Match Phrase
By clicking on the "Exact Match phrase," you can restrict the trigger action to an exact word or phrase.
 For Example, your Exact Match Phrase is "Yes." If a contact types anything besides “Yes”, the workflow will not be triggered.
### Has Tag
Select a tag from the CRM. When a tag is allocated to the contact's workflow, the workflow will only be triggered based on the specific tag.
For Example, your Exact Match Phrase is "Yes." If a contact types anything besides “Yes”, the workflow will not be triggered.
### Has Tag
Select a tag from the CRM. When a tag is allocated to the contact's workflow, the workflow will only be triggered based on the specific tag.
 ### Intent Type
For "Intent Type," the system tries to understand the contact response, whether it is positive or negative, then uses this automation as a reply to the contact's response.
### Intent Type
For "Intent Type," the system tries to understand the contact response, whether it is positive or negative, then uses this automation as a reply to the contact's response.
 ### Replied To Workflow
By selecting this filter, you can choose the workflow from which you are looking for a reply.
### Replied To Workflow
By selecting this filter, you can choose the workflow from which you are looking for a reply.
 ### Reply Channel
This filter makes it easy to trigger workflows based on the channel where the reply originated, such as SMS, email, call, WhatsApp, Chat Widget, Live Chat, GMB Messaging, Facebook Messenger, or Instagram DM.
### Reply Channel
This filter makes it easy to trigger workflows based on the channel where the reply originated, such as SMS, email, call, WhatsApp, Chat Widget, Live Chat, GMB Messaging, Facebook Messenger, or Instagram DM.
 If the Reply Channel is set to Chat Widget or Live Chat, you will need to include two filters to specify the exact Chat Widget or Live Chat that should trigger the reply.
 Select your preferred Chat Widget.
 The "****Customer Replied****" trigger isn’t just about automating responses; it’s about building smarter, more intentional workflows that adapt to how your customers communicate. With filters like Reply Channel, Intent Type, and Exact Match Phrase, you can make your automation as simple or sophisticated as you need.
### messaging-error-trigger
The "Messaging Error – SMS" trigger is a powerful automation tool that enables you to initiate workflows in response to failed SMS delivery attempts. When an SMS message cannot be delivered, the system generates a specific error code indicating the reason for failure, ranging from invalid numbers to carrier issues or blocked content. Read on to learn more about this trigger and the steps to add it to your workflow.
### Implementing the Messaging Error Trigger
To add this trigger to your workflows, go to the Automation > Workflows tab. From there, either choose an existing workflow or create a new one.
The "****Customer Replied****" trigger isn’t just about automating responses; it’s about building smarter, more intentional workflows that adapt to how your customers communicate. With filters like Reply Channel, Intent Type, and Exact Match Phrase, you can make your automation as simple or sophisticated as you need.
### messaging-error-trigger
The "Messaging Error – SMS" trigger is a powerful automation tool that enables you to initiate workflows in response to failed SMS delivery attempts. When an SMS message cannot be delivered, the system generates a specific error code indicating the reason for failure, ranging from invalid numbers to carrier issues or blocked content. Read on to learn more about this trigger and the steps to add it to your workflow.
### Implementing the Messaging Error Trigger
To add this trigger to your workflows, go to the Automation > Workflows tab. From there, either choose an existing workflow or create a new one.
 Next, click the "Add New Trigger" button and search and select “Messaging Error - SMS” as the trigger event.
 Assign a clear and descriptive name to the trigger to ensure easy identification within your workflow.
 Add filters to refine the trigger by specifying particular error codes. This allows you to target and respond only to relevant messaging failures, ensuring that your workflow is activated under the appropriate conditions.
 This feature supports the following error codes and can be selectively included or excluded based on your specific requirements:
* ****21211****: The "To" number is invalid or improperly formatted.
* ****21408****: Messaging not permitted to the specified region.
* ****21606****: The "From" number is invalid or improperly formatted.
* ****21610****: The recipient has opted out by replying STOP.
* ****21614****: The "To" number is not a valid mobile number.
* ****21635****: The "To" number is a landline and cannot receive SMS.
* ****21661****: The "From" number is not capable of sending SMS.
* ****30002****: The account has been suspended and cannot send messages.
* ****30003****: Unreachable/Out of Service Number
* ****30004****: Do not want SMS/DND enabled
* ****30005****: User Inactive/Number does not exist
* ****30006****: Landline/Incapable of receiving SMS
* ****30007****: Carrier Violation
* ****30008****: An unknown error occurred during message delivery.
* ****30011****: MMS is not supported by the recipient’s device or region.
* ****30023****: Daily A2P messaging limit reached in the U.S.
* ****30032****: Toll-Free Number not verified
* ****30033****: The A2P campaign has been suspended or deleted.
* ****30034****: A2P Registration Pending on Number
* ****30037****: Outbound messaging has been disabled for this account.
Once you are satisfied with your configurations, go ahead and save the trigger to your workflow.
This feature supports the following error codes and can be selectively included or excluded based on your specific requirements:
* ****21211****: The "To" number is invalid or improperly formatted.
* ****21408****: Messaging not permitted to the specified region.
* ****21606****: The "From" number is invalid or improperly formatted.
* ****21610****: The recipient has opted out by replying STOP.
* ****21614****: The "To" number is not a valid mobile number.
* ****21635****: The "To" number is a landline and cannot receive SMS.
* ****21661****: The "From" number is not capable of sending SMS.
* ****30002****: The account has been suspended and cannot send messages.
* ****30003****: Unreachable/Out of Service Number
* ****30004****: Do not want SMS/DND enabled
* ****30005****: User Inactive/Number does not exist
* ****30006****: Landline/Incapable of receiving SMS
* ****30007****: Carrier Violation
* ****30008****: An unknown error occurred during message delivery.
* ****30011****: MMS is not supported by the recipient’s device or region.
* ****30023****: Daily A2P messaging limit reached in the U.S.
* ****30032****: Toll-Free Number not verified
* ****30033****: The A2P campaign has been suspended or deleted.
* ****30034****: A2P Registration Pending on Number
* ****30037****: Outbound messaging has been disabled for this account.
Once you are satisfied with your configurations, go ahead and save the trigger to your workflow.
 This provides improved message deliverability and contact quality, minimizes wasted sends to unreachable or non-compliant numbers, enhances control over how your system handles delivery failures, and reduces reliance on support teams for error resolution.
By leveraging this trigger, you can automatically respond to these undelivered messages with tailored workflows, such as notifying internal teams, retrying the message, or escalating the issue for further review. This not only improves communication reliability but also enhances your ability to proactively manage messaging errors and maintain a seamless customer experience.
### email-events
Email events capture valuable insights into how recipients engage with email content, such as opening the email or unsubscribing from marketing communications. The Email Event trigger is designed to initiate a workflow whenever a specific email event occurs, notifying businesses of significant customer actions in response to their emails, and enabling you to adjust your recipient list or refine your email strategies.
Add the trigger to your workflow to get started!
This provides improved message deliverability and contact quality, minimizes wasted sends to unreachable or non-compliant numbers, enhances control over how your system handles delivery failures, and reduces reliance on support teams for error resolution.
By leveraging this trigger, you can automatically respond to these undelivered messages with tailored workflows, such as notifying internal teams, retrying the message, or escalating the issue for further review. This not only improves communication reliability but also enhances your ability to proactively manage messaging errors and maintain a seamless customer experience.
### email-events
Email events capture valuable insights into how recipients engage with email content, such as opening the email or unsubscribing from marketing communications. The Email Event trigger is designed to initiate a workflow whenever a specific email event occurs, notifying businesses of significant customer actions in response to their emails, and enabling you to adjust your recipient list or refine your email strategies.
Add the trigger to your workflow to get started!
 ### Workflow Trigger Name
Update the trigger name, if required, to reflect its function and purpose.
### Workflow Trigger Name
Update the trigger name, if required, to reflect its function and purpose.
 ### Add Filters
Add filters to choose the event that will fire the workflow, or limit the trigger to only retrieve data on emails within a particular workflow.
### Add Filters
Add filters to choose the event that will fire the workflow, or limit the trigger to only retrieve data on emails within a particular workflow.
 #### Event
When configuring a trigger based on email events, the Event filter enables users to select the specific event that will activate the trigger from a sent email. Available options include email Bounced, Clicked, Complained (the contact reports the email as spam), Opened, or Unsubscribed.
#### Event
When configuring a trigger based on email events, the Event filter enables users to select the specific event that will activate the trigger from a sent email. Available options include email Bounced, Clicked, Complained (the contact reports the email as spam), Opened, or Unsubscribed.
 #### In Workflow
The In Workflow filter allows you to select a specific workflow to search for events when setting up a trigger. Utilize the search bar to locate the desired workflow with ease.
This filter enables you to move contacts from other workflows into a more targeted workflow, where you can provide tailored information. Alternatively, it allows you to remove contacts from all workflows and mark them as Do Not Disturb (DND)—typically for contacts who have marked emails as spam, bounced, or unsubscribed—helping to protect your email deliverability and maintain a positive sender reputation.
#### In Workflow
The In Workflow filter allows you to select a specific workflow to search for events when setting up a trigger. Utilize the search bar to locate the desired workflow with ease.
This filter enables you to move contacts from other workflows into a more targeted workflow, where you can provide tailored information. Alternatively, it allows you to remove contacts from all workflows and mark them as Do Not Disturb (DND)—typically for contacts who have marked emails as spam, bounced, or unsubscribed—helping to protect your email deliverability and maintain a positive sender reputation.
 These filters can be combined according to your preference for a more targeted approach.
Save the trigger once you are pleased with its configuration, then add the appropriate workflow actions. By leveraging this trigger, you can enhance your email marketing strategies and drive improved customer engagement.
### form-submitted-trigger
The Form Submitted workflow trigger enables automatic actions whenever a form is submitted through your CRM. Whether it’s sending an instant auto-reply, notifying your team, or updating records, this trigger simplifies communication and follow-ups.
****📌NOTE:**** This only works if the form was created in your CRM.
***
## Adding the Form Submitted Trigger
To get started, click on \*\*\*\*“Add New Trigger” \*\*\*\*and select and select ****Form Submitted.****
These filters can be combined according to your preference for a more targeted approach.
Save the trigger once you are pleased with its configuration, then add the appropriate workflow actions. By leveraging this trigger, you can enhance your email marketing strategies and drive improved customer engagement.
### form-submitted-trigger
The Form Submitted workflow trigger enables automatic actions whenever a form is submitted through your CRM. Whether it’s sending an instant auto-reply, notifying your team, or updating records, this trigger simplifies communication and follow-ups.
****📌NOTE:**** This only works if the form was created in your CRM.
***
## Adding the Form Submitted Trigger
To get started, click on \*\*\*\*“Add New Trigger” \*\*\*\*and select and select ****Form Submitted.****
 ***
## Add Filters
To add a filter, click on the ****Add Filters**** button.
***
## Add Filters
To add a filter, click on the ****Add Filters**** button.
 ### Form Is
Click the ****Add Filters**** button and select “****Form Is”**** from the dropdown. Then in the second dropdown select a form from the that you’d like to use to trigger your workflow.
### Form Is
Click the ****Add Filters**** button and select “****Form Is”**** from the dropdown. Then in the second dropdown select a form from the that you’d like to use to trigger your workflow.
 ### Terms and Conditions
Configure filters based on users who have agreed or not agreed to the Terms and Conditions (T\&C). This allows for:
* \*\*\*\*User Segmentation: \*\*\*\*Helps you distinguish users based on their T\&C agreement status.
* ****Compliance Assurance:**** This ensures that only users who have accepted the terms proceed in workflows.
* ****Customized Workflow Paths:**** You can tailor actions based on T\&C agreement status for targeted user experiences.
### Terms and Conditions
Configure filters based on users who have agreed or not agreed to the Terms and Conditions (T\&C). This allows for:
* \*\*\*\*User Segmentation: \*\*\*\*Helps you distinguish users based on their T\&C agreement status.
* ****Compliance Assurance:**** This ensures that only users who have accepted the terms proceed in workflows.
* ****Customized Workflow Paths:**** You can tailor actions based on T\&C agreement status for targeted user experiences.
 This workflow trigger is great for setting up auto-replies via SMS or email to customers and notifying team members when a form is filled out that they need to follow up on.
Once you’ve set up your filters and reminders, click ****"Save Trigger"**** to finalize your form-submitted workflow.
\*\*\*\*📌NOTE: \*\*\*\*You can add workflow actions to automate tasks such as notifications, follow-ups, or account updates.
Once you’ve set up the trigger and its actions, \*\*\*\*Publish ****and**** Save \*\*\*\*the workflow to enable its functionality.
This workflow trigger is great for setting up auto-replies via SMS or email to customers and notifying team members when a form is filled out that they need to follow up on.
Once you’ve set up your filters and reminders, click ****"Save Trigger"**** to finalize your form-submitted workflow.
\*\*\*\*📌NOTE: \*\*\*\*You can add workflow actions to automate tasks such as notifications, follow-ups, or account updates.
Once you’ve set up the trigger and its actions, \*\*\*\*Publish ****and**** Save \*\*\*\*the workflow to enable its functionality.
 Using the Form Submitted trigger optimizes customer interactions and streamlines internal processes. By applying filters like Terms and Conditions agreements, businesses can ensure compliance and create more personalized workflow automation.
### survey-submitted-trigger
The Survey Submitted trigger is designed for specific actions after a lead submits a survey. This trigger activates each time someone submits a survey, thus triggering the workflow created for the task. This feature allows businesses to streamline their workflow and automate certain actions based on survey submissions, resulting in improved efficiency and a more personalized customer experience.
***
## Adding the Survey Submitted Trigger
To get started setting up your workflow, click on ****"Add New Trigger"**** and select ****Survey Submitted.****
Using the Form Submitted trigger optimizes customer interactions and streamlines internal processes. By applying filters like Terms and Conditions agreements, businesses can ensure compliance and create more personalized workflow automation.
### survey-submitted-trigger
The Survey Submitted trigger is designed for specific actions after a lead submits a survey. This trigger activates each time someone submits a survey, thus triggering the workflow created for the task. This feature allows businesses to streamline their workflow and automate certain actions based on survey submissions, resulting in improved efficiency and a more personalized customer experience.
***
## Adding the Survey Submitted Trigger
To get started setting up your workflow, click on ****"Add New Trigger"**** and select ****Survey Submitted.****
 📌\*\*\*\*Note: \*\*\*\*To publish workflows you have added a trigger to, you must establish workflow actions. Without both, you can only save the workflow.
***
## Add Filters
You can filter your trigger by clicking ****Add Filter**** and selecting\*\*\*\* “Disqualified”, or “Survey Is”.\*\*\*\*
📌\*\*\*\*Note: \*\*\*\*To publish workflows you have added a trigger to, you must establish workflow actions. Without both, you can only save the workflow.
***
## Add Filters
You can filter your trigger by clicking ****Add Filter**** and selecting\*\*\*\* “Disqualified”, or “Survey Is”.\*\*\*\*
 ### Disqualified
This filter is useful when you want the system to activate the trigger based on the qualification status of each survey submitted. As shown in the image below, Disqualified ****"Is False"**** means when the survey is not disqualified (or say the survey is "Qualified"), whereas Disqualified ****"Is True"**** means when the survey is disqualified.
### Disqualified
This filter is useful when you want the system to activate the trigger based on the qualification status of each survey submitted. As shown in the image below, Disqualified ****"Is False"**** means when the survey is not disqualified (or say the survey is "Qualified"), whereas Disqualified ****"Is True"**** means when the survey is disqualified.
 ### Survey Is
The Survey Is filter displays a dropdown list when a user has one or more surveys within the system. Users can select the survey they want to use to activate the trigger from this list.
### Survey Is
The Survey Is filter displays a dropdown list when a user has one or more surveys within the system. Users can select the survey they want to use to activate the trigger from this list.
 ### Terms and Conditions
Set up filters to differentiate users based on whether they have accepted the Terms and Conditions (T\&C). This enables:
* ****Audience Segmentation:**** Identify and categorize users according to their T\&C agreement status.
* ****Regulatory Compliance:**** Ensure that only those who have agreed to the terms can proceed within workflows.
* ****Personalized Workflow Actions:**** Customize processes and responses based on a user’s agreement status for a more tailored experience.
### Terms and Conditions
Set up filters to differentiate users based on whether they have accepted the Terms and Conditions (T\&C). This enables:
* ****Audience Segmentation:**** Identify and categorize users according to their T\&C agreement status.
* ****Regulatory Compliance:**** Ensure that only those who have agreed to the terms can proceed within workflows.
* ****Personalized Workflow Actions:**** Customize processes and responses based on a user’s agreement status for a more tailored experience.
 Once you’ve set up your filters and reminders, click ****"Save Trigger"**** to finalize your survey submitted workflow.
You can add workflow actions to automate tasks such as notifications, follow-ups, or account updates.
Once you’ve set up the trigger and its actions, \*\*\*\*Publish ****and**** Save \*\*\*\*the workflow to enable its functionality.
Once you’ve set up your filters and reminders, click ****"Save Trigger"**** to finalize your survey submitted workflow.
You can add workflow actions to automate tasks such as notifications, follow-ups, or account updates.
Once you’ve set up the trigger and its actions, \*\*\*\*Publish ****and**** Save \*\*\*\*the workflow to enable its functionality.
 By leveraging the ****Survey Submitted Trigger****, you can efficiently automate actions based on survey responses, enhancing productivity and creating a tailored experience for your leads.
### quiz-submitted-trigger
Quizzes are a great way to engage your audience, but the real magic happens after they hit "Submit." The Quiz Submission Trigger lets you automate actions based on quiz results, saving time and enhancing user experiences. Whether you're sending feedback, segmenting users, or assigning tasks, this feature makes it easy to turn responses into actionable insights.
***
## Adding the Quiz Submitted Trigger
Go to the Automation section and click Create Workflow or edit an existing one. In the workflow editor, click ****Add New Trigger**** and select ****Quiz Submitted.****
By leveraging the ****Survey Submitted Trigger****, you can efficiently automate actions based on survey responses, enhancing productivity and creating a tailored experience for your leads.
### quiz-submitted-trigger
Quizzes are a great way to engage your audience, but the real magic happens after they hit "Submit." The Quiz Submission Trigger lets you automate actions based on quiz results, saving time and enhancing user experiences. Whether you're sending feedback, segmenting users, or assigning tasks, this feature makes it easy to turn responses into actionable insights.
***
## Adding the Quiz Submitted Trigger
Go to the Automation section and click Create Workflow or edit an existing one. In the workflow editor, click ****Add New Trigger**** and select ****Quiz Submitted.****
 ### Quiz Name
Choose the quiz you want to automate by selecting its name. This ensures the trigger only activates for submissions from that specific quiz. For example, if you have multiple quizzes for different campaigns, you can set up separate triggers for each one.
### Quiz Name
Choose the quiz you want to automate by selecting its name. This ensures the trigger only activates for submissions from that specific quiz. For example, if you have multiple quizzes for different campaigns, you can set up separate triggers for each one.
 ***
## Add Filters
Click on Add Filters to add conditions to refine when the trigger should activate.
### Overall Score
Set minimum or maximum score thresholds to trigger actions only for specific results. For instance, you might send a congratulatory email to users who score above 80% or a follow-up message to those who score below 50%.
***
## Add Filters
Click on Add Filters to add conditions to refine when the trigger should activate.
### Overall Score
Set minimum or maximum score thresholds to trigger actions only for specific results. For instance, you might send a congratulatory email to users who score above 80% or a follow-up message to those who score below 50%.
 ### Terms and Condition
Apply logic based on user responses to specific questions or categories. For example, if a user selects a particular answer, you can trigger a specific action, like assigning them to a sales team or sending a product recommendation.
### Terms and Condition
Apply logic based on user responses to specific questions or categories. For example, if a user selects a particular answer, you can trigger a specific action, like assigning them to a sales team or sending a product recommendation.
 Once you’ve set up your filters and reminders, click ****"Save Trigger"**** to finalize your quiz-submitted workflow.
 ��****NOTE:**** You can add workflow actions to automate tasks such as notifications, follow-ups, or account updates.
****Publish**** and ****Save**** to activate the workflow to start automating actions based on quiz submissions.
��****NOTE:**** You can add workflow actions to automate tasks such as notifications, follow-ups, or account updates.
****Publish**** and ****Save**** to activate the workflow to start automating actions based on quiz submissions.
 The Quiz Submission Trigger simplifies automation, helping you save time and engage users effectively. Start using it today to turn quiz responses into meaningful actions.
### order-submitted
The Order Submitted trigger is a versatile tool that enables businesses to upsell customers after they have submitted an order. This trigger works seamlessly with both 1-step and 2-step order forms, offering flexibility to businesses in tailoring upsell opportunities based on the order form type or the specific products purchased.
It activates upon submitting an order form and again when an upsell purchase occurs, capturing relevant product information in both cases. This means that if a customer purchases products A and B through the order form and then buys product C through an upsell, the trigger will activate twice—first for the primary products and again for the upsell item.
### Order Submitted vs. Order Form Submitted
There are several key distinctions between the Order Submitted trigger and the Order Form Submitted trigger:
* ****Trigger Activation:**** The Order Submitted trigger can run multiple times for each product purchased, whereas the Order Form Submitted trigger only activates once, even if multiple products are purchased within a single session.
* ****Filter Capabilities:**** The Order Submitted trigger allows filtering based on global product/price, which the Order Form Submitted trigger does not.
* ****Custom Value Usage:**** The Order Submitted trigger enables the use of order-related custom values within the workflow, such as adding customer details, order information, coupon data, and payment methods to an email. These custom values are accessible only if the Order Submitted trigger is included in the workflow's setup.
With the above information in mind, navigate to the Automation > Workflows section in your account, and proceed to add the Order Submitted trigger to a new or existing workflow.
The Quiz Submission Trigger simplifies automation, helping you save time and engage users effectively. Start using it today to turn quiz responses into meaningful actions.
### order-submitted
The Order Submitted trigger is a versatile tool that enables businesses to upsell customers after they have submitted an order. This trigger works seamlessly with both 1-step and 2-step order forms, offering flexibility to businesses in tailoring upsell opportunities based on the order form type or the specific products purchased.
It activates upon submitting an order form and again when an upsell purchase occurs, capturing relevant product information in both cases. This means that if a customer purchases products A and B through the order form and then buys product C through an upsell, the trigger will activate twice—first for the primary products and again for the upsell item.
### Order Submitted vs. Order Form Submitted
There are several key distinctions between the Order Submitted trigger and the Order Form Submitted trigger:
* ****Trigger Activation:**** The Order Submitted trigger can run multiple times for each product purchased, whereas the Order Form Submitted trigger only activates once, even if multiple products are purchased within a single session.
* ****Filter Capabilities:**** The Order Submitted trigger allows filtering based on global product/price, which the Order Form Submitted trigger does not.
* ****Custom Value Usage:**** The Order Submitted trigger enables the use of order-related custom values within the workflow, such as adding customer details, order information, coupon data, and payment methods to an email. These custom values are accessible only if the Order Submitted trigger is included in the workflow's setup.
With the above information in mind, navigate to the Automation > Workflows section in your account, and proceed to add the Order Submitted trigger to a new or existing workflow.
 ### Workflow Trigger Name
Update the name of the trigger to accurately represent its intended purpose.
### Workflow Trigger Name
Update the name of the trigger to accurately represent its intended purpose.
 ***
## Trigger Customization Options
The Order Submitted trigger provides a range of filters to customize workflows according to various order details. Click the “Add Filters” button to customize your trigger.
### Global Product
The "Global Product" filter allows you to trigger workflows based on a specific global product or price. You can select 'Is' or 'Is not' and choose a product from the dropdown.
***
## Trigger Customization Options
The Order Submitted trigger provides a range of filters to customize workflows according to various order details. Click the “Add Filters” button to customize your trigger.
### Global Product
The "Global Product" filter allows you to trigger workflows based on a specific global product or price. You can select 'Is' or 'Is not' and choose a product from the dropdown.
 ### Order Source
The "Order Source" filter lets you specify the source of the order. Choose 'Is' or 'Is not' and select an order source from the dropdown.
### Order Source
The "Order Source" filter lets you specify the source of the order. Choose 'Is' or 'Is not' and select an order source from the dropdown.
 ### Sub-Source
For Order Forms, External Sources, or Stores, you can specify the sub-source you are interested in.
### Sub-Source
For Order Forms, External Sources, or Stores, you can specify the sub-source you are interested in.
 If “Order Form” is chosen as the source, you will be able to refine the trigger even further by utilizing the following filters:
### In Funnel/Website
The "In Funnel/Website" filter ensures that the workflow triggers only when an order form is submitted through a specific funnel or website. Select 'Is' or 'Is not' and pick the funnel or website from the dropdown.
If “Order Form” is chosen as the source, you will be able to refine the trigger even further by utilizing the following filters:
### In Funnel/Website
The "In Funnel/Website" filter ensures that the workflow triggers only when an order form is submitted through a specific funnel or website. Select 'Is' or 'Is not' and pick the funnel or website from the dropdown.
 #### Page Is
The "Page Is" filter triggers the workflow when a form is submitted on a specific page in the funnel or website. You can select 'Is' or 'Is not' and choose a specific page from the dropdown. For example, selecting the "Registration Form" page in a funnel will trigger the workflow only when the form on this particular page is completed.
#### Page Is
The "Page Is" filter triggers the workflow when a form is submitted on a specific page in the funnel or website. You can select 'Is' or 'Is not' and choose a specific page from the dropdown. For example, selecting the "Registration Form" page in a funnel will trigger the workflow only when the form on this particular page is completed.
 ### Submission Type
The Submission Type filter allows businesses to customize workflow triggers based on the type of purchase made by the customer:
* ****Bump:**** Triggers if a bump product is purchased.
* ****Primary:**** Triggers if a primary product is purchased at checkout.
* ****Upsell:**** Triggers if an upsell product is purchased.
### Submission Type
The Submission Type filter allows businesses to customize workflow triggers based on the type of purchase made by the customer:
* ****Bump:**** Triggers if a bump product is purchased.
* ****Primary:**** Triggers if a primary product is purchased at checkout.
* ****Upsell:**** Triggers if an upsell product is purchased.
 ### Product Price
The "Product Price" filter is useful when there are multiple pricing options for a product, such as a regular price and a promotional price. Choose 'Is' or 'Is not' and select the price from the dropdown.
### Product Price
The "Product Price" filter is useful when there are multiple pricing options for a product, such as a regular price and a promotional price. Choose 'Is' or 'Is not' and select the price from the dropdown.
 These options provide businesses with flexibility in setting up highly tailored workflows.
By understanding and utilizing the various filters, operators, and custom value options, you can use this trigger to enhance workflows to maximize revenue from existing customers while delivering a more personalized shopping experience.
### ✍️Important Notes
* If you want the workflow to trigger for both a primary product and an upsell purchase, ensure that the Allow Multiple setting is toggled on.
* Avoid using "Wait steps" if you plan on selling Upsells or Bumps for the same product, as this could prevent the upsell trigger from firing properly. If a customer proceeds to purchase an upsell after the primary product, the workflow will not re-trigger.
### order-form-submission-trigger
The Order Form Submission trigger helps automate workflows whenever a customer submits an order form through your funnel or website. Whether it’s a Bump offer, Opt-in, Sale, or Upsell. An Order Form is a form you put on your website or funnel to facilitate the checkout process for a product or service.
***
## Adding the Order Form Submission Trigger
To begin, click\*\*\*\* Add New Trigger\*\*\*\*, then search and select ****Order Form Submission**** Trigger.
These options provide businesses with flexibility in setting up highly tailored workflows.
By understanding and utilizing the various filters, operators, and custom value options, you can use this trigger to enhance workflows to maximize revenue from existing customers while delivering a more personalized shopping experience.
### ✍️Important Notes
* If you want the workflow to trigger for both a primary product and an upsell purchase, ensure that the Allow Multiple setting is toggled on.
* Avoid using "Wait steps" if you plan on selling Upsells or Bumps for the same product, as this could prevent the upsell trigger from firing properly. If a customer proceeds to purchase an upsell after the primary product, the workflow will not re-trigger.
### order-form-submission-trigger
The Order Form Submission trigger helps automate workflows whenever a customer submits an order form through your funnel or website. Whether it’s a Bump offer, Opt-in, Sale, or Upsell. An Order Form is a form you put on your website or funnel to facilitate the checkout process for a product or service.
***
## Adding the Order Form Submission Trigger
To begin, click\*\*\*\* Add New Trigger\*\*\*\*, then search and select ****Order Form Submission**** Trigger.
 ***
## Add Filters
You can filter the trigger by clicking the ****Add Filters**** button.
***
## Add Filters
You can filter the trigger by clicking the ****Add Filters**** button.
 ### In Funnel/ Website
The ****"In Funnel/Website"**** filter feature enables users to select a specific funnel or website to trigger the workflow when a form is submitted. When a user selects this filter option, the workflow will activate only when a form is submitted through the specified funnel or website.
### In Funnel/ Website
The ****"In Funnel/Website"**** filter feature enables users to select a specific funnel or website to trigger the workflow when a form is submitted. When a user selects this filter option, the workflow will activate only when a form is submitted through the specified funnel or website.
 #### Page Is
The ****"Page Is"**** filter option in this trigger could be used when you want a specific page in your funnel or website to trigger the workflow when a customer fills it. For example, by clicking on the ****"2-Step Order form" ****Page in the**** "Demo Sales"**** funnel, this workflow will only trigger when a customer fills this specific page.
#### Page Is
The ****"Page Is"**** filter option in this trigger could be used when you want a specific page in your funnel or website to trigger the workflow when a customer fills it. For example, by clicking on the ****"2-Step Order form" ****Page in the**** "Demo Sales"**** funnel, this workflow will only trigger when a customer fills this specific page.
 #### Product Is
The\*\*\*\* "Product Is"\*\*\*\* filter option in this trigger could be used when you want a specific product in your funnel or website to trigger the workflow when a customer fills it. For example, choosing the ****"Demo Product"**** Product in the\*\*\*\* "Test Product"\*\*\*\* page, this workflow will only trigger when a customer chooses this specific product.
#### Product Is
The\*\*\*\* "Product Is"\*\*\*\* filter option in this trigger could be used when you want a specific product in your funnel or website to trigger the workflow when a customer fills it. For example, choosing the ****"Demo Product"**** Product in the\*\*\*\* "Test Product"\*\*\*\* page, this workflow will only trigger when a customer chooses this specific product.
 ### Submission Type
The ****"Submission type"**** filter consists of four (4) types, and this will help identify what a customer did during the checkout process;
* ****Bump:**** It is also an add-on you give your customer for purchasing a particular product or service.
* ****Optin:**** This is when a customer puts their contact information on your website for checkout but doesn't complete the order (like when a cart is abandoned).
* \*\*\*\*Sale: \*\*\*\*It is the main submission type. This is when a customer fills in their contact information on your website for checkout and completes or purchases the order. This is good for a post-purchase nurture campaign where you can send a "thank you" message to the customer for purchasing your product or becoming a member.
* ****Upsell:**** It is an add-on you give your customer for purchasing a particular product or service.
### Submission Type
The ****"Submission type"**** filter consists of four (4) types, and this will help identify what a customer did during the checkout process;
* ****Bump:**** It is also an add-on you give your customer for purchasing a particular product or service.
* ****Optin:**** This is when a customer puts their contact information on your website for checkout but doesn't complete the order (like when a cart is abandoned).
* \*\*\*\*Sale: \*\*\*\*It is the main submission type. This is when a customer fills in their contact information on your website for checkout and completes or purchases the order. This is good for a post-purchase nurture campaign where you can send a "thank you" message to the customer for purchasing your product or becoming a member.
* ****Upsell:**** It is an add-on you give your customer for purchasing a particular product or service.
 Once you’ve set up your filters and reminders, click ****"Save Trigger"**** to finalize your order form workflow.
****📌NOTE:**** You can add workflow actions to automate tasks such as notifications, follow-ups, or account updates.
Once you’ve set up the trigger and its actions, ****Publish**** and \*\*\*\*Save \*\*\*\*the workflow to enable its functionality.
Once you’ve set up your filters and reminders, click ****"Save Trigger"**** to finalize your order form workflow.
****📌NOTE:**** You can add workflow actions to automate tasks such as notifications, follow-ups, or account updates.
Once you’ve set up the trigger and its actions, ****Publish**** and \*\*\*\*Save \*\*\*\*the workflow to enable its functionality.
 This trigger makes it easy to set up workflows that match your goals. By adding filters, you can ensure the right actions happen at the right time, helping you deliver a better customer experience while keeping things running smoothly.
### order-placed
The Order Placed trigger is utilized for workflows when a customer places an order through your Shopify store. Use this workflow trigger to send internal notifications of placed orders to team members, follow up with customers, and more.
To start, click Add New Trigger then select Order Placed.
This trigger makes it easy to set up workflows that match your goals. By adding filters, you can ensure the right actions happen at the right time, helping you deliver a better customer experience while keeping things running smoothly.
### order-placed
The Order Placed trigger is utilized for workflows when a customer places an order through your Shopify store. Use this workflow trigger to send internal notifications of placed orders to team members, follow up with customers, and more.
To start, click Add New Trigger then select Order Placed.
 ***
## Filters
Once selected, click Add Filters to further customize it. The main filter for this trigger will be Cart Value.
### Cart Value
The Cart Value filter is designed to enable users to select a cart value with specific customizations. Once instructions, such as cart value greater than \$500 are provided, the trigger will activate. First, select the filter.
***
## Filters
Once selected, click Add Filters to further customize it. The main filter for this trigger will be Cart Value.
### Cart Value
The Cart Value filter is designed to enable users to select a cart value with specific customizations. Once instructions, such as cart value greater than \$500 are provided, the trigger will activate. First, select the filter.
 Add an operator for the value, your options will be:
 Once the filter is set in place, click Save trigger. After this, you can add any actions you'd like the workflow to follow! Remember to click save at the top right corner to maintain your changes and switch your workflow to Publish once you're ready to implement the automation.
### order-fulfilled
The Order Fulfilled trigger will start a series of actions when an order on your Shopify store has been fulfilled. Use this workflow trigger to notify contacts or send internal notifications to clients. To use this trigger, click Add New Workflow Trigger and select Order Fulfilled.
Once the filter is set in place, click Save trigger. After this, you can add any actions you'd like the workflow to follow! Remember to click save at the top right corner to maintain your changes and switch your workflow to Publish once you're ready to implement the automation.
### order-fulfilled
The Order Fulfilled trigger will start a series of actions when an order on your Shopify store has been fulfilled. Use this workflow trigger to notify contacts or send internal notifications to clients. To use this trigger, click Add New Workflow Trigger and select Order Fulfilled.
 ***
## Filters
Now, let's customize it with additional filters by clicking Add Filters.
***
## Filters
Now, let's customize it with additional filters by clicking Add Filters.
 #### Cart Value
The Cart Value filter lets users select a cart value with specific customizations.
#### Cart Value
The Cart Value filter lets users select a cart value with specific customizations.
 To trigger the filter, provide instructions such as cart value is greater than \$500.
Once the filter is set in place, click Save trigger, after this, you can add any actions you'd like the workflow to follow! Remember to click save at the top right corner to maintain your changes and switch your workflow to Publish once you're ready to implement the automation.
### payment-received-trigger
Receiving payment can be the start of many steps with your clients, from fulfilling orders to upselling to granting access to specific offers, and more. After the payment is received, you have to keep track of many things, which can get overwhelming fast. Good thing you have your CRM to help you. This trigger will help you automate the steps to take after you receive payment, making your workload much lighter.
***
## Building the Workflow
To start, let's create a new Workflow. We need to head to the Workflows tab inside the Automation section and select the ****“+ Create Workflow”**** button. You can build from scratch or use the premade recipes.
To trigger the filter, provide instructions such as cart value is greater than \$500.
Once the filter is set in place, click Save trigger, after this, you can add any actions you'd like the workflow to follow! Remember to click save at the top right corner to maintain your changes and switch your workflow to Publish once you're ready to implement the automation.
### payment-received-trigger
Receiving payment can be the start of many steps with your clients, from fulfilling orders to upselling to granting access to specific offers, and more. After the payment is received, you have to keep track of many things, which can get overwhelming fast. Good thing you have your CRM to help you. This trigger will help you automate the steps to take after you receive payment, making your workload much lighter.
***
## Building the Workflow
To start, let's create a new Workflow. We need to head to the Workflows tab inside the Automation section and select the ****“+ Create Workflow”**** button. You can build from scratch or use the premade recipes.
 When building a Workflow select the trigger ****Payment Received****, you can find it in the Payments section or by looking it up in the search bar.
 ***
## Filters
Now, let's set up the filters. This is optional, but it helps you narrow down when the workflow is triggered. The three main ones here will be:
### Global Products
This helps you limit the automation trigger to a specific product or by selecting “Is Not” exclude particular products from this workflow. Additionally, you can narrow this further by choosing a price for the product.
***
## Filters
Now, let's set up the filters. This is optional, but it helps you narrow down when the workflow is triggered. The three main ones here will be:
### Global Products
This helps you limit the automation trigger to a specific product or by selecting “Is Not” exclude particular products from this workflow. Additionally, you can narrow this further by choosing a price for the product.
 ### Payments Status
This lets you separate between successful and failed payments.
### Payments Status
This lets you separate between successful and failed payments.
 ### Source
This limits the automation to trigger only if the payment came from that source. This can be the general source, like Website, Form, etc. Or by adding a Sub-Source filter, you can limit it to only one of those sources. With Funnels and Website, you can also filter out repeated from first-time payments.
### Source
This limits the automation to trigger only if the payment came from that source. This can be the general source, like Website, Form, etc. Or by adding a Sub-Source filter, you can limit it to only one of those sources. With Funnels and Website, you can also filter out repeated from first-time payments.
 ***
## Using If/Else Action
When using the If/Else action with this trigger, you can branch out your contacts with the same filters as the main trigger. Additionally, you can use the payment amount as a conditional and the sub-source can be set directly, without selecting Source first.
***
## Using If/Else Action
When using the If/Else action with this trigger, you can branch out your contacts with the same filters as the main trigger. Additionally, you can use the payment amount as a conditional and the sub-source can be set directly, without selecting Source first.
 In the dropdown, you can select the channel where you want to receive payment information.
 And there you have it, you're ready to use the Payment Received trigger! No more worrying about forgetting to send out the product or reaching back to your customers to complete the service; now you can add the steps to follow, and the system will do it for you.
### abandoned-checkout-trigger
The ****Abandoned Checkout**** trigger is used to engage with the shoppers who spent a good amount of time on your website and added a few products but left the store without completing their purchase. It is designed to connect with customers who have spent a significant time browsing products on your website but did not complete their purchase. Use this workflow trigger if you’d like to send a notification to the contact about their abandoned checkout, or even send a coupon code!
***
## Adding the Abandoned Checkout Trigger
Go to the ****Workflow Builder****, click ****Add New Trigger****, then search and select ****Abandoned Checkout**** from the options.
And there you have it, you're ready to use the Payment Received trigger! No more worrying about forgetting to send out the product or reaching back to your customers to complete the service; now you can add the steps to follow, and the system will do it for you.
### abandoned-checkout-trigger
The ****Abandoned Checkout**** trigger is used to engage with the shoppers who spent a good amount of time on your website and added a few products but left the store without completing their purchase. It is designed to connect with customers who have spent a significant time browsing products on your website but did not complete their purchase. Use this workflow trigger if you’d like to send a notification to the contact about their abandoned checkout, or even send a coupon code!
***
## Adding the Abandoned Checkout Trigger
Go to the ****Workflow Builder****, click ****Add New Trigger****, then search and select ****Abandoned Checkout**** from the options.
 ***
## Filters
Filters can be added by clicking the “\*\*\*\*Add Filters” \*\*\*\*button. You have the option to filter by \*\*\*\*Duration \*\*\*\*and/or ****Cart Value****.
***
## Filters
Filters can be added by clicking the “\*\*\*\*Add Filters” \*\*\*\*button. You have the option to filter by \*\*\*\*Duration \*\*\*\*and/or ****Cart Value****.
 ### Duration
Users can set the duration for triggering the Abandoned Checkout workflow after a shopper leaves their Shopify store. The duration can be set in minutes, and once the shopper exits the store within that timeframe, the trigger will be activated.
### Duration
Users can set the duration for triggering the Abandoned Checkout workflow after a shopper leaves their Shopify store. The duration can be set in minutes, and once the shopper exits the store within that timeframe, the trigger will be activated.
 ****📌NOTE:**** The Duration option is there by default, but you can modify the number of minutes.
### Cart Value
The Cart Value filter allows for user customization by selecting a specific value. By providing instructions such as *****the cart value is greater than \$500*****, the trigger will activate.
****📌NOTE:**** The Duration option is there by default, but you can modify the number of minutes.
### Cart Value
The Cart Value filter allows for user customization by selecting a specific value. By providing instructions such as *****the cart value is greater than \$500*****, the trigger will activate.
 ### Country
The Country filter lets you specify which countries you want to include (1), make sure the field is empty (2), set countries to exclude (3), or prevent triggering when the field is empty (4).
### Country
The Country filter lets you specify which countries you want to include (1), make sure the field is empty (2), set countries to exclude (3), or prevent triggering when the field is empty (4).
 ### Global Products
The Global Products filter lets you specify which products you want to include (1), make sure the field is empty (2), set products to exclude (3), or prevent triggering when the field is empty (4).
### Global Products
The Global Products filter lets you specify which products you want to include (1), make sure the field is empty (2), set products to exclude (3), or prevent triggering when the field is empty (4).
 ### Order Source
The Order Source filter lets you verify that the order comes from Shopify (1), make sure the field is empty (2), exclude Shopify orders (3), or prevent triggering when the field is empty (4).
### Order Source
The Order Source filter lets you verify that the order comes from Shopify (1), make sure the field is empty (2), exclude Shopify orders (3), or prevent triggering when the field is empty (4).
 ### Store Name
The Store Name filter lets you specify which stores you want to include (1), make sure the field is empty (2), set stores to exclude (3), or prevent triggering when the field is empty (4).
### Store Name
The Store Name filter lets you specify which stores you want to include (1), make sure the field is empty (2), set stores to exclude (3), or prevent triggering when the field is empty (4).
 ### Sub Source
The Sub Source filter lets you verify that the order comes from Shopify (1), make sure the field is empty (2), exclude Shopify orders (3), or prevent triggering when the field is empty (4).
### Sub Source
The Sub Source filter lets you verify that the order comes from Shopify (1), make sure the field is empty (2), exclude Shopify orders (3), or prevent triggering when the field is empty (4).
 Save the Trigger and continue adding other relevant actions to your workflow. For example, an Email reminder that prompts the customer to revisit your store's checkout page.
 The ****Abandoned Checkout**** trigger is an essential feature for re-engaging potential customers and increasing sales. By setting useful filters like\*\*\*\* duration ****and**** cart value\*\*\*\*, you can create personalized workflows to recover lost revenue.
### subscription-return-triggers
Subscriptions and refunds are two big tells of how a customer's journey is going; they may be the perfect point to engage more with them or the moment to cut things off. But you may not have the time to keep checking on those details with each customer, right? That's where workflows come in handy, especially with the “Subscription” or “Refund” triggers.
With their help, you can step up full workflows for your contacts to experience as soon as their status changes. To start, add a new trigger; you can find these two under Payments.
The ****Abandoned Checkout**** trigger is an essential feature for re-engaging potential customers and increasing sales. By setting useful filters like\*\*\*\* duration ****and**** cart value\*\*\*\*, you can create personalized workflows to recover lost revenue.
### subscription-return-triggers
Subscriptions and refunds are two big tells of how a customer's journey is going; they may be the perfect point to engage more with them or the moment to cut things off. But you may not have the time to keep checking on those details with each customer, right? That's where workflows come in handy, especially with the “Subscription” or “Refund” triggers.
With their help, you can step up full workflows for your contacts to experience as soon as their status changes. To start, add a new trigger; you can find these two under Payments.
 For both triggers, the beginning will be the same; pick one of the two. After selecting it, click on Add Filters, you can get as specific as needed. However, here's where things get different between them.
For Subscription, the main filters will be Status and Global Product. The steps will pop up in the following order:
1. Field: Here's where you select the thing you want to filter. For example, a status or a global product.
2. Operator: This is where you select if the field is or isn't what you will specify.
3. Value to meet: This will be the final step, where you set your status or product itself. For example, active or canceled.
For both triggers, the beginning will be the same; pick one of the two. After selecting it, click on Add Filters, you can get as specific as needed. However, here's where things get different between them.
For Subscription, the main filters will be Status and Global Product. The steps will pop up in the following order:
1. Field: Here's where you select the thing you want to filter. For example, a status or a global product.
2. Operator: This is where you select if the field is or isn't what you will specify.
3. Value to meet: This will be the final step, where you set your status or product itself. For example, active or canceled.
 For Refunds, the main filters will be Amount, Source, Status, and Type. They work the same as the ones we showed you for the Subscription except for the Amount. In that case, the operator has more options, and the value is not a drop-down menu; instead, you can freely set the total.
 After setting the filters, save your action, and you're ready to go. You can use these automation triggers to create nurture campaigns, clean up your lists, track the state of refunds, and more! We hope you enjoy creating with them.
### invoice-trigger
The Invoice trigger provides workflow automation tailored to payment and invoice status, according to your requirements. This feature allows you to set up automated actions that respond to changes in invoice status. By configuring this trigger, you can enhance your financial processes, ensuring timely follow-ups, notifications, and actions are executed automatically based on the current state of your invoices. This helps maintain operational efficiency and ensures that critical tasks related to invoice management are handled promptly and accurately.
To configure this trigger, click on the Add New Workflow Trigger button within a workflow and choose the Invoice option from the available selections.
After setting the filters, save your action, and you're ready to go. You can use these automation triggers to create nurture campaigns, clean up your lists, track the state of refunds, and more! We hope you enjoy creating with them.
### invoice-trigger
The Invoice trigger provides workflow automation tailored to payment and invoice status, according to your requirements. This feature allows you to set up automated actions that respond to changes in invoice status. By configuring this trigger, you can enhance your financial processes, ensuring timely follow-ups, notifications, and actions are executed automatically based on the current state of your invoices. This helps maintain operational efficiency and ensures that critical tasks related to invoice management are handled promptly and accurately.
To configure this trigger, click on the Add New Workflow Trigger button within a workflow and choose the Invoice option from the available selections.
 ### Filters
An initial filter labeled Invoice Status will appear, allowing you to choose from the paid, partially paid, sent, viewed, or void options.
### Filters
An initial filter labeled Invoice Status will appear, allowing you to choose from the paid, partially paid, sent, viewed, or void options.
 These options allow you to track invoices for better oversight, set up proactive communications, and take actions based on them.
### Additional Filters
To refine the trigger further, additional filters such as Has Tag and other custom fields can be added using the Add Filters option. If the Has Tag filter is selected, choose the specific tag that should trigger the workflow.
These options allow you to track invoices for better oversight, set up proactive communications, and take actions based on them.
### Additional Filters
To refine the trigger further, additional filters such as Has Tag and other custom fields can be added using the Add Filters option. If the Has Tag filter is selected, choose the specific tag that should trigger the workflow.
 By implementing this trigger, you can efficiently manage your invoicing and payment processes, ensuring timely and accurate tracking of financial transactions, leading to improved financial management and streamlined operations.
### opportunity-created-trigger
The Opportunities section helps you organize and track the journey of your leads, from entering your system to sales being completed. And this trigger helps you automate that process by following up with opportunities once created inside the system.
***
## Adding the Opportunity Created Trigger
To get started, click on “Add New Trigger”, then search and select “Opportunity Created."
By implementing this trigger, you can efficiently manage your invoicing and payment processes, ensuring timely and accurate tracking of financial transactions, leading to improved financial management and streamlined operations.
### opportunity-created-trigger
The Opportunities section helps you organize and track the journey of your leads, from entering your system to sales being completed. And this trigger helps you automate that process by following up with opportunities once created inside the system.
***
## Adding the Opportunity Created Trigger
To get started, click on “Add New Trigger”, then search and select “Opportunity Created."
 ***
## Adding Filters
You can filter which contacts trigger your automation by clicking Add Filters and selecting from the drop-down menu. The main ones for this trigger will be:
***
## Adding Filters
You can filter which contacts trigger your automation by clicking Add Filters and selecting from the drop-down menu. The main ones for this trigger will be:
 ### Assigned To
This allows you to filter the trigger based on the contact being assigned to a specific team member.
### Assigned To
This allows you to filter the trigger based on the contact being assigned to a specific team member.
 ### Has Tag
Use specific tags along with the opportunity being created to start your workflow.
### Has Tag
Use specific tags along with the opportunity being created to start your workflow.
 ### In Pipeline
The creation only triggers the workflow when an opportunity card is in a specific pipeline you selected.
### In Pipeline
The creation only triggers the workflow when an opportunity card is in a specific pipeline you selected.
 ### Lead Value
This allows you to exclude leads whose value is outside of your desired parameters.
### Lead Value
This allows you to exclude leads whose value is outside of your desired parameters.
 ### Lost Reason
This tracks opportunities lost for specific reasons you’ve defined.
### Lost Reason
This tracks opportunities lost for specific reasons you’ve defined.
 ### Status
This allows you to only include or exclude opportunities with a specific status.
### Status
This allows you to only include or exclude opportunities with a specific status.
 After setting the filters, click the Save Trigger button located in the bottom-right corner to finalize your configuration.
 Once you’ve set up the trigger, add any actions you want the workflow to perform and click "Publish" then "Save" to enable and save your changes.
 ��****NOTE****: To publish a workflow after adding a trigger, you will need to establish workflow actions. Without both, you can only save the workflow.
This trigger helps you automate processes after a contact is added to your pipelines. Improving your processes and ensuring contacts are taken care of, giving you an easy way to assign tasks, notify teammates, and follow up with contacts.
### opportunity-changed-trigger
The opportunity tab helps you keep track of your customer's journey, and when changes happen, it becomes crucial in your acquisition process to follow up with those changes. This trigger will help you create workflows to automate any actions you need to happen immediately upon a change.
***
## Adding Your Trigger
You can find this trigger in the Opportunities section of your workflow triggers. To add it, simply click “+ Add New Trigger” and select it.
��****NOTE****: To publish a workflow after adding a trigger, you will need to establish workflow actions. Without both, you can only save the workflow.
This trigger helps you automate processes after a contact is added to your pipelines. Improving your processes and ensuring contacts are taken care of, giving you an easy way to assign tasks, notify teammates, and follow up with contacts.
### opportunity-changed-trigger
The opportunity tab helps you keep track of your customer's journey, and when changes happen, it becomes crucial in your acquisition process to follow up with those changes. This trigger will help you create workflows to automate any actions you need to happen immediately upon a change.
***
## Adding Your Trigger
You can find this trigger in the Opportunities section of your workflow triggers. To add it, simply click “+ Add New Trigger” and select it.
 ### Workflow Trigger Name
Update the name that will be displayed in the builder.
### Workflow Trigger Name
Update the name that will be displayed in the builder.
 ***
## Filters
Define the contacts that should be added to the workflow by including filters based on the desired criteria. The main filters for this trigger will be:
### Assigned To
Select “Assigned To” from the Filters dropdown, then select an operator to limit the trigger to contacts assigned to a specific user or who've changed hands.
***
## Filters
Define the contacts that should be added to the workflow by including filters based on the desired criteria. The main filters for this trigger will be:
### Assigned To
Select “Assigned To” from the Filters dropdown, then select an operator to limit the trigger to contacts assigned to a specific user or who've changed hands.
 ### Has Tag
This filter lets you limit the workflow triggering to only contacts with the select tag added to them.
### Has Tag
This filter lets you limit the workflow triggering to only contacts with the select tag added to them.
 ### In Pipeline
Select “In Pipeline” from the Filters dropdown, then select an operator to limit the workflow triggering to opportunities from a specific pipeline or that have changed pipelines.
### In Pipeline
Select “In Pipeline” from the Filters dropdown, then select an operator to limit the workflow triggering to opportunities from a specific pipeline or that have changed pipelines.
 After adding this filter, you can also click Add filters and select “Pipeline Stage” for extra precision, limiting the contacts that trigger the workflow.
 ### Lead Value
Select “Lead Value” from the Filters dropdown. Next, you will need to choose your operator. Finally, select the amount you want to trigger or exclude from your workflow.
### Lead Value
Select “Lead Value” from the Filters dropdown. Next, you will need to choose your operator. Finally, select the amount you want to trigger or exclude from your workflow.
 ### Lost Reason
Select “Lost Reason” from the Filters dropdown. Next, you will need to choose your operator. Finally, if using “Equals” or “Has Changed To,” select the reason you want to trigger or exclude from your workflow.
### Lost Reason
Select “Lost Reason” from the Filters dropdown. Next, you will need to choose your operator. Finally, if using “Equals” or “Has Changed To,” select the reason you want to trigger or exclude from your workflow.
 ### Status
Select “Status” from the Filters dropdown. Next, you will need to choose your operator. Finally, select the status you want to trigger or exclude from your workflow.
### Status
Select “Status” from the Filters dropdown. Next, you will need to choose your operator. Finally, select the status you want to trigger or exclude from your workflow.
 Once you are satisfied with your selections, click “Save Trigger” to establish your changes.
 There you have it, following up with opportunity changes has never been easy. Use this trigger and its filters to automate your opportunity management, leading to more efficient acquisitions and improved customer care.
### opportunity-status-change
The Opportunity status change trigger is activated only when an opportunity's status changes in the Opportunities CRM section, moving from one status to another. This trigger will not be activated unless the opportunity card status changes.
***
## Adding the Opportunity Status Changed Trigger
To get started, click on \*\*\*\*“Add New Trigger”, ****then search**** \*\*\*\*and select ****“Opportunity Status Changed”****.
There you have it, following up with opportunity changes has never been easy. Use this trigger and its filters to automate your opportunity management, leading to more efficient acquisitions and improved customer care.
### opportunity-status-change
The Opportunity status change trigger is activated only when an opportunity's status changes in the Opportunities CRM section, moving from one status to another. This trigger will not be activated unless the opportunity card status changes.
***
## Adding the Opportunity Status Changed Trigger
To get started, click on \*\*\*\*“Add New Trigger”, ****then search**** \*\*\*\*and select ****“Opportunity Status Changed”****.
 ***
## All Filters
You can filter your trigger by clicking ****Add Filters**** and selecting all filters; they are all required.
***
## All Filters
You can filter your trigger by clicking ****Add Filters**** and selecting all filters; they are all required.
 ### Assigned To
The ****"Assigned To"**** filter allows you to trigger the assignment of a Contact to a User based on a condition of your choice. Simply select a team member from the dropdown to select the Assigned To.
### Assigned To
The ****"Assigned To"**** filter allows you to trigger the assignment of a Contact to a User based on a condition of your choice. Simply select a team member from the dropdown to select the Assigned To.
 ### Has Tag
In the filter options, choosing "****Has tag"**** will trigger the workflow when an opportunity card with a specific tag moves from one status to another. For instance, this filter will only activate the workflow when an opportunity card with a ****First Appointment tag**** moves from the open status to the won status.
### Has Tag
In the filter options, choosing "****Has tag"**** will trigger the workflow when an opportunity card with a specific tag moves from one status to another. For instance, this filter will only activate the workflow when an opportunity card with a ****First Appointment tag**** moves from the open status to the won status.
 ### In Pipeline
Selecting the In Pipeline filter will activate the workflow only when an opportunity card in a specific pipeline moves from one status to another. For instance, if an opportunity card in the\*\*\*\* Appointment pipeline\*\*\*\* moves from open to abandoned status, this filter will trigger the workflow.
### In Pipeline
Selecting the In Pipeline filter will activate the workflow only when an opportunity card in a specific pipeline moves from one status to another. For instance, if an opportunity card in the\*\*\*\* Appointment pipeline\*\*\*\* moves from open to abandoned status, this filter will trigger the workflow.
 ### Pipeline Stage
To further narrow the criteria, the Pipeline Stage filter can be used. This option targets a designated stage in the pipeline to activate the workflow when an opportunity card arrives.
### Pipeline Stage
To further narrow the criteria, the Pipeline Stage filter can be used. This option targets a designated stage in the pipeline to activate the workflow when an opportunity card arrives.
 For instance, if \*\*\*\*Confirmed \*\*\*\*is chosen in the ****Appointment pipeline****, this filter will only activate the workflow when a customer moves to that stage.
### Lead Value
Choose the Lead value, set an Operator, and then add the lead value in numbers.
For instance, if \*\*\*\*Confirmed \*\*\*\*is chosen in the ****Appointment pipeline****, this filter will only activate the workflow when a customer moves to that stage.
### Lead Value
Choose the Lead value, set an Operator, and then add the lead value in numbers.
 ### Lost Reason
Track opportunities lost for specific reasons by using this filter to activate workflows when an opportunity is marked as lost with a defined cause.
### Lost Reason
Track opportunities lost for specific reasons by using this filter to activate workflows when an opportunity is marked as lost with a defined cause.
 ### Moved From Status
When an opportunity card moves from one status to another, the Move from status filter allows users to trigger a workflow. For example, if the opportunity card moves from open to abandoned, lost, or won, this will activate the workflow.
### Moved From Status
When an opportunity card moves from one status to another, the Move from status filter allows users to trigger a workflow. For example, if the opportunity card moves from open to abandoned, lost, or won, this will activate the workflow.
 ### Moved To Status
Similarly, if the opportunity card moves to won from either abandoned, lost, or open, this will trigger the workflow defined by the Move to status filter.
### Moved To Status
Similarly, if the opportunity card moves to won from either abandoned, lost, or open, this will trigger the workflow defined by the Move to status filter.
 After setting the filters, click the ****Save Trigger**** button located in the bottom-right corner to finalize your configuration.
\*\*\*\*📌NOTE: \*\*\*\*You can add workflow actions to automate tasks such as notifications, follow-ups, or account updates.
After setting the filters, click the ****Save Trigger**** button located in the bottom-right corner to finalize your configuration.
\*\*\*\*📌NOTE: \*\*\*\*You can add workflow actions to automate tasks such as notifications, follow-ups, or account updates.
 By leveraging its customizable filters and automated workflow capabilities, teams can ensure timely responses, maintain pipeline visibility, and improve overall efficiency. With this trigger, managing and tracking opportunity transitions becomes a seamless process that enhances both productivity and customer experience.
### stale-opportunities-trigger
The Stale Opportunities trigger is activated only for opportunities that are older than a specific duration of time. Users can customize the timeframe for an opportunity to be considered stale and define certain actions to be taken as a result.
When no filters are selected, the workflow automatically activates for all opportunities in the open stage in any pipeline.
To get started, click Add New Trigger and select Stale Opportunities.
By leveraging its customizable filters and automated workflow capabilities, teams can ensure timely responses, maintain pipeline visibility, and improve overall efficiency. With this trigger, managing and tracking opportunity transitions becomes a seamless process that enhances both productivity and customer experience.
### stale-opportunities-trigger
The Stale Opportunities trigger is activated only for opportunities that are older than a specific duration of time. Users can customize the timeframe for an opportunity to be considered stale and define certain actions to be taken as a result.
When no filters are selected, the workflow automatically activates for all opportunities in the open stage in any pipeline.
To get started, click Add New Trigger and select Stale Opportunities.
 ��****Note****: Once the workflow is triggered, it runs daily at 8:00 am.
***
## Adding Filters
You can further filter your trigger by clicking on Add Filters. Your standard field options here are Assigned To, Doesn’t Have Tag, Duration in days, Has Tag, In Pipeline, Lead Value, Lost Reason, and Status.
��****Note****: Once the workflow is triggered, it runs daily at 8:00 am.
***
## Adding Filters
You can further filter your trigger by clicking on Add Filters. Your standard field options here are Assigned To, Doesn’t Have Tag, Duration in days, Has Tag, In Pipeline, Lead Value, Lost Reason, and Status.
 ### Assigned To
Assigned To triggers the workflow when an opportunity card assigned to a specific user exceeds its set timeframe and is marked as stale.
### Assigned To
Assigned To triggers the workflow when an opportunity card assigned to a specific user exceeds its set timeframe and is marked as stale.
 ### Doesn't Have Tag
By selecting the Doesn't Have Tag filter, the workflow will activate only when an opportunity card in the Open status of a pipeline has exceeded its set timeframe and does not have a specific tag.
### Doesn't Have Tag
By selecting the Doesn't Have Tag filter, the workflow will activate only when an opportunity card in the Open status of a pipeline has exceeded its set timeframe and does not have a specific tag.
 ### Duration of Days
The Duration of Days filter is used to identify and trigger workflows for stale opportunities. This filter only activates the workflow when the set timeframe for an opportunity card has been exceeded, labeling the opportunity card as stale.
### Duration of Days
The Duration of Days filter is used to identify and trigger workflows for stale opportunities. This filter only activates the workflow when the set timeframe for an opportunity card has been exceeded, labeling the opportunity card as stale.
 ### Has Tag
By selecting the Has Tag filter, the workflow will only trigger when an opportunity card in the Open status of a pipeline has a specific tag and has exceeded its set timeframe.
### Has Tag
By selecting the Has Tag filter, the workflow will only trigger when an opportunity card in the Open status of a pipeline has a specific tag and has exceeded its set timeframe.
 ### In Pipeline
The In Pipeline filter is an option to automate workflows when an opportunity card in a specific pipeline exceeds its set timeframe and is marked as stale. However, this filter only triggers workflows for opportunity cards that are in the Open pipeline stage. It won't activate the workflows for opportunity cards that are in the Won, Lost, or Abandon pipeline stages.
### In Pipeline
The In Pipeline filter is an option to automate workflows when an opportunity card in a specific pipeline exceeds its set timeframe and is marked as stale. However, this filter only triggers workflows for opportunity cards that are in the Open pipeline stage. It won't activate the workflows for opportunity cards that are in the Won, Lost, or Abandon pipeline stages.
 ### Lead Value
The Lead Value filter triggers the workflow only when an opportunity card with a specified monetary value is marked as stale. This allows you to target stale opportunities based on their deal value, helping prioritize follow-up or cleanup actions for higher- or lower-value leads.
### Lead Value
The Lead Value filter triggers the workflow only when an opportunity card with a specified monetary value is marked as stale. This allows you to target stale opportunities based on their deal value, helping prioritize follow-up or cleanup actions for higher- or lower-value leads.
 ### Lost Reason
The Lost Reason filter triggers the workflow when an opportunity card marked as Lost, with a lost reason of your choice, exceeds its set timeframe and is considered stale.
### Lost Reason
The Lost Reason filter triggers the workflow when an opportunity card marked as Lost, with a lost reason of your choice, exceeds its set timeframe and is considered stale.
 ### Status
The Status filter activates the workflow when an opportunity card with a selected status (Open, Won, Lost, or Abandoned) exceeds its set timeframe and becomes stale. This filter helps ensure workflows run only for stale opportunities in the specific lifecycle stage you want to manage.
### Status
The Status filter activates the workflow when an opportunity card with a selected status (Open, Won, Lost, or Abandoned) exceeds its set timeframe and becomes stale. This filter helps ensure workflows run only for stale opportunities in the specific lifecycle stage you want to manage.
 We recommend using the filters in conjunction to create a more efficient workflow. Once satisfied with your Trigger make sure to save it and add actions to fully round out your automation before publishing!
### pipeline-stage-changed-trigger
When an opportunity's pipeline stage is updated, the Pipeline Stage Change workflow trigger will be activated. This trigger operates as the opportunity card progresses through any stage within the pipeline, activating the workflow at each stage.
***
## Adding the Pipeline Stage Changed Trigger
To begin, click on the ****"Add New Trigger"**** button and select ****“Pipeline Stage Changed”****.
We recommend using the filters in conjunction to create a more efficient workflow. Once satisfied with your Trigger make sure to save it and add actions to fully round out your automation before publishing!
### pipeline-stage-changed-trigger
When an opportunity's pipeline stage is updated, the Pipeline Stage Change workflow trigger will be activated. This trigger operates as the opportunity card progresses through any stage within the pipeline, activating the workflow at each stage.
***
## Adding the Pipeline Stage Changed Trigger
To begin, click on the ****"Add New Trigger"**** button and select ****“Pipeline Stage Changed”****.
 ***
## All Filters
Here, you can add more filters to narrow down your trigger. Click on ****Add Filters**** and select.
***
## All Filters
Here, you can add more filters to narrow down your trigger. Click on ****Add Filters**** and select.
 ### Assigned To
The ****"Assigned To"**** trigger allows you to trigger the assignment of a Contact to a User based on a condition of your choice. Simply select a team member from the dropdown to select the Assigned To.
### Assigned To
The ****"Assigned To"**** trigger allows you to trigger the assignment of a Contact to a User based on a condition of your choice. Simply select a team member from the dropdown to select the Assigned To.
 ### Has Tag
Selecting the ****“Has Tag”**** filter option will only trigger the workflow when an opportunity card with a specific tag moves from one stage to another within a pipeline. For instance, if an opportunity card with a Member-exclusive reward tag moves from one stage to another, this will activate the workflow.
### Has Tag
Selecting the ****“Has Tag”**** filter option will only trigger the workflow when an opportunity card with a specific tag moves from one stage to another within a pipeline. For instance, if an opportunity card with a Member-exclusive reward tag moves from one stage to another, this will activate the workflow.
 ### In Pipeline
The ****“In Pipeline”**** filter is an option for more targeted workflow automation that triggers when an opportunity card moves from one stage to another in a specific pipeline.
### In Pipeline
The ****“In Pipeline”**** filter is an option for more targeted workflow automation that triggers when an opportunity card moves from one stage to another in a specific pipeline.
 ### Lead Value
Choose the ****"Lead value"**** option, set an operator for it, and then add the lead value in figures.
### Lead Value
Choose the ****"Lead value"**** option, set an operator for it, and then add the lead value in figures.
 ### Lost Reason
The ****"Lost Reason"**** filter allows you to capture insights into why an opportunity was marked as lost. By adding this filter, you can trigger workflows to notify your team, analyze patterns, or follow up for feedback.
### Lost Reason
The ****"Lost Reason"**** filter allows you to capture insights into why an opportunity was marked as lost. By adding this filter, you can trigger workflows to notify your team, analyze patterns, or follow up for feedback.
 ### Pipeline Stage
To further narrow the criteria, the \*\*\*\*"Pipeline Stage" \*\*\*\*filter can be used to target a designated stage in the pipeline to activate the workflow when an opportunity card arrives. For instance, if No Show is chosen in the Appointment pipeline, this filter will only activate the workflow when a customer moves to that stage.
### Pipeline Stage
To further narrow the criteria, the \*\*\*\*"Pipeline Stage" \*\*\*\*filter can be used to target a designated stage in the pipeline to activate the workflow when an opportunity card arrives. For instance, if No Show is chosen in the Appointment pipeline, this filter will only activate the workflow when a customer moves to that stage.
 ### Status
Within the \*\*\*\*“Status” ****option,**** \*\*\*\*you can choose from Open, Won, Lost, and Abandoned. This will trigger the workflow defined by the Status filter.
### Status
Within the \*\*\*\*“Status” ****option,**** \*\*\*\*you can choose from Open, Won, Lost, and Abandoned. This will trigger the workflow defined by the Status filter.
 After setting up the filters, click the ****Save Trigger**** button in the bottom-right corner to complete the configuration.
 📌 ****NOTE:**** Be sure to add workflow actions to automate tasks such as notifications, follow-ups, or account updates.
With the ****Pipeline Stage Change**** trigger, you can effortlessly automate processes as opportunities progress through your pipeline. This ensures every stage is managed efficiently, improving customer engagement and driving better outcomes for your business.
### lead-created-trigger
The best way to leverage the leads your affiliates refer to you is by keeping in contact with them and following up immediately. However, we know that it can be quite time-consuming, so we'll learn how to use the "Lead Created" trigger to start a workflow when a new lead is referred, giving you instant automation opportunities.
***
## Adding Your Trigger
You can find this trigger in the Affiliate section of your workflow triggers. To add it, simply click “+ Add New Trigger” and select it.
📌 ****NOTE:**** Be sure to add workflow actions to automate tasks such as notifications, follow-ups, or account updates.
With the ****Pipeline Stage Change**** trigger, you can effortlessly automate processes as opportunities progress through your pipeline. This ensures every stage is managed efficiently, improving customer engagement and driving better outcomes for your business.
### lead-created-trigger
The best way to leverage the leads your affiliates refer to you is by keeping in contact with them and following up immediately. However, we know that it can be quite time-consuming, so we'll learn how to use the "Lead Created" trigger to start a workflow when a new lead is referred, giving you instant automation opportunities.
***
## Adding Your Trigger
You can find this trigger in the Affiliate section of your workflow triggers. To add it, simply click “+ Add New Trigger” and select it.
 ### Workflow Trigger Name
Update the name that will be displayed in the builder.
### Workflow Trigger Name
Update the name that will be displayed in the builder.
 ***
## Filters
Define the contacts that should be added to the workflow by including filters based on the desired criteria. The main filter for this trigger will be:
### Campaign
Select “Campaign” from the Filters dropdown. Next, you will need to choose your operator. Finally, select the affiliate campaign you want to trigger or exclude from your workflow.
***
## Filters
Define the contacts that should be added to the workflow by including filters based on the desired criteria. The main filter for this trigger will be:
### Campaign
Select “Campaign” from the Filters dropdown. Next, you will need to choose your operator. Finally, select the affiliate campaign you want to trigger or exclude from your workflow.
 Once you are satisfied with your selections, click “Save Trigger” to establish your changes.
 ***
## Action Compatibility
### Contact Actions
When using actions such as “Send email” or “Notify internal team,” you can use custom values from the Lead Created section to personalize your communications.
***
## Action Compatibility
### Contact Actions
When using actions such as “Send email” or “Notify internal team,” you can use custom values from the Lead Created section to personalize your communications.
 ### Add Leads under an Affiliate
Adding the “Add Leads under an Affiliate” can be used to reassign leads with the Lead Created Trigger. When using this action, you can use Lead Created custom values when selecting Custom Mapping.
### Add Leads under an Affiliate
Adding the “Add Leads under an Affiliate” can be used to reassign leads with the Lead Created Trigger. When using this action, you can use Lead Created custom values when selecting Custom Mapping.
 This trigger and its compatibility with your actions will help you easily manage your incoming affiliate campaign leads, ensuring none slip by the sidelines, and you can leverage your affiliates' work into sales.
### prospect-generated-trigger
The Prospect Generated trigger allows you to automate workflows whenever a new prospect is created within the Prospecting Tool or through embedded widgets. This feature enhances lead management by automatically initiating contact creation, tagging, and engagement strategies.
***
## Adding the Prospect-Generated Trigger
To set up the trigger, navigate to the Workflow Builder, click the ****"Add New Trigger"**** button, and search and select ****"Prospect Generated"**** as the trigger event. This trigger ensures that every new prospect automatically enters your automated workflow without manual intervention.
This trigger and its compatibility with your actions will help you easily manage your incoming affiliate campaign leads, ensuring none slip by the sidelines, and you can leverage your affiliates' work into sales.
### prospect-generated-trigger
The Prospect Generated trigger allows you to automate workflows whenever a new prospect is created within the Prospecting Tool or through embedded widgets. This feature enhances lead management by automatically initiating contact creation, tagging, and engagement strategies.
***
## Adding the Prospect-Generated Trigger
To set up the trigger, navigate to the Workflow Builder, click the ****"Add New Trigger"**** button, and search and select ****"Prospect Generated"**** as the trigger event. This trigger ensures that every new prospect automatically enters your automated workflow without manual intervention.
 ***
## Add Filters
Click the ****"Add Filters"**** button to customize the prospect-generated trigger by choosing from various available filters.
***
## Add Filters
Click the ****"Add Filters"**** button to customize the prospect-generated trigger by choosing from various available filters.
 ### Prospect Conversion Score
The ****Prospect Conversion Score**** filter enables businesses to prioritize leads based on their conversion potential. This score helps determine which prospects are more likely to engage and convert.
For example, if you want to focus only on high-potential leads, you can set the filter to trigger workflows for prospects with a conversion score greater than 70. This ensures that your automated actions, such as follow-up emails or SMS, are directed at leads with the highest probability of success.
### Prospect Conversion Score
The ****Prospect Conversion Score**** filter enables businesses to prioritize leads based on their conversion potential. This score helps determine which prospects are more likely to engage and convert.
For example, if you want to focus only on high-potential leads, you can set the filter to trigger workflows for prospects with a conversion score greater than 70. This ensures that your automated actions, such as follow-up emails or SMS, are directed at leads with the highest probability of success.
 ### Prospect Source
The Prospect Source filter allows segmentation based on how the lead was created. This difference is crucial for carrying out targeted automation strategies.
* ****AI****: Prospects generated through AI tools.
* ****In-App:**** Prospects are created manually within the Prospecting Tool.
* ****Widget:**** Prospects generated through embedded lead capture widgets.
For instance, if you want to create separate workflows for manually added leads and those coming from a website form, this filter helps tailor automation accordingly.
### Prospect Source
The Prospect Source filter allows segmentation based on how the lead was created. This difference is crucial for carrying out targeted automation strategies.
* ****AI****: Prospects generated through AI tools.
* ****In-App:**** Prospects are created manually within the Prospecting Tool.
* ****Widget:**** Prospects generated through embedded lead capture widgets.
For instance, if you want to create separate workflows for manually added leads and those coming from a website form, this filter helps tailor automation accordingly.
 Once you’ve set up your filters, click ****"Save Trigger"**** to finalize your prospect-generated workflow.
 \*\*\*\*📌NOTE: \*\*\*\*You can add workflow actions to automate tasks such as notifications, follow-ups, or account updates.
Once you’ve set up the trigger and its actions, ****publish ****and**** save**** the workflow to enable its functionality.
\*\*\*\*📌NOTE: \*\*\*\*You can add workflow actions to automate tasks such as notifications, follow-ups, or account updates.
Once you’ve set up the trigger and its actions, ****publish ****and**** save**** the workflow to enable its functionality.
 With the Prospect Generated trigger, businesses can automate lead engagement, streamline contact management, and ensure high-priority prospects receive immediate attention. By utilizing filters such as conversion scores and prospect sources, teams can optimize their outreach strategies and improve conversion rates effortlessly.
### Practical Example & Use Case
A business wants to prioritize high-conversion prospects and engage them automatically. By using the "Prospect Generated" trigger with filters and automated actions, they can streamline lead management.
* ****Trigger:**** Prospect Generated.
* \*\*\*\*Filters: \*\*\*\*
* ****Source:**** Widget.
* ****Conversion Score:**** Greater than 70.
****Actions:****- ****Automatically create contacts**** for these prospects.
* ****Assign special tags**** for segmentation and follow-ups.
* ****Send a welcome email or SMS**** to new high-value prospects.
* \*\*\*\*Export prospect data to Google Sheets \*\*\*\*for easy tracking.
****Expected Outcomes:****- ****Improved Engagement****: Automated messages ensure prospects receive timely communication.
* ****Prioritized Lead Follow-Up****: Focus efforts on high-converting leads.
* ****Seamless Contact Creation****: Reduce manual data entry and enhance organization.
### membership
When creating workflows and adding triggers, you will encounter a category titled "Courses." Within this category, you will find various triggers, including those related to category and lesson progress, user sign-ups, offer and product access, and user logins.
With the Prospect Generated trigger, businesses can automate lead engagement, streamline contact management, and ensure high-priority prospects receive immediate attention. By utilizing filters such as conversion scores and prospect sources, teams can optimize their outreach strategies and improve conversion rates effortlessly.
### Practical Example & Use Case
A business wants to prioritize high-conversion prospects and engage them automatically. By using the "Prospect Generated" trigger with filters and automated actions, they can streamline lead management.
* ****Trigger:**** Prospect Generated.
* \*\*\*\*Filters: \*\*\*\*
* ****Source:**** Widget.
* ****Conversion Score:**** Greater than 70.
****Actions:****- ****Automatically create contacts**** for these prospects.
* ****Assign special tags**** for segmentation and follow-ups.
* ****Send a welcome email or SMS**** to new high-value prospects.
* \*\*\*\*Export prospect data to Google Sheets \*\*\*\*for easy tracking.
****Expected Outcomes:****- ****Improved Engagement****: Automated messages ensure prospects receive timely communication.
* ****Prioritized Lead Follow-Up****: Focus efforts on high-converting leads.
* ****Seamless Contact Creation****: Reduce manual data entry and enhance organization.
### membership
When creating workflows and adding triggers, you will encounter a category titled "Courses." Within this category, you will find various triggers, including those related to category and lesson progress, user sign-ups, offer and product access, and user logins.
 ### Category Started
The Category Started trigger activates when a contact begins engaging with a specific group of lessons, known as a category. This trigger allows you to automate actions based on the status of product categories, ensuring your team stays informed about contact progress within those categories.
### Category Started
The Category Started trigger activates when a contact begins engaging with a specific group of lessons, known as a category. This trigger allows you to automate actions based on the status of product categories, ensuring your team stays informed about contact progress within those categories.
 ### Category Completed
The Category Completed trigger activates when a contact completes a category. This trigger enables you to automate actions based on the completion status of product categories, helping your team track progress and completion within various courses.
### Category Completed
The Category Completed trigger activates when a contact completes a category. This trigger enables you to automate actions based on the completion status of product categories, helping your team track progress and completion within various courses.
 ### Lesson Started
The Lesson Started trigger functions when a contact begins a lesson within a course. This trigger automates actions or responses based on lesson engagement, ensuring your team stays informed about your contacts' progress.
### Lesson Started
The Lesson Started trigger functions when a contact begins a lesson within a course. This trigger automates actions or responses based on lesson engagement, ensuring your team stays informed about your contacts' progress.
 ### Lesson Completed
The Lesson Completed trigger is activated when a contact finishes a lesson within a course. This trigger automates actions based on lesson completion, allowing your team to respond to progress as members complete lessons.
### Lesson Completed
The Lesson Completed trigger is activated when a contact finishes a lesson within a course. This trigger automates actions based on lesson completion, allowing your team to respond to progress as members complete lessons.
 ### New Signup
The New Signup trigger is triggered when a customer or lead registers for a course. This allows for the automation of actions upon new sign-ups, ensuring your team can welcome and engage with new members effectively.
### New Signup
The New Signup trigger is triggered when a customer or lead registers for a course. This allows for the automation of actions upon new sign-ups, ensuring your team can welcome and engage with new members effectively.
 ### Offer Access Granted
The Offer Access Granted trigger activates when a customer gains access to a specific offer. This trigger automates actions related to offer access, ensuring your team is informed when customers receive access to special business offerings.
### Offer Access Granted
The Offer Access Granted trigger activates when a customer gains access to a specific offer. This trigger automates actions related to offer access, ensuring your team is informed when customers receive access to special business offerings.
 ### Offer Access Removed
The Offer Access Removed trigger activates when a customer’s access to a particular offer is revoked, keeping your team informed about any changes in customer eligibility for promotions or exclusive content.
### Offer Access Removed
The Offer Access Removed trigger activates when a customer’s access to a particular offer is revoked, keeping your team informed about any changes in customer eligibility for promotions or exclusive content.
 ### Product Access Granted
The Product Access Granted trigger is activated when a customer receives access to a specific membership product.
### Product Access Granted
The Product Access Granted trigger is activated when a customer receives access to a specific membership product.
 ### Product Access Removed
The Product Access Removed trigger is activated when a customer's access to a product is revoked.
### Product Access Removed
The Product Access Removed trigger is activated when a customer's access to a product is revoked.
 ### Product Started
The Product Started trigger activates when a customer begins a product. This trigger enables automation of actions based on initiating product access, ensuring your team is aware when customers engage with a product.
### Product Started
The Product Started trigger activates when a customer begins a product. This trigger enables automation of actions based on initiating product access, ensuring your team is aware when customers engage with a product.
 ### Product Completed
The Product Completed trigger is activated when a customer completes a product, helping your team track customer engagement and progress with specific products or services.
### Product Completed
The Product Completed trigger is activated when a customer completes a product, helping your team track customer engagement and progress with specific products or services.
 ### User Login
The User Login trigger activates when a user logs into their membership portal, enabling you to analyze member activity and engagement within the platform.
### User Login
The User Login trigger activates when a user logs into their membership portal, enabling you to analyze member activity and engagement within the platform.
 By utilizing these triggers effectively, you can streamline processes, improve responsiveness, and enhance overall user experience, ensuring that your team is always in sync with customer activity and progress.
### new-signup-trigger
The New Signup trigger initiates your workflow when a customer or potential lead subscribes to a Course. By implementing this trigger, you can effectively manage new member signups, streamline onboarding processes, and ensure a seamless experience for your organization and the newly enrolled members.
***
## Adding the New Signup Trigger
To set this up, click “****Add New Trigger****,” search, and select ****“New Signup”**** from the available choices.
By utilizing these triggers effectively, you can streamline processes, improve responsiveness, and enhance overall user experience, ensuring that your team is always in sync with customer activity and progress.
### new-signup-trigger
The New Signup trigger initiates your workflow when a customer or potential lead subscribes to a Course. By implementing this trigger, you can effectively manage new member signups, streamline onboarding processes, and ensure a seamless experience for your organization and the newly enrolled members.
***
## Adding the New Signup Trigger
To set this up, click “****Add New Trigger****,” search, and select ****“New Signup”**** from the available choices.
 ***
## Filters
To add filters to the trigger, click the \*\*\*\*“Add Filters” \*\*\*\*button.
***
## Filters
To add filters to the trigger, click the \*\*\*\*“Add Filters” \*\*\*\*button.
 ### Offer
In the first dropdown, click on Offer. A drop-down menu will appear for you to choose the Offer type.
### Offer
In the first dropdown, click on Offer. A drop-down menu will appear for you to choose the Offer type.
 Once you’ve chosen your filters for your trigger, click on the ****Save Trigger**** button in the bottom right corner.
 With the ****New Signup**** trigger, you can make onboarding effortless by automatically engaging and managing new course signups, ensuring every enrollee enjoys a seamless start to their journey.
### product-started-trigger
The ****Product Started**** trigger enables businesses to monitor when customers start accessing a product, automating processes that enhance user experience and streamline operations. This trigger becomes active when a customer begins a specific product, subsequently initiating the designated workflow.
***
## Adding the Product Started Trigger
To configure the Product Started trigger, click on the ****Add New Trigger**** button, search, and choose the \*\*\*\*Product Started \*\*\*\*option from the available selections.
With the ****New Signup**** trigger, you can make onboarding effortless by automatically engaging and managing new course signups, ensuring every enrollee enjoys a seamless start to their journey.
### product-started-trigger
The ****Product Started**** trigger enables businesses to monitor when customers start accessing a product, automating processes that enhance user experience and streamline operations. This trigger becomes active when a customer begins a specific product, subsequently initiating the designated workflow.
***
## Adding the Product Started Trigger
To configure the Product Started trigger, click on the ****Add New Trigger**** button, search, and choose the \*\*\*\*Product Started \*\*\*\*option from the available selections.
 ***
## Filters
### Select Product
Further customization can be made by adding filters and selecting ****Product**** from the \*\*\*\*Standard Fields \*\*\*\*section of the dropdown menu, adding the \*\*\*\*Operator ("Is any of" \*\*\*\*or ****“Is none of”)****, and then selecting the specific product from the third dropdown menu.
***
## Filters
### Select Product
Further customization can be made by adding filters and selecting ****Product**** from the \*\*\*\*Standard Fields \*\*\*\*section of the dropdown menu, adding the \*\*\*\*Operator ("Is any of" \*\*\*\*or ****“Is none of”)****, and then selecting the specific product from the third dropdown menu.
 Continue selecting products by clicking the Add Filter button.
 Once all filters have been selected, users can save the trigger by clicking on the \*\*\*\*Save Trigger \*\*\*\*button located in the bottom right corner.
\*\*\*\*📌NOTE: \*\*\*\*You can Add Actions to the workflow that suit your desired automation.
Once all filters have been selected, users can save the trigger by clicking on the \*\*\*\*Save Trigger \*\*\*\*button located in the bottom right corner.
\*\*\*\*📌NOTE: \*\*\*\*You can Add Actions to the workflow that suit your desired automation.
 \*\*\*\*Publish \*\*\*\*and ****Save**** the workflow to activate its functions.
 By implementing this trigger, businesses can effectively monitor and manage product access, streamlining the process and enhancing the overall customer experience.
### product-completed-trigger
The ****Product Completed**** trigger is activated when a customer fully completes their access to a specific product, initiating a designated workflow. This automation enables businesses to efficiently monitor and manage product completions, ensuring no milestone goes unnoticed.
***
## Adding the Product Completed Trigger
To configure the Product Completed trigger, click the ****“Add New Trigger”**** button and select the ****Product Completed**** option.
By implementing this trigger, businesses can effectively monitor and manage product access, streamlining the process and enhancing the overall customer experience.
### product-completed-trigger
The ****Product Completed**** trigger is activated when a customer fully completes their access to a specific product, initiating a designated workflow. This automation enables businesses to efficiently monitor and manage product completions, ensuring no milestone goes unnoticed.
***
## Adding the Product Completed Trigger
To configure the Product Completed trigger, click the ****“Add New Trigger”**** button and select the ****Product Completed**** option.
 \*\*\*\*📌NOTE: \*\*\*\*This runs when access to a product is completed.
***
## Filters
Within the Trigger, you can configure the filters by selecting ****Add Filters****.
\*\*\*\*📌NOTE: \*\*\*\*This runs when access to a product is completed.
***
## Filters
Within the Trigger, you can configure the filters by selecting ****Add Filters****.
 ### Product
Further customization can be made by adding filters and selecting ****Product**** from the dropdown menu, followed by selecting the Operator from the second dropdown menu and then the specific product from the third dropdown menu.
### Product
Further customization can be made by adding filters and selecting ****Product**** from the dropdown menu, followed by selecting the Operator from the second dropdown menu and then the specific product from the third dropdown menu.
 Once all filters have been selected, save the trigger by clicking the ****Save Trigger**** button in the bottom-right corner.
 📌 ****NOTE:**** Add workflow actions to automate tasks such as notifications, follow-ups, or account updates.
By using this feature, you can improve customer engagement, boost operational efficiency, and create a seamless, positive experience for your clients as they reach the end of their journey with your product.
### product-access-granted-trigger
The ****Product Access Granted**** trigger comes into play when a customer receives access to a particular product, initiating the designated workflow. By using this trigger, businesses can effectively manage and track customer access to products, ensuring a smooth process and an enhanced customer experience while maintaining oversight of product access.
***
## Adding the Product Access Granted Trigger
Within the workflow builder, click the ****“Add New Trigger”**** button and select the ****Product Access Granted**** option from the available list.
📌 ****NOTE:**** Add workflow actions to automate tasks such as notifications, follow-ups, or account updates.
By using this feature, you can improve customer engagement, boost operational efficiency, and create a seamless, positive experience for your clients as they reach the end of their journey with your product.
### product-access-granted-trigger
The ****Product Access Granted**** trigger comes into play when a customer receives access to a particular product, initiating the designated workflow. By using this trigger, businesses can effectively manage and track customer access to products, ensuring a smooth process and an enhanced customer experience while maintaining oversight of product access.
***
## Adding the Product Access Granted Trigger
Within the workflow builder, click the ****“Add New Trigger”**** button and select the ****Product Access Granted**** option from the available list.
 ***
## Filter
To add filters to the trigger, click the \*\*\*\*“Add Filters” \*\*\*\*button.
***
## Filter
To add filters to the trigger, click the \*\*\*\*“Add Filters” \*\*\*\*button.
 ### Select Product
Choose ****“Select Product”**** from the dropdown menu. Specify the product by selecting it from the second dropdown menu.
### Select Product
Choose ****“Select Product”**** from the dropdown menu. Specify the product by selecting it from the second dropdown menu.
 Once all filters have been selected, click the ****Save Trigger**** button in the bottom right corner to save the trigger.
 With the ****Product Access Granted**** trigger, managing customer access becomes simpler and more efficient. By automating this step, you ensure your customers receive a smooth and timely experience while staying in full control of product distribution.
### products-access-removed-trigger
The Product Access Removed trigger initiates a workflow when a customer's access to a specific product has been revoked. By employing this trigger, businesses can efficiently manage and monitor customer access to products, ensuring that only authorized customers can utilize the products while maintaining control over the access process.
***
## Adding the Products Access Removed Trigger
To enable this trigger, click on the ****"Add New Trigger"**** button, then search and choose the ****“Product Access Removed”**** option from the available choices.
With the ****Product Access Granted**** trigger, managing customer access becomes simpler and more efficient. By automating this step, you ensure your customers receive a smooth and timely experience while staying in full control of product distribution.
### products-access-removed-trigger
The Product Access Removed trigger initiates a workflow when a customer's access to a specific product has been revoked. By employing this trigger, businesses can efficiently manage and monitor customer access to products, ensuring that only authorized customers can utilize the products while maintaining control over the access process.
***
## Adding the Products Access Removed Trigger
To enable this trigger, click on the ****"Add New Trigger"**** button, then search and choose the ****“Product Access Removed”**** option from the available choices.
 ***
## Filters
### Select Product
To further customize the trigger, add Filters. Click ****“Select**** ****Product”**** from the \*\*\*\*Standard Fields \*\*\*\*section of the dropdown menu and then followed by selecting the specific Product from the second dropdown menu.
***
## Filters
### Select Product
To further customize the trigger, add Filters. Click ****“Select**** ****Product”**** from the \*\*\*\*Standard Fields \*\*\*\*section of the dropdown menu and then followed by selecting the specific Product from the second dropdown menu.
 After setting the filters, click the ****Save Trigger**** button located in the bottom-right corner to finalize your configuration.
\*\*\*\*📌NOTE: \*\*\*\*You can add workflow actions to automate tasks such as notifications, follow-ups, or account updates.
Once you’ve set up the trigger and its corresponding actions,\*\*\*\* Publish ****and**** Save\*\*\*\* the workflow to enable its functionality.
After setting the filters, click the ****Save Trigger**** button located in the bottom-right corner to finalize your configuration.
\*\*\*\*📌NOTE: \*\*\*\*You can add workflow actions to automate tasks such as notifications, follow-ups, or account updates.
Once you’ve set up the trigger and its corresponding actions,\*\*\*\* Publish ****and**** Save\*\*\*\* the workflow to enable its functionality.
 The ****Product Access Removed**** trigger is a valuable tool for automating processes when customer access to a product is revoked. By integrating this feature into workflows, businesses can ensure smoother transitions, send timely follow-ups, and maintain a well-organized system for managing permissions. This not only enhances operational efficiency but also improves the overall customer experience.
### offer-access-granted-trigger
The ****Offer Access Granted**** trigger automates workflows whenever a customer gains access to a specific offer. By using this trigger, businesses can simplify how they manage and monitor customer access to special deals or promotions. It ensures a process that not only enhances customer satisfaction but also supports operational efficiency.
***
## Adding the Offer Access Granted Trigger
Within the Workflow builder click on the ****"Add New Trigger"**** button and select the ****"Offer Access Granted"**** option from the available list.
The ****Product Access Removed**** trigger is a valuable tool for automating processes when customer access to a product is revoked. By integrating this feature into workflows, businesses can ensure smoother transitions, send timely follow-ups, and maintain a well-organized system for managing permissions. This not only enhances operational efficiency but also improves the overall customer experience.
### offer-access-granted-trigger
The ****Offer Access Granted**** trigger automates workflows whenever a customer gains access to a specific offer. By using this trigger, businesses can simplify how they manage and monitor customer access to special deals or promotions. It ensures a process that not only enhances customer satisfaction but also supports operational efficiency.
***
## Adding the Offer Access Granted Trigger
Within the Workflow builder click on the ****"Add New Trigger"**** button and select the ****"Offer Access Granted"**** option from the available list.
 ***
## Filter
Within the Trigger, you can configure the filters by selecting ****Add Filters****.
***
## Filter
Within the Trigger, you can configure the filters by selecting ****Add Filters****.
 ### Offer
Click on\*\*\*\* "Add Filters" ****and select**** "Offer"\*\*\*\* from the dropdown menu, then select the specific offer you want from the second dropdown menu.
### Offer
Click on\*\*\*\* "Add Filters" ****and select**** "Offer"\*\*\*\* from the dropdown menu, then select the specific offer you want from the second dropdown menu.
 Once the filters have been selected, click the ****"Save Trigger"**** button in the bottom right corner.
 📌 ****NOTE:**** Add workflow actions to automate tasks such as notifications, follow-ups, or account updates.
With the ****Offer Access Granted**** trigger, you can effectively automate the process of granting offers, ensuring every customer interaction is smooth and efficient. By leveraging this feature, you can focus on delivering value to your customers while maintaining streamlined workflows that boost overall productivity.
### offer-access-removed-trigger
The ****Offer Access Removed**** trigger automates the process of revoking customer access to specific offers, ensuring better control over promotions and eligibility. This helps businesses streamline workflows, maintain consistency, and improve the overall customer experience by handling access updates efficiently.
***
## Adding the Offer Access Removed Trigger
Within the workflow builder, click the ****“Add New Trigger”**** button and choose the ****“Offer Access Removed”**** option from the provided selections.
📌 ****NOTE:**** Add workflow actions to automate tasks such as notifications, follow-ups, or account updates.
With the ****Offer Access Granted**** trigger, you can effectively automate the process of granting offers, ensuring every customer interaction is smooth and efficient. By leveraging this feature, you can focus on delivering value to your customers while maintaining streamlined workflows that boost overall productivity.
### offer-access-removed-trigger
The ****Offer Access Removed**** trigger automates the process of revoking customer access to specific offers, ensuring better control over promotions and eligibility. This helps businesses streamline workflows, maintain consistency, and improve the overall customer experience by handling access updates efficiently.
***
## Adding the Offer Access Removed Trigger
Within the workflow builder, click the ****“Add New Trigger”**** button and choose the ****“Offer Access Removed”**** option from the provided selections.
 ***
## Filters
You can filter your trigger by clicking ****Add Filters****.
***
## Filters
You can filter your trigger by clicking ****Add Filters****.
 ### Offer
Further customization can be made by adding filters, selecting ****Offer**** from the ****Standard Fields**** dropdown menu, and selecting the appropriate \*\*\*\*Offer \*\*\*\*from the second dropdown menu.
### Offer
Further customization can be made by adding filters, selecting ****Offer**** from the ****Standard Fields**** dropdown menu, and selecting the appropriate \*\*\*\*Offer \*\*\*\*from the second dropdown menu.
 Users can save the trigger once all filters have been selected by clicking on the ****Save Trigger**** button at the bottom right corner.
 By incorporating this trigger, businesses can effectively manage customer access to offers, ensuring that only eligible customers can take advantage of promotions while maintaining control over the process. This trigger allows businesses to automate removing access to offers, improving customer experience, and optimizing operations.
### lesson-started-trigger
Following up with your students as they interact with your courses helps you greatly improve completion rates, keep engagement up, and help address any issues right away. And a great way to approach it is by using the Lesson Started trigger.
This trigger lets you automate actions or responses as soon as a contact begins a lesson within a course, helping your team stay informed about your contacts' progress and making the outreach process smooth.
***
## Setting Your Trigger
You can find this trigger in the Courses section of your workflow triggers. To add it, simply click “+ Add New Trigger” and select it.
By incorporating this trigger, businesses can effectively manage customer access to offers, ensuring that only eligible customers can take advantage of promotions while maintaining control over the process. This trigger allows businesses to automate removing access to offers, improving customer experience, and optimizing operations.
### lesson-started-trigger
Following up with your students as they interact with your courses helps you greatly improve completion rates, keep engagement up, and help address any issues right away. And a great way to approach it is by using the Lesson Started trigger.
This trigger lets you automate actions or responses as soon as a contact begins a lesson within a course, helping your team stay informed about your contacts' progress and making the outreach process smooth.
***
## Setting Your Trigger
You can find this trigger in the Courses section of your workflow triggers. To add it, simply click “+ Add New Trigger” and select it.
 ### Workflow Trigger Name
Update the name that will be displayed in the builder.
### Workflow Trigger Name
Update the name that will be displayed in the builder.
 ***
## Filters
Define the contacts that should be added to the workflow by including filters based on the desired criteria. The main filters for this trigger will be:
### Product
Select ‘Product’ from the Filters dropdown. Next, you will need to choose your operator. Finally, select the product(s) you want to trigger your workflow.
***
## Filters
Define the contacts that should be added to the workflow by including filters based on the desired criteria. The main filters for this trigger will be:
### Product
Select ‘Product’ from the Filters dropdown. Next, you will need to choose your operator. Finally, select the product(s) you want to trigger your workflow.
 ### Category
To filter a single product by the available categories, add another filter, then choose 'Category' from the list. Again, you can select 'Is any of' or 'Is none of' and select the product category for your filter.
### Category
To filter a single product by the available categories, add another filter, then choose 'Category' from the list. Again, you can select 'Is any of' or 'Is none of' and select the product category for your filter.
 ### Lesson
To narrow down this trigger to specific lessons, add another filter, then choose 'Lesson' from the list. Again, you can select 'Is any of' or 'Is none of' and select the lessons for your filter. You can add multiple lessons with a single filter.
### Lesson
To narrow down this trigger to specific lessons, add another filter, then choose 'Lesson' from the list. Again, you can select 'Is any of' or 'Is none of' and select the lessons for your filter. You can add multiple lessons with a single filter.
 Once you are satisfied with your selections, save the trigger and your workflow!
 This trigger gives you a way to effectively monitor your students' progress and implement appropriate follow-up, such as sending congratulatory emails, answers to FAQs, and invitations for discussion that lead to enhanced user engagement.
### lesson-completed-trigger
The Lesson Completed trigger initiates a workflow when a contact completes a specific lesson in a course. This is especially useful for tracking granular progress, delivering timely follow-ups, and driving personalized engagement. With optional filters, this trigger ensures workflows are activated only when designated lessons are completed.
### Key Benefits of Using the Trigger
* \*\*\*\*Personalized Engagement: \*\*\*\*Send targeted recommendations, encouragement, or next steps based on lesson-level progress.
* \*\*\*\*Real-Time Progress Tracking: \*\*\*\*No need to wait for full course or category completion—engage learners the moment they finish key lessons.
* \*\*\*\*Improved Retention: \*\*\*\*Keep learners motivated with milestone-based rewards or check-ins.
* \*\*\*\*Flexible Filters: \*\*\*\*Target specific lessons within specific courses to fine-tune automation logic.
***
## Configuring the Trigger
Navigate to your workflow and select Lesson Completed from the list of available triggers.
This trigger gives you a way to effectively monitor your students' progress and implement appropriate follow-up, such as sending congratulatory emails, answers to FAQs, and invitations for discussion that lead to enhanced user engagement.
### lesson-completed-trigger
The Lesson Completed trigger initiates a workflow when a contact completes a specific lesson in a course. This is especially useful for tracking granular progress, delivering timely follow-ups, and driving personalized engagement. With optional filters, this trigger ensures workflows are activated only when designated lessons are completed.
### Key Benefits of Using the Trigger
* \*\*\*\*Personalized Engagement: \*\*\*\*Send targeted recommendations, encouragement, or next steps based on lesson-level progress.
* \*\*\*\*Real-Time Progress Tracking: \*\*\*\*No need to wait for full course or category completion—engage learners the moment they finish key lessons.
* \*\*\*\*Improved Retention: \*\*\*\*Keep learners motivated with milestone-based rewards or check-ins.
* \*\*\*\*Flexible Filters: \*\*\*\*Target specific lessons within specific courses to fine-tune automation logic.
***
## Configuring the Trigger
Navigate to your workflow and select Lesson Completed from the list of available triggers.
 ### Name Your Trigger
Use a clear, descriptive name that captures the essence of your workflow.
### Name Your Trigger
Use a clear, descriptive name that captures the essence of your workflow.
 ### Set Up Filters
Refine the trigger by selecting specific products to monitor for completion. You can choose to include or exclude products using the “is any of” or “is none of” filters, respectively.
### Set Up Filters
Refine the trigger by selecting specific products to monitor for completion. You can choose to include or exclude products using the “is any of” or “is none of” filters, respectively.
 Repeat these steps for the Category and lesson filters to restrict when the workflow will be activated.
 ### Save the Trigger
Review and confirm your setup, then save the trigger.
### Save the Trigger
Review and confirm your setup, then save the trigger.
 Finally, test the workflow to ensure it behaves as expected, then activate the workflow so it begins running once the lesson completion criteria are met.
Whether you're looking to boost engagement, improve learning outcomes, or streamline your post-lesson actions, this trigger offers the flexibility and precision you need. By leveraging its full potential—and combining it with strategic filters and workflow actions—you can deliver meaningful experiences that keep your audience motivated and progressive.
### Frequently Asked Questions
Yes. You can create separate triggers for each lesson or use filters to target specific lessons individually.
Yes, the workflow will trigger each time the lesson completion conditions are met.
Yes, you can set filters to monitor specific lessons in different courses for greater flexibility.
### category-started
The Category Started workflow trigger is activated when a contact begins a new category in a membership product. To use this trigger, click the Add New Workflow Trigger option within the workflow builder, then choose Category Started from the available options.
Finally, test the workflow to ensure it behaves as expected, then activate the workflow so it begins running once the lesson completion criteria are met.
Whether you're looking to boost engagement, improve learning outcomes, or streamline your post-lesson actions, this trigger offers the flexibility and precision you need. By leveraging its full potential—and combining it with strategic filters and workflow actions—you can deliver meaningful experiences that keep your audience motivated and progressive.
### Frequently Asked Questions
Yes. You can create separate triggers for each lesson or use filters to target specific lessons individually.
Yes, the workflow will trigger each time the lesson completion conditions are met.
Yes, you can set filters to monitor specific lessons in different courses for greater flexibility.
### category-started
The Category Started workflow trigger is activated when a contact begins a new category in a membership product. To use this trigger, click the Add New Workflow Trigger option within the workflow builder, then choose Category Started from the available options.
 ### Workflow Trigger Name
Update the name that will be displayed in the builder.
### Workflow Trigger Name
Update the name that will be displayed in the builder.
 ***
## Filters
Define the contacts that should be added to the workflow by including filters based on the desired criteria.
***
## Filters
Define the contacts that should be added to the workflow by including filters based on the desired criteria.
 ### Product
Select ‘Product’ from the Filters dropdown. Next, you will need to choose your operator. Finally, select the product(s) you want to trigger your workflow.
### Product
Select ‘Product’ from the Filters dropdown. Next, you will need to choose your operator. Finally, select the product(s) you want to trigger your workflow.
 ### Category
To filter a single product by the available categories, add another filter, then choose 'Category' from the list. Again, you can select 'Is any of' or 'Is none of' and select the product category for your filter.
### Category
To filter a single product by the available categories, add another filter, then choose 'Category' from the list. Again, you can select 'Is any of' or 'Is none of' and select the product category for your filter.
 Once you are satisfied with your selections, save the trigger to your workflow!
By utilizing this trigger, you can effectively monitor the start of your product categories and implement appropriate actions, such as sending congratulatory emails, leading to enhanced user engagement.
### category-completed
The Category Completed workflow trigger is activated when a category within a membership product has been completed by a contact enrolled in the product. To use this trigger, click the Add New Workflow Trigger option within the workflow builder, then choose Category Completed from the available options.
Once you are satisfied with your selections, save the trigger to your workflow!
By utilizing this trigger, you can effectively monitor the start of your product categories and implement appropriate actions, such as sending congratulatory emails, leading to enhanced user engagement.
### category-completed
The Category Completed workflow trigger is activated when a category within a membership product has been completed by a contact enrolled in the product. To use this trigger, click the Add New Workflow Trigger option within the workflow builder, then choose Category Completed from the available options.
 ### Workflow Trigger Name
Update the name that will be displayed in the builder.
### Workflow Trigger Name
Update the name that will be displayed in the builder.
 ***
## Filters
Define the contacts that should be added to the workflow by including filters based on the desired criteria.
***
## Filters
Define the contacts that should be added to the workflow by including filters based on the desired criteria.
 ### Product
Select ‘Product’ from the Filters dropdown to specify which product should trigger the workflow. Next, you will need to choose your operator. Finally, select the product(s) from the dropdown.
### Product
Select ‘Product’ from the Filters dropdown to specify which product should trigger the workflow. Next, you will need to choose your operator. Finally, select the product(s) from the dropdown.
 ### Category
If one product is chosen from the dropdown, you may also filter the trigger by the available categories. To do so, add another filter, then choose 'Category' from the list. Again, you can select 'Is any of' or 'Is none of' and select the product category for your filter.
### Category
If one product is chosen from the dropdown, you may also filter the trigger by the available categories. To do so, add another filter, then choose 'Category' from the list. Again, you can select 'Is any of' or 'Is none of' and select the product category for your filter.
 ��****Note****: To filter by category across multiple products, you must add additional triggers to the workflow, as the Category filter only becomes available when a single product is selected from the list.
Once you are satisfied with your selections, save the trigger to your workflow!
By utilizing this trigger, you can effectively monitor the progress of product categories and implement appropriate actions, leading to enhanced project management.
### certificates-issued-trigger
The best indicator that a customer has finished one of your products is when a certificate for it is issued. This is a great opportunity for an upsell, whether that be to other courses or to extra services you have. One way to do it is by using the "Certificates Issued" trigger to start nurturing them.
��****Note****: To filter by category across multiple products, you must add additional triggers to the workflow, as the Category filter only becomes available when a single product is selected from the list.
Once you are satisfied with your selections, save the trigger to your workflow!
By utilizing this trigger, you can effectively monitor the progress of product categories and implement appropriate actions, leading to enhanced project management.
### certificates-issued-trigger
The best indicator that a customer has finished one of your products is when a certificate for it is issued. This is a great opportunity for an upsell, whether that be to other courses or to extra services you have. One way to do it is by using the "Certificates Issued" trigger to start nurturing them.
 ***
## Adding Filters
By clicking on Add filter you can keep it only for a specific template or use one of your custom fields to make it more specific.
### Templates
Use the operators “Is”, “Is Not”, “Is Empty”, or “Is Not Empty” to choose what will activate the workflow. If you choose the operators “Is” or “Is Not”, select the certificate template from the dropdown on the right.
***
## Adding Filters
By clicking on Add filter you can keep it only for a specific template or use one of your custom fields to make it more specific.
### Templates
Use the operators “Is”, “Is Not”, “Is Empty”, or “Is Not Empty” to choose what will activate the workflow. If you choose the operators “Is” or “Is Not”, select the certificate template from the dropdown on the right.
 Finally, click on Save Trigger to set it.
 From then on, it's up to you to do interesting things with your workflow! Will you use it to send an email campaign and invite them to your next conference, or will you leverage your audience to make more sales of your awesome products? We're sure that whatever you decide, this will help you achieve it.
### coupon-code-redeemed-trigger
A completed order is an awesome opportunity to nurture that customer and get them to engage more with our business. Especially if they use a coupon. Which lets us know more about them, where they heard about your business, and what kind of offer is likely to interest them. So, to help you ensure you don't miss this chance, we'll use workflows to make the response and management process easier.
***
## Setting The Trigger
To start, navigate to the Workflows tab inside the Automation section and create a new workflow.
From then on, it's up to you to do interesting things with your workflow! Will you use it to send an email campaign and invite them to your next conference, or will you leverage your audience to make more sales of your awesome products? We're sure that whatever you decide, this will help you achieve it.
### coupon-code-redeemed-trigger
A completed order is an awesome opportunity to nurture that customer and get them to engage more with our business. Especially if they use a coupon. Which lets us know more about them, where they heard about your business, and what kind of offer is likely to interest them. So, to help you ensure you don't miss this chance, we'll use workflows to make the response and management process easier.
***
## Setting The Trigger
To start, navigate to the Workflows tab inside the Automation section and create a new workflow.
 Click the plus sign icon to add a trigger and select Coupon Code Redeemed.
 ### Adding filters
To limit which events trigger the workflow even further, click the “+ Add Filter” button. The main filters for this trigger are:
* ****Contact Email ID****: To filter for users with a specific email provider, for example, @gmail.com.
* ****Contact Tag****: This limits the workflow to orders placed by contacts with certain tags assigned to them.
* ****Coupon Code:**** This lets you limit the workflow to only specific coupon codes, regardless of their name.
* ****Coupon Name:**** This lets you limit the workflow to coupons with a specific name
* ****Coupon Type****: To filter between Net Amount and Percentage coupons.
* ****Coupon Value****: This lets you set a numeric value to define the orders that trigger the workflow based on the amount of money they discount in total.
* ****Order Value****: To filter for orders in a specific price range without the discount being applied.
* ****Product Collection****: Using this filter will ensure the workflow is only triggered when the order contains products from your selected collection.
* ****Product Type****: Using this filter will ensure the workflow is only triggered when the order contains either one-time or Recurring products.
* ****Product(s) In Order****: Using this filter will ensure the workflow is only triggered when the order contains one of the selected products.
* ****Redemption Count****: This filters the orders based on how many times the applied coupon has been redeemed.
* ****Source****: To filter the orders based on where they originate from.
To set them up, select your filter, add the conditional operator (for example, Is, Is not empty, or Is any of), then add the value to include or exclude.
### Adding filters
To limit which events trigger the workflow even further, click the “+ Add Filter” button. The main filters for this trigger are:
* ****Contact Email ID****: To filter for users with a specific email provider, for example, @gmail.com.
* ****Contact Tag****: This limits the workflow to orders placed by contacts with certain tags assigned to them.
* ****Coupon Code:**** This lets you limit the workflow to only specific coupon codes, regardless of their name.
* ****Coupon Name:**** This lets you limit the workflow to coupons with a specific name
* ****Coupon Type****: To filter between Net Amount and Percentage coupons.
* ****Coupon Value****: This lets you set a numeric value to define the orders that trigger the workflow based on the amount of money they discount in total.
* ****Order Value****: To filter for orders in a specific price range without the discount being applied.
* ****Product Collection****: Using this filter will ensure the workflow is only triggered when the order contains products from your selected collection.
* ****Product Type****: Using this filter will ensure the workflow is only triggered when the order contains either one-time or Recurring products.
* ****Product(s) In Order****: Using this filter will ensure the workflow is only triggered when the order contains one of the selected products.
* ****Redemption Count****: This filters the orders based on how many times the applied coupon has been redeemed.
* ****Source****: To filter the orders based on where they originate from.
To set them up, select your filter, add the conditional operator (for example, Is, Is not empty, or Is any of), then add the value to include or exclude.
 ### Save the Trigger
Review and confirm your setup, then save the trigger.
### Save the Trigger
Review and confirm your setup, then save the trigger.
 Finally, test the workflow to ensure it behaves as expected, then activate the workflow so it begins running once a coupon is successfully used in a completed transaction.
### coupon-code-applied-trigger
For businesses aiming to personalize customer interactions and improve operational efficiency, real-time automation is key. The Coupon Code Applied workflow trigger enables you to respond instantly when a coupon code is used at checkout, without waiting for the transaction to be completed. Whether you're sending personalized emails, tagging contacts, or notifying your team, this trigger provides the control and flexibility needed to act in the moment.
### Why Use the Coupon Code Applied Trigger?
* \*\*\*\*Personalized, Timely Messaging: \*\*\*\*Engage customers while they’re still active with targeted emails, reminders, or upsell offers.
* \*\*\*\*Intelligent Filtering: \*\*\*\*Use advanced filters to target workflows based on coupon code, coupon type, product, order value, and more.
* \*\*\*\*Internal Visibility: \*\*\*\*Notify your team or apply contact tags when specific codes are used to track marketing performance or enforce internal processes.
* \*\*\*\*Recover Lost Sales: \*\*\*\*Follow up with users who applied a code but abandoned their cart before checkout was completed.
***
## How to Configure the Coupon Code Applied Trigger
Setting up this trigger is quick and intuitive inside the Workflow Builder:
### Add the Trigger to Your Workflow
Go to Automation > Workflows, and either create a new workflow or edit an existing one.
Click + Add New Trigger once you are in the builder and select “Coupon Code Applied” from the available options.
Finally, test the workflow to ensure it behaves as expected, then activate the workflow so it begins running once a coupon is successfully used in a completed transaction.
### coupon-code-applied-trigger
For businesses aiming to personalize customer interactions and improve operational efficiency, real-time automation is key. The Coupon Code Applied workflow trigger enables you to respond instantly when a coupon code is used at checkout, without waiting for the transaction to be completed. Whether you're sending personalized emails, tagging contacts, or notifying your team, this trigger provides the control and flexibility needed to act in the moment.
### Why Use the Coupon Code Applied Trigger?
* \*\*\*\*Personalized, Timely Messaging: \*\*\*\*Engage customers while they’re still active with targeted emails, reminders, or upsell offers.
* \*\*\*\*Intelligent Filtering: \*\*\*\*Use advanced filters to target workflows based on coupon code, coupon type, product, order value, and more.
* \*\*\*\*Internal Visibility: \*\*\*\*Notify your team or apply contact tags when specific codes are used to track marketing performance or enforce internal processes.
* \*\*\*\*Recover Lost Sales: \*\*\*\*Follow up with users who applied a code but abandoned their cart before checkout was completed.
***
## How to Configure the Coupon Code Applied Trigger
Setting up this trigger is quick and intuitive inside the Workflow Builder:
### Add the Trigger to Your Workflow
Go to Automation > Workflows, and either create a new workflow or edit an existing one.
Click + Add New Trigger once you are in the builder and select “Coupon Code Applied” from the available options.
 ### Name Your Trigger
Provide a clear name for other users to easily understand the event that activates the workflow.
### Name Your Trigger
Provide a clear name for other users to easily understand the event that activates the workflow.
 ### Apply Filters to Target Specific Scenarios
Refine your workflow by applying filters.
### Apply Filters to Target Specific Scenarios
Refine your workflow by applying filters.
 Each filter supports multiple operator types to help tailor your automation to very specific use cases:
| ****Filter**** | ****Operators**** | ****Input Type**** |
| ----------------------------- | ----------------------------------------- | ---------------------------- |
| Coupon Code | Is / Is Not / Contains / Does Not Contain | Multi-select dropdown |
| Coupon Type | Is / Is Not | Dropdown (Percentage, Fixed) |
| Coupon Name | Is / Is Not / Contains / Does Not Contain | Multi-select dropdown |
| Order Value (Before Discount) | Greater Than / Less Than / Is / Is Not | Numeric input |
| Coupon Value | Greater Than / Less Than / Is / Is Not | Numeric input |
| Product(s) in Order | Contains / Does Not Contain | Checkbox (multi-select) |
| Product Collection | Contains / Does Not Contain | Checkbox (multi-select) |
| Source | Is / Is Not | Single-select dropdown |
| Product Type | Is / Is Not | One-time vs Subscription |
### Save and Build Your Workflow
After configuring your trigger and filters, click Save Trigger. Then, begin building your actions and test your workflow using the Test Workflow option before publishing.
Each filter supports multiple operator types to help tailor your automation to very specific use cases:
| ****Filter**** | ****Operators**** | ****Input Type**** |
| ----------------------------- | ----------------------------------------- | ---------------------------- |
| Coupon Code | Is / Is Not / Contains / Does Not Contain | Multi-select dropdown |
| Coupon Type | Is / Is Not | Dropdown (Percentage, Fixed) |
| Coupon Name | Is / Is Not / Contains / Does Not Contain | Multi-select dropdown |
| Order Value (Before Discount) | Greater Than / Less Than / Is / Is Not | Numeric input |
| Coupon Value | Greater Than / Less Than / Is / Is Not | Numeric input |
| Product(s) in Order | Contains / Does Not Contain | Checkbox (multi-select) |
| Product Collection | Contains / Does Not Contain | Checkbox (multi-select) |
| Source | Is / Is Not | Single-select dropdown |
| Product Type | Is / Is Not | One-time vs Subscription |
### Save and Build Your Workflow
After configuring your trigger and filters, click Save Trigger. Then, begin building your actions and test your workflow using the Test Workflow option before publishing.
 ### Recommended Workflow Actions
Make the most of your automation by layering in relevant actions that align with your business goals:
* ****Send Email**** – Send a thank-you, promo follow-up, or upsell offer.
* ****Assign to User**** – Route the contact to a sales or support rep for faster follow-up.
* ****Add Tag**** – Segment contacts based on coupon usage.
* ****Internal Notification**** – Notify your team when key discount codes are used.
* ****Create/Update Opportunity**** – Push contacts into your sales pipeline for further nurturing.
The Coupon Code Applied workflow trigger offers a powerful way to monitor coupon usage and automate timely, relevant actions—whether it’s re-engaging customers, assigning leads, or improving internal visibility. By acting in real-time, your team can close sales gaps, reward loyalty, and ensure that every interaction with a discount code is a strategic one.
### Frequently Asked Questions
Yes. This trigger activates as soon as a coupon is applied, regardless of whether the order is completed.
Yes. Use the Product(s) in Order, and Product Collection filters to target specific items.
The workflow will trigger for any coupon applied at checkout. It’s best practice to use filters to narrow this down for more strategic targeting.
Yes. Use Order Value (Before Discount) or Order Value (After Discount) filters with comparison operators.
No. This trigger only fires when a coupon is actively applied during the checkout process.
### coupon-code-expired-trigger
Once a coupon expires, it is time to do some housekeeping, making sure to remove or renew them, update offer listings, and decide on your next steps. However, it's really easy to miss the expiry date as you go about your daily responsibilities. So, let's learn how to use workflows to make it easier!
***
## Setting The Trigger
To start, navigate to the Workflows tab inside the Automation section and create a new workflow.
### Recommended Workflow Actions
Make the most of your automation by layering in relevant actions that align with your business goals:
* ****Send Email**** – Send a thank-you, promo follow-up, or upsell offer.
* ****Assign to User**** – Route the contact to a sales or support rep for faster follow-up.
* ****Add Tag**** – Segment contacts based on coupon usage.
* ****Internal Notification**** – Notify your team when key discount codes are used.
* ****Create/Update Opportunity**** – Push contacts into your sales pipeline for further nurturing.
The Coupon Code Applied workflow trigger offers a powerful way to monitor coupon usage and automate timely, relevant actions—whether it’s re-engaging customers, assigning leads, or improving internal visibility. By acting in real-time, your team can close sales gaps, reward loyalty, and ensure that every interaction with a discount code is a strategic one.
### Frequently Asked Questions
Yes. This trigger activates as soon as a coupon is applied, regardless of whether the order is completed.
Yes. Use the Product(s) in Order, and Product Collection filters to target specific items.
The workflow will trigger for any coupon applied at checkout. It’s best practice to use filters to narrow this down for more strategic targeting.
Yes. Use Order Value (Before Discount) or Order Value (After Discount) filters with comparison operators.
No. This trigger only fires when a coupon is actively applied during the checkout process.
### coupon-code-expired-trigger
Once a coupon expires, it is time to do some housekeeping, making sure to remove or renew them, update offer listings, and decide on your next steps. However, it's really easy to miss the expiry date as you go about your daily responsibilities. So, let's learn how to use workflows to make it easier!
***
## Setting The Trigger
To start, navigate to the Workflows tab inside the Automation section and create a new workflow.
 Click the plus sign icon to add a trigger and select Coupon Code Expired.
 ***
## Adding filters
To limit which events trigger the workflow even further, click the “+ Add Filter” button. The main filters for this trigger are:
### Coupon Code
This lets you limit the workflow to only specific coupon codes. To use it, select an operator. Finally, select the codes you want to trigger or exclude from your workflow.
***
## Adding filters
To limit which events trigger the workflow even further, click the “+ Add Filter” button. The main filters for this trigger are:
### Coupon Code
This lets you limit the workflow to only specific coupon codes. To use it, select an operator. Finally, select the codes you want to trigger or exclude from your workflow.
 ### Coupon Name
This lets you limit the workflow to coupons with a specific name, regardless of the code. Just like with the previous case, select an operator and add the coupon names you desire.
### Coupon Name
This lets you limit the workflow to coupons with a specific name, regardless of the code. Just like with the previous case, select an operator and add the coupon names you desire.
 ### Coupon Type
This helps you define the discount type, whether it applies to the percentage or net amount, and to which orders your coupon applies to the orders.
### Coupon Type
This helps you define the discount type, whether it applies to the percentage or net amount, and to which orders your coupon applies to the orders.
 Once you are satisfied with your selections, click “Save Trigger” to establish your changes.
 There you have it, once you've finished with your workflow, you can test it or simply publish it. Now, it will take care of those pesky expired coupons for you!
### coupon-redemption-limit-reached-trigger
Managing overused coupons is key to ensuring your customers don't lose interest while ensuring your system is updated and properly maintained. So, how can you make this easier? Well, by using the power of workflows, you can start an automation once the usage limit is reached. Let's check it out!
***
## Setting The Trigger
To start, navigate to the Workflows tab inside the Automation section and create a new workflow.
There you have it, once you've finished with your workflow, you can test it or simply publish it. Now, it will take care of those pesky expired coupons for you!
### coupon-redemption-limit-reached-trigger
Managing overused coupons is key to ensuring your customers don't lose interest while ensuring your system is updated and properly maintained. So, how can you make this easier? Well, by using the power of workflows, you can start an automation once the usage limit is reached. Let's check it out!
***
## Setting The Trigger
To start, navigate to the Workflows tab inside the Automation section and create a new workflow.
 Click the plus sign icon to add a trigger and select Coupon Redemption Limit Reached.
 ***
## Adding filters
To limit which events trigger the workflow even further, click the “+ Add Filter” button. The main filters for this trigger are:
### Coupon Code
This lets you limit the workflow to only specific coupon codes. To use it, select an operator. Finally, select the codes you want to trigger or exclude from your workflow.
### Coupon Name
This lets you limit the workflow to coupons with a specific name, regardless of the code. Just like with the previous case, select an operator and add the coupon names you desire.
### Coupon Type
This helps you define the discount type, whether it applies to the percentage or net amount, and to which orders your coupon applies to the orders.
### Redemption Limit
This lets you use a set numeric value to filter which Coupons trigger the automation based on how many times they can be redeemed.
***
## Adding filters
To limit which events trigger the workflow even further, click the “+ Add Filter” button. The main filters for this trigger are:
### Coupon Code
This lets you limit the workflow to only specific coupon codes. To use it, select an operator. Finally, select the codes you want to trigger or exclude from your workflow.
### Coupon Name
This lets you limit the workflow to coupons with a specific name, regardless of the code. Just like with the previous case, select an operator and add the coupon names you desire.
### Coupon Type
This helps you define the discount type, whether it applies to the percentage or net amount, and to which orders your coupon applies to the orders.
### Redemption Limit
This lets you use a set numeric value to filter which Coupons trigger the automation based on how many times they can be redeemed.
 Once you are satisfied with your selections, click “Save Trigger” to establish your changes.
 There you have it! Now you can reach out to customers with other offers, pause other workflows, and more right after a coupon code reaches its max. This will improve your efficiency when managing Coupon Codes.
### facebook-lead-form-submitted-trigger
The Facebook Lead Form Submitted trigger is a feature that starts your workflows when a Facebook lead form is submitted. It ensures all lead data is captured and integrated into your CRM.
Before setting up this trigger, confirm that your Facebook form fields are mapped in your CRM by going to Settings > Integrations > Facebook Form Fields Mapping.
To start setting up your workflow, click Add New Workflow Trigger and select Facebook Lead Form Submitted.\*\*
There you have it! Now you can reach out to customers with other offers, pause other workflows, and more right after a coupon code reaches its max. This will improve your efficiency when managing Coupon Codes.
### facebook-lead-form-submitted-trigger
The Facebook Lead Form Submitted trigger is a feature that starts your workflows when a Facebook lead form is submitted. It ensures all lead data is captured and integrated into your CRM.
Before setting up this trigger, confirm that your Facebook form fields are mapped in your CRM by going to Settings > Integrations > Facebook Form Fields Mapping.
To start setting up your workflow, click Add New Workflow Trigger and select Facebook Lead Form Submitted.\*\*
 ***
## Filters
There are two default fields to configure:
### Page Is
Here, you can choose the specific Facebook page you wish to target.
***
## Filters
There are two default fields to configure:
### Page Is
Here, you can choose the specific Facebook page you wish to target.
 ### Form Is
After selecting the page, you can select the Facebook lead form that you’d like to trigger the workflow.
### Form Is
After selecting the page, you can select the Facebook lead form that you’d like to trigger the workflow.
 Include custom filters by clicking the “Add Filters” button.
 Once the filters have been selected, click the "Save Trigger" button in the bottom right corner.
 📌\*\*Note\*\*\*\*: Add workflow actions to automate tasks such as notifications, follow-ups, or account updates.
Once all actions are defined, Publish and Save the workflow to activate its functionality.
The Facebook Lead Form Submitted trigger helps connect your Facebook lead generation efforts with your CRM. This integration ensures no lead is missed and allows for automated notifications, follow-ups, and updates. With your workflow activated, you can focus on engaging leads while automation handles repetitive tasks.
### tiktok-lead-form-submitted
The TikTok Form Submitted trigger will run your workflow when a TikTok Lead Form has been submitted. If you have not already mapped out the TikTok fields in your CRM, visit the Integrations tab under Settings in your CRM and click on TikTok Fields Mapping. This will ensure that all of the information collected in your TikTok lead form will be integrated into your CRM.
***
## Adding the TikTok Lead Form Submitted Trigger
To get started setting up your workflow, click on ****"Add New Trigger"**** and select ****TikTok Form Submitted.****
📌\*\*Note\*\*\*\*: Add workflow actions to automate tasks such as notifications, follow-ups, or account updates.
Once all actions are defined, Publish and Save the workflow to activate its functionality.
The Facebook Lead Form Submitted trigger helps connect your Facebook lead generation efforts with your CRM. This integration ensures no lead is missed and allows for automated notifications, follow-ups, and updates. With your workflow activated, you can focus on engaging leads while automation handles repetitive tasks.
### tiktok-lead-form-submitted
The TikTok Form Submitted trigger will run your workflow when a TikTok Lead Form has been submitted. If you have not already mapped out the TikTok fields in your CRM, visit the Integrations tab under Settings in your CRM and click on TikTok Fields Mapping. This will ensure that all of the information collected in your TikTok lead form will be integrated into your CRM.
***
## Adding the TikTok Lead Form Submitted Trigger
To get started setting up your workflow, click on ****"Add New Trigger"**** and select ****TikTok Form Submitted.****
 📌\*\*\*\*NOTE: \*\*\*\*To publish workflows, you must establish a workflow trigger and action. Without both, you can only save the workflow and not publish it.
***
## Add Filter
Click the ****"Add Filters"**** button to choose from various available filters.
📌\*\*\*\*NOTE: \*\*\*\*To publish workflows, you must establish a workflow trigger and action. Without both, you can only save the workflow and not publish it.
***
## Add Filter
Click the ****"Add Filters"**** button to choose from various available filters.
 ### In Form
If you are running multiple lead forms on TikTok and need to narrow down your workflow trigger, click on ****All Filters**** and select the ****“In Form”**** filter from the dropdown menu. Here you’ll be able to select the lead form that you would like to trigger the workflow.
### In Form
If you are running multiple lead forms on TikTok and need to narrow down your workflow trigger, click on ****All Filters**** and select the ****“In Form”**** filter from the dropdown menu. Here you’ll be able to select the lead form that you would like to trigger the workflow.
 Once you’ve set up your filters and reminders, click ****"Save Trigger"**** to finalize your “TikTok Lead Form Submitted” workflow.
 \*\*\*\*📌NOTE: \*\*\*\*You can add workflow actions to automate tasks such as notifications, follow-ups, or account updates.
The TikTok Form Submitted trigger streamlines your lead management process by automating workflows based on submissions. By mapping fields, setting up triggers, and publishing workflows, you can ensure seamless integration and efficient follow-up with your leads.
### linkedin-lead-form-submitted-trigger
Your LinkedIn forms help you capture leads and add them to your system. Routing them into a workflow for further actions to automate tasks is possible with the LinkedIn Lead Form Submitted Trigger. Follow along to learn how to use this trigger and smooth out your work!
***
## Adding Your Trigger
You can find this trigger in the Events section of your workflow triggers. To add it, simply click “+ Add New Trigger” and select it.
\*\*\*\*📌NOTE: \*\*\*\*You can add workflow actions to automate tasks such as notifications, follow-ups, or account updates.
The TikTok Form Submitted trigger streamlines your lead management process by automating workflows based on submissions. By mapping fields, setting up triggers, and publishing workflows, you can ensure seamless integration and efficient follow-up with your leads.
### linkedin-lead-form-submitted-trigger
Your LinkedIn forms help you capture leads and add them to your system. Routing them into a workflow for further actions to automate tasks is possible with the LinkedIn Lead Form Submitted Trigger. Follow along to learn how to use this trigger and smooth out your work!
***
## Adding Your Trigger
You can find this trigger in the Events section of your workflow triggers. To add it, simply click “+ Add New Trigger” and select it.
 ### Workflow Trigger Name
Update the name that will be displayed in the builder.
### Workflow Trigger Name
Update the name that will be displayed in the builder.
 ***
## Filters
Define the contacts to add to the workflow by specifying filters based on the desired criteria. To add them, click the “+ Add filters” button at the bottom.
***
## Filters
Define the contacts to add to the workflow by specifying filters based on the desired criteria. To add them, click the “+ Add filters” button at the bottom.
 The main filters for this trigger will be:
### Page
If you have multiple LinkedIn pages connected, you can specify which ones should start the workflow by selecting “Page” from the Filters dropdown. Next, you will need to choose your operator. Finally, select the page you want to trigger or exclude from your workflow.
The main filters for this trigger will be:
### Page
If you have multiple LinkedIn pages connected, you can specify which ones should start the workflow by selecting “Page” from the Filters dropdown. Next, you will need to choose your operator. Finally, select the page you want to trigger or exclude from your workflow.
 ### Business Niche
To only include or exclude leads with a specific business niche, select this filter from the drop-down menu. Next, you will need to choose your operator. Finally, select the niche you want to trigger or exclude from your workflow.
### Business Niche
To only include or exclude leads with a specific business niche, select this filter from the drop-down menu. Next, you will need to choose your operator. Finally, select the niche you want to trigger or exclude from your workflow.
 Once you are satisfied with your selections.
And there you have it! Now, you can add any actions you want the workflow to follow. Giving you an easy way to monitor your form responses and implement appropriate follow-up, such as lead-nurturing emails or a sales team alert.
### click-to-whatsapp-ads-trigger
Click-to-WhatsApp Ads provide a seamless way for businesses to engage with high-intent leads directly from Meta platforms. By configuring this trigger, you can automate responses when users initiate conversations through these ads or Facebook Page CTA buttons. This guide walks you through setting up the trigger and understanding how Free Entry Point Conversations work to help you optimize engagement and minimize messaging costs.
��****Note****: This workflow is triggered when a customer on Android or iOS sends you a message via:
* A Click-to-WhatsApp Ad
* A Facebook Page Call-to-Action (CTA) button
These interactions can open a Free Entry Point Conversation, provided you respond within 24 hours.
### How It Works
Navigate to the relevant workflow builder, then add the Click to WhatsApp Ads trigger.
Once you are satisfied with your selections.
And there you have it! Now, you can add any actions you want the workflow to follow. Giving you an easy way to monitor your form responses and implement appropriate follow-up, such as lead-nurturing emails or a sales team alert.
### click-to-whatsapp-ads-trigger
Click-to-WhatsApp Ads provide a seamless way for businesses to engage with high-intent leads directly from Meta platforms. By configuring this trigger, you can automate responses when users initiate conversations through these ads or Facebook Page CTA buttons. This guide walks you through setting up the trigger and understanding how Free Entry Point Conversations work to help you optimize engagement and minimize messaging costs.
��****Note****: This workflow is triggered when a customer on Android or iOS sends you a message via:
* A Click-to-WhatsApp Ad
* A Facebook Page Call-to-Action (CTA) button
These interactions can open a Free Entry Point Conversation, provided you respond within 24 hours.
### How It Works
Navigate to the relevant workflow builder, then add the Click to WhatsApp Ads trigger.
 Once added, update the name of the trigger to communicate its purpose to all users.
 Then, apply relevant filters, such as Ad/Post ID, Ad/Post URL, and Headline or Source Type, as needed.
 The Ad/Post ID, Ad/Post URL, and Headline options require you to choose between the “Contains Phrase” and “Is Not Empty” operators, while the Source Type operator prompts you to choose whether the source type field is empty or not, or determine whether the source is or isn't the selected value.
 Once you have finalized your configurations, save the trigger and define the desired workflow actions (e.g., send an automated message, assign the contact, add tags).
 ### Understanding Free Entry Point Conversations
A Free Entry Point Conversation begins when a customer using an Android or iOS device messages you via a Click-to-WhatsApp Ad or Facebook CTA, and you respond within 24 hours.
#### Key Details:
* The conversation begins when your message is delivered and lasts for 72 hours.
* It allows unlimited free messaging (including template and non-template messages).
* It closes all other open conversations between you and the customer.
* No new conversations are opened until the 72-hour period ends.
****📌Note:**** Non-template (free-form) messages can only be sent during the active 24-hour customer service window. If this window expires, only template messages are permitted—unless the customer re-initiates contact.
#### Example
The customer clicks your ad at 10:00 AM and sends a message. You respond with a template message at 10:00 PM (within 24 hours). The free entry point conversation starts at 10:00 PM and runs for 72 hours.
You can send:
* ****Template messages****: Free during the entire 72 hours
* ****Non-template messages****: Only until 10:00 AM the next day (when the 24-hour window closes)
Setting up the Click-to-WhatsApp Ads workflow trigger is a powerful way to engage leads instantly and cost-effectively. By understanding the mechanics of Free Entry Point Conversations and configuring filters wisely, you can ensure timely communication, reduce operational costs, and improve customer satisfaction. For best results, respond promptly to all ad-initiated conversations and leverage automation to deliver consistent, high-quality service.
### Frequently Asked Questions
They are 72-hour messaging sessions initiated when a user messages you via a Click-to-WhatsApp Ad or Facebook CTA, and you reply within 24 hours. These conversations incur no charges for messages sent, automatically close any open WhatsApp conversations, and allow free-form messaging only within the 24-hour response window.
If you respond within 24 hours, the session is free for 72 hours. If you respond after 24 hours, a paid template message is required to re-initiate contact.
Yes, with conditions: within 24 hours of the customer's message, free-form and template messages are allowed. After 24 hours, only template messages are permitted unless the customer sends another message to reopen the service window.
### video-tracking
A video needs to be encoded for it to show up in the filters for a Video Tracking Workflow Trigger. We recommend turning off the Show Progress Bar in the Video Element settings so viewers cannot move back and forth in a video, to ensure accurate progress tracking. You are also recommended to set up a Redirect for Unregistered Visitors.
### Understanding Free Entry Point Conversations
A Free Entry Point Conversation begins when a customer using an Android or iOS device messages you via a Click-to-WhatsApp Ad or Facebook CTA, and you respond within 24 hours.
#### Key Details:
* The conversation begins when your message is delivered and lasts for 72 hours.
* It allows unlimited free messaging (including template and non-template messages).
* It closes all other open conversations between you and the customer.
* No new conversations are opened until the 72-hour period ends.
****📌Note:**** Non-template (free-form) messages can only be sent during the active 24-hour customer service window. If this window expires, only template messages are permitted—unless the customer re-initiates contact.
#### Example
The customer clicks your ad at 10:00 AM and sends a message. You respond with a template message at 10:00 PM (within 24 hours). The free entry point conversation starts at 10:00 PM and runs for 72 hours.
You can send:
* ****Template messages****: Free during the entire 72 hours
* ****Non-template messages****: Only until 10:00 AM the next day (when the 24-hour window closes)
Setting up the Click-to-WhatsApp Ads workflow trigger is a powerful way to engage leads instantly and cost-effectively. By understanding the mechanics of Free Entry Point Conversations and configuring filters wisely, you can ensure timely communication, reduce operational costs, and improve customer satisfaction. For best results, respond promptly to all ad-initiated conversations and leverage automation to deliver consistent, high-quality service.
### Frequently Asked Questions
They are 72-hour messaging sessions initiated when a user messages you via a Click-to-WhatsApp Ad or Facebook CTA, and you reply within 24 hours. These conversations incur no charges for messages sent, automatically close any open WhatsApp conversations, and allow free-form messaging only within the 24-hour response window.
If you respond within 24 hours, the session is free for 72 hours. If you respond after 24 hours, a paid template message is required to re-initiate contact.
Yes, with conditions: within 24 hours of the customer's message, free-form and template messages are allowed. After 24 hours, only template messages are permitted unless the customer sends another message to reopen the service window.
### video-tracking
A video needs to be encoded for it to show up in the filters for a Video Tracking Workflow Trigger. We recommend turning off the Show Progress Bar in the Video Element settings so viewers cannot move back and forth in a video, to ensure accurate progress tracking. You are also recommended to set up a Redirect for Unregistered Visitors.
 Note: The accuracy of the video tracking depends on whether or not you have turned off the progress bar. Keeping it toggled on would interfere with the accuracy of the workflow's video tracking.
***
## Adding Filters
Besides the standard filters, you have three video-specific filtering options you can access by clicking + Add filters.
Note: The accuracy of the video tracking depends on whether or not you have turned off the progress bar. Keeping it toggled on would interfere with the accuracy of the workflow's video tracking.
***
## Adding Filters
Besides the standard filters, you have three video-specific filtering options you can access by clicking + Add filters.
 ### Funnel
The Funnel filter lets you choose if you want any of the funnels in your CRM to be a trigger for the workflow or if you prefer for none of them to activate it. When you select this filter, you’ll then be able to choose which funnels to include or exclude with this filter.
### Funnel
The Funnel filter lets you choose if you want any of the funnels in your CRM to be a trigger for the workflow or if you prefer for none of them to activate it. When you select this filter, you’ll then be able to choose which funnels to include or exclude with this filter.
 ### Video
The Video filter permits you to select any of the videos in your CRM or none of them as a trigger for the workflow. Once you have chosen this filter, you can then specify which videos to include or exclude based on your preferences for the workflow trigger.
### Video
The Video filter permits you to select any of the videos in your CRM or none of them as a trigger for the workflow. Once you have chosen this filter, you can then specify which videos to include or exclude based on your preferences for the workflow trigger.
 ### Video Duration %
The Video Duration % enables you to activate a workflow trigger when a visitor watches a specific percentage of the video. To trigger the workflow, you will need to provide precise instructions like video duration is greater than 50%.
### Video Duration %
The Video Duration % enables you to activate a workflow trigger when a visitor watches a specific percentage of the video. To trigger the workflow, you will need to provide precise instructions like video duration is greater than 50%.
 Once satisfied with the filters, click Save and keep working on your workflow. This is an excellent tool to re-engage viewers, so pair it with emails, SMS, or even social media messages for maximum effect. We hope you enjoy it!
### page-view-trigger
Using the Page View trigger in workflows can transform customer interactions. You can deliver timely and personalized engagements by automating responses based on specific web page visits. This method enhances customer engagement tracking and helps identify the most engaged users, leading to more effective marketing strategies.
***
## Adding the Funnel/Website PageView Trigger
Within the workflow builder, click the ****"Add New Trigger"**** button and choose the ****"Funnel/Website PageView"**** option from the provided selections.
Once satisfied with the filters, click Save and keep working on your workflow. This is an excellent tool to re-engage viewers, so pair it with emails, SMS, or even social media messages for maximum effect. We hope you enjoy it!
### page-view-trigger
Using the Page View trigger in workflows can transform customer interactions. You can deliver timely and personalized engagements by automating responses based on specific web page visits. This method enhances customer engagement tracking and helps identify the most engaged users, leading to more effective marketing strategies.
***
## Adding the Funnel/Website PageView Trigger
Within the workflow builder, click the ****"Add New Trigger"**** button and choose the ****"Funnel/Website PageView"**** option from the provided selections.
 ***
## Filters
### Funnel/Website
Once the trigger is selected, you will choose the filters, starting with the Funnel or Website. This will fire off the workflow once a contact has visited the funnel of your choosing, depending on the filters you've selected.
***
## Filters
### Funnel/Website
Once the trigger is selected, you will choose the filters, starting with the Funnel or Website. This will fire off the workflow once a contact has visited the funnel of your choosing, depending on the filters you've selected.
 ### Page
You can also choose a specific page or URL to filter by if you want your automation to fire based on your contact visiting a particular page.
### Page
You can also choose a specific page or URL to filter by if you want your automation to fire based on your contact visiting a particular page.
 ### Page Path
The ****Page Path**** filter allows you to specify a portion of a URL path that will activate the workflow. For instance, if you want your automation to fire when a contact visits any page within a specific category or section of your website (e.g., /cart-page/ or /product-details-page/), you can define that path here. This is especially useful for creating targeted automation based on broader page groupings rather than specific URLs.
### Page Path
The ****Page Path**** filter allows you to specify a portion of a URL path that will activate the workflow. For instance, if you want your automation to fire when a contact visits any page within a specific category or section of your website (e.g., /cart-page/ or /product-details-page/), you can define that path here. This is especially useful for creating targeted automation based on broader page groupings rather than specific URLs.
 ### UTM Parameters
If you want to get even more specific, you can filter by different UTM Parameters.
### UTM Parameters
If you want to get even more specific, you can filter by different UTM Parameters.
 ��****NOTE:**** The ****"Page View Trigger"**** activates only if the visiting customer's details are present on the webpage. This ensures that workflow automation is executed with accurate customer context and engagement data.
Once you’ve configured the necessary filters, click the ****Save Trigger**** button in the bottom-right corner to complete the setup.
��****NOTE:**** The ****"Page View Trigger"**** activates only if the visiting customer's details are present on the webpage. This ensures that workflow automation is executed with accurate customer context and engagement data.
Once you’ve configured the necessary filters, click the ****Save Trigger**** button in the bottom-right corner to complete the setup.
 You’re all set to build workflows that respond to your clients’ visits to specific funnels or websites. This allows you to engage with your audience in meaningful ways, creating a smoother and more personalized experience.
### task-added-trigger
The Task Added trigger is utilized when there is one or more actions to be carried out after a task is created in the system. Depending on the task requirements, additional filters can also be added.
***
## Adding the Task Added Trigger
To begin, click\*\*\*\* Add New Trigger\*\*\*\*, then search and select ****Task Added**** Trigger.
You’re all set to build workflows that respond to your clients’ visits to specific funnels or websites. This allows you to engage with your audience in meaningful ways, creating a smoother and more personalized experience.
### task-added-trigger
The Task Added trigger is utilized when there is one or more actions to be carried out after a task is created in the system. Depending on the task requirements, additional filters can also be added.
***
## Adding the Task Added Trigger
To begin, click\*\*\*\* Add New Trigger\*\*\*\*, then search and select ****Task Added**** Trigger.
 📌\*\*\*\*NOTE: \*\*\*\*To publish workflows, you must establish a workflow trigger and action. Without both, you can only save the workflow and not publish it.
***
## Add Filter
You can filter your trigger by clicking the ****Add Filters**** button.
📌\*\*\*\*NOTE: \*\*\*\*To publish workflows, you must establish a workflow trigger and action. Without both, you can only save the workflow and not publish it.
***
## Add Filter
You can filter your trigger by clicking the ****Add Filters**** button.
 ### Assigned User
The ****"Assign User"**** trigger allows you to trigger the assignment of a Contact to a User based on a condition of your choice. Simply select a team member from the dropdown to select the assigned user.
### Assigned User
The ****"Assign User"**** trigger allows you to trigger the assignment of a Contact to a User based on a condition of your choice. Simply select a team member from the dropdown to select the assigned user.
 Once you’ve set up your filters and reminders, click ****"Save Trigger"**** to finalize your task-added workflow.
\*\*\*\*📌NOTE: \*\*\*\*You can add workflow actions to automate tasks such as notifications, follow-ups, or account updates.
Using the Task Added trigger ensures your tasks are automatically managed, saving time and keeping your team focused on what matters most.
### task-reminder-trigger
The Task Reminder workflow trigger allows you to activate a workflow based on a task previously created in your CRM. This will help you generate reminders based on the nature of your work.
***
## Adding the Task Reminder Trigger
To begin, click\*\*\*\* “Add New Trigger”,\*\*\*\* then search\*\*\*\* \*\*\*\*and select ****Task Reminder**** Trigger.
Once you’ve set up your filters and reminders, click ****"Save Trigger"**** to finalize your task-added workflow.
\*\*\*\*📌NOTE: \*\*\*\*You can add workflow actions to automate tasks such as notifications, follow-ups, or account updates.
Using the Task Added trigger ensures your tasks are automatically managed, saving time and keeping your team focused on what matters most.
### task-reminder-trigger
The Task Reminder workflow trigger allows you to activate a workflow based on a task previously created in your CRM. This will help you generate reminders based on the nature of your work.
***
## Adding the Task Reminder Trigger
To begin, click\*\*\*\* “Add New Trigger”,\*\*\*\* then search\*\*\*\* \*\*\*\*and select ****Task Reminder**** Trigger.
 ***
## All Filters
To add a filter, click on the ****Add Filters**** button. Here you can trigger the workflow before or after several days or even based on custom fields.
***
## All Filters
To add a filter, click on the ****Add Filters**** button. Here you can trigger the workflow before or after several days or even based on custom fields.
 ### After No. Of Days
Use this trigger when you must perform set actions after a certain number of days. In the second field, type a number.
### After No. Of Days
Use this trigger when you must perform set actions after a certain number of days. In the second field, type a number.
 ### Before No. Of Days
Use this trigger when you must perform set actions before a certain number of days. Select the number of days by typing a number in the second field.
### Before No. Of Days
Use this trigger when you must perform set actions before a certain number of days. Select the number of days by typing a number in the second field.
 Once you’ve set up your filters and reminders, click ****"Save Trigger"**** to finalize your task reminder workflow.
****📌NOTE:**** You can add workflow actions to automate tasks such as notifications, follow-ups, or account updates.
Once you’ve set up the trigger and its actions, Publish and Save the workflow to enable its functionality.
Once you’ve set up your filters and reminders, click ****"Save Trigger"**** to finalize your task reminder workflow.
****📌NOTE:**** You can add workflow actions to automate tasks such as notifications, follow-ups, or account updates.
Once you’ve set up the trigger and its actions, Publish and Save the workflow to enable its functionality.
 The Task Reminder trigger simplifies your workflow, ensuring you never miss important tasks or deadlines. Set it up, activate it, and stay organized with ease.
### task-completed-trigger
The Task Completed Trigger will start your workflow when a task is marked as completed by a user. This is compatible with recurring tasks and tasks assigned to a specific user. It helps manage internal processes and ensures the customer journey continues without a hitch once a task is completed. Let's see how it works.
### Using the Task Completion Trigger
Create a new workflow by selecting + Start from Scratch.
The Task Reminder trigger simplifies your workflow, ensuring you never miss important tasks or deadlines. Set it up, activate it, and stay organized with ease.
### task-completed-trigger
The Task Completed Trigger will start your workflow when a task is marked as completed by a user. This is compatible with recurring tasks and tasks assigned to a specific user. It helps manage internal processes and ensures the customer journey continues without a hitch once a task is completed. Let's see how it works.
### Using the Task Completion Trigger
Create a new workflow by selecting + Start from Scratch.
 Set your Trigger as “Task Completed” by adding a new trigger.
 ### Applying filters
Click + Add Filters to narrow down the tasks that will trigger the workflow
### Applying filters
Click + Add Filters to narrow down the tasks that will trigger the workflow
 The main filter will be Assigned User, which allows you to limit the user's tasks that trigger the workflow.
 Select an operator for your filter, your options will be:
1. Is: This limits the workflow trigger to a specific user.
2. Is empty: This will only trigger the workflow when there's no assigned user.
3. Is not: This will exclude tasks assigned to a specific user.
4. Is not empty: This will only trigger the workflow when there's an assigned user.
Select an operator for your filter, your options will be:
1. Is: This limits the workflow trigger to a specific user.
2. Is empty: This will only trigger the workflow when there's no assigned user.
3. Is not: This will exclude tasks assigned to a specific user.
4. Is not empty: This will only trigger the workflow when there's an assigned user.
 Once you've added the filters click Save Trigger.
 Add any actions you want the workflow to follow, then click Save at the top right corner.
 This Trigger will help you follow up with customers and monitor that your team is completing the tasks assigned to them without the need to constantly check the Tasks Tab. Enhancing your efficiency and smoothing your operations.
### note-added
The Note Added trigger activates a workflow when a note is attached to a contact. By implementing this trigger, you can automate specific actions or responses, ensuring that your team stays informed about important updates and enabling more efficient customer relationship management.
To initiate this process, click 'Add New Workflow Trigger' and choose 'Note Added' from the dropdown menu labeled 'Choose a Workflow Trigger'.
This Trigger will help you follow up with customers and monitor that your team is completing the tasks assigned to them without the need to constantly check the Tasks Tab. Enhancing your efficiency and smoothing your operations.
### note-added
The Note Added trigger activates a workflow when a note is attached to a contact. By implementing this trigger, you can automate specific actions or responses, ensuring that your team stays informed about important updates and enabling more efficient customer relationship management.
To initiate this process, click 'Add New Workflow Trigger' and choose 'Note Added' from the dropdown menu labeled 'Choose a Workflow Trigger'.
 ***
## All Filters
You can filter the trigger by clicking the ****Add Filters**** button.
***
## All Filters
You can filter the trigger by clicking the ****Add Filters**** button.
 ### Doesn't Have a Tag
By selecting the "Doesn't Have Tag" filter option, this workflow will ONLY be triggered when you add notes to a contact that doesn't have the tag you specify in the filter area.
### Doesn't Have a Tag
By selecting the "Doesn't Have Tag" filter option, this workflow will ONLY be triggered when you add notes to a contact that doesn't have the tag you specify in the filter area.
 ### Has Tag
By selecting the "has tag" filter, the workflow will only fire when a note is added to a contact who has the specified tag.
### Has Tag
By selecting the "has tag" filter, the workflow will only fire when a note is added to a contact who has the specified tag.
 Once satisfied with your filters, click Save Trigger.
 And there you have it, you can add any actions you'd like the workflow to follow! Remember to click save at the top right corner to maintain your changes and switch your workflow to Publish once you're ready to implement the automation.
📌Note: You need a workflow trigger and action to PUBLISH workflows. Without both, you can only save the workflow and not publish it.
### note-changed-trigger
The Note Changed trigger ensures that any updates to contact notes are automatically captured, allowing you to stay organized and informed about important changes. This guide walks you through setting up and customizing the "Note Changed" trigger to optimize your workflows.
***
## Adding the Note Changed Trigger
Start by clicking ****"Add New Trigger"**** in your workflow setup. Search for and select the ****"Note Changed"**** trigger under the Contact section.
And there you have it, you can add any actions you'd like the workflow to follow! Remember to click save at the top right corner to maintain your changes and switch your workflow to Publish once you're ready to implement the automation.
📌Note: You need a workflow trigger and action to PUBLISH workflows. Without both, you can only save the workflow and not publish it.
### note-changed-trigger
The Note Changed trigger ensures that any updates to contact notes are automatically captured, allowing you to stay organized and informed about important changes. This guide walks you through setting up and customizing the "Note Changed" trigger to optimize your workflows.
***
## Adding the Note Changed Trigger
Start by clicking ****"Add New Trigger"**** in your workflow setup. Search for and select the ****"Note Changed"**** trigger under the Contact section.
 📌\*\*\*\*NOTE: \*\*\*\*To publish workflows, you must establish a workflow trigger and action. Without both, you can only save the workflow and not publish it.
***
## Add Filters
You can filter the trigger by clicking the ****Add Filters**** button.
📌\*\*\*\*NOTE: \*\*\*\*To publish workflows, you must establish a workflow trigger and action. Without both, you can only save the workflow and not publish it.
***
## Add Filters
You can filter the trigger by clicking the ****Add Filters**** button.
 ### Doesn't Have a Tag
By selecting the ****"Doesn't Have Tag"**** filter option, this workflow will ONLY be triggered when you change a note for a contact that doesn't have the tag you specify in the filter area.
### Doesn't Have a Tag
By selecting the ****"Doesn't Have Tag"**** filter option, this workflow will ONLY be triggered when you change a note for a contact that doesn't have the tag you specify in the filter area.
 ### Has Tag
By selecting the \*\*\*\*"has tag" \*\*\*\*filter, the workflow will only fire when a note is added to a contact who has the specified tag.
### Has Tag
By selecting the \*\*\*\*"has tag" \*\*\*\*filter, the workflow will only fire when a note is added to a contact who has the specified tag.
 Once you’ve set up your filters and reminders, click ****"Save Trigger"**** to finalize your note-changed workflow.
 ****📌NOTE:**** You can add workflow actions to automate tasks such as notifications, follow-ups, or account updates.
This trigger simplifies contact management by syncing updates and automating related tasks. With the right filters and actions, you can ensure your workflows remain efficient and responsive to changes in your contact records.
### group-access-granted-trigger
The "Group Access Granted" trigger is activated when a user is added to a specific community group. This trigger allows you to initiate automated workflows to welcome users, deliver onboarding content, or assign new resources, ensuring a smooth and engaging entry into the group.
***
## How It Works
Begin by accessing the relevant workflow, then add the Group Access Granted trigger.
****📌NOTE:**** You can add workflow actions to automate tasks such as notifications, follow-ups, or account updates.
This trigger simplifies contact management by syncing updates and automating related tasks. With the right filters and actions, you can ensure your workflows remain efficient and responsive to changes in your contact records.
### group-access-granted-trigger
The "Group Access Granted" trigger is activated when a user is added to a specific community group. This trigger allows you to initiate automated workflows to welcome users, deliver onboarding content, or assign new resources, ensuring a smooth and engaging entry into the group.
***
## How It Works
Begin by accessing the relevant workflow, then add the Group Access Granted trigger.
 ### Workflow Trigger Name
In the Workflow Trigger Name field, assign a descriptive name that reflects the trigger’s purpose, such as “Onboarding: Marketing Group Access Granted.”
### Workflow Trigger Name
In the Workflow Trigger Name field, assign a descriptive name that reflects the trigger’s purpose, such as “Onboarding: Marketing Group Access Granted.”
 ### Set Up Filters
Refine the trigger by specifying the groups users are being added to. Use the “is” or “is not” filters to include or exclude specific groups. Additionally, apply the “is empty” or “is not empty” filters to target users based on their existing group memberships.
### Set Up Filters
Refine the trigger by specifying the groups users are being added to. Use the “is” or “is not” filters to include or exclude specific groups. Additionally, apply the “is empty” or “is not empty” filters to target users based on their existing group memberships.
 ### Save the Trigger
Review your configuration, confirm the settings, and save the trigger.
### Save the Trigger
Review your configuration, confirm the settings, and save the trigger.
 Finally, test the workflow to ensure it performs as expected. Once verified, activate it so the automation begins as soon as users are granted access to the specified group(s).
With flexible filters and intuitive setup, this trigger supports seamless community management while enhancing user satisfaction from the very first interaction.
### group-access-revoked-trigger
The "Group Access Revoked" trigger is activated when a user's membership in a specific community group is removed. This trigger enables automated workflows to notify users of the change and initiate any necessary follow-up actions, ensuring clear communication and a seamless user experience.
***
## How It Works
Begin by accessing the relevant workflow, then add the Group Access Revoked trigger.
Finally, test the workflow to ensure it performs as expected. Once verified, activate it so the automation begins as soon as users are granted access to the specified group(s).
With flexible filters and intuitive setup, this trigger supports seamless community management while enhancing user satisfaction from the very first interaction.
### group-access-revoked-trigger
The "Group Access Revoked" trigger is activated when a user's membership in a specific community group is removed. This trigger enables automated workflows to notify users of the change and initiate any necessary follow-up actions, ensuring clear communication and a seamless user experience.
***
## How It Works
Begin by accessing the relevant workflow, then add the Group Access Revoked trigger.
 ### Workflow Trigger Name
In the Workflow Trigger Name field, you can rename the trigger to paint a better picture of its intended purpose.
### Workflow Trigger Name
In the Workflow Trigger Name field, you can rename the trigger to paint a better picture of its intended purpose.
 ### Set Up Filters
Refine the trigger by specifying the groups from which users should be removed. Use the “is” or “is not” filters to include or exclude specific groups. Additionally, the “is empty” and “is not empty” filters can be used to target users based on whether they currently belong to any groups or none at all.
### Set Up Filters
Refine the trigger by specifying the groups from which users should be removed. Use the “is” or “is not” filters to include or exclude specific groups. Additionally, the “is empty” and “is not empty” filters can be used to target users based on whether they currently belong to any groups or none at all.
 ### Save the Trigger
Review and confirm your setup, then save the trigger.
### Save the Trigger
Review and confirm your setup, then save the trigger.
 Finally, test the workflow to ensure it behaves as expected, then activate the workflow so it begins running once the trigger criteria are met.
By automating responses to group access changes, you can ensure users are promptly informed, and any necessary follow-up actions are seamlessly executed. With customizable filters and straightforward configuration, this trigger helps streamline workflows and enhance the overall user experience.
### private-channel-access-granted-trigger
The Private Channel Access Granted Trigger allows you to automate processes based on a user gaining access to one of your Community Private Channels, such as sending follow-up emails, notifying team members, or providing access to another channel.
To get started with this trigger, navigate to the Workflows section within your account, then opt to edit an existing workflow or create a new one.
Finally, test the workflow to ensure it behaves as expected, then activate the workflow so it begins running once the trigger criteria are met.
By automating responses to group access changes, you can ensure users are promptly informed, and any necessary follow-up actions are seamlessly executed. With customizable filters and straightforward configuration, this trigger helps streamline workflows and enhance the overall user experience.
### private-channel-access-granted-trigger
The Private Channel Access Granted Trigger allows you to automate processes based on a user gaining access to one of your Community Private Channels, such as sending follow-up emails, notifying team members, or providing access to another channel.
To get started with this trigger, navigate to the Workflows section within your account, then opt to edit an existing workflow or create a new one.
 Select Add New Trigger. This will display the trigger list, where you will need to locate and select the Private Channel Access Granted trigger.
 Update the name of the Trigger within the Workflow Trigger Name field to accurately reflect its intended purpose.
 Within the Filters section, choose an Operator from the dropdown menu. If you selected the “Is” or “Is Not” operator, choose the relevant Community Group when prompted.
 📌 ****Note****: Please ensure that the selected group includes at least one private channel. If no private channels are available within the group, the workflow will not be successfully registered.
Further refine the trigger by applying additional filters to target specific private channels, if desired.
📌 ****Note****: Please ensure that the selected group includes at least one private channel. If no private channels are available within the group, the workflow will not be successfully registered.
Further refine the trigger by applying additional filters to target specific private channels, if desired.
 Save the trigger and begin adding actions to your workflow!
 With these steps in place, you can confidently manage workflows tied to private channel access within your community.
### private-channel-access-revoked-trigger
The Private Channel Access Revoked Trigger allows you to automate processes based on a user losing access to one of your Community Private Channels such as sending follow-up emails, notifying team members, or revoking their access to another channel.
To get started with this trigger, navigate to the Workflows section within your account, then opt to edit an existing workflow or create a new one.
Select Add New Trigger. This action will display the trigger list, where you will need to locate and select the Private Channel Access Revoked trigger.
With these steps in place, you can confidently manage workflows tied to private channel access within your community.
### private-channel-access-revoked-trigger
The Private Channel Access Revoked Trigger allows you to automate processes based on a user losing access to one of your Community Private Channels such as sending follow-up emails, notifying team members, or revoking their access to another channel.
To get started with this trigger, navigate to the Workflows section within your account, then opt to edit an existing workflow or create a new one.
Select Add New Trigger. This action will display the trigger list, where you will need to locate and select the Private Channel Access Revoked trigger.
 Update the name of the Trigger within the Workflow Trigger Name field to accurately reflect its intended purpose.
 Within the Filters section, choose an Operator from the dropdown menu. If you selected the “Is” or “Is Not” operator, choose the relevant Community Group when prompted.
 📌 ****Note****: Please ensure that the selected group includes at least one private channel. If no private channels are available within the group, the workflow will not be successfully registered.
Further refine the trigger by applying additional filters to target specific private channels, if desired.
📌 ****Note****: Please ensure that the selected group includes at least one private channel. If no private channels are available within the group, the workflow will not be successfully registered.
Further refine the trigger by applying additional filters to target specific private channels, if desired.
 Save the trigger and begin adding actions to your workflow!
 With these steps in place, you can confidently manage workflows tied to private channel access within your community.
��****Please Note****: Any user removed from a private channel will lose access to its content and communications immediately.
### community-group-member-leaderboard-level-changed-trigger
Managing your Community's Gamification ensures your members have a sense of purpose and encourages them to participate more in your groups. So let's check how to automate this process with the new trigger.
***
## Getting Started
Navigate to the Workflows tab inside the Automation section and create a new Workflow.
With these steps in place, you can confidently manage workflows tied to private channel access within your community.
��****Please Note****: Any user removed from a private channel will lose access to its content and communications immediately.
### community-group-member-leaderboard-level-changed-trigger
Managing your Community's Gamification ensures your members have a sense of purpose and encourages them to participate more in your groups. So let's check how to automate this process with the new trigger.
***
## Getting Started
Navigate to the Workflows tab inside the Automation section and create a new Workflow.
 Click +Add New Trigger and select Community Group Member Leaderboard Level Changed.
 In Filters select the Group this automation will be for or the Groups you'd like to exclude, this filter is obligatory.
 You can add any additional filters you want. For this trigger, you can filter contacts based on their Leaderboard Level.
 Click Save Trigger at the bottom right corner to set your trigger.
 And there you have it! You can set the rest of your workflow as normal and use this trigger to easily manage group members for their progress and grant access to rewards, special promotions, and more, keeping them motivated and interested.
### affiliate-created-trigger
Affiliate marketing is a cost-effective way to increase brand awareness, loyalty, and recognition. Creating a clear procedure to follow is key to increasing profit and improving your onboarding process. To make it easier, we'll explore the “Affiliate Created Trigger”, which allows you to start your workflow's functioning upon an affiliate being added to your CRM.
***
## Adding Your Trigger
You can find this trigger in the Affiliate section of your workflow triggers. To add it, simply click “+ Add New Trigger” and select it.
And there you have it! You can set the rest of your workflow as normal and use this trigger to easily manage group members for their progress and grant access to rewards, special promotions, and more, keeping them motivated and interested.
### affiliate-created-trigger
Affiliate marketing is a cost-effective way to increase brand awareness, loyalty, and recognition. Creating a clear procedure to follow is key to increasing profit and improving your onboarding process. To make it easier, we'll explore the “Affiliate Created Trigger”, which allows you to start your workflow's functioning upon an affiliate being added to your CRM.
***
## Adding Your Trigger
You can find this trigger in the Affiliate section of your workflow triggers. To add it, simply click “+ Add New Trigger” and select it.
 ### Workflow Trigger Name
Update the name that will be displayed in the builder.
### Workflow Trigger Name
Update the name that will be displayed in the builder.
 ### Narrowing The Reach
Define the contacts that should be added to the workflow by including filters based on the desired criteria. To add them, click “+ Add Filters.”
### Narrowing The Reach
Define the contacts that should be added to the workflow by including filters based on the desired criteria. To add them, click “+ Add Filters.”
 This trigger is only compatible with Custom Fields, you can add them by opening the drop-down menu and searching for them from the lists.
 Once you are satisfied with your selections, click “Save Trigger” to establish your changes.
 Add your actions as normal, then save your workflow. Using this trigger helps you contact affiliates immediately as they enter your CRM, leading to smoother communications, improved onboarding, and increased ROI on your affiliate campaigns.
### affiliate-enrolled-in-campaign-trigger
The Affiliate Enrolled In Campaign trigger is designed to capture essential data points related to an affiliate's enrollment in a campaign. This trigger gathers the following information:
* Affiliate Name
* Affiliate Email
* Affiliate Phone Number
* Campaigns in which the affiliate is included
* Total Revenue Generated
* Commission Earned
* Affiliate Referral Link
* Affiliate Portal Link
* Magic Login Link (direct access to the affiliate portal)
### How Does the Affiliate Enrolled In Campaign Trigger Work in a Workflow?
Navigate to Automation > Workflows from your account Dashboard.
Create a new workflow from scratch or select an existing workflow from the list.
Add your actions as normal, then save your workflow. Using this trigger helps you contact affiliates immediately as they enter your CRM, leading to smoother communications, improved onboarding, and increased ROI on your affiliate campaigns.
### affiliate-enrolled-in-campaign-trigger
The Affiliate Enrolled In Campaign trigger is designed to capture essential data points related to an affiliate's enrollment in a campaign. This trigger gathers the following information:
* Affiliate Name
* Affiliate Email
* Affiliate Phone Number
* Campaigns in which the affiliate is included
* Total Revenue Generated
* Commission Earned
* Affiliate Referral Link
* Affiliate Portal Link
* Magic Login Link (direct access to the affiliate portal)
### How Does the Affiliate Enrolled In Campaign Trigger Work in a Workflow?
Navigate to Automation > Workflows from your account Dashboard.
Create a new workflow from scratch or select an existing workflow from the list.
 Add the Affiliate Enrolled In Campaign trigger.
 Rename the trigger as needed within the Workflow Trigger Name field.
 Apply filters to target specific affiliate campaigns, if desired.
 Save the trigger and begin adding actions to your workflow!
 Incorporate actions such as "Send Email" or "Send SMS" to integrate the custom values from the Affiliate Enrolled In Campaign trigger into your communications.
 ### Practical Examples and Use Cases
* ****Sending Email/SMS to the Affiliate:**** Enhances the affiliate experience by recognizing their participation, which boosts morale and encourages ongoing engagement. This acknowledgment fosters loyalty and can lead to improved performance.
* ****Adding Affiliate Tags for Segmentation:**** Enables personalized communication by segmenting affiliates, thereby increasing the effectiveness of marketing campaigns.
Utilizing the Affiliate Enrolled In Campaign trigger enhances your ability to capture and act on critical affiliate data, optimizing your communications. By integrating actions and segmentation strategies, you can effectively engage and manage your affiliates for improved performance and campaign success.
### new-affiliate-sales-trigger
Affiliate marketing is a cost-effective way to increase brand awareness, loyalty, and recognition. However, a crucial part to keep this machine properly working is to address affiliate sales promptly. And what better way to do so than by leveraging automation?
The “New Affiliate Sales” trigger lets you create workflows that start upon an affiliate completing a sale or a sale being attributed to them.
***
## Adding Your Trigger
You can find this trigger in the Affiliate section of your workflow triggers. To add it, simply click “+ Add New Trigger” and select it.
### Practical Examples and Use Cases
* ****Sending Email/SMS to the Affiliate:**** Enhances the affiliate experience by recognizing their participation, which boosts morale and encourages ongoing engagement. This acknowledgment fosters loyalty and can lead to improved performance.
* ****Adding Affiliate Tags for Segmentation:**** Enables personalized communication by segmenting affiliates, thereby increasing the effectiveness of marketing campaigns.
Utilizing the Affiliate Enrolled In Campaign trigger enhances your ability to capture and act on critical affiliate data, optimizing your communications. By integrating actions and segmentation strategies, you can effectively engage and manage your affiliates for improved performance and campaign success.
### new-affiliate-sales-trigger
Affiliate marketing is a cost-effective way to increase brand awareness, loyalty, and recognition. However, a crucial part to keep this machine properly working is to address affiliate sales promptly. And what better way to do so than by leveraging automation?
The “New Affiliate Sales” trigger lets you create workflows that start upon an affiliate completing a sale or a sale being attributed to them.
***
## Adding Your Trigger
You can find this trigger in the Affiliate section of your workflow triggers. To add it, simply click “+ Add New Trigger” and select it.
 ### Workflow Trigger Name
Update the name that will be displayed in the builder.
### Workflow Trigger Name
Update the name that will be displayed in the builder.
 ***
## Narrowing The Reach
Define the contacts that should be added to the workflow by including filters based on the desired criteria. The main filter for this trigger will be:
### Affiliate
Select “Affiliate” from the Filters dropdown. Next, you will need to choose your operator. Finally, select the affiliate you want to trigger or exclude from your workflow.
***
## Narrowing The Reach
Define the contacts that should be added to the workflow by including filters based on the desired criteria. The main filter for this trigger will be:
### Affiliate
Select “Affiliate” from the Filters dropdown. Next, you will need to choose your operator. Finally, select the affiliate you want to trigger or exclude from your workflow.
 ### Campaign
Select “Campaign” from the Filters dropdown. Next, you will need to choose your operator. Finally, select the affiliate campaign you want to trigger or exclude from your workflow.
### Payout Method
This filter will help you include or exclude sales from affiliates who have added a payout method. To use it, select “Payout Method” from the Filters dropdown and choose an operator.
### Campaign
Select “Campaign” from the Filters dropdown. Next, you will need to choose your operator. Finally, select the affiliate campaign you want to trigger or exclude from your workflow.
### Payout Method
This filter will help you include or exclude sales from affiliates who have added a payout method. To use it, select “Payout Method” from the Filters dropdown and choose an operator.
 ### W8/W9 Form
This will trigger the workflow based on whether the affiliate has submitted tax forms.
### W8/W9 Form
This will trigger the workflow based on whether the affiliate has submitted tax forms.
 Once you are satisfied with your selections, click “Save Trigger” to establish your changes.
Add your actions as normal, then save your workflow. Using this trigger helps you manage affiliate sales immediately as they enter your CRM, leading to smoother communications, improved onboarding, and increased ROI on your affiliate campaigns.
### workflow-triggers
Workflows are a series of actions the system will complete for you, allowing you to take a hands-off approach to operations. The Trigger is the piece that starts it all, activating the series based on one or more predefined events. The plenty of options make it easy for you to use them to meet your unique objectives.
To access the workflow trigger, click the "Add New Trigger" button to get started!
Once you are satisfied with your selections, click “Save Trigger” to establish your changes.
Add your actions as normal, then save your workflow. Using this trigger helps you manage affiliate sales immediately as they enter your CRM, leading to smoother communications, improved onboarding, and increased ROI on your affiliate campaigns.
### workflow-triggers
Workflows are a series of actions the system will complete for you, allowing you to take a hands-off approach to operations. The Trigger is the piece that starts it all, activating the series based on one or more predefined events. The plenty of options make it easy for you to use them to meet your unique objectives.
To access the workflow trigger, click the "Add New Trigger" button to get started!
 ***
## Workflow Trigger Type
The Choose a Workflow Trigger feature allows you to select the trigger type assigned to a workflow. There are various trigger types available, each related to a different category in your CRM system, such as:
1. Contacts Triggers: For triggers related to contact actions or management.
2. Events Triggers: For triggers related to specific actions within the system.
3. Appointments Triggers: These will be triggers related to appointments managed within the system and any changes they may undergo.
4. Opportunities Triggers: These triggers work based on Opportunity cards and details rather than the contact itself, allowing you to connect your workflows to your pipelines.
5. Affiliate Triggers: For triggers related to actions performed by your affiliates.
6. Courses Triggers: These will be triggers related to actions that happen inside your client portal or Course content.
7. Payment Triggers: These triggers work based on actions with your products, payment processors, and contracts.
8. Shopify Triggers: For triggers related to changes in your connected Shopify account.
9. IVR Trigger: For triggers related to your automated phone system actions.
10. Facebook/Instagram Events Triggers: These triggers allow you to create automation for interactions with one of your connected Meta pages.
11. Communities Triggers: These will be triggers related to actions that happen inside your client portal or community pages.
By selecting the appropriate trigger type, you can customize your workflow's behavior to better align with your specific business needs.
### Choosing Workflow Triggers
You can select the trigger you would like to work with using the dropdown menu under Workflow Trigger.
***
## Workflow Trigger Type
The Choose a Workflow Trigger feature allows you to select the trigger type assigned to a workflow. There are various trigger types available, each related to a different category in your CRM system, such as:
1. Contacts Triggers: For triggers related to contact actions or management.
2. Events Triggers: For triggers related to specific actions within the system.
3. Appointments Triggers: These will be triggers related to appointments managed within the system and any changes they may undergo.
4. Opportunities Triggers: These triggers work based on Opportunity cards and details rather than the contact itself, allowing you to connect your workflows to your pipelines.
5. Affiliate Triggers: For triggers related to actions performed by your affiliates.
6. Courses Triggers: These will be triggers related to actions that happen inside your client portal or Course content.
7. Payment Triggers: These triggers work based on actions with your products, payment processors, and contracts.
8. Shopify Triggers: For triggers related to changes in your connected Shopify account.
9. IVR Trigger: For triggers related to your automated phone system actions.
10. Facebook/Instagram Events Triggers: These triggers allow you to create automation for interactions with one of your connected Meta pages.
11. Communities Triggers: These will be triggers related to actions that happen inside your client portal or community pages.
By selecting the appropriate trigger type, you can customize your workflow's behavior to better align with your specific business needs.
### Choosing Workflow Triggers
You can select the trigger you would like to work with using the dropdown menu under Workflow Trigger.
 ***
## Editing Workflow Trigger Names
When creating a workflow trigger, you can name the trigger title according to your preference. This feature improves the organization of workflows by allowing users to identify and locate specific triggers quickly. Users can choose any name that aligns with their naming conventions, making managing multiple workflows within the platform easier.
***
## Editing Workflow Trigger Names
When creating a workflow trigger, you can name the trigger title according to your preference. This feature improves the organization of workflows by allowing users to identify and locate specific triggers quickly. Users can choose any name that aligns with their naming conventions, making managing multiple workflows within the platform easier.
 ***
## Adding Filters for a Workflow Trigger
Without a filter, the workflow will only trigger the default behavior. Adding a filter lets you narrow down the specific situations that will initiate the workflow. Each workflow trigger has specific filters, accessed by clicking + Add Filter.
***
## Adding Filters for a Workflow Trigger
Without a filter, the workflow will only trigger the default behavior. Adding a filter lets you narrow down the specific situations that will initiate the workflow. Each workflow trigger has specific filters, accessed by clicking + Add Filter.
 Once clicked, you can choose from the available filter options specific to that trigger. This customization option helps you tailor workflows to meet your unique requirements.
 Once satisfied with your filters, click Save Trigger, and you're done. Every Trigger has its own specifications, so we encourage you to read the articles inside this category to familiarize yourself with how they work and how to use them.
### scheduler-trigger
If you routinely need “run this every morning” or “the 2nd Friday at 10 AM,” the Scheduler Trigger can be your greatest ally. This trigger enables you to create automations that manage routines without requiring manual input or external tools. Let's learn how to use it!
***
## Adding Your Trigger
Start by navigating to the Workflows tab inside the Automation section and creating a new build.
Once satisfied with your filters, click Save Trigger, and you're done. Every Trigger has its own specifications, so we encourage you to read the articles inside this category to familiarize yourself with how they work and how to use them.
### scheduler-trigger
If you routinely need “run this every morning” or “the 2nd Friday at 10 AM,” the Scheduler Trigger can be your greatest ally. This trigger enables you to create automations that manage routines without requiring manual input or external tools. Let's learn how to use it!
***
## Adding Your Trigger
Start by navigating to the Workflows tab inside the Automation section and creating a new build.
 Click Add Trigger and select Scheduler from the Events options.
 Select your interval, which can be hourly, daily, weekly, monthly, or a cron expression.
 ### Hourly Frequency
When setting an Hourly Frequency, enter the numerical value for the total hours it should wait before repeating.
### Hourly Frequency
When setting an Hourly Frequency, enter the numerical value for the total hours it should wait before repeating.
 ### Daily Frequency
When setting a Daily Frequency, select the time of day the workflow should be triggered on.
### Daily Frequency
When setting a Daily Frequency, select the time of day the workflow should be triggered on.
 You can select multiple times on the same day to execute the workflow.
 ### Weekly Frequency
When setting a Weekly Frequency, first select the days of the week, then set the time of day the workflow should be triggered on.
### Weekly Frequency
When setting a Weekly Frequency, first select the days of the week, then set the time of day the workflow should be triggered on.
 ### Monthly Frequency
For Monthly Frequency, select whether the pattern will be days of the month (for numerical values, such as the 15th) or Week and day of the month (to set patterns such as the second Monday).
### Monthly Frequency
For Monthly Frequency, select whether the pattern will be days of the month (for numerical values, such as the 15th) or Week and day of the month (to set patterns such as the second Monday).
 If selecting “Days of month,” select the days and time of day the workflow should be triggered on.
 ### Setting a Cron Expression
Selecting Cron allows you to enter a detailed time for execution by using numerical values and asterisks to represent the exact minutes, hours, days, and months for your parameter. For example, 0 9 \* \* 1 to represent Mondays at 9 AM.
### Setting a Cron Expression
Selecting Cron allows you to enter a detailed time for execution by using numerical values and asterisks to represent the exact minutes, hours, days, and months for your parameter. For example, 0 9 \* \* 1 to represent Mondays at 9 AM.
 Use this table to aid yourself when setting a Cron Schedule.
| Number followed by the astericks reprensenting empty values | | | | |
| ----------------------------------------------------------- | ------- | ---------------- | ------- | --------------- |
| Minutes | Hours | Day of the month | Month | Day of the week |
| 0 to 59 | \* | \* | \* | \* |
| \* | 0 to 23 | \* | \* | \* |
| \* | \* | 1 to 31 | \* | \* |
| \* | \* | \* | 1 to 12 | \* |
| \* | \* | \* | \* | 0 to 6 |
### Advanced Settings
Open the advanced settings tab to further customize your trigger. In this section, you can toggle the option to skip triggering the workflow on weekends (1) and set a date (2) for the workflow to stop executing.
Use this table to aid yourself when setting a Cron Schedule.
| Number followed by the astericks reprensenting empty values | | | | |
| ----------------------------------------------------------- | ------- | ---------------- | ------- | --------------- |
| Minutes | Hours | Day of the month | Month | Day of the week |
| 0 to 59 | \* | \* | \* | \* |
| \* | 0 to 23 | \* | \* | \* |
| \* | \* | 1 to 31 | \* | \* |
| \* | \* | \* | 1 to 12 | \* |
| \* | \* | \* | \* | 0 to 6 |
### Advanced Settings
Open the advanced settings tab to further customize your trigger. In this section, you can toggle the option to skip triggering the workflow on weekends (1) and set a date (2) for the workflow to stop executing.
 ### Checking Your Trigger
Once you've set your schedule, click Check.
### Checking Your Trigger
Once you've set your schedule, click Check.
 This will show you a list containing your following executions. If they are correct, click Save Trigger to finalize.
 After this, you can add any actions you see fit to complete your workflow, and you're done. This trigger is compatible with all regular contact-based actions, so we hope it helps you manage your routines with less manual input. Perfect for newsletters, recurring events, and seasonal activities!
### user-login-trigger
This ****User Login**** workflow will be activated each time a user logs in to your membership platform, ensuring efficient management and monitoring of user activity, ultimately leading to an enhanced user experience and improved membership administration. The User Login trigger initiates the specified workflow when a user signs in to their membership account.
***
## Adding the User Login Trigger
To set up this trigger, click the\*\*\*\* “Add New Trigger”\*\*\*\* button and select the ****User Login**** option from the list of available triggers.
After this, you can add any actions you see fit to complete your workflow, and you're done. This trigger is compatible with all regular contact-based actions, so we hope it helps you manage your routines with less manual input. Perfect for newsletters, recurring events, and seasonal activities!
### user-login-trigger
This ****User Login**** workflow will be activated each time a user logs in to your membership platform, ensuring efficient management and monitoring of user activity, ultimately leading to an enhanced user experience and improved membership administration. The User Login trigger initiates the specified workflow when a user signs in to their membership account.
***
## Adding the User Login Trigger
To set up this trigger, click the\*\*\*\* “Add New Trigger”\*\*\*\* button and select the ****User Login**** option from the list of available triggers.
 ### Filters
You have the option to add additional filters using the ****“Add Filter”**** button.
### Filters
You have the option to add additional filters using the ****“Add Filter”**** button.
 ****📌NOTE:**** Here, you will not see any standard fields, but you can choose a ****Custom Field**** from your list to trigger the workflow.
 Once all filters have been selected, click the ****Save Trigger**** button in the bottom right corner to save the trigger.
 The ****User Login Trigger**** helps you stay on top of user activity, creating a more organized and personalized experience for your members. Set it up to simplify your workflow and make membership management easier.
### number-validation-trigger
Marketing is a numbers game; you always want to reach the largest number of people at the lowest possible expense. Validating the Numbers you're reaching out to makes your SMS marketing more efficient and gives you the best return on your investments by noting any number that can't be reached by SMS and allowing you to decide what happens next.
### Adding the Number Validation Trigger
To begin automating your response to these errors, you'll need to set up a new workflow trigger, click on\*\*\*\* “Add New Trigger”, \*\*\*\*search, and add the ****Number Validation**** option.
The ****User Login Trigger**** helps you stay on top of user activity, creating a more organized and personalized experience for your members. Set it up to simplify your workflow and make membership management easier.
### number-validation-trigger
Marketing is a numbers game; you always want to reach the largest number of people at the lowest possible expense. Validating the Numbers you're reaching out to makes your SMS marketing more efficient and gives you the best return on your investments by noting any number that can't be reached by SMS and allowing you to decide what happens next.
### Adding the Number Validation Trigger
To begin automating your response to these errors, you'll need to set up a new workflow trigger, click on\*\*\*\* “Add New Trigger”, \*\*\*\*search, and add the ****Number Validation**** option.
 ### Filters
You can add filters within the trigger by clicking the \*\*\*\*"Add Filter" \*\*\*\*button.
### Filters
You can add filters within the trigger by clicking the \*\*\*\*"Add Filter" \*\*\*\*button.
 ### Number Is
In the first dropdown, under Standard Field select ****“Number Type”****. You can specify the error type in the second dropdown, such as ****"Not Valid"**** for invalid numbers or ****"SMS Incapable"**** for landlines.
### Number Is
In the first dropdown, under Standard Field select ****“Number Type”****. You can specify the error type in the second dropdown, such as ****"Not Valid"**** for invalid numbers or ****"SMS Incapable"**** for landlines.
 ****📌Note:**** For easy identification, name your trigger accordingly, e.g., ****"Not Valid"**** or ****"SMS Incapable."****
### Adding Multiple Triggers
It's possible to add multiple triggers within a single workflow to handle different types of errors separately:
For instance, you can create one trigger for ****"Not Valid"**** errors and another for ****"SMS Incapable"**** errors. This allows for more targeted actions based on the specific error encountered.
****📌Note:**** For easy identification, name your trigger accordingly, e.g., ****"Not Valid"**** or ****"SMS Incapable."****
### Adding Multiple Triggers
It's possible to add multiple triggers within a single workflow to handle different types of errors separately:
For instance, you can create one trigger for ****"Not Valid"**** errors and another for ****"SMS Incapable"**** errors. This allows for more targeted actions based on the specific error encountered.
 ### Implementing If-Else Actions
To further refine your workflow, consider using If-Else actions:
* These actions enable you to split the workflow based on the type of error detected.
* For example, if the error is ****"Not Valid,"**** you might instruct your team to attempt contact via email instead.
* Conversely, if the error is ****"SMS Incapable,"**** the workflow could advise calling the contact, as the number might still be a functional landline.
### Implementing If-Else Actions
To further refine your workflow, consider using If-Else actions:
* These actions enable you to split the workflow based on the type of error detected.
* For example, if the error is ****"Not Valid,"**** you might instruct your team to attempt contact via email instead.
* Conversely, if the error is ****"SMS Incapable,"**** the workflow could advise calling the contact, as the number might still be a functional landline.
 ### Practical Applications and Tips
* ****Team Notifications****: Use the workflow to automatically notify your team about the nature of the error, suggesting alternative contact methods.
* ****Maintaining CRM Health****: Automating responses to validation Errors helps keep your CRM account in good standing by avoiding repeated attempts to obtain unreachable numbers.
By using the Number Validation Trigger, you can streamline your SMS marketing efforts, avoid unnecessary costs, and ensure your messages reach the right audience. This simple addition helps maintain clean contact lists and improves overall campaign success.
### Frequently Asked Questions
Ensure you've correctly applied filters and named your triggers for clarity. Reviewing the specific error messages can also provide insights into necessary adjustments.
Yes, by using If-Else actions, you can tailor your workflow to respond uniquely to each type of Validation Error.
### documents-and-contracts-trigger
The Documents and Contracts trigger enables the automation of actions based on changes in the status of a document or contract, or when new documents meet the specified trigger criteria.
Let's start by adding the trigger to a workflow.
### Practical Applications and Tips
* ****Team Notifications****: Use the workflow to automatically notify your team about the nature of the error, suggesting alternative contact methods.
* ****Maintaining CRM Health****: Automating responses to validation Errors helps keep your CRM account in good standing by avoiding repeated attempts to obtain unreachable numbers.
By using the Number Validation Trigger, you can streamline your SMS marketing efforts, avoid unnecessary costs, and ensure your messages reach the right audience. This simple addition helps maintain clean contact lists and improves overall campaign success.
### Frequently Asked Questions
Ensure you've correctly applied filters and named your triggers for clarity. Reviewing the specific error messages can also provide insights into necessary adjustments.
Yes, by using If-Else actions, you can tailor your workflow to respond uniquely to each type of Validation Error.
### documents-and-contracts-trigger
The Documents and Contracts trigger enables the automation of actions based on changes in the status of a document or contract, or when new documents meet the specified trigger criteria.
Let's start by adding the trigger to a workflow.
 ### Workflow Trigger Name
Update the trigger name to accurately reflect the criteria for entry.
### Workflow Trigger Name
Update the trigger name to accurately reflect the criteria for entry.
 ***
## Applying Filters
Refine the trigger conditions by adding filters. This allows for more precise control over when and how the trigger is executed.
***
## Applying Filters
Refine the trigger conditions by adding filters. This allows for more precise control over when and how the trigger is executed.
 Filter the trigger based on specific conditions like the document status, value, or recipient type.
 ### Recipient Type
Select the appropriate operator and choose the desired recipient type from the dropdown menu if prompted.
### Recipient Type
Select the appropriate operator and choose the desired recipient type from the dropdown menu if prompted.
 ### Status
The Status filter enables you to refine the trigger by selecting from the following options:
* ****Completed****: Activates the workflow once the document has been signed by all recipients.
* \*\*\*\*Declined: \*\*\*\*Initiates the workflow when the document is rejected by at least one recipient.
* ****Sent****: Triggers the workflow when the document is marked as “Sent.”
* ****Signed/Accepted****: Initiates the workflow when the document is signed or accepted by at least one recipient (particularly useful when multiple recipients are involved, allowing you to track when an individual has signed or accepted the document).
* ****Viewed****: Activates the workflow once the document is seen by anyone besides the user who sent it.
### Status
The Status filter enables you to refine the trigger by selecting from the following options:
* ****Completed****: Activates the workflow once the document has been signed by all recipients.
* \*\*\*\*Declined: \*\*\*\*Initiates the workflow when the document is rejected by at least one recipient.
* ****Sent****: Triggers the workflow when the document is marked as “Sent.”
* ****Signed/Accepted****: Initiates the workflow when the document is signed or accepted by at least one recipient (particularly useful when multiple recipients are involved, allowing you to track when an individual has signed or accepted the document).
* ****Viewed****: Activates the workflow once the document is seen by anyone besides the user who sent it.
 ### Template
Include this filter to specify the template that should activate the workflow.
### Template
Include this filter to specify the template that should activate the workflow.
 ### Value
Set a monetary threshold for the system to check before initiating the workflow. Use key operators such as "less than," "greater than," and "equal to" to filter documents and contracts within a specific monetary range.
### Value
Set a monetary threshold for the system to check before initiating the workflow. Use key operators such as "less than," "greater than," and "equal to" to filter documents and contracts within a specific monetary range.
 Review your configurations, then save the trigger to add it to your workflow. Add the relevant actions, such as notifying a team member or sending an invoice, and then publish and save the workflow!
### estimates-trigger
The Estimates trigger activates a workflow based on specific events related to estimates, making it valuable for automating follow-up actions, notifications, and responses tied to customer interactions with your estimates.
To add this trigger to your workflows, go to the Automation tab and select Workflows in your account. From there, either choose an existing workflow or create a new one.
Review your configurations, then save the trigger to add it to your workflow. Add the relevant actions, such as notifying a team member or sending an invoice, and then publish and save the workflow!
### estimates-trigger
The Estimates trigger activates a workflow based on specific events related to estimates, making it valuable for automating follow-up actions, notifications, and responses tied to customer interactions with your estimates.
To add this trigger to your workflows, go to the Automation tab and select Workflows in your account. From there, either choose an existing workflow or create a new one.
 Select the option to add a new trigger, then proceed to select the Estimates option from the Workflow Triggers list.
 Proceed to update the name of the Trigger within the Workflow Trigger Name field to accurately reflect its intended purpose.
 Click the + Add Filters button to refine the trigger criteria. Available standard field options include filtering by estimate status, estimate value, or the template used.
 Once you have chosen your preferred standard field, choose the corresponding operator from the dropdown menu.
 If you selected the "Is" or "Is Not" operator, choose the appropriate status or template when prompted. For the Estimate Value option, input the required value after selecting the Greater Than, Equal To, or Greater Than or Equal To operator.
 Save the trigger and begin adding actions to your workflow!
 By following these steps, you can efficiently configure the Estimates trigger in your workflows to automate important actions and responses based on customer interactions with your estimates.
### review-received-trigger
The Review Received Trigger will help you fully automate your review management, from filtering to responding, leading to more customer interactions and heightened efficiency. So let's check how to use it!
Create a new workflow or edit an existing one in Draft.
By following these steps, you can efficiently configure the Estimates trigger in your workflows to automate important actions and responses based on customer interactions with your estimates.
### review-received-trigger
The Review Received Trigger will help you fully automate your review management, from filtering to responding, leading to more customer interactions and heightened efficiency. So let's check how to use it!
Create a new workflow or edit an existing one in Draft.
 Click + Add New Trigger and select New Review Received.
 Click Add Filters to set added criteria. For this trigger, there are three main filters:
1. Is Review Spam: This allows you to separate reviews that the system has marked as Spam vs not spam.
2. Review Rating: This filter separates reviews depending on whether the rating is equal, greater, or less than the selected number.
3. Review Source: This allows you to separate reviews based on the page you received it on, this is especially useful if you're managing several branches or review pages.
Click Add Filters to set added criteria. For this trigger, there are three main filters:
1. Is Review Spam: This allows you to separate reviews that the system has marked as Spam vs not spam.
2. Review Rating: This filter separates reviews depending on whether the rating is equal, greater, or less than the selected number.
3. Review Source: This allows you to separate reviews based on the page you received it on, this is especially useful if you're managing several branches or review pages.
 You can mix and match these filters based on your needs, or if none were selected, you can use these filters as conditionals in your If/Else actions.
 And there you have it! Enjoy the simplified review responses and automated management this trigger brings you. Helping you connect with customers, make customers feel appreciated and heard, and build a strong, positive reputation online.
### shopify-triggers
As you create workflows and incorporate workflow triggers, you'll discover a category called ****Shopify Triggers****. These triggers are specifically designed to streamline your e-commerce operations on the Shopify platform by automating essential processes such as monitoring incomplete checkouts, tracking placed orders, and confirming order fulfillment.
To get started, within the workflow builder, click \*\*\*\*“Add New Trigger”, ****search for**** Shopify, \*\*\*\*and all the triggers associated with Shopify will appear. They Include:
* Abandoned Checkout.
* Order Placed, and
* Order Fulfilled.
And there you have it! Enjoy the simplified review responses and automated management this trigger brings you. Helping you connect with customers, make customers feel appreciated and heard, and build a strong, positive reputation online.
### shopify-triggers
As you create workflows and incorporate workflow triggers, you'll discover a category called ****Shopify Triggers****. These triggers are specifically designed to streamline your e-commerce operations on the Shopify platform by automating essential processes such as monitoring incomplete checkouts, tracking placed orders, and confirming order fulfillment.
To get started, within the workflow builder, click \*\*\*\*“Add New Trigger”, ****search for**** Shopify, \*\*\*\*and all the triggers associated with Shopify will appear. They Include:
* Abandoned Checkout.
* Order Placed, and
* Order Fulfilled.
 ### Abandoned Cart
The Abandoned Cart trigger allows businesses to reconnect with customers who browsed products but did not complete their purchases. This trigger can help recover lost sales by enabling workflows that send reminders, offer incentives, or address potential concerns that may have deterred buyers.
### Abandoned Cart
The Abandoned Cart trigger allows businesses to reconnect with customers who browsed products but did not complete their purchases. This trigger can help recover lost sales by enabling workflows that send reminders, offer incentives, or address potential concerns that may have deterred buyers.
 ### Order Placed
The Order Placed trigger activates workflows when customers place orders on your Shopify store. It automates tasks such as sending order confirmations, updating inventory, and initiating shipping processes, saving time and ensuring seamless order management.
### Order Placed
The Order Placed trigger activates workflows when customers place orders on your Shopify store. It automates tasks such as sending order confirmations, updating inventory, and initiating shipping processes, saving time and ensuring seamless order management.
 ### Order Fulfilled
The Order Fulfilled trigger is designed to automate actions once an order is marked as fulfilled. This trigger helps businesses handle post-fulfillment processes like sending delivery notifications, requesting customer feedback, and launching follow-up marketing campaigns to encourage repeat purchases.
### Order Fulfilled
The Order Fulfilled trigger is designed to automate actions once an order is marked as fulfilled. This trigger helps businesses handle post-fulfillment processes like sending delivery notifications, requesting customer feedback, and launching follow-up marketing campaigns to encourage repeat purchases.
 ��****NOTE:**** Each Shopify Trigger is covered in individual articles for detailed guidance.
Shopify Triggers provide a powerful way to optimize e-commerce workflows by automating critical processes, enhancing efficiency, and improving customer engagement. By incorporating these triggers into your workflows, you can simplify operations and focus on scaling your Shopify store.
### custom-object-created-trigger
The Custom Object Created Trigger enables you to automate workflows associated with your custom objects whenever a new custom object is created. By allowing you to filter the trigger based on specific field inputs, it provides advanced customization options to optimize workflows and improve operational efficiency.
***
## How It Works
Begin by creating a new workflow in the Automation section of your account or accessing an existing Objects workflow from the list.
��****Note****: The title of the Custom Object workflow option will vary depending on the Custom Objects you have configured in the Settings > Objects section and will take the format of `{{Custom Object Name}}` based workflow.
In this guide, we will use an Examples custom object to demonstrate how you can use the Custom Object Created Trigger.
��****NOTE:**** Each Shopify Trigger is covered in individual articles for detailed guidance.
Shopify Triggers provide a powerful way to optimize e-commerce workflows by automating critical processes, enhancing efficiency, and improving customer engagement. By incorporating these triggers into your workflows, you can simplify operations and focus on scaling your Shopify store.
### custom-object-created-trigger
The Custom Object Created Trigger enables you to automate workflows associated with your custom objects whenever a new custom object is created. By allowing you to filter the trigger based on specific field inputs, it provides advanced customization options to optimize workflows and improve operational efficiency.
***
## How It Works
Begin by creating a new workflow in the Automation section of your account or accessing an existing Objects workflow from the list.
��****Note****: The title of the Custom Object workflow option will vary depending on the Custom Objects you have configured in the Settings > Objects section and will take the format of `{{Custom Object Name}}` based workflow.
In this guide, we will use an Examples custom object to demonstrate how you can use the Custom Object Created Trigger.
 ### Add New Trigger
With your workflow builder now loaded, proceed to rename the workflow, then click the option to add a trigger and select the `{{Custom Object}}` Created trigger from the list.
### Add New Trigger
With your workflow builder now loaded, proceed to rename the workflow, then click the option to add a trigger and select the `{{Custom Object}}` Created trigger from the list.
 ### Workflow Trigger Name
Update the Workflow Trigger Name if necessary to provide a clear overview of the trigger's function.
### Workflow Trigger Name
Update the Workflow Trigger Name if necessary to provide a clear overview of the trigger's function.
 ### Applying Filters
Add filters to specify the conditions by which the workflow should be activated. You will be able to filter by the primary object field name and the object name.
### Applying Filters
Add filters to specify the conditions by which the workflow should be activated. You will be able to filter by the primary object field name and the object name.
 From the dropdown menu, select an operator to finalize the filter configuration. You can specify whether the trigger should activate when the field contains a particular phrase, if the phrase matches the input exactly, or if the field is empty or not. For phrase-based operators, enter the desired phrase in the designated field, ensuring each phrase is separated by pressing the Enter key.
 Review your trigger configuration, then click Save to add it to your workflow! You can then define object-specific actions, like creating, updating, or clearing custom object records, to automate your object management.
### custom-objects-changed-trigger
The Custom Objects Changed trigger enables you to automate a process based on changes made to your Custom Objects. This trigger is particularly valuable in scenarios where consistent actions or updates are required whenever specific changes occur within these Objects. By leveraging this functionality, you can simplify repetitive processes, saving time and reducing the likelihood of manual errors.
***
## How It Works
Begin by creating a new workflow in the Automation section of your account or accessing an existing Objects workflow from the list.
��****Note****: The title of the Custom Object workflow option will vary depending on the Custom Objects you have configured in the Settings > Objects section and will take the format of `{{Custom Object Name}}` based workflow.
In this guide, we will use an Examples Custom Object to demonstrate how you can use the Custom Objects Changed Trigger.
Review your trigger configuration, then click Save to add it to your workflow! You can then define object-specific actions, like creating, updating, or clearing custom object records, to automate your object management.
### custom-objects-changed-trigger
The Custom Objects Changed trigger enables you to automate a process based on changes made to your Custom Objects. This trigger is particularly valuable in scenarios where consistent actions or updates are required whenever specific changes occur within these Objects. By leveraging this functionality, you can simplify repetitive processes, saving time and reducing the likelihood of manual errors.
***
## How It Works
Begin by creating a new workflow in the Automation section of your account or accessing an existing Objects workflow from the list.
��****Note****: The title of the Custom Object workflow option will vary depending on the Custom Objects you have configured in the Settings > Objects section and will take the format of `{{Custom Object Name}}` based workflow.
In this guide, we will use an Examples Custom Object to demonstrate how you can use the Custom Objects Changed Trigger.
 ### Add New Trigger
Proceed to rename the workflow, then click the option to add a trigger, selecting the `{{Custom Object}}` Changed trigger from the list.
### Add New Trigger
Proceed to rename the workflow, then click the option to add a trigger, selecting the `{{Custom Object}}` Changed trigger from the list.
 ### Workflow Trigger Name
Update the Workflow Trigger Name if necessary to give a precise overview of the function of the trigger.
### Workflow Trigger Name
Update the Workflow Trigger Name if necessary to give a precise overview of the function of the trigger.
 ### Applying Filters
Add filters to specify the conditions by which the workflow should be activated. You will be able to filter by object custom fields and the type of the object.
### Applying Filters
Add filters to specify the conditions by which the workflow should be activated. You will be able to filter by object custom fields and the type of the object.
 From the dropdown menu, select an operator to finalize the filter configuration. You can specify whether the trigger should activate for all changes or specific changes.
 For operators that rely on specific changes, input the desired phrase in the value field. This field supports alphanumeric characters and symbols, allowing you to define precise criteria for the trigger.
Ensure the input accurately represents the conditions needed for the workflow to execute effectively.
For operators that rely on specific changes, input the desired phrase in the value field. This field supports alphanumeric characters and symbols, allowing you to define precise criteria for the trigger.
Ensure the input accurately represents the conditions needed for the workflow to execute effectively.
 Review your trigger configuration then click Save to add it to your workflow!
 You can then define object-specific actions, like creating, updating, or clearing custom object records to automate your object management.
### product-review-submitted-trigger
The Product Review Submitted trigger enables ecommerce teams to automate actions the moment a customer leaves a product review. This makes it easy to respond to feedback in real time, manage reputation workflows, and create engagement flows that improve customer experience.
### How to Add the Trigger to a Workflow
To begin using this trigger in your automations, open the Workflows section and select Product Review Submitted from the Ecommerce Stores category.
You can then define object-specific actions, like creating, updating, or clearing custom object records to automate your object management.
### product-review-submitted-trigger
The Product Review Submitted trigger enables ecommerce teams to automate actions the moment a customer leaves a product review. This makes it easy to respond to feedback in real time, manage reputation workflows, and create engagement flows that improve customer experience.
### How to Add the Trigger to a Workflow
To begin using this trigger in your automations, open the Workflows section and select Product Review Submitted from the Ecommerce Stores category.
 ***
## How the Trigger Works
You can control when the trigger activates using the available filters:
### Global Product
Targets a specific product (single-product selection only).
***
## How the Trigger Works
You can control when the trigger activates using the available filters:
### Global Product
Targets a specific product (single-product selection only).
 ### Review Comment
Triggers based on review text content using phrase-based conditions.
### Review Comment
Triggers based on review text content using phrase-based conditions.
 ### Review Headline
Filters by headline content, including conditions like contains a phrase or is not empty.
### Review Headline
Filters by headline content, including conditions like contains a phrase or is not empty.
 ### Review Rating
Filters reviews by star rating (e.g., 1–5 stars).
### Review Rating
Filters reviews by star rating (e.g., 1–5 stars).
 ### Store Name
Activates workflows for reviews submitted to a specific store.
### Store Name
Activates workflows for reviews submitted to a specific store.
 ### User Email
Targets reviews submitted by a specific customer email address.
### User Email
Targets reviews submitted by a specific customer email address.
 ### User Name
Filters based on the reviewer’s name.
### User Name
Filters based on the reviewer’s name.
 These filters make it possible to build highly targeted, review-driven automations tailored to specific products, customers, ratings, or stores.
The Product Review Submitted trigger transforms customer feedback into actionable automation. It enables teams to respond faster, engage smarter, and turn reviews into a powerful operational and growth asset.
### trigger-link-clicked-trigger
Trigger Links are designed to record customer interactions with URLs you create, but how do you automate actions after the link is clicked? The Trigger Link Clicked workflow trigger was built just for those instances, allowing you to pair suitable actions to the specific link that was clicked. Follow along to learn how you can set up this trigger in your workflow.
### Adding the Trigger Link Clicked Trigger
To get started with setting up your workflow, click on "Add New Trigger" and select Trigger Link Clicked.
These filters make it possible to build highly targeted, review-driven automations tailored to specific products, customers, ratings, or stores.
The Product Review Submitted trigger transforms customer feedback into actionable automation. It enables teams to respond faster, engage smarter, and turn reviews into a powerful operational and growth asset.
### trigger-link-clicked-trigger
Trigger Links are designed to record customer interactions with URLs you create, but how do you automate actions after the link is clicked? The Trigger Link Clicked workflow trigger was built just for those instances, allowing you to pair suitable actions to the specific link that was clicked. Follow along to learn how you can set up this trigger in your workflow.
### Adding the Trigger Link Clicked Trigger
To get started with setting up your workflow, click on "Add New Trigger" and select Trigger Link Clicked.
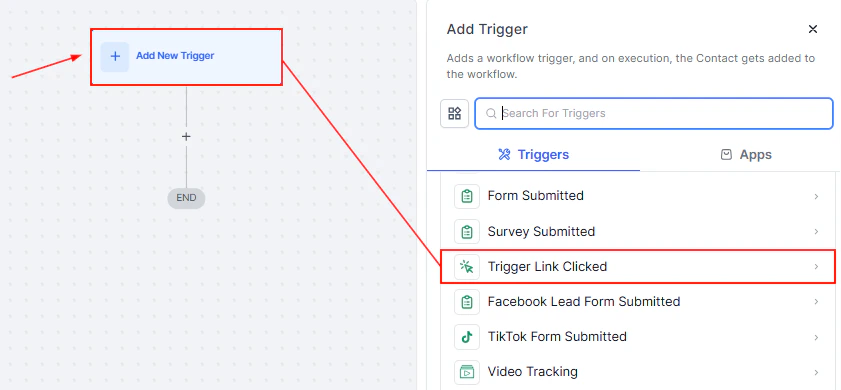 📌\*\*\*\*NOTE: \*\*\*\*To publish a workflow after adding a trigger, you must establish corresponding actions. Without actions, you can only save the workflow.
### Add Filter
Click the "Add Filters" button to choose from the standard filter or custom filters.
📌\*\*\*\*NOTE: \*\*\*\*To publish a workflow after adding a trigger, you must establish corresponding actions. Without actions, you can only save the workflow.
### Add Filter
Click the "Add Filters" button to choose from the standard filter or custom filters.
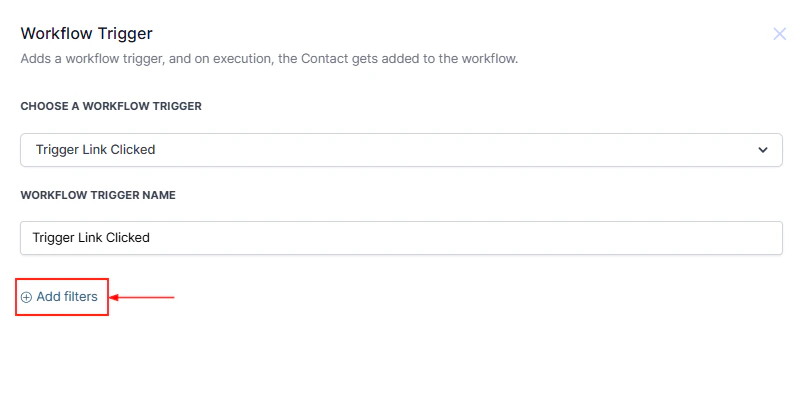 ### Trigger Link
You can filter your trigger by clicking Add Filters and selecting Trigger Link. In the second dropdown, select the trigger link you would like to use for the workflow.
### Trigger Link
You can filter your trigger by clicking Add Filters and selecting Trigger Link. In the second dropdown, select the trigger link you would like to use for the workflow.
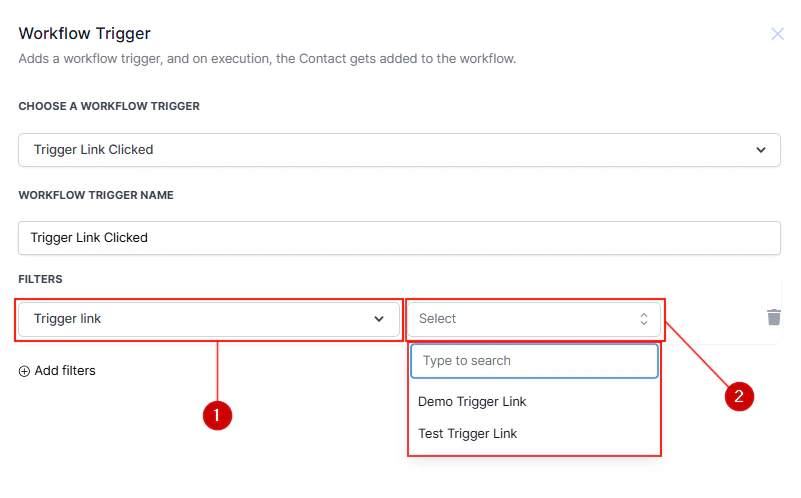 ��****NOTE****: Only one trigger link can be added to each trigger. To activate a workflow when other trigger links are clicked, add multiple triggers to the workflow.
Once you’ve set up your filters, click ****"Save Trigger"**** to finalize your trigger link clicked workflow.
Add workflow actions to automate tasks such as sending internal notifications or customer follow-ups.
Once you’ve set up the trigger and its actions, Publish and Save the workflow to enable its functionality.
��****NOTE****: Only one trigger link can be added to each trigger. To activate a workflow when other trigger links are clicked, add multiple triggers to the workflow.
Once you’ve set up your filters, click ****"Save Trigger"**** to finalize your trigger link clicked workflow.
Add workflow actions to automate tasks such as sending internal notifications or customer follow-ups.
Once you’ve set up the trigger and its actions, Publish and Save the workflow to enable its functionality.
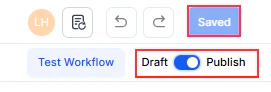 The Trigger Link Clicked trigger helps businesses save time and improve customer engagement by streamlining repetitive tasks. By setting up this workflow, you can ensure timely responses, efficient follow-ups, and a more tailored customer experience.
***
## FAQs
A single workflow can have multiple triggers. Each trigger can have its own filters and, in the Advanced Builder, its own Go-To connection to a specific point in the workflow. This lets you handle different entry conditions within a single automation.
A trigger determines what event starts the workflow (for example, Contact Created). Filters refine when the trigger fires — for instance, only when the new contact has a specific tag or came from a particular source. Filters act like AND conditions on top of the trigger event.
Only if the Allow Re-entry setting is enabled on the workflow. By default, a contact can only enroll in a given workflow once. Enable re-entry for recurring use cases like birthday reminders, appointment confirmations, or subscription renewals.
This can cause a race condition where both triggers attempt to enroll the contact simultaneously. To mitigate this, add a short Wait step (1–2 minutes) at the start of the workflow and use specific filters so only the intended trigger fires. See the Workflow Troubleshooting page for detailed guidance.
Common causes include: the workflow is in Draft mode (not Published), a filter condition isn't being met, the contact was already enrolled and re-entry is disabled, or the event type is slightly different from what the trigger expects (for example, using Customer Booked Appointment instead of Appointment Status for a booking trigger). Check Execution Logs to confirm whether the trigger event was received.
The Trigger Link Clicked trigger helps businesses save time and improve customer engagement by streamlining repetitive tasks. By setting up this workflow, you can ensure timely responses, efficient follow-ups, and a more tailored customer experience.
***
## FAQs
A single workflow can have multiple triggers. Each trigger can have its own filters and, in the Advanced Builder, its own Go-To connection to a specific point in the workflow. This lets you handle different entry conditions within a single automation.
A trigger determines what event starts the workflow (for example, Contact Created). Filters refine when the trigger fires — for instance, only when the new contact has a specific tag or came from a particular source. Filters act like AND conditions on top of the trigger event.
Only if the Allow Re-entry setting is enabled on the workflow. By default, a contact can only enroll in a given workflow once. Enable re-entry for recurring use cases like birthday reminders, appointment confirmations, or subscription renewals.
This can cause a race condition where both triggers attempt to enroll the contact simultaneously. To mitigate this, add a short Wait step (1–2 minutes) at the start of the workflow and use specific filters so only the intended trigger fires. See the Workflow Troubleshooting page for detailed guidance.
Common causes include: the workflow is in Draft mode (not Published), a filter condition isn't being met, the contact was already enrolled and re-entry is disabled, or the event type is slightly different from what the trigger expects (for example, using Customer Booked Appointment instead of Appointment Status for a booking trigger). Check Execution Logs to confirm whether the trigger event was received.