> ## Documentation Index
> Fetch the complete documentation index at: https://help.hoopai.com/llms.txt
> Use this file to discover all available pages before exploring further.
# Workflow Actions
> Reference for all workflow actions in the HoopAI Platform — messaging, contacts, payments, AI, integrations, and more.
Actions are the steps that execute when a workflow trigger fires. The HoopAI Platform provides over 100 actions organized by category.
### send-sms-action
The Send SMS workflow action allows you to send automated text messages to your contacts when a workflow is triggered. Whether you’re sharing updates, confirmations, or promotional messages, this action streamlines communication and ensures your customers receive timely information.
## Setting Up the Send SMS Action
To get started, click on the “+” icon in your workflow builder to add a new action, then select “Send SMS” from the list.
 ***
## Edit Action
### Templates
If you would like to use an SMS template that you’ve created previously, click on the Templates dropdown and choose the template you would like to use, or search for the template name in the search bar.
***
## Edit Action
### Templates
If you would like to use an SMS template that you’ve created previously, click on the Templates dropdown and choose the template you would like to use, or search for the template name in the search bar.
 ### Message
If you’re not using a template, type your SMS directly into the Message box.
### Message
If you’re not using a template, type your SMS directly into the Message box.
 If you need some help writing your message, click “Write with AI.”
 This will open a module where you must select a tone (1), enter your prompt (2), and generate your message (3).
 Make any necessary changes to your message, and when you're ready, click “Use Message” to add it to your workflow builder.
 ### Custom Values & Trigger Links
Personalize the SMS using Custom Values such as the contact's name or event details. You can also add trigger links to direct recipients to a funnel, webpage, or other destination.
### Custom Values & Trigger Links
Personalize the SMS using Custom Values such as the contact's name or event details. You can also add trigger links to direct recipients to a funnel, webpage, or other destination.
 ### Add Attachment
If you would like to add an attachment, such as a file or image, you can do so by clicking the "Add attachment" button and selecting the file or image you would like to include.
### Add Attachment
If you would like to add an attachment, such as a file or image, you can do so by clicking the "Add attachment" button and selecting the file or image you would like to include.
 ### Add Files Through the URL
Additionally, you can add a file through URL by inputting the URL into the field and then clicking on the "+Add" button to add the file.
### Add Files Through the URL
Additionally, you can add a file through URL by inputting the URL into the field and then clicking on the "+Add" button to add the file.
 ### Test Phone Number
Before saving your action, test the SMS by entering a demo phone number and clicking Send Test SMS. Make sure to use a real phone number to review how the message appears on a mobile device.
### Test Phone Number
Before saving your action, test the SMS by entering a demo phone number and clicking Send Test SMS. Make sure to use a real phone number to review how the message appears on a mobile device.
 When you're satisfied, click Save Action to finalize.
 ***
## SMS Statistics
When your workflow is live and customers have run through the workflow, you will then be able to see the statistics of SMS messages sent to contacts.
1. Delivered: The number of SMS messages delivered to contacts is seen here.
2. Clicked: This shows the number of contacts that clicked on the SMS message.
3. Failed: You can see the number of SMS messages that failed to deliver to contacts.
4. View Details: Click on "view details" to see the full details of each statistic.
***
## SMS Statistics
When your workflow is live and customers have run through the workflow, you will then be able to see the statistics of SMS messages sent to contacts.
1. Delivered: The number of SMS messages delivered to contacts is seen here.
2. Clicked: This shows the number of contacts that clicked on the SMS message.
3. Failed: You can see the number of SMS messages that failed to deliver to contacts.
4. View Details: Click on "view details" to see the full details of each statistic.
 Additionally, you can access the “Stats View” by clicking the pie-chart icon.
 This will give you an overview of the stats from the last 30 days.
 The Send SMS action simplifies communication by automating text messages and allowing you to personalize, test, and analyze your messaging strategy. Use this feature to connect with your contacts more efficiently and maintain strong engagement with your audience.
### send-email-action
The Send Email workflow action will enable you to send an outbound email to a contact when your workflow is triggered. Utilize this action when a form or survey is submitted to quickly follow up with a client, or send emails triggered by certain events to cut down on day-to-day manual actions.
To get started, click on the\*\*\*\* “+”\*\*\*\* icon to add a Workflow action, and select ****Send Email****.
The Send SMS action simplifies communication by automating text messages and allowing you to personalize, test, and analyze your messaging strategy. Use this feature to connect with your contacts more efficiently and maintain strong engagement with your audience.
### send-email-action
The Send Email workflow action will enable you to send an outbound email to a contact when your workflow is triggered. Utilize this action when a form or survey is submitted to quickly follow up with a client, or send emails triggered by certain events to cut down on day-to-day manual actions.
To get started, click on the\*\*\*\* “+”\*\*\*\* icon to add a Workflow action, and select ****Send Email****.
 ### Action Name
Rename the workflow action to enhance communication and collaboration among team members by using consistent and descriptive naming conventions that indicate the function or purpose of the action.
### Action Name
Rename the workflow action to enhance communication and collaboration among team members by using consistent and descriptive naming conventions that indicate the function or purpose of the action.
 ### From Name
In the\*\*\*\* From Name\*\*\*\* field, you should enter the sender's name. You can also click on the tag icon to use the custom values.
### From Name
In the\*\*\*\* From Name\*\*\*\* field, you should enter the sender's name. You can also click on the tag icon to use the custom values.
 ### From Email
In the \*\*\*\*From Email \*\*\*\*field, you should enter the sender's email. You can also click on the tag icon to use the custom values.
### From Email
In the \*\*\*\*From Email \*\*\*\*field, you should enter the sender's email. You can also click on the tag icon to use the custom values.
 📌 ****NOTE****: If the 'From Name' and 'From Email' fields are empty, then the Email will be sent using the Default Values.
### Additional Recipients
You can CC or BCC additional recipients by clicking their respective icons.
📌 ****NOTE****: If the 'From Name' and 'From Email' fields are empty, then the Email will be sent using the Default Values.
### Additional Recipients
You can CC or BCC additional recipients by clicking their respective icons.
 This will open a field for you to add their email or select a custom value to fill it for you; this email will not be reflected in the Email Stats.
 ### Subject
Type the subject of the email in this field. You can also click on the tag icon to use the custom values.
### Subject
Type the subject of the email in this field. You can also click on the tag icon to use the custom values.
 ### Create Email
Select how you want to build your email. You can select to write it directly in the builder (1), the Smart Builder to create a new template in the Marketing builder (2), or use an already created template (3).
### Create Email
Select how you want to build your email. You can select to write it directly in the builder (1), the Smart Builder to create a new template in the Marketing builder (2), or use an already created template (3).
 ### Message
If you are not using an email template, you can type the body of the message in the message box. You have a variety of text editing options available to customize your email, including typography, alignment, bullet points, and adding images.
You can use custom values to input user or contact info as well as add trigger links to your email using the corresponding dropdowns in the message box to customize your email.
### Message
If you are not using an email template, you can type the body of the message in the message box. You have a variety of text editing options available to customize your email, including typography, alignment, bullet points, and adding images.
You can use custom values to input user or contact info as well as add trigger links to your email using the corresponding dropdowns in the message box to customize your email.
 Optionally, click "Write with AI" to launch the AI Assistant, then enter your desired prompt (e.g., "Write a promotional email encouraging users to take advantage of holiday discounts"). You may also select your preferred tone for the email; this is optional, and the default is a neutral tone.
Once ready, click "Generate" to have the AI compose the email for you.
Optionally, click "Write with AI" to launch the AI Assistant, then enter your desired prompt (e.g., "Write a promotional email encouraging users to take advantage of holiday discounts"). You may also select your preferred tone for the email; this is optional, and the default is a neutral tone.
Once ready, click "Generate" to have the AI compose the email for you.
 ### Add Attachments
If you would like to add attachments to your email, such as files or images, click on the Add attachment button and select the file or image you’d like to add.
### Add Attachments
If you would like to add attachments to your email, such as files or images, click on the Add attachment button and select the file or image you’d like to add.
 ### Test Emails
Enter an email address in the Test Emails field and click on Send Test Email. Once you are satisfied with the demo email, you’ll be ready to send it out to your contacts.
### Test Emails
Enter an email address in the Test Emails field and click on Send Test Email. Once you are satisfied with the demo email, you’ll be ready to send it out to your contacts.
 ### Email Delivery Statistics
Once your workflow is live and you’ve had customers run through it, you’ll be able to access the email delivery statistics. The Email Delivery Statistics provides metrics on sent emails, including the number and details of emails delivered, opened, clicked, replied, bounced, accepted, stored, and rejected by contacts. Additionally, it reveals the number of contacts that have complained/reported the email.
### Email Delivery Statistics
Once your workflow is live and you’ve had customers run through it, you’ll be able to access the email delivery statistics. The Email Delivery Statistics provides metrics on sent emails, including the number and details of emails delivered, opened, clicked, replied, bounced, accepted, stored, and rejected by contacts. Additionally, it reveals the number of contacts that have complained/reported the email.
 1. ****Delivered****: Shows the numbers and details of emails delivered to the contacts under this workflow.
2. ****Opened****: Shows the numbers and details of contacts that opened the mail under this workflow.
3. ****Clicked****: Shows the number and details of contacts that clicked on the mail.
4. ****Replied****: Shows the numbers and details of contacts that replied to the mail within this workflow.
5. ****Bounced****: You can see the numbers and details of emails that got bounced.
6. ****Accepted:**** Here, you will see the number of accepted emails.
7. ****Stored****: You can see the number of stored emails here.
8. ****Rejected****: This shows the number of emails that were rejected by the contact.
9. ****Complained****: Here you will see the number of contacts who complained/reported the email.
\*\*
1. ****Delivered****: Shows the numbers and details of emails delivered to the contacts under this workflow.
2. ****Opened****: Shows the numbers and details of contacts that opened the mail under this workflow.
3. ****Clicked****: Shows the number and details of contacts that clicked on the mail.
4. ****Replied****: Shows the numbers and details of contacts that replied to the mail within this workflow.
5. ****Bounced****: You can see the numbers and details of emails that got bounced.
6. ****Accepted:**** Here, you will see the number of accepted emails.
7. ****Stored****: You can see the number of stored emails here.
8. ****Rejected****: This shows the number of emails that were rejected by the contact.
9. ****Complained****: Here you will see the number of contacts who complained/reported the email.
\*\*
 Select the “View All Statistics” button to load the \*\*accepted, stored, rejected, ****and**** complained \*\*\*\*statistics.
 Additionally, you can access the “Stats View” by clicking the pie-chart icon.
This will give you an overview of the stats from the last 30 days.
Additionally, you can access the “Stats View” by clicking the pie-chart icon.
This will give you an overview of the stats from the last 30 days.
 The ****Send Email workflow action**** is a great feature designed to streamline your communication processes. Automating email delivery based on specific triggers ensures timely and efficient follow-ups while reducing manual effort. Whether you use customized templates or craft messages directly within the action. With detailed delivery statistics, you can monitor performance and optimize your email campaigns.
### manual-action-to-sms
The Manual SMS action creates a manual task for a person to send an SMS directly to the contact. (You can find the manual tasks under ****Contacts > Manual Actions****). Utilize the Manual SMS workflow action when you want a team member to follow up with a client after a certain event has been triggered.
***
## Creating Manual Actions In Workflows
### Assign To User
To add manual actions to a user in your CRM, you need to first assign the user to a specific workflow or campaign. This can be done using the Assign To User action in your workflow or campaign.
The ****Send Email workflow action**** is a great feature designed to streamline your communication processes. Automating email delivery based on specific triggers ensures timely and efficient follow-ups while reducing manual effort. Whether you use customized templates or craft messages directly within the action. With detailed delivery statistics, you can monitor performance and optimize your email campaigns.
### manual-action-to-sms
The Manual SMS action creates a manual task for a person to send an SMS directly to the contact. (You can find the manual tasks under ****Contacts > Manual Actions****). Utilize the Manual SMS workflow action when you want a team member to follow up with a client after a certain event has been triggered.
***
## Creating Manual Actions In Workflows
### Assign To User
To add manual actions to a user in your CRM, you need to first assign the user to a specific workflow or campaign. This can be done using the Assign To User action in your workflow or campaign.
 ### Assign User Workflow Step
Once you add this step to your workflow, it will look like this image. Any manual actions you add will be assigned to the user you chose in this step.
### Assign User Workflow Step
Once you add this step to your workflow, it will look like this image. Any manual actions you add will be assigned to the user you chose in this step.
 ### Adding Manual Actions
Once you have added the Assign To User action to your workflow or campaign, you can add manual action steps for that user. To add a manual SMS action, click on the ****“+”**** icon and select ****Manual Action To SMS****.
### Adding Manual Actions
Once you have added the Assign To User action to your workflow or campaign, you can add manual action steps for that user. To add a manual SMS action, click on the ****“+”**** icon and select ****Manual Action To SMS****.
 ### Templates
You can use previously created templates for your messages by selecting the Templates field in your workflow and choosing the one you want from the available options in your CRM.
### Templates
You can use previously created templates for your messages by selecting the Templates field in your workflow and choosing the one you want from the available options in your CRM.
 ### Message
However, if you prefer to create a customized message, you can type it in the Message field instead. Moreover, you can use specific custom values for your message, such as the contact name, by clicking on the \*\*\*\*Custom Values option (Tag icon) \*\*\*\*and ****Trigger Links (Lightning bolt icon)****.
### Message
However, if you prefer to create a customized message, you can type it in the Message field instead. Moreover, you can use specific custom values for your message, such as the contact name, by clicking on the \*\*\*\*Custom Values option (Tag icon) \*\*\*\*and ****Trigger Links (Lightning bolt icon)****.
 ### Add Attachment
To add an attachment to your message, click on the green Add Attachment button and select the file you want to attach from your computer.
### Add Attachment
To add an attachment to your message, click on the green Add Attachment button and select the file you want to attach from your computer.
 ### Add Files Through URL
Alternatively, you could add files via URL by entering the URL in the dedicated field and clicking on the ****+Add**** button to include it.
### Add Files Through URL
Alternatively, you could add files via URL by entering the URL in the dedicated field and clicking on the ****+Add**** button to include it.
 ### Test Phone Number
Before the action step is added to the workflow you can add a phone number to test what the SMS would look like when it gets to the customer. Remember to add the country codes of the number you are using for the test run.
### Test Phone Number
Before the action step is added to the workflow you can add a phone number to test what the SMS would look like when it gets to the customer. Remember to add the country codes of the number you are using for the test run.
 ### Save Action
And always remember to save the Action.
### Save Action
And always remember to save the Action.
 ### Manual Actions Workflow Step
If needed, you can click on the Manual SMS and edit it or add more steps. Finally, toggle Publish to activate the workflow.
### Manual Actions Workflow Step
If needed, you can click on the Manual SMS and edit it or add more steps. Finally, toggle Publish to activate the workflow.
 Manual SMS actions are a practical way to ensure personal follow-ups with clients are handled efficiently. With options like message templates, custom values, and file attachments, it’s easy to create tailored, professional messages that resonate with your audience. Integrating manual SMS into your workflows allows you to maintain a more personal touch while keeping your team aligned and focused on client engagement.
### manual-action-to-call
The Manual Call workflow action creates a manual task for an individual to directly send a Call to a contact. You can locate these manual tasks in the ****Contacts > Manual Actions**** section. This action is great for when you want a team member to follow up with a contact in your CRM following a certain trigger or event.
***
## Creating Manual Actions In Workflows
### Assign To User
The first thing you need to do to add manual actions to a user in your CRM is to assign that user to a particular workflow or campaign. You can do that with a workflow or campaign action called ****"Assign To User".****
### Assign User Workflow Step
Once you add this step to your workflow, it will look like this image. Now, any manual actions you add will be assigned to the user you chose in this step.
Manual SMS actions are a practical way to ensure personal follow-ups with clients are handled efficiently. With options like message templates, custom values, and file attachments, it’s easy to create tailored, professional messages that resonate with your audience. Integrating manual SMS into your workflows allows you to maintain a more personal touch while keeping your team aligned and focused on client engagement.
### manual-action-to-call
The Manual Call workflow action creates a manual task for an individual to directly send a Call to a contact. You can locate these manual tasks in the ****Contacts > Manual Actions**** section. This action is great for when you want a team member to follow up with a contact in your CRM following a certain trigger or event.
***
## Creating Manual Actions In Workflows
### Assign To User
The first thing you need to do to add manual actions to a user in your CRM is to assign that user to a particular workflow or campaign. You can do that with a workflow or campaign action called ****"Assign To User".****
### Assign User Workflow Step
Once you add this step to your workflow, it will look like this image. Now, any manual actions you add will be assigned to the user you chose in this step.
 ### Adding the Manual Action
After you finish adding the \*\*\*\*"Assign To User" \*\*\*\*step, you will need to add the manual action steps. In this case, we would be adding the ****"Manual Action To Call"****. The action selectors will look like this in your workflows.
### Adding the Manual Action
After you finish adding the \*\*\*\*"Assign To User" \*\*\*\*step, you will need to add the manual action steps. In this case, we would be adding the ****"Manual Action To Call"****. The action selectors will look like this in your workflows.
 ### Manual Action Workflow Step
Once added to your workflow, your manual action will look like this and you can edit it as and when need be.
### Manual Action Workflow Step
Once added to your workflow, your manual action will look like this and you can edit it as and when need be.
 Adding ****Manual Action to Call**** into your workflows ensures timely communication with your contacts. Assign tasks, customize and add more actions that suit the purpose of the workflow, and save your workflow to keep everything running smoothly while staying adaptable to your team’s needs.
### voicemail-action
The Voicemail action lets you send pre-recorded voicemail messages directly to your contacts, adding a personal touch to your automated workflows. This feature ensures you can communicate important messages efficiently while maintaining a professional tone.
### Assign User Action
Start by adding the ****“Assign To User”**** action to the workflow. This action helps you to direct calls to the assigned user's phone number. From here, you can select the user or user(s) you would like to assign to the workflow actions.
Adding ****Manual Action to Call**** into your workflows ensures timely communication with your contacts. Assign tasks, customize and add more actions that suit the purpose of the workflow, and save your workflow to keep everything running smoothly while staying adaptable to your team’s needs.
### voicemail-action
The Voicemail action lets you send pre-recorded voicemail messages directly to your contacts, adding a personal touch to your automated workflows. This feature ensures you can communicate important messages efficiently while maintaining a professional tone.
### Assign User Action
Start by adding the ****“Assign To User”**** action to the workflow. This action helps you to direct calls to the assigned user's phone number. From here, you can select the user or user(s) you would like to assign to the workflow actions.
 ****📌Note:**** If selecting multiple users, you can choose to assign them equally or unequally. Assigning users equally will cycle through the users you have chosen, while assigning unequally will give you the option to add traffic weightage to each user.
### Add Voicemail Action
To add this action to your workflow, click on the\*\*\*\* “+”\*\*\*\* icon to create a new workflow action and select the ****Voicemail**** action.
****📌Note:**** If selecting multiple users, you can choose to assign them equally or unequally. Assigning users equally will cycle through the users you have chosen, while assigning unequally will give you the option to add traffic weightage to each user.
### Add Voicemail Action
To add this action to your workflow, click on the\*\*\*\* “+”\*\*\*\* icon to create a new workflow action and select the ****Voicemail**** action.
 ### Drop Your File
You can upload the voicemail file by clicking on the \*\*\*\*"Upload File" \*\*\*\*button select the file you want to upload. You can upload the file in \*\*\*\*MP3 \*\*\*\*or ****WAV**** format.
### Drop Your File
You can upload the voicemail file by clicking on the \*\*\*\*"Upload File" \*\*\*\*button select the file you want to upload. You can upload the file in \*\*\*\*MP3 \*\*\*\*or ****WAV**** format.
 Remember to ****publish**** and ****save**** the workflow to activate the voicemail function.
 With the Voicemail action, you can add a personal touch to your automated workflows by sending pre-recorded messages directly to your contacts. This simple yet effective feature helps you stay connected and ensures your messages are delivered in a timely and professional manner.
### Important Notes
If the voicemail file is not working, try these steps;
* Visit [https://online-audio-converter.com/](https://online-audio-converter.com/)[.](https://online-audio-converter.com/)
* Upload your voicemail file.
* Select 64kbps MP3 (lower file sizes perform better).
* Download the converted file and re-upload it to your workflow.
### record-voicemail-action
The "Record Voicemail" action enables callers to leave a voicemail when no one is available to answer the phone, effectively capturing important customer inquiries or feedback when live agents are unavailable. So, let's check how to use it.
Navigate to the Workflow tab inside the Automation section and click “Create Workflow.”
With the Voicemail action, you can add a personal touch to your automated workflows by sending pre-recorded messages directly to your contacts. This simple yet effective feature helps you stay connected and ensures your messages are delivered in a timely and professional manner.
### Important Notes
If the voicemail file is not working, try these steps;
* Visit [https://online-audio-converter.com/](https://online-audio-converter.com/)[.](https://online-audio-converter.com/)
* Upload your voicemail file.
* Select 64kbps MP3 (lower file sizes perform better).
* Download the converted file and re-upload it to your workflow.
### record-voicemail-action
The "Record Voicemail" action enables callers to leave a voicemail when no one is available to answer the phone, effectively capturing important customer inquiries or feedback when live agents are unavailable. So, let's check how to use it.
Navigate to the Workflow tab inside the Automation section and click “Create Workflow.”
 Set the trigger as “Start IVR.”
 Click the Plus sign icon to add an action and select “Record voicemail.”
 1. Enable “Play Beep” to include a sound indicating that the recording has started.
2. Add the seconds of silence the automation should wait before stopping the recording.
3. Add a key that contacts can press to Stop Recording.
1. Enable “Play Beep” to include a sound indicating that the recording has started.
2. Add the seconds of silence the automation should wait before stopping the recording.
3. Add a key that contacts can press to Stop Recording.
 Set a max time for the recording; this will be entered in seconds.
 By enabling Add Voice Instructions, you may introduce a message for your contacts. You have two main options for this:
1. Say a message: This lets you input your desired message in writing.
2. Play a message: With it, you can upload a recording to be played to the caller.
By enabling Add Voice Instructions, you may introduce a message for your contacts. You have two main options for this:
1. Say a message: This lets you input your desired message in writing.
2. Play a message: With it, you can upload a recording to be played to the caller.
 Set the number of loops to define how many times the message should repeat.
 Click "Save Action" to apply the settings.
 Add any actions you want to happen once the message is recorded and you're done! This feature ensures no important messages are missed, even if immediate contact isn't possible, improving your customers' experience.
### send-internal-notification
To notify an assigned user in an active workflow, you can use the Send Internal Notification action. To begin, click the plus (+) button in the workflow action menu, then select Send Internal Notification. This feature allows you to send internal notifications to team members when specific events, such as the submission of a new lead form, are triggered.
Add any actions you want to happen once the message is recorded and you're done! This feature ensures no important messages are missed, even if immediate contact isn't possible, improving your customers' experience.
### send-internal-notification
To notify an assigned user in an active workflow, you can use the Send Internal Notification action. To begin, click the plus (+) button in the workflow action menu, then select Send Internal Notification. This feature allows you to send internal notifications to team members when specific events, such as the submission of a new lead form, are triggered.
 ***
## Notification Type
Four types of notifications can be sent to individuals other than the contact: Email, Notification, SMS, and WhatsApp. Select your preferred notification method from the dropdown menu to continue.
***
## Notification Type
Four types of notifications can be sent to individuals other than the contact: Email, Notification, SMS, and WhatsApp. Select your preferred notification method from the dropdown menu to continue.
 ***
## Email
### From Name
In the From Name field, input the sender's name, or click the tag icon to insert a custom value.
***
## Email
### From Name
In the From Name field, input the sender's name, or click the tag icon to insert a custom value.
 ### From Email
For the From Email field, enter the sender’s email address, with the option to use custom values if needed.
### From Email
For the From Email field, enter the sender’s email address, with the option to use custom values if needed.
 ### To User Type
Under To User Type, select who will receive the email notification. You can send it to all users, the assigned user, a custom email address, or a particular user. If the contact has not been assigned, you can manually designate a specific user.
### To User Type
Under To User Type, select who will receive the email notification. You can send it to all users, the assigned user, a custom email address, or a particular user. If the contact has not been assigned, you can manually designate a specific user.
 ### CC and BCC
To add CC and BCC recipients to internal email notifications, select the appropriate option and enter their email, making internal communication faster.
### CC and BCC
To add CC and BCC recipients to internal email notifications, select the appropriate option and enter their email, making internal communication faster.
 ### Subject
In the Subject field, enter the subject of the email.
### Subject
In the Subject field, enter the subject of the email.
 ### Templates
Choose a template from the Template section, or if you prefer to compose a custom message, select "None," which will enable the Message Body field.
### Templates
Choose a template from the Template section, or if you prefer to compose a custom message, select "None," which will enable the Message Body field.
 ### Message
In this section, you can write your message and include custom values or trigger links.
### Message
In this section, you can write your message and include custom values or trigger links.
 ### Add Attachment
To add attachments, click on the attachment icon and select the desired file from your device.
### Add Attachment
To add attachments, click on the attachment icon and select the desired file from your device.
 ### Test Email
To preview the email, use the Test Emails feature by entering a valid email address and clicking Send Test Mail.
### Test Email
To preview the email, use the Test Emails feature by entering a valid email address and clicking Send Test Mail.
 ***
## Notification
### Title
Enter the notification title in the Title field. You may also insert custom values by clicking the tag icon.
***
## Notification
### Title
Enter the notification title in the Title field. You may also insert custom values by clicking the tag icon.
 ### Message
In the Message Body field, input the content of the notification message, with the option to add custom values and trigger links.
### Message
In the Message Body field, input the content of the notification message, with the option to add custom values and trigger links.
 ### Redirect Page
Select the Page to which the notification should redirect the user.
### Redirect Page
Select the Page to which the notification should redirect the user.
 ### To User Type
Select who will receive the notification. You can send it to all users, the assigned user, or a particular user.
### To User Type
Select who will receive the notification. You can send it to all users, the assigned user, or a particular user.
 ***
## SMS Notifications
### To User Type
Select the recipient in the To User Type field.
***
## SMS Notifications
### To User Type
Select the recipient in the To User Type field.
 ### Template
Choose a template from the Template section, or if you prefer to compose a custom message, select "None," which will enable the Message Body field.
### Template
Choose a template from the Template section, or if you prefer to compose a custom message, select "None," which will enable the Message Body field.
 ### Message
In this section, you can write your message and include custom values or trigger links.
### Message
In this section, you can write your message and include custom values or trigger links.
 ### Add Attachment
If needed, attach files by clicking the attachment icon.
### Add Attachment
If needed, attach files by clicking the attachment icon.
 Furthermore, you can add files via a URL by entering the link and clicking +Add.
 ### Test Phone Number
To test the SMS, input a demo phone number and click Send Test SMS. You can use your own phone number for testing.
### Test Phone Number
To test the SMS, input a demo phone number and click Send Test SMS. You can use your own phone number for testing.
 ***
## WhatsApp
### To User Type
Select the recipient in the To User Type field.
***
## WhatsApp
### To User Type
Select the recipient in the To User Type field.
 ### Template
Choose a template from the Template section, or if you prefer to compose a custom message, select "None," which will enable the Message Body field.
### Template
Choose a template from the Template section, or if you prefer to compose a custom message, select "None," which will enable the Message Body field.
 ### Message
In this section, you can write your message and include custom values or trigger links.
### Message
In this section, you can write your message and include custom values or trigger links.
 ***
## Statistics
To see how successful your internal notification sending has been, access the “Stats View” by clicking the pie-chart icon.
This will give you an overview of the stats from the last 30 days.
***
## Statistics
To see how successful your internal notification sending has been, access the “Stats View” by clicking the pie-chart icon.
This will give you an overview of the stats from the last 30 days.
 After configuring the action according to your preferences, click the "Save Action" button to add it to your workflow. This functionality ensures your workflows remain organized and responsive. Explore the other articles in this section to discover more about the available workflow actions.
### Practical Examples and Use Cases
* ****Update Notifications:**** Keep your team informed by sending updates to assigned users.
### Troubleshooting Tips
****Emails Not Sending****
* Ensure that you have correctly entered email addresses and separated them with commas. Also, check if the trigger condition is met.
****Workflow Not Triggering****
* Verify that the initial trigger is correctly set up and relevant to the action you want to perform.
### Frequently Asked Questions
****Can I use this workflow to email external contacts?****
* Yes, by using the custom emails option, you can enter any email addresses, including those of external contacts.
****How many recipients can I email at once?****
* While the CRM allows emailing multiple recipients, it's essential to adhere to best practices and limitations to avoid being marked as spam.
****Can I personalize the emails sent through the workflow?****
* Yes, you can use templates and dynamic fields to personalize emails for each recipient.
### send-live-chat-message-action
Your Live Chat Widget allows you to interact with customers on your website without leaving the page. A great incentive for customers to use this channel is getting immediate responses, which you can achieve with a little aid from automation. Let's check how!
### How It Works
Navigate to the workflow builder and click the plus sign icon to select the “Send Live Chat Message” Action, located under the Communication section.
After configuring the action according to your preferences, click the "Save Action" button to add it to your workflow. This functionality ensures your workflows remain organized and responsive. Explore the other articles in this section to discover more about the available workflow actions.
### Practical Examples and Use Cases
* ****Update Notifications:**** Keep your team informed by sending updates to assigned users.
### Troubleshooting Tips
****Emails Not Sending****
* Ensure that you have correctly entered email addresses and separated them with commas. Also, check if the trigger condition is met.
****Workflow Not Triggering****
* Verify that the initial trigger is correctly set up and relevant to the action you want to perform.
### Frequently Asked Questions
****Can I use this workflow to email external contacts?****
* Yes, by using the custom emails option, you can enter any email addresses, including those of external contacts.
****How many recipients can I email at once?****
* While the CRM allows emailing multiple recipients, it's essential to adhere to best practices and limitations to avoid being marked as spam.
****Can I personalize the emails sent through the workflow?****
* Yes, you can use templates and dynamic fields to personalize emails for each recipient.
### send-live-chat-message-action
Your Live Chat Widget allows you to interact with customers on your website without leaving the page. A great incentive for customers to use this channel is getting immediate responses, which you can achieve with a little aid from automation. Let's check how!
### How It Works
Navigate to the workflow builder and click the plus sign icon to select the “Send Live Chat Message” Action, located under the Communication section.
 Type out your message as normal. You can personalize the message by using Custom Values (1), links (2), or images (3) from the options at the top.
 Once you're satisfied with your message, click “Save Action.”
 Add any extra actions needed and publish the changes. There you have it, now you can engage customers with preset messages without the need for manual intervention. Lowering the response time and helping you engage customers through the Chat Widget.
### edit-conversation
The "Edit Conversation" action allows users to automate the process of marking conversations as read/unread or archiving/unarchiving, eliminating the need for manual intervention once a specific event triggers the workflow.
In a workflow, add your preferred trigger, then click the “+” icon to search and add the Edit Conversation action.
Add any extra actions needed and publish the changes. There you have it, now you can engage customers with preset messages without the need for manual intervention. Lowering the response time and helping you engage customers through the Chat Widget.
### edit-conversation
The "Edit Conversation" action allows users to automate the process of marking conversations as read/unread or archiving/unarchiving, eliminating the need for manual intervention once a specific event triggers the workflow.
In a workflow, add your preferred trigger, then click the “+” icon to search and add the Edit Conversation action.
 ### Action Name
Update the name of the action to display its intended purpose.
### Action Name
Update the name of the action to display its intended purpose.
 ### Marking Chats as Read or Unread
* ****Mark as Read:**** Designate a conversation as "Read" without opening it, particularly useful for chats you want to skip but still keep track of.
* ****Mark as Unread:**** If you have already opened a conversation but need to be reminded to follow up, marking it as "Unread" restores the notification pop-up, ensuring the chat remains visible for future attention.
* ****None****: Maintain the current state of the conversation, neither marking it as read or unread.
### Marking Chats as Read or Unread
* ****Mark as Read:**** Designate a conversation as "Read" without opening it, particularly useful for chats you want to skip but still keep track of.
* ****Mark as Unread:**** If you have already opened a conversation but need to be reminded to follow up, marking it as "Unread" restores the notification pop-up, ensuring the chat remains visible for future attention.
* ****None****: Maintain the current state of the conversation, neither marking it as read or unread.
 ### Archive or Unarchive Chats
You can also automate the process of archiving or unarchiving a conversation to better organize your contacts.
* ****Archive:**** By archiving a chat, you effectively hide it from your active conversations, helping you focus on more pressing matters.
* ****Unarchive:**** Conversely, you can unarchive a chat to restore it to your recent tab, ensuring that it is readily available for ongoing engagement.
* ****None****: Maintain the current state of the conversation, neither archiving or unarchiving the chat.
### Archive or Unarchive Chats
You can also automate the process of archiving or unarchiving a conversation to better organize your contacts.
* ****Archive:**** By archiving a chat, you effectively hide it from your active conversations, helping you focus on more pressing matters.
* ****Unarchive:**** Conversely, you can unarchive a chat to restore it to your recent tab, ensuring that it is readily available for ongoing engagement.
* ****None****: Maintain the current state of the conversation, neither archiving or unarchiving the chat.
 Once you are satisfied with your configuration, save the action, then publish the workflow to activate it! Each subsequent contact that is added to the workflow will be updated according to your changes.
 By utilizing the "Edit Conversation" action within your workflows, you can automate these important steps, eliminating the need for manual updates and improving the efficiency of your communication processes.
### whatsapp-action
The WhatsApp Send Message action allows for automatic message delivery via WhatsApp triggered by workflow events. You can send either free-form messages within the 24-hour messaging window or use pre-approved templates to initiate communication outside of that timeframe. This flexibility makes it an excellent tool for timely customer outreach, ensuring that messages are sent according to their needs—whether to confirm appointments or share promotional content.
### Key Features
* Send real-time WhatsApp messages directly from workflows.
* Use pre-approved templates for messaging outside the 24-hour window.
* Customize messages using dynamic variables such as contact names or email addresses.
* Support for both business-initiated and customer-initiated conversations.
📌 ****Note****: Ensure that WhatsApp is enabled and properly set up in your system. For business-initiated conversations, pre-approved message templates are required.
### Choose the Action Type
In your workflow builder, add a suitable workflow trigger if required, then select "WhatsApp" from the available actions.
By utilizing the "Edit Conversation" action within your workflows, you can automate these important steps, eliminating the need for manual updates and improving the efficiency of your communication processes.
### whatsapp-action
The WhatsApp Send Message action allows for automatic message delivery via WhatsApp triggered by workflow events. You can send either free-form messages within the 24-hour messaging window or use pre-approved templates to initiate communication outside of that timeframe. This flexibility makes it an excellent tool for timely customer outreach, ensuring that messages are sent according to their needs—whether to confirm appointments or share promotional content.
### Key Features
* Send real-time WhatsApp messages directly from workflows.
* Use pre-approved templates for messaging outside the 24-hour window.
* Customize messages using dynamic variables such as contact names or email addresses.
* Support for both business-initiated and customer-initiated conversations.
📌 ****Note****: Ensure that WhatsApp is enabled and properly set up in your system. For business-initiated conversations, pre-approved message templates are required.
### Choose the Action Type
In your workflow builder, add a suitable workflow trigger if required, then select "WhatsApp" from the available actions.
 ### Name Your Action
Assign a descriptive name to your action to identify it easily.
### Name Your Action
Assign a descriptive name to your action to identify it easily.
 ### Select From Phone Number
When setting up your WhatsApp message action, you can choose from any connected WhatsApp number from the dropdown.
��****Note****: Only numbers with an “ACTIVE” status will appear in the dropdown, ensuring accuracy.
### Select From Phone Number
When setting up your WhatsApp message action, you can choose from any connected WhatsApp number from the dropdown.
��****Note****: Only numbers with an “ACTIVE” status will appear in the dropdown, ensuring accuracy.
 ### Select WhatsApp Template
Choose between WhatsApp Templates for pre-approved messages outside the 24-hour window or Free-form messages within the window.
### Select WhatsApp Template
Choose between WhatsApp Templates for pre-approved messages outside the 24-hour window or Free-form messages within the window.
 If you choose to send a free-form message, you can select a pre-existing snippet from your account. Once selected from the dropdown menu, the snippet will be available for preview and editing in the Message section. Unlike templates, snippets do not require WhatsApp approval and can be customized instantly. This flexibility makes them ideal for responding to frequently asked questions or providing quick, consistent replies during active customer support interactions.
 📌 ****Note****: Snippets can only be sent if there is a 24-hour open conversation window with the contact.
### Enable Branches
Enable branches to enjoy smart workflows with auto-branching, reply-based triggers, and an optional simple mode. When enabled, you can easily update media at send-time and use flexible messaging formats in one seamless action. Additionally, this feature ensures reliability with built-in failover, timeout handling, and wait-for-reply controls.
📌 ****Note****: Snippets can only be sent if there is a 24-hour open conversation window with the contact.
### Enable Branches
Enable branches to enjoy smart workflows with auto-branching, reply-based triggers, and an optional simple mode. When enabled, you can easily update media at send-time and use flexible messaging formats in one seamless action. Additionally, this feature ensures reliability with built-in failover, timeout handling, and wait-for-reply controls.
 ### Save and Activate
Save the action and activate the workflow to automate WhatsApp message delivery based on your defined triggers.
### Save and Activate
Save the action and activate the workflow to automate WhatsApp message delivery based on your defined triggers.
 Whether you're sending timely updates or managing ongoing conversations, the ability to automate message delivery from your workflow ensures your business remains responsive and connected with your audience.
### Practical Example
****Scenario****: A business wants to send appointment reminders via WhatsApp 24 hours before a scheduled meeting.
* ****Trigger****: Appointment Reminder
* ****Action****: WhatsApp
* ****Name****: "Send WhatsApp Appointment Reminder"
* ****Message Type****: Template – Appointment Reminder
* ****Template Content****: "Hi `{{contact.first_name}}`, this is a reminder for your appointment scheduled on `{{appointment.date}}`."
* ****Outcome****: Customers will automatically receive a personalized reminder about their upcoming appointment via WhatsApp.
### ✍️Key Notes
* ****Free Entry Point Conversations****: When customers respond to a WhatsApp message, it opens a conversation window allowing free-form or template messaging for up to 72 hours at no additional cost.
* ****Do Not Disturb (DND)****: You can configure DND to manage customer preferences and avoid messaging individuals who have opted out.
### whatsapp-media-action
The WhatsApp Media Action is designed to elevate your communication strategy by automatically sending rich media - images, videos, documents, and audio - directly through WhatsApp, streamlining your processes and enhancing engagement with ease.
To get started, click the “+” icon to add a Workflow action, and select WhatsApp Media.
Whether you're sending timely updates or managing ongoing conversations, the ability to automate message delivery from your workflow ensures your business remains responsive and connected with your audience.
### Practical Example
****Scenario****: A business wants to send appointment reminders via WhatsApp 24 hours before a scheduled meeting.
* ****Trigger****: Appointment Reminder
* ****Action****: WhatsApp
* ****Name****: "Send WhatsApp Appointment Reminder"
* ****Message Type****: Template – Appointment Reminder
* ****Template Content****: "Hi `{{contact.first_name}}`, this is a reminder for your appointment scheduled on `{{appointment.date}}`."
* ****Outcome****: Customers will automatically receive a personalized reminder about their upcoming appointment via WhatsApp.
### ✍️Key Notes
* ****Free Entry Point Conversations****: When customers respond to a WhatsApp message, it opens a conversation window allowing free-form or template messaging for up to 72 hours at no additional cost.
* ****Do Not Disturb (DND)****: You can configure DND to manage customer preferences and avoid messaging individuals who have opted out.
### whatsapp-media-action
The WhatsApp Media Action is designed to elevate your communication strategy by automatically sending rich media - images, videos, documents, and audio - directly through WhatsApp, streamlining your processes and enhancing engagement with ease.
To get started, click the “+” icon to add a Workflow action, and select WhatsApp Media.
 ��****Note****: You can only send WhatsApp media when the 24-hour customer service window is open, so it is advisable to add the “WhatsApp: Customer Service Window Check” action before this step.
 ### Action Name
Assign a more descriptive name to the workflow or use the default name based on your preferences.
### Action Name
Assign a more descriptive name to the workflow or use the default name based on your preferences.
 ### From Number
Choose the number from which the message should be sent. This number will be visible to all the recipients of the message.
### From Number
Choose the number from which the message should be sent. This number will be visible to all the recipients of the message.
 ### Media Type
Select whether the media is an audio, video, image, or document from the media type dropdown.
### Media Type
Select whether the media is an audio, video, image, or document from the media type dropdown.
 ### Media
Click the Add Attachment button to upload the media from your device, noting the following requirements:
* ****Images****: JPEG or PNG formats, up to 5 MB
* ****Videos****: MP4 or 3GP formats, up to 16 MB (must use H.264 video codec and AAC audio codec)
* ****Audio****: AAC, AMR, MP3, M4A, or OGG (OPUS) formats, up to 16 MB
* ****Documents****: TXT, PDF, DOC/X, PPT/X, or XLS/X formats, up to 100 MB
��****Note****: Attempting to send files exceeding these size or format limitations will result in an error returned by the WhatsApp API.
### Media
Click the Add Attachment button to upload the media from your device, noting the following requirements:
* ****Images****: JPEG or PNG formats, up to 5 MB
* ****Videos****: MP4 or 3GP formats, up to 16 MB (must use H.264 video codec and AAC audio codec)
* ****Audio****: AAC, AMR, MP3, M4A, or OGG (OPUS) formats, up to 16 MB
* ****Documents****: TXT, PDF, DOC/X, PPT/X, or XLS/X formats, up to 100 MB
��****Note****: Attempting to send files exceeding these size or format limitations will result in an error returned by the WhatsApp API.
 ### Caption
Finally, enter a caption to accompany your media, then click Save to add the action to your workflow.
****📌Note:**** Captions are not supported for audio files due to a WhatsApp API limitation. Any text entered in the caption field will be ignored when Audio is selected as the media type.
### Caption
Finally, enter a caption to accompany your media, then click Save to add the action to your workflow.
****📌Note:**** Captions are not supported for audio files due to a WhatsApp API limitation. Any text entered in the caption field will be ignored when Audio is selected as the media type.
 That's all there is to it! Be sure to publish and save your workflow to start sending media to your customers, increasing engagement and customer satisfaction right away!
### whatsapp-interactive-messages-action
With its growing global adoption, managing your WhatsApp messages efficiently is key to ensuring customer satisfaction and lead acquisition. However, you might not be available to respond 24/7, and even if you are, managing their needs can become overwhelming. So, let's learn how to use the "WhatsApp Interactive Messages" action to send rich, engaging, and interactive experiences directly to your customers.
To start, navigate to the Workflows tab inside the Automation Section and edit one of your workflows.
That's all there is to it! Be sure to publish and save your workflow to start sending media to your customers, increasing engagement and customer satisfaction right away!
### whatsapp-interactive-messages-action
With its growing global adoption, managing your WhatsApp messages efficiently is key to ensuring customer satisfaction and lead acquisition. However, you might not be available to respond 24/7, and even if you are, managing their needs can become overwhelming. So, let's learn how to use the "WhatsApp Interactive Messages" action to send rich, engaging, and interactive experiences directly to your customers.
To start, navigate to the Workflows tab inside the Automation Section and edit one of your workflows.
 ***
## Pre-requisites
This action will work with any desired trigger; however, you must add the action “WhatsApp: Customer Service Window Check”, which helps you ensure the WhatsApp 24-hour Customer Service Window is open. Please keep in mind you can't reach out to customers with a freeform message outside that timeframe.
***
## Pre-requisites
This action will work with any desired trigger; however, you must add the action “WhatsApp: Customer Service Window Check”, which helps you ensure the WhatsApp 24-hour Customer Service Window is open. Please keep in mind you can't reach out to customers with a freeform message outside that timeframe.
 ***
## Setting Up Your Action
Click the plus sign icon underneath the Open branch to add your action.
***
## Setting Up Your Action
Click the plus sign icon underneath the Open branch to add your action.
 Select the WhatsApp Interactive Messages action from the right side menu.
 Select your interactive message type; you have four available options:
1. Quick Reply Buttons: This type allows users to choose from predefined options (up to 3) during a conversation, making responses quick and easy.
2. List: Presents a scrollable list of options for users to select, useful for offering multiple choices in a structured way.
3. Visit Website Button: This type lets you replace long, messy URLs in message bodies with clean, tappable buttons.
4. Contact: Shares contact information, such as a phone number or email, often used to save or share contact details.
5. Location: Sends or requests a user's geographical location via a map, helping with location-based services.
Select your interactive message type; you have four available options:
1. Quick Reply Buttons: This type allows users to choose from predefined options (up to 3) during a conversation, making responses quick and easy.
2. List: Presents a scrollable list of options for users to select, useful for offering multiple choices in a structured way.
3. Visit Website Button: This type lets you replace long, messy URLs in message bodies with clean, tappable buttons.
4. Contact: Shares contact information, such as a phone number or email, often used to save or share contact details.
5. Location: Sends or requests a user's geographical location via a map, helping with location-based services.
 ### “Quick Reply Buttons” Type Settings
To use it, set your button total from the dropdown menu.
### “Quick Reply Buttons” Type Settings
To use it, set your button total from the dropdown menu.
 Select a header type, then enter the text or URL (for an image or video) you want on your header.
 Craft your message in the body and footer fields.
 Set your timeout for the customer to respond before the automation triggers the next step.
 Enter the button text for each option. Once entered, the text will be added to the branches.
 Click “Save Action” after the branches are updated and you see the button text added.
 ### “List” Type Settings
Since this option allows for a list of options, first select the number of sections that will contain the options. You can add up to ten sections.
### “List” Type Settings
Since this option allows for a list of options, first select the number of sections that will contain the options. You can add up to ten sections.
 Like with the Button option, enter your header, body, and footer.
 If needed, enter a list button text.
 Set your timeout for the customer to respond before the automation triggers the next step.
 Enter a title for your section. This will help customers understand what options to expect in this section.
 Use the “Row count for section” to define how many options will be under the section; you can add up to 10 options per section.
 Add your row title and description; this step must be repeated for each row you've added.
 Once you're done configuring your rows, repeat the process for any other section you've added, then head to the branches section. Each branch (except for undelivered or timeout messages) will be named after the section it belongs to, a space, and the row title. If this is correct, save your action.
 ### “Visit Website Button” Type Settings
WhatsApp users may be hesitant to tap long or complex URLs in plain text messages, so this helps you replace them with a clean, tappable button. To start, select a header type, then enter the text or URL (for an image or video) you want on your header.
### “Visit Website Button” Type Settings
WhatsApp users may be hesitant to tap long or complex URLs in plain text messages, so this helps you replace them with a clean, tappable button. To start, select a header type, then enter the text or URL (for an image or video) you want on your header.
 Craft your message in the body and footer fields.
 Enter the URL (1) you want to redirect customers to and the text (2) you want to put in the CTA.
 Set your timeout for the customer to respond before the automation triggers the next step.
 Click “Save Action” after the branches are updated and you see the button text added.
 ### “Contact” Type Settings
This will help customers easily save a contact's information, for example, a specific sales representative's contact. To use it, enter the contact's information in the respective fields, then click Save Action.
### “Contact” Type Settings
This will help customers easily save a contact's information, for example, a specific sales representative's contact. To use it, enter the contact's information in the respective fields, then click Save Action.
 ### “Location” Type Settings
To use this option, enter the location's name (1), address (2), latitude (3), and longitude (4). Lastly, click Save Action (5).
### “Location” Type Settings
To use this option, enter the location's name (1), address (2), latitude (3), and longitude (4). Lastly, click Save Action (5).
 Once finished, the action will be added to your workflow, along with any branches it contains.
 Configure any added options as needed and save your workflow!
 And there you have it! Now, you know how to use this action to create guided and engaging customer experiences while remaining in compliance with WhatsApp’s latest conversation rules. We hope it helps you create richer message formats and use the branching capabilities to automate your customer care.
### whatsapp-send-flows-action
WhatsApp's widespread popularity allows businesses to connect with customers globally. To make conversation management easier, you can use pre-designed message sequences to guide users. Let's check how to integrate them into a workflow to streamline management.
***
## Prerequisits
Navigate to the WhatsApp tab inside your account settings and switch to the flows tab.
And there you have it! Now, you know how to use this action to create guided and engaging customer experiences while remaining in compliance with WhatsApp’s latest conversation rules. We hope it helps you create richer message formats and use the branching capabilities to automate your customer care.
### whatsapp-send-flows-action
WhatsApp's widespread popularity allows businesses to connect with customers globally. To make conversation management easier, you can use pre-designed message sequences to guide users. Let's check how to integrate them into a workflow to streamline management.
***
## Prerequisits
Navigate to the WhatsApp tab inside your account settings and switch to the flows tab.
 If you haven't before, create a flow.
 ***
## Setting Your Workflow
Navigate to the Workflows tab inside the Automation section and click Create Workflow.
***
## Setting Your Workflow
Navigate to the Workflows tab inside the Automation section and click Create Workflow.
 Set the trigger as Customer replied with the filter “Reply Channel Whatsapp.”
 Click the plus sign icon to add an action and select “Whatsapp: Send Flows.”
 Select the flow you wish to use.
 Customize the flow's information if needed, then click Save Action.
 This will create a branch for you to configure the actions to follow.
 Configure any following actions, and you're done! You can use these flows to guide users through specific interactions, such as booking appointments or collecting information directly inside WhatsApp.
***
## FAQ
### Are there any costs associated with sending WhatsApp Flows for appointment booking?
The first 1,000 service conversations for appointment booking using WhatsApp Flows are free each month. After that, charges may apply based on WhatsApp's pricing model.
### What limitations should I be aware of with WhatsApp Flows for Appointment Booking?
* No payment processing: Appointments that require payments cannot be booked through the WhatsApp Flow, as WhatsApp currently does not support payments.
* Custom fields: Only default form fields are supported. Custom fields must be handled manually.
* Recurring appointments: Recurring calendar events are not supported.
* Guest support: Guest booking functionality is not available within the WhatsApp Flow.
### whatsapp-customer-service-window-check-action
In this article, we will explore how the WhatsApp: Customer Service Window Check condition can be leveraged to create automated workflows and send free-form messages. This feature enables you to determine if an active Customer Service Window is open between your business and a customer. While the window is open, you can send unlimited free-form messages at no cost for up to 1,000 service conversations each month.
***
## How to Use WhatsApp: Customer Service Window Check in Workflows
To send free-form messages, first confirm if the customer service window is open. If it is open, you can send messages freely. Responding to a customer’s inbound message automatically opens a service conversation. Businesses are allotted 1,000 free service conversations monthly, significantly reducing messaging costs.
Navigate to ****Automation****> ****Workflows**** > ****Create Workflow or click an existing workflow****.
Configure any following actions, and you're done! You can use these flows to guide users through specific interactions, such as booking appointments or collecting information directly inside WhatsApp.
***
## FAQ
### Are there any costs associated with sending WhatsApp Flows for appointment booking?
The first 1,000 service conversations for appointment booking using WhatsApp Flows are free each month. After that, charges may apply based on WhatsApp's pricing model.
### What limitations should I be aware of with WhatsApp Flows for Appointment Booking?
* No payment processing: Appointments that require payments cannot be booked through the WhatsApp Flow, as WhatsApp currently does not support payments.
* Custom fields: Only default form fields are supported. Custom fields must be handled manually.
* Recurring appointments: Recurring calendar events are not supported.
* Guest support: Guest booking functionality is not available within the WhatsApp Flow.
### whatsapp-customer-service-window-check-action
In this article, we will explore how the WhatsApp: Customer Service Window Check condition can be leveraged to create automated workflows and send free-form messages. This feature enables you to determine if an active Customer Service Window is open between your business and a customer. While the window is open, you can send unlimited free-form messages at no cost for up to 1,000 service conversations each month.
***
## How to Use WhatsApp: Customer Service Window Check in Workflows
To send free-form messages, first confirm if the customer service window is open. If it is open, you can send messages freely. Responding to a customer’s inbound message automatically opens a service conversation. Businesses are allotted 1,000 free service conversations monthly, significantly reducing messaging costs.
Navigate to ****Automation****> ****Workflows**** > ****Create Workflow or click an existing workflow****.
 Rename the workflow as you see fit, then add a suitable workflow trigger.
 Add an action by clicking the plus icon and selecting ****"WhatsApp: Customer Service Window Check."**** The WhatsApp Customer Service Window Check feature allows businesses to select from multiple connected WhatsApp numbers within a location when verifying the service window.
 Only numbers with an "ACTIVE" status are available for selection, ensuring accurate workflow execution. This enables businesses to validate service windows for the correct phone numbers, streamline customer support, and efficiently manage multiple WhatsApp interactions.
 Review the action details, then ****save**** it!
 This action creates two branches: \*\*\*\*Open \*\*\*\*and ****Closed.****
 ### Open Branch
Select the WhatsApp action and choose ****"None - Free-form message."**** This allows you to send unlimited messages during the open window, using the 1,000 free service conversations.
### Open Branch
Select the WhatsApp action and choose ****"None - Free-form message."**** This allows you to send unlimited messages during the open window, using the 1,000 free service conversations.
 ### Closed Branch
Choose a WhatsApp action and select a marketing or utility template to initiate a new conversation.
### Closed Branch
Choose a WhatsApp action and select a marketing or utility template to initiate a new conversation.
 If the customer service window is closed, meaning the customer hasn’t replied within 24 hours, you can only send WhatsApp marketing or utility templates.
***
## Understanding Conversations
Conversations represent 24-hour message threads between your business and customers, forming the basis for WhatsApp pricing. Conversations can be initiated through free-form messages or by using pre-approved templates.
### When are Conversations Opened?
1. ****Marketing, Utility, and Authentication Conversations****
These conversations are opened when you send a pre-approved marketing, utility, or authentication template to a customer. If an existing conversation of the same category is open, no new conversation is initiated. Otherwise, a new 24-hour conversation starts.\*\*Example:
* **Hour 0:**\*\* A marketing conversation is opened by sending a promotion.
* ****Hour 4:**** The customer replies, opening a customer service window that allows you to send free-form messages for the next 24 hours.
* ****Hour 5:**** You send a free-form message. Since an open conversation (marketing) exists, no service conversation is initiated.
* ****Hour 25:**** After the marketing conversation expires, you send another message. This starts a new service conversation, lasting 24 hours.
\*\*\*\* 2. Service Conversations\*\*\*\*
A service conversation begins when any message other than a template is delivered, and no open conversation of any category exists.
****Example:****
* ****Hour 0:**** A marketing conversation is initiated by sending a promotion.
* ****Hour 4:**** The customer replies, opening a customer service window for free-form messaging.
* ****Hour 5:**** You send a free-form message. Since a marketing conversation is open, no service conversation is initiated.
* ****Hour 25:**** After the marketing conversation expires, sending another message starts a new 24-hour service conversation.
\*\*\*\* 3. Customer Service Window\*\*\*\*
A Customer Service Window is a 24-hour period initiated when a WhatsApp user messages your business. During this time, free-form messages can be sent without additional charges as long as the window remains open.
\*\*\*\* 4. Free Tier Conversations\*\*\*\*
WhatsApp Business Accounts (WABA) receive 1,000 free service conversations per month across all business phone numbers. This allowance resets monthly. Service conversations are included in this free tier, but marketing, utility, and authentication conversations are not.
### FAQs
"None - Free-form message" allows you to send custom messages within the 24-hour service window. Templates, on the other hand, are pre-approved messages useful for initiating conversations outside the service window or for specific marketing or support purposes.
You can view your free-tier conversation count in Facebook Business Manager by selecting your WhatsApp account and then navigating to Account Tools > Insights.
Yes, workflows support the integration of WhatsApp with other channels such as SMS or Email, allowing for comprehensive automation sequences.
Yes, you can use approved WhatsApp templates to send messages after the customer service window has closed. Note that template-based messages will incur additional charges.
A Free Entry Point Conversation occurs when a customer clicks a "Click to WhatsApp" ad or a Facebook Call-to-Action button. These conversations last 72 hours, during which you can send both free-form and template messages.
### messenger
The Messenger action in your workflow sends a message to your contacts via Facebook Messenger. The contact needs to have previously messaged the connected Facebook page in your account, no more than 24 hours before arriving at this event, for the message to be successfully delivered.
Utilize this workflow action to quickly follow up with a prospective client before the lead gets cold, allowing for a more personalized (and simplified) approach!
If the customer service window is closed, meaning the customer hasn’t replied within 24 hours, you can only send WhatsApp marketing or utility templates.
***
## Understanding Conversations
Conversations represent 24-hour message threads between your business and customers, forming the basis for WhatsApp pricing. Conversations can be initiated through free-form messages or by using pre-approved templates.
### When are Conversations Opened?
1. ****Marketing, Utility, and Authentication Conversations****
These conversations are opened when you send a pre-approved marketing, utility, or authentication template to a customer. If an existing conversation of the same category is open, no new conversation is initiated. Otherwise, a new 24-hour conversation starts.\*\*Example:
* **Hour 0:**\*\* A marketing conversation is opened by sending a promotion.
* ****Hour 4:**** The customer replies, opening a customer service window that allows you to send free-form messages for the next 24 hours.
* ****Hour 5:**** You send a free-form message. Since an open conversation (marketing) exists, no service conversation is initiated.
* ****Hour 25:**** After the marketing conversation expires, you send another message. This starts a new service conversation, lasting 24 hours.
\*\*\*\* 2. Service Conversations\*\*\*\*
A service conversation begins when any message other than a template is delivered, and no open conversation of any category exists.
****Example:****
* ****Hour 0:**** A marketing conversation is initiated by sending a promotion.
* ****Hour 4:**** The customer replies, opening a customer service window for free-form messaging.
* ****Hour 5:**** You send a free-form message. Since a marketing conversation is open, no service conversation is initiated.
* ****Hour 25:**** After the marketing conversation expires, sending another message starts a new 24-hour service conversation.
\*\*\*\* 3. Customer Service Window\*\*\*\*
A Customer Service Window is a 24-hour period initiated when a WhatsApp user messages your business. During this time, free-form messages can be sent without additional charges as long as the window remains open.
\*\*\*\* 4. Free Tier Conversations\*\*\*\*
WhatsApp Business Accounts (WABA) receive 1,000 free service conversations per month across all business phone numbers. This allowance resets monthly. Service conversations are included in this free tier, but marketing, utility, and authentication conversations are not.
### FAQs
"None - Free-form message" allows you to send custom messages within the 24-hour service window. Templates, on the other hand, are pre-approved messages useful for initiating conversations outside the service window or for specific marketing or support purposes.
You can view your free-tier conversation count in Facebook Business Manager by selecting your WhatsApp account and then navigating to Account Tools > Insights.
Yes, workflows support the integration of WhatsApp with other channels such as SMS or Email, allowing for comprehensive automation sequences.
Yes, you can use approved WhatsApp templates to send messages after the customer service window has closed. Note that template-based messages will incur additional charges.
A Free Entry Point Conversation occurs when a customer clicks a "Click to WhatsApp" ad or a Facebook Call-to-Action button. These conversations last 72 hours, during which you can send both free-form and template messages.
### messenger
The Messenger action in your workflow sends a message to your contacts via Facebook Messenger. The contact needs to have previously messaged the connected Facebook page in your account, no more than 24 hours before arriving at this event, for the message to be successfully delivered.
Utilize this workflow action to quickly follow up with a prospective client before the lead gets cold, allowing for a more personalized (and simplified) approach!
 ### Templates
To use a previously created template for your message, click on the ****Templates**** field and select the one you want from the available options in your CRM. Templates help you save time and maintain consistency in your communication.
### Templates
To use a previously created template for your message, click on the ****Templates**** field and select the one you want from the available options in your CRM. Templates help you save time and maintain consistency in your communication.
 ### Message
If you choose not to use a template, you can type the message directly into the ****Message**** field. By clicking on the Custom Values option (Tag icon), you can select specific custom values and personalize the message, such as the contact’s name. And, you can also add Trigger links by clicking the lightning bolt icon.
### Message
If you choose not to use a template, you can type the message directly into the ****Message**** field. By clicking on the Custom Values option (Tag icon), you can select specific custom values and personalize the message, such as the contact’s name. And, you can also add Trigger links by clicking the lightning bolt icon.
 ### Add Attachments
To include attachments in your message, click the green ****Add Attachments**** button and select the files from your computer. Attachments can help provide additional details, such as PDFs, images, or documents relevant to the conversation.
### Add Attachments
To include attachments in your message, click the green ****Add Attachments**** button and select the files from your computer. Attachments can help provide additional details, such as PDFs, images, or documents relevant to the conversation.
 ### Add Files Through URL
You can also include files by inputting their URLs into the dedicated field and clicking ****+Add**** to include them in the message. This option is helpful when sharing files hosted online, such as presentations or downloadable resources.
### Add Files Through URL
You can also include files by inputting their URLs into the dedicated field and clicking ****+Add**** to include them in the message. This option is helpful when sharing files hosted online, such as presentations or downloadable resources.
 ### Save Action
After configuring your message, templates, and attachments click ****Save Action**** to complete the setup. Your Messenger action is ready to deliver a good and engaging customer experience.
### Save Action
After configuring your message, templates, and attachments click ****Save Action**** to complete the setup. Your Messenger action is ready to deliver a good and engaging customer experience.
 By incorporating features like templates, custom values, and attachments, you can create a highly personalized and efficient messaging experience. Use these tools to ensure timely follow-ups and guide your customers toward meaningful actions, all while maintaining clear and structured communication.
### instagram-dm
Instagram DMs are a powerful way to connect with your audience instantly. By integrating Instagram DM actions into your workflow, you can streamline follow-ups, nurture potential leads, and maintain consistent communication with your audience. This feature ensures your contacts stay engaged and informed about your products or services at the right moments. Here’s a step-by-step guide to help you make the most of it.
To get started, click on the \*\*\*\*“+” \*\*\*\*icon and select ****Instagram DM**** in the Actions menu.
By incorporating features like templates, custom values, and attachments, you can create a highly personalized and efficient messaging experience. Use these tools to ensure timely follow-ups and guide your customers toward meaningful actions, all while maintaining clear and structured communication.
### instagram-dm
Instagram DMs are a powerful way to connect with your audience instantly. By integrating Instagram DM actions into your workflow, you can streamline follow-ups, nurture potential leads, and maintain consistent communication with your audience. This feature ensures your contacts stay engaged and informed about your products or services at the right moments. Here’s a step-by-step guide to help you make the most of it.
To get started, click on the \*\*\*\*“+” \*\*\*\*icon and select ****Instagram DM**** in the Actions menu.
 ****📌NOTE:**** To send a message to your contacts via Instagram using the Instagram action in your workflow, they should have messaged an Instagram page that is connected to your CRM within 24 hours before arriving at the event.
### Templates
You could use a previously created template for your message by clicking on the \*\*\*\*Templates \*\*\*\*field and selecting the one you want from the available options.
****📌NOTE:**** To send a message to your contacts via Instagram using the Instagram action in your workflow, they should have messaged an Instagram page that is connected to your CRM within 24 hours before arriving at the event.
### Templates
You could use a previously created template for your message by clicking on the \*\*\*\*Templates \*\*\*\*field and selecting the one you want from the available options.
 ### Message
If you prefer not to use a template and draft your message instead, you can type it in the Message field or use the AI tool. Also, you can select specific custom values, such as the contact name, by clicking on the Custom Values (tag icon) option.
### Message
If you prefer not to use a template and draft your message instead, you can type it in the Message field or use the AI tool. Also, you can select specific custom values, such as the contact name, by clicking on the Custom Values (tag icon) option.
 ### Add Attachment
To include attachments in your message, click the green ****Add Attachments**** button and select the files from your computer. Attachments can help provide additional details, such as PDFs, images, or documents relevant to the conversation.
### Add Files Through URL
Alternatively, you can also upload files from a URL by entering its link into the dedicated field and clicking on the ****+Add**** button to include it.
### Save Action
Once you have configured the message, attachments, and other details, click on ****Save Action**** to finalize your setup.
Now that you’ve got the hang of Instagram DM actions, you’re ready to keep those connections alive and thriving. Whether you’re sending a quick “Hello!” or a detailed update, this workflow action helps you maintain timely and meaningful interactions with your audience.
### instagram-interactive-messenger-action
The Instagram Interactive Messenger action in your workflow enables you to send messages directly to contacts via Instagram Messenger. To successfully deliver the message, the contact must have previously interacted with your connected Instagram account within 24 hours of reaching this workflow event.
This action is a powerful tool for promptly following up with leads, prompting personalized interactions, and ensuring no opportunity slips away.
To begin, add a Trigger. For this example, we would be using the ****Customer Replied**** trigger, once that is done, select the ****Instagram Interactive Messenger Action****.
### Add Attachment
To include attachments in your message, click the green ****Add Attachments**** button and select the files from your computer. Attachments can help provide additional details, such as PDFs, images, or documents relevant to the conversation.
### Add Files Through URL
Alternatively, you can also upload files from a URL by entering its link into the dedicated field and clicking on the ****+Add**** button to include it.
### Save Action
Once you have configured the message, attachments, and other details, click on ****Save Action**** to finalize your setup.
Now that you’ve got the hang of Instagram DM actions, you’re ready to keep those connections alive and thriving. Whether you’re sending a quick “Hello!” or a detailed update, this workflow action helps you maintain timely and meaningful interactions with your audience.
### instagram-interactive-messenger-action
The Instagram Interactive Messenger action in your workflow enables you to send messages directly to contacts via Instagram Messenger. To successfully deliver the message, the contact must have previously interacted with your connected Instagram account within 24 hours of reaching this workflow event.
This action is a powerful tool for promptly following up with leads, prompting personalized interactions, and ensuring no opportunity slips away.
To begin, add a Trigger. For this example, we would be using the ****Customer Replied**** trigger, once that is done, select the ****Instagram Interactive Messenger Action****.
 ### Reply Type
This option determines how the system responds to a customer on Instagram Messenger. You can choose between, \*\*\*\*Reply to DM \*\*\*\*which sends a private message to users who have previously messaged your Instagram account, and \*\*\*\*Reply to Comment via DM ****which**** \*\*\*\*Sends a direct message to users who commented on your Instagram post.
### Reply Type
This option determines how the system responds to a customer on Instagram Messenger. You can choose between, \*\*\*\*Reply to DM \*\*\*\*which sends a private message to users who have previously messaged your Instagram account, and \*\*\*\*Reply to Comment via DM ****which**** \*\*\*\*Sends a direct message to users who commented on your Instagram post.
 ****📌NOTE:**** These options allow you to tailor your responses based on the type of interaction your customer initiated.
### Templates
To save time and ensure consistent messaging, you can use pre-designed templates for your responses. Simply select a template from the ****Templates**** field in your CRM. Templates helps streamline communication.
****📌NOTE:**** These options allow you to tailor your responses based on the type of interaction your customer initiated.
### Templates
To save time and ensure consistent messaging, you can use pre-designed templates for your responses. Simply select a template from the ****Templates**** field in your CRM. Templates helps streamline communication.
 ### Message
If you prefer not to use a template, you can craft your message directly in the ****Message**** field. Personalize your message by using the ****Custom Values**** option ****(Tag icon)**** to insert details like the contact’s name. You can also include ****Trigger Links**** by clicking on the ****Lightning bolt icon**** to drive further engagement.
### Message
If you prefer not to use a template, you can craft your message directly in the ****Message**** field. Personalize your message by using the ****Custom Values**** option ****(Tag icon)**** to insert details like the contact’s name. You can also include ****Trigger Links**** by clicking on the ****Lightning bolt icon**** to drive further engagement.
 ### Upload Files
Click the green ****Add Attachments**** button to upload files from your computer, such as images, documents, or PDFs. Attachments help provide additional information and make your message more engaging.
### Upload Files
Click the green ****Add Attachments**** button to upload files from your computer, such as images, documents, or PDFs. Attachments help provide additional information and make your message more engaging.
 ### Add Files Via URL
Alternatively, input the URL of an online file in the provided field and click ****+Add**** to attach it. This feature is especially useful for sharing resources like presentations or downloadable guides hosted online.
### Add Files Via URL
Alternatively, input the URL of an online file in the provided field and click ****+Add**** to attach it. This feature is especially useful for sharing resources like presentations or downloadable guides hosted online.
 ### Buttons
Add up to three action buttons to messages, like opening a URL or triggering a workflow step, by clicking ****+ Add New Button**** and defining their functions; for the ****Wait Step****, set a customizable wait period (default 1 minute) to allow customer responses, with the workflow automatically proceeding via the "Default Timeout" branch if no input is received.
### Buttons
Add up to three action buttons to messages, like opening a URL or triggering a workflow step, by clicking ****+ Add New Button**** and defining their functions; for the ****Wait Step****, set a customizable wait period (default 1 minute) to allow customer responses, with the workflow automatically proceeding via the "Default Timeout" branch if no input is received.
 ### Quick Replies
Quick Replies are predefined, tappable responses on Instagram Messenger that make communication easy, allowing up to 13 options (20 characters each) to guide conversations. Add them using the ****+ Add Quick Reply**** button. Also, you can set a customizable wait time (default 1 minute) for responses, and let the workflow proceed via the "Default Timeout" branch if no input is received.
### Quick Replies
Quick Replies are predefined, tappable responses on Instagram Messenger that make communication easy, allowing up to 13 options (20 characters each) to guide conversations. Add them using the ****+ Add Quick Reply**** button. Also, you can set a customizable wait time (default 1 minute) for responses, and let the workflow proceed via the "Default Timeout" branch if no input is received.
 ### Save Your Action
Once your message, attachments, templates, and Quick Replies are configured, click ****Save Action**** to complete the setup. Your Instagram Interactive Messenger action is now ready to engage customers effectively.
### Save Your Action
Once your message, attachments, templates, and Quick Replies are configured, click ****Save Action**** to complete the setup. Your Instagram Interactive Messenger action is now ready to engage customers effectively.
 By utilizing templates, custom values, attachments, and Quick Replies, you can create an efficient and highly personalized messaging experience. These features empower your business to deliver timely follow-ups, guide customers to take action, and maintain structured communication, all while increasing engagement.
### FAQs
Yes. To include interactive elements in your message, you can choose between buttons or Quick Replies. However, Quick Replies can only be used if no attachments are included in the same message.
No, Quick Replies are specific to the most recent message to keep the interaction clear and focused.
When a Quick Reply is chosen, it appears in the chat highlighted in blue, making the response easy to track and providing clear context for the conversation.
### facebook-interactive-messenger-action
The Facebook Interactive Messenger action in your workflow sends a message to your contacts via Facebook Messenger. Provided you were messaged no more than 24 hours prior to the workflow sending a response. Use this workflow action to quickly follow up with a prospective client before the lead becomes cold, allowing for a more personalized and streamlined approach.
***
## Setting Your Action
Add the ****Customer Replied**** Trigger to get started, then select the ****Facebook Interactive Messenger**** Action.
By utilizing templates, custom values, attachments, and Quick Replies, you can create an efficient and highly personalized messaging experience. These features empower your business to deliver timely follow-ups, guide customers to take action, and maintain structured communication, all while increasing engagement.
### FAQs
Yes. To include interactive elements in your message, you can choose between buttons or Quick Replies. However, Quick Replies can only be used if no attachments are included in the same message.
No, Quick Replies are specific to the most recent message to keep the interaction clear and focused.
When a Quick Reply is chosen, it appears in the chat highlighted in blue, making the response easy to track and providing clear context for the conversation.
### facebook-interactive-messenger-action
The Facebook Interactive Messenger action in your workflow sends a message to your contacts via Facebook Messenger. Provided you were messaged no more than 24 hours prior to the workflow sending a response. Use this workflow action to quickly follow up with a prospective client before the lead becomes cold, allowing for a more personalized and streamlined approach.
***
## Setting Your Action
Add the ****Customer Replied**** Trigger to get started, then select the ****Facebook Interactive Messenger**** Action.
 ### Reply Type
The Facebook Interactive Message action allows you to respond to two types of interaction:
1. ****Reply to DM**** (Direct Message) sends a direct message to users who have previously messaged your Facebook page.
2. ****Reply to Comment via DM**** sends a private message to users who commented on your post.
### Reply Type
The Facebook Interactive Message action allows you to respond to two types of interaction:
1. ****Reply to DM**** (Direct Message) sends a direct message to users who have previously messaged your Facebook page.
2. ****Reply to Comment via DM**** sends a private message to users who commented on your post.
 ### Templates
To use a previously created template for your message, click on the \*\*\*\*Templates \*\*\*\*field and select the one you want from the available options in your CRM. Templates help you save time and maintain consistency in your communication.
### Templates
To use a previously created template for your message, click on the \*\*\*\*Templates \*\*\*\*field and select the one you want from the available options in your CRM. Templates help you save time and maintain consistency in your communication.
 ### Message
If you choose not to use a template, you can type the message directly into the \*\*\*\*Message \*\*\*\*field. By clicking on the Custom Values option (****Tag icon****), you can select specific custom values and personalize the message, such as the contact’s name. And, you can also add Trigger links by clicking the \*\*\*\*Lightning bolt icon. \*\*\*\*
### Message
If you choose not to use a template, you can type the message directly into the \*\*\*\*Message \*\*\*\*field. By clicking on the Custom Values option (****Tag icon****), you can select specific custom values and personalize the message, such as the contact’s name. And, you can also add Trigger links by clicking the \*\*\*\*Lightning bolt icon. \*\*\*\*
 ### Add Attachment
To include an attachment in your message, click the green \*\*\*\*Add Attachment \*\*\*\*button and select the file from your computer. Attachments can help provide additional details, such as PDFs, images, or documents relevant to the conversation.
### Add Attachment
To include an attachment in your message, click the green \*\*\*\*Add Attachment \*\*\*\*button and select the file from your computer. Attachments can help provide additional details, such as PDFs, images, or documents relevant to the conversation.
 ### Add Files Through URL
You can also include files by inputting their URLs into the dedicated field and clicking \*\*\*\*+Add \*\*\*\*to include them in the message. This option is helpful when sharing files hosted online, such as presentations or downloadable resources.
### Add Files Through URL
You can also include files by inputting their URLs into the dedicated field and clicking \*\*\*\*+Add \*\*\*\*to include them in the message. This option is helpful when sharing files hosted online, such as presentations or downloadable resources.
 ### Response Options
When it comes to managing your responses, there are a few things to consider:
1. \*\*\*\*Buttons: \*\*\*\*You can add up to 3 action buttons for Messenger interactions, each performing a specific function, like opening a URL or triggering a workflow step. To add a button, click the ****+ Add New Button**** option and define its function.
2. \*\*\*\*Quick Replies: \*\*\*\*Configure up to 13 predefined, tappable response options (max 20 characters) to guide conversations and encourage faster engagement. Use the ****+ Add Quick Reply**** button to configure responses.
3. ****Wait Step:**** Set a wait time (default 1 minute, editable) for user input before automatically moving to the "Default Timeout" branch.
### Response Options
When it comes to managing your responses, there are a few things to consider:
1. \*\*\*\*Buttons: \*\*\*\*You can add up to 3 action buttons for Messenger interactions, each performing a specific function, like opening a URL or triggering a workflow step. To add a button, click the ****+ Add New Button**** option and define its function.
2. \*\*\*\*Quick Replies: \*\*\*\*Configure up to 13 predefined, tappable response options (max 20 characters) to guide conversations and encourage faster engagement. Use the ****+ Add Quick Reply**** button to configure responses.
3. ****Wait Step:**** Set a wait time (default 1 minute, editable) for user input before automatically moving to the "Default Timeout" branch.
 ### Save Action
After configuring your message, templates, Quick Replies, and attachments, click ****Save Action**** to complete the setup. Your Messenger action is ready to deliver a good and engaging customer experience.
### Save Action
After configuring your message, templates, Quick Replies, and attachments, click ****Save Action**** to complete the setup. Your Messenger action is ready to deliver a good and engaging customer experience.
 By incorporating features like templates, custom values, attachments, and Quick Replies, you can create a highly personalized and efficient messaging experience. Use these tools to ensure timely follow-ups and guide your customers toward meaningful actions, all while maintaining clear and structured communication.
### FAQs
You can add Quick Replies alongside buttons and images.
No, Quick Replies are only visible as part of the most recent message and are designed to keep interactions focused and clear.
Once selected, the Quick Reply appears in the conversation, highlighted in blue, to provide clear context and track the customer’s response.
### reply-in-comments-action
When a comment is made on your Facebook or Instagram post, a workflow can be triggered to respond. The Reply in Comments action allows you to post a direct reply beneath the original comment and optionally like the comment as well.
��****Note****: The Reply in Comments action must be paired with a compatible trigger—either Facebook Comment(s) on a Post or Instagram Comment(s) on a Post—to function properly.
### How It Works
Navigate to the workflow with the Facebook Comment(s) on a Post or Instagram Comment(s) on a Post trigger. Then, click the plus action to add the Reply in Comments action.
By incorporating features like templates, custom values, attachments, and Quick Replies, you can create a highly personalized and efficient messaging experience. Use these tools to ensure timely follow-ups and guide your customers toward meaningful actions, all while maintaining clear and structured communication.
### FAQs
You can add Quick Replies alongside buttons and images.
No, Quick Replies are only visible as part of the most recent message and are designed to keep interactions focused and clear.
Once selected, the Quick Reply appears in the conversation, highlighted in blue, to provide clear context and track the customer’s response.
### reply-in-comments-action
When a comment is made on your Facebook or Instagram post, a workflow can be triggered to respond. The Reply in Comments action allows you to post a direct reply beneath the original comment and optionally like the comment as well.
��****Note****: The Reply in Comments action must be paired with a compatible trigger—either Facebook Comment(s) on a Post or Instagram Comment(s) on a Post—to function properly.
### How It Works
Navigate to the workflow with the Facebook Comment(s) on a Post or Instagram Comment(s) on a Post trigger. Then, click the plus action to add the Reply in Comments action.
 Once the action settings load, enter the message to be sent as a reply. Optionally, click the tag icon to use custom values, reducing manual effort.
 Next, configure multiple reply variations by clicking the Add New Response button. The system will randomly select one to respond to each comment, ensuring more dynamic and engaging interactions.
 You can also enable the Like Comments toggle to automatically like comments on the post.
��****Note****: This feature is available for Facebook posts only and is not supported on Instagram.
You can also enable the Like Comments toggle to automatically like comments on the post.
��****Note****: This feature is available for Facebook posts only and is not supported on Instagram.
 Finally, save the action to your workflow and be sure to publish the changes.
 Now you can engage customers with preset messages without the need for manual intervention.
### update-contact-field
The Update Contact Field workflow action empowers users with the ability to modify a particular field within a contact's record. This feature enables efficient management of contact information, ensuring that your database remains current and accurate, ultimately contributing to improved communication and stronger relationships with your contacts.
To begin, click on the designated + icon to add a new workflow action and select Update Contact Field.
Now you can engage customers with preset messages without the need for manual intervention.
### update-contact-field
The Update Contact Field workflow action empowers users with the ability to modify a particular field within a contact's record. This feature enables efficient management of contact information, ensuring that your database remains current and accurate, ultimately contributing to improved communication and stronger relationships with your contacts.
To begin, click on the designated + icon to add a new workflow action and select Update Contact Field.
 From there, users can choose to update the field data or clear existing field data.
 Next, click +Add Field.
 If choosing to update field data, users can select between all field options and input the data to be updated.
 If choosing to clear data, simply select the field you want to clear.
 Click + Add field again if there's more than one field to be updated.
 And there you have it, now you can click Save Action and continue on with your workflow creation.
📌Note: Make sure you've established a workflow trigger before publishing. Without both an action and a trigger, you will only be able to save the workflow, not publish it.
### add-contact-tag-action
Tags help keep your contacts organized and enable more efficient segmentation for targeted campaigns. The ****Add Contact Tag**** workflow action allows you to automatically add tags to contacts when specific triggers are activated, such as form or survey submissions. This action ensures your contact database stays organized and that you can easily manage your audience.
In the workflow builder, click the ****“+”**** and add the ****“Add Contact Tag”**** action in the options.
And there you have it, now you can click Save Action and continue on with your workflow creation.
📌Note: Make sure you've established a workflow trigger before publishing. Without both an action and a trigger, you will only be able to save the workflow, not publish it.
### add-contact-tag-action
Tags help keep your contacts organized and enable more efficient segmentation for targeted campaigns. The ****Add Contact Tag**** workflow action allows you to automatically add tags to contacts when specific triggers are activated, such as form or survey submissions. This action ensures your contact database stays organized and that you can easily manage your audience.
In the workflow builder, click the ****“+”**** and add the ****“Add Contact Tag”**** action in the options.
 ### Tags
To add tags to a contact in your workflow, select the tags you want to associate with the contact. You have the option to choose multiple tags for each contact if you would like. The tags that you have already selected will have Checkmarks next to them.
### Tags
To add tags to a contact in your workflow, select the tags you want to associate with the contact. You have the option to choose multiple tags for each contact if you would like. The tags that you have already selected will have Checkmarks next to them.
 ### +Add Tag
If you want to add a new tag that is not available in your existing tag list, begin typing in the tag in the space provided, and click on\*\*\*\* Add New Tag\*\*\*\* to save it.
### +Add Tag
If you want to add a new tag that is not available in your existing tag list, begin typing in the tag in the space provided, and click on\*\*\*\* Add New Tag\*\*\*\* to save it.
 Remember to ****Save**** the Action.
 The ****Add Contact Tag**** action is a valuable tool for keeping your contact database organized and ensuring your marketing efforts are streamlined. By automatically tagging contacts based on specific triggers, you can maintain a clean and accurate list that supports targeted campaigns and improves customer engagement.
### remove-contact-tag-action
Tags allow you to maintain your contacts in an organized manner, so it’s important to keep them updated and remove any tag that no longer applies to a customer. Doing so offers control over contact categorization and improves your targeting in marketing campaigns. You can delete tags associated with a contact upon executing the workflow with the Remove Contact Tag workflow action.
### Removing Tags
To use this action access the \*\*\*\*Workflow \*\*\*\*builder inside the \*\*\*\*Automation \*\*\*\*section. Create or edit an existing workflow.
The ****Add Contact Tag**** action is a valuable tool for keeping your contact database organized and ensuring your marketing efforts are streamlined. By automatically tagging contacts based on specific triggers, you can maintain a clean and accurate list that supports targeted campaigns and improves customer engagement.
### remove-contact-tag-action
Tags allow you to maintain your contacts in an organized manner, so it’s important to keep them updated and remove any tag that no longer applies to a customer. Doing so offers control over contact categorization and improves your targeting in marketing campaigns. You can delete tags associated with a contact upon executing the workflow with the Remove Contact Tag workflow action.
### Removing Tags
To use this action access the \*\*\*\*Workflow \*\*\*\*builder inside the \*\*\*\*Automation \*\*\*\*section. Create or edit an existing workflow.
 In the workflow builder click the ****“+”**** icon to add an action and select ****Remove Contact Tag**** from the list.
 Toggle the Remove All tags option to reset the contact to no tags.
 Alternatively, individually select the desired tag(s) to remove from the dropdown menu; in this step, you can include multiple tags for removal.
 Click ****Save Action**** once you've selected the tags.
 Then, ****Publish**** and ****Save**** to activate the workflow.
By removing outdated or irrelevant tags, you can maintain a clean, organized contact database. Making it easier to re-engage customers through other pipelines or with new offers. This action helps ensure your marketing efforts stay relevant, and your contact list remains well-maintained.
### assign-to-user-action
The Assign to User action is designed to assign the identified contact to a specified user or multiple users using a round-robin assignment method.
To get started, click on the \*\*\*\*“+” \*\*\*\*icon to add a new workflow action, and select ****Assign to User****. Utilize this workflow action to assign the workflow or specific workflow actions to a team member or multiple team members for easy tracking.
Then, ****Publish**** and ****Save**** to activate the workflow.
By removing outdated or irrelevant tags, you can maintain a clean, organized contact database. Making it easier to re-engage customers through other pipelines or with new offers. This action helps ensure your marketing efforts stay relevant, and your contact list remains well-maintained.
### assign-to-user-action
The Assign to User action is designed to assign the identified contact to a specified user or multiple users using a round-robin assignment method.
To get started, click on the \*\*\*\*“+” \*\*\*\*icon to add a new workflow action, and select ****Assign to User****. Utilize this workflow action to assign the workflow or specific workflow actions to a team member or multiple team members for easy tracking.
 ***
## Users
When selecting the user(s) to assign the contact to, you have the option to choose either a single user or multiple users from the Select User dropdown.
***
## Users
When selecting the user(s) to assign the contact to, you have the option to choose either a single user or multiple users from the Select User dropdown.
 ### Single User Assignment
If you select only one user, then the assigned contact will solely belong to that user, and each time the trigger condition is met, the assigned contact remains with that user.
### Round-Robin Assignment
When you select more than one user, the trigger automatically rotates between the designated users for each triggered event. For instance, if you choose Tom and Jane, the first trigger assigns the contact to Tom, the second trigger assigns to Jane, the third assigns to Tom again, and so on until all users have had contacts assigned to them.
***
## Split Traffic
After assigning multiple users to your contacts, the Split Traffic feature becomes active to determine how you want the traffic to be distributed among the selected users.
### Single User Assignment
If you select only one user, then the assigned contact will solely belong to that user, and each time the trigger condition is met, the assigned contact remains with that user.
### Round-Robin Assignment
When you select more than one user, the trigger automatically rotates between the designated users for each triggered event. For instance, if you choose Tom and Jane, the first trigger assigns the contact to Tom, the second trigger assigns to Jane, the third assigns to Tom again, and so on until all users have had contacts assigned to them.
***
## Split Traffic
After assigning multiple users to your contacts, the Split Traffic feature becomes active to determine how you want the traffic to be distributed among the selected users.
 ### Equally
By selecting Equally under the Split Traffic option, the traffic will be distributed evenly among all the users, similar to the Round-Robin Assignment method (e.g., 1:1, 2:2, etc.). This is enabled by default until you switch to the Unevenly option.
### Equally
By selecting Equally under the Split Traffic option, the traffic will be distributed evenly among all the users, similar to the Round-Robin Assignment method (e.g., 1:1, 2:2, etc.). This is enabled by default until you switch to the Unevenly option.
 ### Unevenly
Opting for the Unevenly option allows you to customize the traffic distribution ratio for each selected user. For instance, you could specify a ratio of 5:2, where User A receives five traffic and User B receives two traffic; therefore, User B will only receive traffic after User A has completed their fifth.
### Unevenly
Opting for the Unevenly option allows you to customize the traffic distribution ratio for each selected user. For instance, you could specify a ratio of 5:2, where User A receives five traffic and User B receives two traffic; therefore, User B will only receive traffic after User A has completed their fifth.
 ***
## Only Apply To Unassigned Contacts
If the \*\*\*\*Only apply to unassigned contacts \*\*\*\*toggle is turned off, and the trigger fires for an already assigned contact, the new assignment will overwrite the previous one, and the contact will be assigned to the new user.
***
## Only Apply To Unassigned Contacts
If the \*\*\*\*Only apply to unassigned contacts \*\*\*\*toggle is turned off, and the trigger fires for an already assigned contact, the new assignment will overwrite the previous one, and the contact will be assigned to the new user.
 Always remember to Save the action.
 With the Assign to User action, you can efficiently manage contact assignments within your workflows, ensuring a balanced and flexible approach for your team. Whether using single-user assignments, round-robin rotations, or customized traffic splits, this feature keeps your workflow adaptable to your needs.
### remove-assigned-user-action
The Remove Assigned User workflow action streamlines your processes by automating the removal of assigned users from contacts after specific events are completed. This feature ensures smooth transitions within your workflows and helps maintain an organized system, saving valuable time for your team.\*\*
Start by adding a suitable Trigger to the Workflow. You can add other actions that fit the task before clicking the\*\* “+” \*\*\*\*icon to search and add the \*\*\*\*“Remove Assigned User” \*\*\*\*action.
With the Assign to User action, you can efficiently manage contact assignments within your workflows, ensuring a balanced and flexible approach for your team. Whether using single-user assignments, round-robin rotations, or customized traffic splits, this feature keeps your workflow adaptable to your needs.
### remove-assigned-user-action
The Remove Assigned User workflow action streamlines your processes by automating the removal of assigned users from contacts after specific events are completed. This feature ensures smooth transitions within your workflows and helps maintain an organized system, saving valuable time for your team.\*\*
Start by adding a suitable Trigger to the Workflow. You can add other actions that fit the task before clicking the\*\* “+” \*\*\*\*icon to search and add the \*\*\*\*“Remove Assigned User” \*\*\*\*action.
 When this workflow action is triggered within the workflow, the assigned user will be removed from the contact to which they were assigned.
 Remember to save the action and continue.
 By adding the Remove Assigned User workflow action, you can efficiently manage contact assignments, ensuring your workflows stay clean and organized. With just a few clicks, you can automate this process, boosting productivity and keeping your team focused on their next tasks.
### add-to-notes-action
With the Add to Notes workflow action, you can add a note to the contact record. Use this workflow action to add notes to a contact record that can be shared with other assigned users to grasp information about content you’d like to share.
Start by adding a suitable Trigger to the Workflow, you can add other actions that fit the task before clicking the\*\*\*\* “+” \*\*\*\*icon to search and add the \*\*\*\*“Add To Notes” \*\*\*\*action.
By adding the Remove Assigned User workflow action, you can efficiently manage contact assignments, ensuring your workflows stay clean and organized. With just a few clicks, you can automate this process, boosting productivity and keeping your team focused on their next tasks.
### add-to-notes-action
With the Add to Notes workflow action, you can add a note to the contact record. Use this workflow action to add notes to a contact record that can be shared with other assigned users to grasp information about content you’d like to share.
Start by adding a suitable Trigger to the Workflow, you can add other actions that fit the task before clicking the\*\*\*\* “+” \*\*\*\*icon to search and add the \*\*\*\*“Add To Notes” \*\*\*\*action.
 ### Add Note
In the Add To Notes action, simply enter the Note in the designated field, which can be used to provide information that could be beneficial to other users assigned to that contact.
### Add Note
In the Add To Notes action, simply enter the Note in the designated field, which can be used to provide information that could be beneficial to other users assigned to that contact.
 ### Custom Values & Trigger Link
When adding notes, you can enhance them with ****Custom Values**** and ****Trigger Links****. Click the ****tag icon**** to insert custom values like `{{contact.name}}` or `{{user.email}}`, which automatically pulls personalized details. Use the ****lightning bolt icon**** to add trigger links, such as `{{trigger_link.AE3ghN6TYHJOI4dKBZ3}}`, for embedding actionable links. These tools make your notes more detailed, specific, and functional for seamless collaboration.
### Custom Values & Trigger Link
When adding notes, you can enhance them with ****Custom Values**** and ****Trigger Links****. Click the ****tag icon**** to insert custom values like `{{contact.name}}` or `{{user.email}}`, which automatically pulls personalized details. Use the ****lightning bolt icon**** to add trigger links, such as `{{trigger_link.AE3ghN6TYHJOI4dKBZ3}}`, for embedding actionable links. These tools make your notes more detailed, specific, and functional for seamless collaboration.
 ### Formatting Tools
Undo or redo actions or use the other styling tools to enhance the appearance of your message.
### Formatting Tools
Undo or redo actions or use the other styling tools to enhance the appearance of your message.
 ### Save Action
Always remember to Save the action.
### Save Action
Always remember to Save the action.
 The Add to Notes action simplifies communication by allowing important details to be recorded and shared among team members. Whether using custom values for precision or simply adding relevant information, this feature helps ensure all assigned users stay informed.
### addremove-contact-followers-action
One of the most critical aspects of running a successful business is ensuring consistent follow-through. Keeping in touch with your contacts and addressing any pending items must remain a top priority. However, managing this process effectively can be challenging. By assigning followers to your contacts, you can ensure that no contact is overlooked—and you can automate this process using the Add/Remove Contact Followers action.
### Adding the Add/Remove Contact Followers Action
First, add an appropriate trigger, then click the \*\*\*\*"+" \*\*\*\*button to add an action. Search ****"Follower"**** or scroll through the Contact actions, and both the \*\*\*\*Add/Remove Followers \*\*\*\*actions will appear as options for selection.
The Add to Notes action simplifies communication by allowing important details to be recorded and shared among team members. Whether using custom values for precision or simply adding relevant information, this feature helps ensure all assigned users stay informed.
### addremove-contact-followers-action
One of the most critical aspects of running a successful business is ensuring consistent follow-through. Keeping in touch with your contacts and addressing any pending items must remain a top priority. However, managing this process effectively can be challenging. By assigning followers to your contacts, you can ensure that no contact is overlooked—and you can automate this process using the Add/Remove Contact Followers action.
### Adding the Add/Remove Contact Followers Action
First, add an appropriate trigger, then click the \*\*\*\*"+" \*\*\*\*button to add an action. Search ****"Follower"**** or scroll through the Contact actions, and both the \*\*\*\*Add/Remove Followers \*\*\*\*actions will appear as options for selection.
 Setting up these actions is straightforward. After selecting the desired action, specify the users to add or remove as contact followers. You can include as many users as needed, providing flexibility in managing team assignments.
 In the Remove action, you can remove all users at once by toggling the ****“Remove all followers”**** button.
 Once your selections are configured, ****Save**** the action.
 ****Publish**** and\*\*\*\* Save \*\*\*\*the workflow and it will be ready to use.
 This feature is particularly beneficial for businesses where different departments or team members manage various stages of the customer journey. For instance, as a customer moves from one stage to another, you can automate the process of assigning the appropriate followers. By leveraging the Add/Remove Contact Followers action, you can maintain a professional and organized approach to customer management.
### dnd-action
Creating relationships with customers is a complex process, and with their changing preferences, it's key to have a way to manage the contact channels you reach out to customers. Enabling and disabling the Do-Not-Disturb (DND) function for those channels can be automated with help from Automation. Let's check how.
***
## Setting Your Workflow
To start, navigate to the Workflows tab inside the Automation section and create or edit a workflow.
This feature is particularly beneficial for businesses where different departments or team members manage various stages of the customer journey. For instance, as a customer moves from one stage to another, you can automate the process of assigning the appropriate followers. By leveraging the Add/Remove Contact Followers action, you can maintain a professional and organized approach to customer management.
### dnd-action
Creating relationships with customers is a complex process, and with their changing preferences, it's key to have a way to manage the contact channels you reach out to customers. Enabling and disabling the Do-Not-Disturb (DND) function for those channels can be automated with help from Automation. Let's check how.
***
## Setting Your Workflow
To start, navigate to the Workflows tab inside the Automation section and create or edit a workflow.
 Set your trigger as needed. The most common will be “Customer Replied” with filters for keywords, such as STOP to opt out or START to resubscribe to communications.
 Click the "+" icon to add an action and select the Set Contact DND option from the available choices.
 ***
## Selecting A DND Type
The DND function works for Inbound and Outbound channels, so first select the one you need.
***
## Selecting A DND Type
The DND function works for Inbound and Outbound channels, so first select the one you need.
 You have the option to enable or disable DND for multiple channels at once. Depending on which option you select, the steps will vary slightly. To choose, open the dropdown menu.
 Let's explore our options further.
### Enable For All
This option is useful if the contact does not want to receive notifications or has opted out of a subscription, as it will remove them from all contact means.
Let's explore our options further.
### Enable For All
This option is useful if the contact does not want to receive notifications or has opted out of a subscription, as it will remove them from all contact means.
 ### Disable For All
To deactivate the Do Not Disturb feature for a contact, choose Disable Contact DND. This will reactivate all communication channels. This is perfect for contacts that want to resubscribe to your notifications.
### Disable For All
To deactivate the Do Not Disturb feature for a contact, choose Disable Contact DND. This will reactivate all communication channels. This is perfect for contacts that want to resubscribe to your notifications.
 ### Enable or Disable for specific channels
Using the dropdown menu, you can select the specific channel for which you want to enable or disable DND, such as SMS or calls.
### Enable or Disable for specific channels
Using the dropdown menu, you can select the specific channel for which you want to enable or disable DND, such as SMS or calls.
 By activating this feature, you can effectively respect your contact's preferences, ensuring that they are not disturbed by unwanted communications, ultimately maintaining a positive customer relationship.
### action-find-contact
The "Find Contact" action is an essential feature that enables you to search for contacts based on specific, customizable criteria. This dynamic tool enables simplified contact management and targeted automation, enhancing the efficiency of workflows by quickly locating the right contacts based on key data points. For more advanced use cases, the "Find Contact" action can be configured to match contacts based on an external reference, such as a Stripe Customer ID stored in a custom field. This enables the search of contacts linked to external systems through Inbound Webhook or Custom Marketplace Triggers.
***
## How It Works
### Insert the "Find Contact" Action
To begin, add the "Find Contact" action at the appropriate point within your workflow. This step ensures that the action is executed when needed in the automation process.
By activating this feature, you can effectively respect your contact's preferences, ensuring that they are not disturbed by unwanted communications, ultimately maintaining a positive customer relationship.
### action-find-contact
The "Find Contact" action is an essential feature that enables you to search for contacts based on specific, customizable criteria. This dynamic tool enables simplified contact management and targeted automation, enhancing the efficiency of workflows by quickly locating the right contacts based on key data points. For more advanced use cases, the "Find Contact" action can be configured to match contacts based on an external reference, such as a Stripe Customer ID stored in a custom field. This enables the search of contacts linked to external systems through Inbound Webhook or Custom Marketplace Triggers.
***
## How It Works
### Insert the "Find Contact" Action
To begin, add the "Find Contact" action at the appropriate point within your workflow. This step ensures that the action is executed when needed in the automation process.
 ### Action Name
Update the action name to reflect its purpose.
### Action Name
Update the action name to reflect its purpose.
 ### Add Field
Specify the search criteria by selecting the relevant standard or custom field values.
### Add Field
Specify the search criteria by selecting the relevant standard or custom field values.
 Configure multiple fields to ensure the search returns only contacts that match all specified criteria, providing highly targeted results.
 ### Email & Phone Fields
When adding an email or Phone field, you can select the checkbox below it to include additional phones or emails.
### Email & Phone Fields
When adding an email or Phone field, you can select the checkbox below it to include additional phones or emails.
 Once you have added all the relevant fields, save the action to add it to the workflow.
If branching is enabled, you can define distinct paths depending on whether a contact is found. All subsequent actions will follow the 'Contact Found' branch accordingly.
Once you have added all the relevant fields, save the action to add it to the workflow.
If branching is enabled, you can define distinct paths depending on whether a contact is found. All subsequent actions will follow the 'Contact Found' branch accordingly.
 By leveraging this feature, you can automate the search for specific contacts based on predefined criteria, ensuring that your workflows are both efficient and effective. Whether you are working with internal data or external references, this feature provides a seamless way to manage and segment your contacts.
### create-contact-action
The Create Contact workflow action allows businesses to automatically create new contact records or update existing ones based on defined criteria. Whether you're onboarding new clients, capturing web leads, or syncing data from third-party platforms, this feature ensures seamless data flow and operational efficiency.
��****Note****: This action only works with contactless execution methods like "Inbound webhook".
### Key Benefits of the Create Contact Action
* \*\*\*\*Improved Data Accuracy: \*\*\*\*Ensures that contact records remain up-to-date, reducing errors and preventing duplications.
* \*\*\*\*Streamlined Processes: \*\*\*\*Automates the manual task of adding or updating contact details, saving valuable time and resources.
* \*\*\*\*Enhanced Communication: \*\*\*\*Maintains accurate information to support timely follow-ups and personalized messaging.
* \*\*\*\*Customizable Fields: \*\*\*\*Supports both standard and custom fields, allowing for flexibility based on business-specific requirements.
### How to Configure the Create Contact Workflow Action
Navigate to the workflow builder within the automation section of your CRM, then create a new workflow or select an existing one where the Create Contact action should be applied.
Next, click the “+” icon and select Create Contact from the Contact section.
By leveraging this feature, you can automate the search for specific contacts based on predefined criteria, ensuring that your workflows are both efficient and effective. Whether you are working with internal data or external references, this feature provides a seamless way to manage and segment your contacts.
### create-contact-action
The Create Contact workflow action allows businesses to automatically create new contact records or update existing ones based on defined criteria. Whether you're onboarding new clients, capturing web leads, or syncing data from third-party platforms, this feature ensures seamless data flow and operational efficiency.
��****Note****: This action only works with contactless execution methods like "Inbound webhook".
### Key Benefits of the Create Contact Action
* \*\*\*\*Improved Data Accuracy: \*\*\*\*Ensures that contact records remain up-to-date, reducing errors and preventing duplications.
* \*\*\*\*Streamlined Processes: \*\*\*\*Automates the manual task of adding or updating contact details, saving valuable time and resources.
* \*\*\*\*Enhanced Communication: \*\*\*\*Maintains accurate information to support timely follow-ups and personalized messaging.
* \*\*\*\*Customizable Fields: \*\*\*\*Supports both standard and custom fields, allowing for flexibility based on business-specific requirements.
### How to Configure the Create Contact Workflow Action
Navigate to the workflow builder within the automation section of your CRM, then create a new workflow or select an existing one where the Create Contact action should be applied.
Next, click the “+” icon and select Create Contact from the Contact section.
 Optionally, you can update the action name to ensure clarity in workflow management.
 Next, configure the data fields to be used during contact creation or updates:
* ****Standard Fields****: First Name, Last Name, Email, Phone, Address, etc.
* ****Custom Fields****: Include fields like Membership ID, Referral Source, or any organization-specific attributes.
��****Note****: You must include either the email or phone number as a contact identifier.
Next, configure the data fields to be used during contact creation or updates:
* ****Standard Fields****: First Name, Last Name, Email, Phone, Address, etc.
* ****Custom Fields****: Include fields like Membership ID, Referral Source, or any organization-specific attributes.
��****Note****: You must include either the email or phone number as a contact identifier.
 After configuring each field, click Save to confirm your settings.
 Finally, use test data to verify the workflow's accuracy. Once confirmed, enable the Publish toggle to activate it in your live environment.
 The Create Contact workflow action is indispensable for businesses looking to automate and scale their contact management processes. By ensuring accurate data collection and integrating seamlessly with other automation tools, it helps teams operate more efficiently and deliver more personalized customer experiences. Implement this feature to optimize your lead handling, customer onboarding, and overall CRM strategy.
### Common Use Cases
#### Updating Contact Records After External Store Purchases
* ****Scenario****: Sync CRM data with customer purchase activity.
* ****Fields****: Full Name, Email, Purchase History (Custom Field).
* ****Outcome****: Contact profiles are updated and tagged as “Active Customer.”
#### Lead Management from External Data Sources
* ****Scenario****: Import third-party leads into the CRM.
* ****Fields****: Business Name, Contact Source, Phone, Email.
* ****Outcome****: Accurate lead records are created, ensuring readiness for outreach.
#### Onboarding New Customers
* ****Scenario****: Automate onboarding for new subscribers.
* ****Fields****: First Name, Last Name, Subscription Tier (Custom Field), Email.
* ****Outcome****: Contact is created, assigned to the onboarding team, and receives a welcome email.
The system updates the existing contact with new data, maintaining consistency and avoiding duplicates.
Yes, the action fully supports custom fields to accommodate your unique data requirements.
Yes. Add a Notification action in the workflow to alert specific team members.
### delete-contact-action
The Delete Contact action enables users to permanently remove a contact and all associated data from the system when specific conditions are met. This is typically used when contacts are no longer relevant or needed within the CRM.
��****Note:**** Deleting a contact is irreversible. Once deleted, all related data, such as conversations, notes, tasks, and activity history, is permanently lost and cannot be recovered. Use this action carefully and always test before deployment.
***
## How It Works
Navigate to Automations and open an existing workflow, or create a new one from scratch or a prebuilt recipe.
The Create Contact workflow action is indispensable for businesses looking to automate and scale their contact management processes. By ensuring accurate data collection and integrating seamlessly with other automation tools, it helps teams operate more efficiently and deliver more personalized customer experiences. Implement this feature to optimize your lead handling, customer onboarding, and overall CRM strategy.
### Common Use Cases
#### Updating Contact Records After External Store Purchases
* ****Scenario****: Sync CRM data with customer purchase activity.
* ****Fields****: Full Name, Email, Purchase History (Custom Field).
* ****Outcome****: Contact profiles are updated and tagged as “Active Customer.”
#### Lead Management from External Data Sources
* ****Scenario****: Import third-party leads into the CRM.
* ****Fields****: Business Name, Contact Source, Phone, Email.
* ****Outcome****: Accurate lead records are created, ensuring readiness for outreach.
#### Onboarding New Customers
* ****Scenario****: Automate onboarding for new subscribers.
* ****Fields****: First Name, Last Name, Subscription Tier (Custom Field), Email.
* ****Outcome****: Contact is created, assigned to the onboarding team, and receives a welcome email.
The system updates the existing contact with new data, maintaining consistency and avoiding duplicates.
Yes, the action fully supports custom fields to accommodate your unique data requirements.
Yes. Add a Notification action in the workflow to alert specific team members.
### delete-contact-action
The Delete Contact action enables users to permanently remove a contact and all associated data from the system when specific conditions are met. This is typically used when contacts are no longer relevant or needed within the CRM.
��****Note:**** Deleting a contact is irreversible. Once deleted, all related data, such as conversations, notes, tasks, and activity history, is permanently lost and cannot be recovered. Use this action carefully and always test before deployment.
***
## How It Works
Navigate to Automations and open an existing workflow, or create a new one from scratch or a prebuilt recipe.
 ### Add the Action
Click the plus (+) icon in the workflow builder to open the Actions menu. Search for and select Delete Contact.
****📌Note:**** Place this action at the end of the workflow. Since deletion is immediate, any steps after this point will not execute.
### Add the Action
Click the plus (+) icon in the workflow builder to open the Actions menu. Search for and select Delete Contact.
****📌Note:**** Place this action at the end of the workflow. Since deletion is immediate, any steps after this point will not execute.
 ### Action Name
You may optionally assign a custom name to the action, or retain the default name provided by the system.
### Action Name
You may optionally assign a custom name to the action, or retain the default name provided by the system.
 There are no settings to configure for this action. When triggered, it will instantly delete the contact that meets the workflow criteria.
### Save and Test
Click "Save Action" to add it to your workflow. Test thoroughly before publishing to ensure only the intended contacts are affected.
There are no settings to configure for this action. When triggered, it will instantly delete the contact that meets the workflow criteria.
### Save and Test
Click "Save Action" to add it to your workflow. Test thoroughly before publishing to ensure only the intended contacts are affected.
 ### Best Practices
* Double-check trigger conditions to avoid unintentional deletions
* Back up contact data externally if needed
* Inform relevant team members before enabling this action in live workflows
For long-term automation success, consider combining this action with smart filtering, conditional logic, and fallback options like "Remove from Workflow" to maintain control and data integrity.
The Delete Contact action is a powerful tool for keeping your CRM clean and compliant but it should be used with thoughtful planning and rigorous safeguards. Always test your workflow, communicate with your team, and back up important data when necessary.
### Frequently Asked Questions
Yes, contacts can be restored within two months of deletion. However, associated data such as conversations and notes cannot be recovered.
The contact record and all associated data are permanently removed. Even if the contact is restored, this associated data will not return.
Yes. If you want to remove a contact from a workflow without deleting their data, use the Remove from Workflow action. This stops the contact from progressing through the automation while preserving their record in the system.
### modify-contact-engagement-score-action
The Modify Contact Engagement Score action enables you to adjust a contact's engagement score based on their interactions and behaviors. This score is typically derived from factors such as email opens, clicks, website visits, and engagement with marketing materials. Add the relevant triggers that best suit your needs.
Now, let's add the action to our workflow.
### Best Practices
* Double-check trigger conditions to avoid unintentional deletions
* Back up contact data externally if needed
* Inform relevant team members before enabling this action in live workflows
For long-term automation success, consider combining this action with smart filtering, conditional logic, and fallback options like "Remove from Workflow" to maintain control and data integrity.
The Delete Contact action is a powerful tool for keeping your CRM clean and compliant but it should be used with thoughtful planning and rigorous safeguards. Always test your workflow, communicate with your team, and back up important data when necessary.
### Frequently Asked Questions
Yes, contacts can be restored within two months of deletion. However, associated data such as conversations and notes cannot be recovered.
The contact record and all associated data are permanently removed. Even if the contact is restored, this associated data will not return.
Yes. If you want to remove a contact from a workflow without deleting their data, use the Remove from Workflow action. This stops the contact from progressing through the automation while preserving their record in the system.
### modify-contact-engagement-score-action
The Modify Contact Engagement Score action enables you to adjust a contact's engagement score based on their interactions and behaviors. This score is typically derived from factors such as email opens, clicks, website visits, and engagement with marketing materials. Add the relevant triggers that best suit your needs.
Now, let's add the action to our workflow.
 ### Action Name
Update the name of the action to accurately reflect its intended purpose.
### Action Name
Update the name of the action to accurately reflect its intended purpose.
 ### Adjustment
When modifying the engagement score, you can choose to either increase or decrease the score based on the contact's level of interaction. Increasing the score reflects strong engagement, such as frequent email opens, clicks, or website visits, indicating a higher likelihood of conversion. Conversely, decreasing the score is appropriate for contacts with minimal interaction or declining engagement, signaling a lower probability of conversion.
### Adjustment
When modifying the engagement score, you can choose to either increase or decrease the score based on the contact's level of interaction. Increasing the score reflects strong engagement, such as frequent email opens, clicks, or website visits, indicating a higher likelihood of conversion. Conversely, decreasing the score is appropriate for contacts with minimal interaction or declining engagement, signaling a lower probability of conversion.
 ### Points
Enter the amount by which the score should be adjusted. Factors that have a direct impact on conversion likelihood should result in a more significant score change, while less influential factors should lead to a more moderate adjustment. This customization allows for more effective lead prioritization and enables the tailoring of follow-up strategies based on real-time engagement data.
### Points
Enter the amount by which the score should be adjusted. Factors that have a direct impact on conversion likelihood should result in a more significant score change, while less influential factors should lead to a more moderate adjustment. This customization allows for more effective lead prioritization and enables the tailoring of follow-up strategies based on real-time engagement data.
 By modifying the engagement score, you can better identify high-potential leads and prioritize follow-up efforts to optimize conversion rates.
### create-opportunity-action
The Create Opportunity action allows you to generate a new opportunity within a specified pipeline and stage, ensuring that new leads are properly categorized without affecting any existing opportunities. This action is great for onboarding new leads, as it automatically populates all details and values. Additionally, the duplicate opportunity setting follows a unified global setting, simplifying opportunity management.
To use this workflow action, navigate to ****Automation > Workflows**** in your CRM and open an existing workflow or create a new one.
By modifying the engagement score, you can better identify high-potential leads and prioritize follow-up efforts to optimize conversion rates.
### create-opportunity-action
The Create Opportunity action allows you to generate a new opportunity within a specified pipeline and stage, ensuring that new leads are properly categorized without affecting any existing opportunities. This action is great for onboarding new leads, as it automatically populates all details and values. Additionally, the duplicate opportunity setting follows a unified global setting, simplifying opportunity management.
To use this workflow action, navigate to ****Automation > Workflows**** in your CRM and open an existing workflow or create a new one.
 First, choose a Trigger to determine when this action should run. Click on the \*\*\*\*“+” \*\*\*\*icon to add an action, then search for and select ****Create Opportunity**** from the list.
 ***
## Configure the Action
### Pipeline
Click the dropdown to select the pipeline where the new opportunity should be created.
***
## Configure the Action
### Pipeline
Click the dropdown to select the pipeline where the new opportunity should be created.
 ### Duplicate Opportunity
This option follows a unified global setting for handling duplicate opportunities. If you click on the ****Duplicate Opportunity**** option, you will be redirected to ****Settings >**** ****Business Profile****. From there, scroll down to the ****General**** section, locate the ****Allow Duplicate Opportunity**** setting, and toggle it ****on**** or ****off**** based on your preference.
This ensures consistency in how duplicate opportunities are managed across workflows.
### Duplicate Opportunity
This option follows a unified global setting for handling duplicate opportunities. If you click on the ****Duplicate Opportunity**** option, you will be redirected to ****Settings >**** ****Business Profile****. From there, scroll down to the ****General**** section, locate the ****Allow Duplicate Opportunity**** setting, and toggle it ****on**** or ****off**** based on your preference.
This ensures consistency in how duplicate opportunities are managed across workflows.
 ### Add Field
Select the \*\*\*\*Add Field \*\*\*\*option to specify additional criteria to refine your search, such as filtering by opportunity name, value, source, pipeline stage, and much more.
### Add Field
Select the \*\*\*\*Add Field \*\*\*\*option to specify additional criteria to refine your search, such as filtering by opportunity name, value, source, pipeline stage, and much more.
 ### Fields
This section displays the opportunity details that can be configured, allowing for further automation steps.
* \*\*\*\*Opportunity Name: \*\*\*\*Enter a name for the new opportunity to help identify it within the pipeline.
### Fields
This section displays the opportunity details that can be configured, allowing for further automation steps.
* \*\*\*\*Opportunity Name: \*\*\*\*Enter a name for the new opportunity to help identify it within the pipeline.
 * \*\*\*\*Pipeline Stage: \*\*\*\*Select the stage where the opportunity will be placed within the pipeline.
 * \*\*\*\*Opportunity Value: \*\*\*\*Here, you can define the monetary value of the opportunity.
 * \*\*\*\*Status: \*\*\*\*Choose the current status of the opportunity (e.g., Open, Closed, Won, Lost). Remember, the Status field must be added before you can mark an opportunity as Lost.
 * ****Opportunity Source:**** Use this option to identify where the opportunity originated from.
 * \*\*\*\*Lost Reason: \*\*\*\*If the opportunity is marked as lost, provide a reason. You must add both the Status and Lost fields before specifying a Lost Reason.
 Once configured, save the action and publish the workflow to activate it.
 Using the Create Opportunity action helps you add leads, manage your pipeline, and stay organized. Adding opportunities effectively ensures that no lead falls through the cracks and that the right steps can be taken toward conversion.
### update-opportunity-action
The Update Opportunity action allows you to modify key details of an existing opportunity. Whether you need to update the name, value, pipeline stage, or status, this action ensures seamless adjustments without the need for manual intervention.
### Action Notes
* With this action, you can easily modify opportunity details, ensuring that your pipeline reflects the most up-to-date information.
* This action is useful for updating an opportunity’s status or moving it to a different stage after a lead takes action. Additionally, it enables seamless transitions between pipelines when opportunities need to be reassigned.
To use this workflow action, go to ****Automation > Workflows**** in your CRM and open an existing workflow or create a new one.
Using the Create Opportunity action helps you add leads, manage your pipeline, and stay organized. Adding opportunities effectively ensures that no lead falls through the cracks and that the right steps can be taken toward conversion.
### update-opportunity-action
The Update Opportunity action allows you to modify key details of an existing opportunity. Whether you need to update the name, value, pipeline stage, or status, this action ensures seamless adjustments without the need for manual intervention.
### Action Notes
* With this action, you can easily modify opportunity details, ensuring that your pipeline reflects the most up-to-date information.
* This action is useful for updating an opportunity’s status or moving it to a different stage after a lead takes action. Additionally, it enables seamless transitions between pipelines when opportunities need to be reassigned.
To use this workflow action, go to ****Automation > Workflows**** in your CRM and open an existing workflow or create a new one.
 Start by selecting a Trigger to determine when the update should occur.
Then, click on the ****“+”**** icon to add an action, and search for and select ****Update Opportunity**** from the list.
Start by selecting a Trigger to determine when the update should occur.
Then, click on the ****“+”**** icon to add an action, and search for and select ****Update Opportunity**** from the list.
 ### Allow Opportunity
This option lets you move an opportunity to a different stage in the pipeline as needed. When toggled on, the opportunity will be moved to the selected stage even if the stage is before the opportunity’s current stage. This is useful if a lead needs to be revisited or repositioned to an earlier step in the sales process.
### Allow Opportunity
This option lets you move an opportunity to a different stage in the pipeline as needed. When toggled on, the opportunity will be moved to the selected stage even if the stage is before the opportunity’s current stage. This is useful if a lead needs to be revisited or repositioned to an earlier step in the sales process.
 ### Duplicate Opportunity
This option follows a global rule for handling duplicates. If you click ****Duplicate Opportunity****, you’ll be redirected to Opportunity settings. Once there, locate the ****Allow Multiple Opportunities for Contact**** option, then toggle it ****on**** or ****off**** based on your preference.
This ensures your system manages duplicate opportunities consistently.
### Duplicate Opportunity
This option follows a global rule for handling duplicates. If you click ****Duplicate Opportunity****, you’ll be redirected to Opportunity settings. Once there, locate the ****Allow Multiple Opportunities for Contact**** option, then toggle it ****on**** or ****off**** based on your preference.
This ensures your system manages duplicate opportunities consistently.
 ### Add Field
Select the \*\*\*\*Add Field \*\*\*\*option to filter by opportunity name, value, source, pipeline stage, pipeline, and more.
### Add Field
Select the \*\*\*\*Add Field \*\*\*\*option to filter by opportunity name, value, source, pipeline stage, pipeline, and more.
 ### Fields
In the dropdown, you can see all available fields that can be modified within this action.
* \*\*\*\*Pipeline: \*\*\*\*Choose the pipeline where the opportunity should be updated. This must be selected first to ensure accurate pipeline stage options.
### Fields
In the dropdown, you can see all available fields that can be modified within this action.
* \*\*\*\*Pipeline: \*\*\*\*Choose the pipeline where the opportunity should be updated. This must be selected first to ensure accurate pipeline stage options.
 * ****Opportunity Name:**** Here, you can modify the name of the opportunity using Custom Fields.
 * \*\*\*\*Pipeline Stage: \*\*\*\*Adjust the stage of the opportunity within the pipeline. Since the pipeline stage depends on the selected pipeline, ensure the Pipeline field is added first.
 * \*\*\*\*Opportunity Value: \*\*\*\*Update the monetary value assigned to the opportunity.
 * \*\*\*\*Status: \*\*\*\*Change the opportunity’s status (e.g., Open, Closed, Won, Lost).
 * \*\*\*\*Opportunity Source: \*\*\*\*Specify the lead source for tracking purposes.
 * \*\*\*\*Lost Reason: \*\*\*\*If the opportunity is marked as lost, provide a reason. You must add both the Status and Lost fields before specifying a Lost Reason.
 Once you’ve configured everything, save the action and publish the workflow to apply the changes automatically.
Using the Update Opportunity action keeps your pipeline organized, reduces manual work, and ensures your opportunities always reflect their most up-to-date status.
### create-update-opportunity-action
The Create/Update Opportunity workflow action allows you to create a new opportunity or update an existing one in the pipeline you select. This workflow action allows you to automate opportunity status changes based on a workflow trigger, getting rid of manually moving contacts to new opportunities.
In the workflow builder choose a suitable Trigger. Click on the\*\*\*\* “+” ****icon to search and add the**** "Create/Update Opportunity"\*\*\*\* Action.
Once you’ve configured everything, save the action and publish the workflow to apply the changes automatically.
Using the Update Opportunity action keeps your pipeline organized, reduces manual work, and ensures your opportunities always reflect their most up-to-date status.
### create-update-opportunity-action
The Create/Update Opportunity workflow action allows you to create a new opportunity or update an existing one in the pipeline you select. This workflow action allows you to automate opportunity status changes based on a workflow trigger, getting rid of manually moving contacts to new opportunities.
In the workflow builder choose a suitable Trigger. Click on the\*\*\*\* “+” ****icon to search and add the**** "Create/Update Opportunity"\*\*\*\* Action.
 ***
## Configure Action
### In Pipeline
To use this workflow action, begin by selecting the pipeline where you want to create or update the contact’s opportunity.
***
## Configure Action
### In Pipeline
To use this workflow action, begin by selecting the pipeline where you want to create or update the contact’s opportunity.
 ### In Pipeline Stage
Next, choose the appropriate stage in the pipeline where the contact’s opportunity should be placed. Use the dropdown menu to select the correct stage.
### In Pipeline Stage
Next, choose the appropriate stage in the pipeline where the contact’s opportunity should be placed. Use the dropdown menu to select the correct stage.
 ### Opportunity & Lead Value
* \*\*\*\*Opportunity Name: \*\*\*\*Provide a name for the opportunity. This could be the contact’s name, their company name, or another identifier that best suits your workflow.
* ****Opportunity Source:**** Fill in the opportunity’s source, such as “Call,” “Organic Lead,” “Facebook,” or “Google.” This helps you track how the contact entered your workflow.
* ****Lead Value:**** Type in the lead value here. This value should reflect the dollar amount of the product or service your client is interested in.
### Opportunity & Lead Value
* \*\*\*\*Opportunity Name: \*\*\*\*Provide a name for the opportunity. This could be the contact’s name, their company name, or another identifier that best suits your workflow.
* ****Opportunity Source:**** Fill in the opportunity’s source, such as “Call,” “Organic Lead,” “Facebook,” or “Google.” This helps you track how the contact entered your workflow.
* ****Lead Value:**** Type in the lead value here. This value should reflect the dollar amount of the product or service your client is interested in.
 ### Opportunity Status, Stages & Duplication
Choose the status you want to add the contact to, either; ****Open, won, lost, ****or**** abandoned.****
### Opportunity Status, Stages & Duplication
Choose the status you want to add the contact to, either; ****Open, won, lost, ****or**** abandoned.****
 * ****Allow Opportunity to Move to Any Previous Stage:**** By enabling the ****Allow Opportunity to Move to Any Previous Stage in Pipeline**** option, you can give flexibility to move the contact back to earlier stages as needed.
* \*\*\*\*Allow Duplicate Opportunities: \*\*\*\*If your workflow involves a single contact needing multiple opportunities in the same pipeline, enable ****Allow Duplicate Opportunities****. This ensures you can create or update multiple opportunities for the same contact without conflict.
* ****Allow Opportunity to Move to Any Previous Stage:**** By enabling the ****Allow Opportunity to Move to Any Previous Stage in Pipeline**** option, you can give flexibility to move the contact back to earlier stages as needed.
* \*\*\*\*Allow Duplicate Opportunities: \*\*\*\*If your workflow involves a single contact needing multiple opportunities in the same pipeline, enable ****Allow Duplicate Opportunities****. This ensures you can create or update multiple opportunities for the same contact without conflict.
 ****📌NOTE:**** Both options cannot work at the same time. You can either create a new Opportunity for the same contact using Allow Duplicate or allow an existing Opportunity to move backward in the Pipeline.
### Save Action
Remember to save configuring the action.
****📌NOTE:**** Both options cannot work at the same time. You can either create a new Opportunity for the same contact using Allow Duplicate or allow an existing Opportunity to move backward in the Pipeline.
### Save Action
Remember to save configuring the action.
 Once configured and saved, this action helps ensure your opportunities stay accurate and organized, reducing manual effort and improving efficiency across your sales process.
### find-opportunity-action
The Find Opportunity action allows you to quickly locate an opportunity associated with a contact. Whether you need to update an existing opportunity or make workflow decisions based on an opportunity’s status, this action helps streamline opportunity management.
### Key Benefit & Use Case
* You can efficiently find the earliest or latest opportunity for contact, ensuring that workflows can accurately interact with the right record.
* This action is Ideal for updating a specific opportunity or making automated decisions based on an existing opportunity’s details.
To use this workflow action, navigate to ****Automation > Workflows**** in your CRM and open an existing workflow or create a new one.
Choose a suitable ****Trigger**** to determine when this action should run, and click on the ****“+”**** icon to add an action. Search for and select ****Find Opportunity**** from the list.
Once configured and saved, this action helps ensure your opportunities stay accurate and organized, reducing manual effort and improving efficiency across your sales process.
### find-opportunity-action
The Find Opportunity action allows you to quickly locate an opportunity associated with a contact. Whether you need to update an existing opportunity or make workflow decisions based on an opportunity’s status, this action helps streamline opportunity management.
### Key Benefit & Use Case
* You can efficiently find the earliest or latest opportunity for contact, ensuring that workflows can accurately interact with the right record.
* This action is Ideal for updating a specific opportunity or making automated decisions based on an existing opportunity’s details.
To use this workflow action, navigate to ****Automation > Workflows**** in your CRM and open an existing workflow or create a new one.
Choose a suitable ****Trigger**** to determine when this action should run, and click on the ****“+”**** icon to add an action. Search for and select ****Find Opportunity**** from the list.
 ### Opportunity To Be Found
When searching for an opportunity, you can specify which one should be identified:
* ****Most Recently Created Opportunity****: Select this option to find and update the most recently created opportunity that matches the criteria.
* ****First Created Opportunity****: This option identifies the earliest opportunity created that meets the specified conditions.
This setting ensures that the correct opportunity is retrieved and updated based on your workflow’s needs.
### Opportunity To Be Found
When searching for an opportunity, you can specify which one should be identified:
* ****Most Recently Created Opportunity****: Select this option to find and update the most recently created opportunity that matches the criteria.
* ****First Created Opportunity****: This option identifies the earliest opportunity created that meets the specified conditions.
This setting ensures that the correct opportunity is retrieved and updated based on your workflow’s needs.
 ### Add Field
Select the \*\*\*\*Add Field \*\*\*\*option to specify additional criteria to refine your search, such as filtering by opportunity ID, status, name, source, pipeline stage, and much more.
### Add Field
Select the \*\*\*\*Add Field \*\*\*\*option to specify additional criteria to refine your search, such as filtering by opportunity ID, status, name, source, pipeline stage, and much more.
 ### Fields
This section displays opportunity details found by the action, allowing you to reference them in subsequent steps within the workflow.
### Fields
This section displays opportunity details found by the action, allowing you to reference them in subsequent steps within the workflow.
 Once configured, save the action and publish the workflow to activate it.
 By using the Find Opportunity action, you can automate opportunity tracking, making it easier to update records or trigger next steps based on existing opportunities.
### remove-opportunity
The Remove Opportunity action serves the purpose of eliminating an opportunity associated with contacts. This feature allows for efficient management of sales opportunities by providing the option to disassociate particular opportunities from contacts when certain criteria are met. This leads to better organization of sales pipelines and improved accuracy in tracking and analyzing sales progress.
To use this feature, navigate to the ****Automation > Workflows**** section in your account and opt to create a new workflow, or click an existing workflow to open its builder.
Add the relevant trigger(s), then click the plus icon to add a new workflow action. Locate and select the Remove Opportunity option from the list by utilizing the search bar, or scrolling to the Opportunity section.\*\*
By using the Find Opportunity action, you can automate opportunity tracking, making it easier to update records or trigger next steps based on existing opportunities.
### remove-opportunity
The Remove Opportunity action serves the purpose of eliminating an opportunity associated with contacts. This feature allows for efficient management of sales opportunities by providing the option to disassociate particular opportunities from contacts when certain criteria are met. This leads to better organization of sales pipelines and improved accuracy in tracking and analyzing sales progress.
To use this feature, navigate to the ****Automation > Workflows**** section in your account and opt to create a new workflow, or click an existing workflow to open its builder.
Add the relevant trigger(s), then click the plus icon to add a new workflow action. Locate and select the Remove Opportunity option from the list by utilizing the search bar, or scrolling to the Opportunity section.\*\*
 ### Action Name
Update the name of the action to display its intended purpose.
### Action Name
Update the name of the action to display its intended purpose.
 ### Opportunity To Be Found
This setting determines which opportunities should be removed when the **Remove Opportunity**\*\* action is triggered in a workflow. The options available are:
* ****All Contact Opportunities in the Selected Pipeline:**** This removes every opportunity linked to the contact within the specified pipeline.
* \*\*\*\*Opportunity Found or Triggered in this Workflow: \*\*\*\*This removes only the specific opportunity that either triggered the workflow or was identified in a previous step.
This flexibility ensures more precise opportunity management, allowing for targeted removal instead of deleting all opportunities.
### Opportunity To Be Found
This setting determines which opportunities should be removed when the **Remove Opportunity**\*\* action is triggered in a workflow. The options available are:
* ****All Contact Opportunities in the Selected Pipeline:**** This removes every opportunity linked to the contact within the specified pipeline.
* \*\*\*\*Opportunity Found or Triggered in this Workflow: \*\*\*\*This removes only the specific opportunity that either triggered the workflow or was identified in a previous step.
This flexibility ensures more precise opportunity management, allowing for targeted removal instead of deleting all opportunities.
 ### Pipeline
Select the Pipeline dropdown to choose the pipeline from which you wish to remove the opportunity.
### Pipeline
Select the Pipeline dropdown to choose the pipeline from which you wish to remove the opportunity.
 Save the action then publish the workflow to activate it!
 By using the Remove Opportunity Action, you can ensure that your sales pipeline remains up-to-date, eliminating outdated or irrelevant opportunities. This helps your team focus on the most promising leads, reduces clutter, and enhances overall organizational efficiency.
### add-owner-to-opportunity-action
The "Add Owner to Opportunity" action assigns a specified user as the owner of an existing opportunity. Depending on your system settings, this action may also update the associated contact's owner if contact and opportunity ownership are synchronized. This functionality ensures that each opportunity is assigned to a designated owner responsible for managing its progression through the sales pipeline.
***
## How It Works
Navigate to Automation > Workflows, and either create a new workflow from scratch or open an existing opportunity-based workflow.
Add the relevant opportunity triggers or the “Find Opportunity” action.
****📌Note:**** This action requires an opportunity to be in context- either triggered directly by an opportunity workflow trigger or through a prior "Find Opportunity" step. If no opportunity is found, the action will not be executed.
By using the Remove Opportunity Action, you can ensure that your sales pipeline remains up-to-date, eliminating outdated or irrelevant opportunities. This helps your team focus on the most promising leads, reduces clutter, and enhances overall organizational efficiency.
### add-owner-to-opportunity-action
The "Add Owner to Opportunity" action assigns a specified user as the owner of an existing opportunity. Depending on your system settings, this action may also update the associated contact's owner if contact and opportunity ownership are synchronized. This functionality ensures that each opportunity is assigned to a designated owner responsible for managing its progression through the sales pipeline.
***
## How It Works
Navigate to Automation > Workflows, and either create a new workflow from scratch or open an existing opportunity-based workflow.
Add the relevant opportunity triggers or the “Find Opportunity” action.
****📌Note:**** This action requires an opportunity to be in context- either triggered directly by an opportunity workflow trigger or through a prior "Find Opportunity" step. If no opportunity is found, the action will not be executed.
 Next, add the Add Owner to Opportunity action.
 ### Action Name
Use this field to update the action name to accurately reflect its intended purpose.
### Action Name
Use this field to update the action name to accurately reflect its intended purpose.
 ### User
From the user dropdown, select the team member to whom each opportunity should be assigned.
### User
From the user dropdown, select the team member to whom each opportunity should be assigned.
 You can choose to limit this assignment to opportunities that are currently unassigned by enabling the “Only Apply to Unassigned Opportunities” feature, or you can override the current owner for all opportunities by leaving it disabled.
 Finally, save the action and activate the workflow to automate the process as required.
 ### Sync Settings
If contact and opportunity owners are synchronized (as configured in the Opportunity Settings), changing the opportunity owner will also update the contact’s owner. If synchronization is not enabled, only the opportunity owner will be modified.
### Edge Cases
* ****Multiple Opportunities:**** If the "Find Opportunity" step identifies multiple potential matches, only one opportunity (either the earliest or latest, depending on your selection in the Find Opportunity step) will be updated.
* ****No Opportunity in Context:**** If no opportunity is found or triggered, the action will be skipped.
### Practical Example
Scenario: A workflow identifies high-value leads through the "Find Opportunity" action and assigns them to a specific user for priority follow-up.
****Trigger:**** A lead qualifies as high-value based on form submission data.
****Action:**** Find Opportunity
* ****Filters****: Opportunity Value greater than 5000
****Action:**** Add Owner to Opportunity
* ****Action Name:**** “Assign High-Value Lead to `{{User}}`”
* ****Only Apply to Unassigned Opportunities:**** Disabled (to override any existing owner)
With this configuration, all opportunities meeting the "high-value" criteria identified by the "Find Opportunity" step will be assigned to the respective user, ensuring immediate attention and follow-up. If the system is set to synchronize contact and opportunity ownership, the contact owner will also be updated accordingly.
### remove-owner-from-opportunity-action
The "Remove Owner from Opportunity" action removes the designated owner from an existing opportunity. Depending on your system settings, this action may also remove the associated contact's owner if contact and opportunity ownership are synchronized. This functionality ensures that opportunities are no longer tied to a specific user for management, potentially reassigning responsibilities or updating the opportunity’s status.
***
## How It Works
Navigate to Automation > Workflows, create a new workflow from scratch or open an existing opportunity-based workflow.
Add the relevant opportunity triggers or the “Find Opportunity” action.
📌 ****Note****: This action requires an opportunity to be in context - either triggered directly by an opportunity workflow trigger or through a prior "Find Opportunity" step. If no opportunity is found, the action will not be executed.
Next, add the Remove Owner from Opportunity action.
### Sync Settings
If contact and opportunity owners are synchronized (as configured in the Opportunity Settings), changing the opportunity owner will also update the contact’s owner. If synchronization is not enabled, only the opportunity owner will be modified.
### Edge Cases
* ****Multiple Opportunities:**** If the "Find Opportunity" step identifies multiple potential matches, only one opportunity (either the earliest or latest, depending on your selection in the Find Opportunity step) will be updated.
* ****No Opportunity in Context:**** If no opportunity is found or triggered, the action will be skipped.
### Practical Example
Scenario: A workflow identifies high-value leads through the "Find Opportunity" action and assigns them to a specific user for priority follow-up.
****Trigger:**** A lead qualifies as high-value based on form submission data.
****Action:**** Find Opportunity
* ****Filters****: Opportunity Value greater than 5000
****Action:**** Add Owner to Opportunity
* ****Action Name:**** “Assign High-Value Lead to `{{User}}`”
* ****Only Apply to Unassigned Opportunities:**** Disabled (to override any existing owner)
With this configuration, all opportunities meeting the "high-value" criteria identified by the "Find Opportunity" step will be assigned to the respective user, ensuring immediate attention and follow-up. If the system is set to synchronize contact and opportunity ownership, the contact owner will also be updated accordingly.
### remove-owner-from-opportunity-action
The "Remove Owner from Opportunity" action removes the designated owner from an existing opportunity. Depending on your system settings, this action may also remove the associated contact's owner if contact and opportunity ownership are synchronized. This functionality ensures that opportunities are no longer tied to a specific user for management, potentially reassigning responsibilities or updating the opportunity’s status.
***
## How It Works
Navigate to Automation > Workflows, create a new workflow from scratch or open an existing opportunity-based workflow.
Add the relevant opportunity triggers or the “Find Opportunity” action.
📌 ****Note****: This action requires an opportunity to be in context - either triggered directly by an opportunity workflow trigger or through a prior "Find Opportunity" step. If no opportunity is found, the action will not be executed.
Next, add the Remove Owner from Opportunity action.
 ### Action Name
Use this field to update the action name to accurately reflect its intended purpose.
### Action Name
Use this field to update the action name to accurately reflect its intended purpose.
 Since this action removes the owner, there is no need to select a user from the dropdown. The purpose is to unassign the current owner, not to reassign to another user.
Finally, save the action and activate the workflow to automate the process as needed.
### Sync Settings
If contact and opportunity owners are synchronized (as configured in the Opportunity Settings), removing the opportunity owner will also remove the contact's owner. If synchronization is not enabled, only the opportunity owner will be modified.
### Edge Cases
* ****No Opportunity in Context****: If the workflow is not triggered by an opportunity and there is no preceding "Find Opportunity" step, this action will be bypassed.
* ****Multiple Opportunities****: In cases where the "Find Opportunity" step identifies multiple potential matches, only one opportunity (either the earliest or latest, depending on your selection) will be updated, while the remaining opportunities will remain unchanged.
* ****Already Unassigned****: If the opportunity already has no assigned owner, this action will have no effect, as there is no owner to remove.
* If the opportunity trigger and find opportunity action are present, the result from the "Find Opportunity" step will take precedence.
### Practical Example
****Scenario****: A workflow identifies opportunities that are being transitioned out of a sales stage and should no longer be managed by the current owner.
****Trigger****: Opportunity reaches a specific sales stage indicating it's ready to be unassigned.
****Action****: Find Opportunity
* ****Filters****: Opportunity Stage is "Transitioned"
****Action****: Remove Owner from Opportunity
* ****Action Name****: “Remove Owner from Opportunity in the ‘Transitioned’ Stage”
With this configuration, all opportunities that meet the "Transitioned" stage criteria will have their owner removed, allowing for reassignment or reassessment by the team. If the system is set to synchronize contact and opportunity ownership, the contact’s owner will also be removed.
### add-followers-to-opportunity-action
The Add Follower(s) to Opportunity action enables the assignment of one or more users as followers to an existing opportunity, allowing these users to receive updates and notifications about any changes related to the opportunity.
***
## How It Works
Navigate to Automation > Workflows, then create a new workflow from scratch, or open an existing opportunity-based workflow.
Add the relevant opportunity triggers or the “Find Opportunity” action.
****📌Note:**** This action requires an opportunity to be in context- either triggered directly by an opportunity workflow trigger or through a prior "Find Opportunity" step. If no opportunity is found, the action will not be executed.
Next, add the “Add the Add Follower(s) to Opportunity” action.
Since this action removes the owner, there is no need to select a user from the dropdown. The purpose is to unassign the current owner, not to reassign to another user.
Finally, save the action and activate the workflow to automate the process as needed.
### Sync Settings
If contact and opportunity owners are synchronized (as configured in the Opportunity Settings), removing the opportunity owner will also remove the contact's owner. If synchronization is not enabled, only the opportunity owner will be modified.
### Edge Cases
* ****No Opportunity in Context****: If the workflow is not triggered by an opportunity and there is no preceding "Find Opportunity" step, this action will be bypassed.
* ****Multiple Opportunities****: In cases where the "Find Opportunity" step identifies multiple potential matches, only one opportunity (either the earliest or latest, depending on your selection) will be updated, while the remaining opportunities will remain unchanged.
* ****Already Unassigned****: If the opportunity already has no assigned owner, this action will have no effect, as there is no owner to remove.
* If the opportunity trigger and find opportunity action are present, the result from the "Find Opportunity" step will take precedence.
### Practical Example
****Scenario****: A workflow identifies opportunities that are being transitioned out of a sales stage and should no longer be managed by the current owner.
****Trigger****: Opportunity reaches a specific sales stage indicating it's ready to be unassigned.
****Action****: Find Opportunity
* ****Filters****: Opportunity Stage is "Transitioned"
****Action****: Remove Owner from Opportunity
* ****Action Name****: “Remove Owner from Opportunity in the ‘Transitioned’ Stage”
With this configuration, all opportunities that meet the "Transitioned" stage criteria will have their owner removed, allowing for reassignment or reassessment by the team. If the system is set to synchronize contact and opportunity ownership, the contact’s owner will also be removed.
### add-followers-to-opportunity-action
The Add Follower(s) to Opportunity action enables the assignment of one or more users as followers to an existing opportunity, allowing these users to receive updates and notifications about any changes related to the opportunity.
***
## How It Works
Navigate to Automation > Workflows, then create a new workflow from scratch, or open an existing opportunity-based workflow.
Add the relevant opportunity triggers or the “Find Opportunity” action.
****📌Note:**** This action requires an opportunity to be in context- either triggered directly by an opportunity workflow trigger or through a prior "Find Opportunity" step. If no opportunity is found, the action will not be executed.
Next, add the “Add the Add Follower(s) to Opportunity” action.
 ### Action Name
Add a unique label for identifying this step in your workflow.
### Action Name
Add a unique label for identifying this step in your workflow.
 ### Followers
Select the user(s) to be added as followers from the dropdown.
### Followers
Select the user(s) to be added as followers from the dropdown.
 Finally, save the action and activate the workflow to automate the process as required.
By automating this process, you ensure that the right team members are consistently informed, streamlining communication and enhancing collaboration on key opportunities.
### Edge Cases
* ****No Opportunity in Context****: If the workflow is not triggered by an opportunity and there is no preceding Find Opportunity step, this action will not execute.
* ****Multiple Opportunities****: If the Find Opportunity step identifies multiple potential matches, only one opportunity (either the earliest or latest, depending on your configuration) will be updated.
* ****Existing Followers****: The system will prevent adding users who are already following or assigned to the opportunity, ensuring no duplicate followers are added.
### Example
****Scenario****: You want to keep both a sales manager and a product specialist informed about a high-value opportunity as soon as it’s created or updated.
****Trigger****: An opportunity is created or updated and meets certain criteria (e.g., value > 10,000).
****Action****: Find Opportunity
* ****Filters****:\*\*Opportunity Value is greater than 10,000Opportunity Status is "Open"
**Action**\*\*: Add Follower(s) to Opportunity
* ****Action Name****: “Notify Key Stakeholders”
* ****Followers****: “Sales Manager,” “Product Specialist”
If the Find Opportunity step locates a matching opportunity, the Sales Manager and Product Specialist will be added as followers (unless they are already following the opportunity), ensuring they are kept up-to-date with the opportunity’s progress.
### remove-followers-from-opportunity-action
When triggered, the Remove Follower(s) From Opportunity action removes the specified user(s) from the opportunity’s follower list. If the "Remove All Followers" option is enabled, all followers associated with the opportunity are removed, regardless of the users listed in the Users field. This feature is particularly useful for streamlining follower lists or ensuring that only the relevant stakeholders remain assigned to an opportunity.
***
## How It Works
Navigate to Automation > Workflows, then create a new workflow from scratch or open an existing opportunity-based workflow.
Add the relevant opportunity triggers or the “Find Opportunity” action.
****📌Note:**** This action requires an opportunity to be in context- either triggered directly by an opportunity workflow trigger or through a prior "Find Opportunity" step. If no opportunity is found, the action will not be executed.
Next, add the “Remove Follower(s) from Opportunity” Action.
Finally, save the action and activate the workflow to automate the process as required.
By automating this process, you ensure that the right team members are consistently informed, streamlining communication and enhancing collaboration on key opportunities.
### Edge Cases
* ****No Opportunity in Context****: If the workflow is not triggered by an opportunity and there is no preceding Find Opportunity step, this action will not execute.
* ****Multiple Opportunities****: If the Find Opportunity step identifies multiple potential matches, only one opportunity (either the earliest or latest, depending on your configuration) will be updated.
* ****Existing Followers****: The system will prevent adding users who are already following or assigned to the opportunity, ensuring no duplicate followers are added.
### Example
****Scenario****: You want to keep both a sales manager and a product specialist informed about a high-value opportunity as soon as it’s created or updated.
****Trigger****: An opportunity is created or updated and meets certain criteria (e.g., value > 10,000).
****Action****: Find Opportunity
* ****Filters****:\*\*Opportunity Value is greater than 10,000Opportunity Status is "Open"
**Action**\*\*: Add Follower(s) to Opportunity
* ****Action Name****: “Notify Key Stakeholders”
* ****Followers****: “Sales Manager,” “Product Specialist”
If the Find Opportunity step locates a matching opportunity, the Sales Manager and Product Specialist will be added as followers (unless they are already following the opportunity), ensuring they are kept up-to-date with the opportunity’s progress.
### remove-followers-from-opportunity-action
When triggered, the Remove Follower(s) From Opportunity action removes the specified user(s) from the opportunity’s follower list. If the "Remove All Followers" option is enabled, all followers associated with the opportunity are removed, regardless of the users listed in the Users field. This feature is particularly useful for streamlining follower lists or ensuring that only the relevant stakeholders remain assigned to an opportunity.
***
## How It Works
Navigate to Automation > Workflows, then create a new workflow from scratch or open an existing opportunity-based workflow.
Add the relevant opportunity triggers or the “Find Opportunity” action.
****📌Note:**** This action requires an opportunity to be in context- either triggered directly by an opportunity workflow trigger or through a prior "Find Opportunity" step. If no opportunity is found, the action will not be executed.
Next, add the “Remove Follower(s) from Opportunity” Action.
 ### Action Name
Add a unique label for identifying this step within your workflow.
### Action Name
Add a unique label for identifying this step within your workflow.
 ### Users
Select one or more users to be removed from the opportunity’s follower list. If a user is not currently a follower, no change is made for that user.
### Users
Select one or more users to be removed from the opportunity’s follower list. If a user is not currently a follower, no change is made for that user.
 ### Remove All Followers
Enable the Remove All Followers toggle to reset the Followers assigned to the Opportunity.
### Remove All Followers
Enable the Remove All Followers toggle to reset the Followers assigned to the Opportunity.
 Finally, save the action and activate the workflow to automate the process as required.
By automating this process, you can efficiently manage the users who have access to an opportunity, keeping the follower list streamlined and relevant to the current stage of the opportunity.
### Edge Cases
* ****No Opportunity in Context****: If the workflow is not triggered by an opportunity and there is no preceding Find Opportunity step, the action will be skipped.
* ****Multiple Opportunities****: If the Find Opportunity step identifies multiple opportunities, only one (either the earliest or latest, depending on your configuration) will be affected.
* ****Non-Followers****: If a specified user is not currently a follower of the opportunity, no change will occur for that user.
* ****Remove All vs. Specific Users****: If Remove All Followers is enabled, the system will disregard the specific user list and remove all followers associated with the opportunity.
### Example
****Scenario****: A workflow is designed to unassign a group of users from a completed opportunity, ensuring that only the opportunity owner remains a follower.
****Trigger****: An opportunity transitions to the "Closed" stage.
****Action****: Find Opportunity
* ****Filters****: Status is "Closed"
****Action****: Remove Follower(s) From Opportunity
* ****Action Name****: “Clear Followers from Closed Deal”
* ****Users****: “Sales Team A,” “Sales Team B”
* ****Remove All Followers****: Disabled (to remove only the specified users)
In this example, once the Find Opportunity step identifies the closed opportunity, the Remove Follower(s) From Opportunity action removes the specified users from the follower list. If the intention was to clear all followers, enabling Remove All Followers would achieve this.
### book-appointment-action
Getting your customers to book an appointment requires one thing more than anything: timing! A great way to approach this around the clock is by using workflows to automate the appointment setting process based on customer responses or actions. To do so, you need to use the “Book Appointment" action. Follow along to see how!
***
## How It Works
Start by creating a workflow in your account, then define the trigger that will initiate the workflow according to your specific requirements. This trigger determines when and how the workflow will begin.
Finally, save the action and activate the workflow to automate the process as required.
By automating this process, you can efficiently manage the users who have access to an opportunity, keeping the follower list streamlined and relevant to the current stage of the opportunity.
### Edge Cases
* ****No Opportunity in Context****: If the workflow is not triggered by an opportunity and there is no preceding Find Opportunity step, the action will be skipped.
* ****Multiple Opportunities****: If the Find Opportunity step identifies multiple opportunities, only one (either the earliest or latest, depending on your configuration) will be affected.
* ****Non-Followers****: If a specified user is not currently a follower of the opportunity, no change will occur for that user.
* ****Remove All vs. Specific Users****: If Remove All Followers is enabled, the system will disregard the specific user list and remove all followers associated with the opportunity.
### Example
****Scenario****: A workflow is designed to unassign a group of users from a completed opportunity, ensuring that only the opportunity owner remains a follower.
****Trigger****: An opportunity transitions to the "Closed" stage.
****Action****: Find Opportunity
* ****Filters****: Status is "Closed"
****Action****: Remove Follower(s) From Opportunity
* ****Action Name****: “Clear Followers from Closed Deal”
* ****Users****: “Sales Team A,” “Sales Team B”
* ****Remove All Followers****: Disabled (to remove only the specified users)
In this example, once the Find Opportunity step identifies the closed opportunity, the Remove Follower(s) From Opportunity action removes the specified users from the follower list. If the intention was to clear all followers, enabling Remove All Followers would achieve this.
### book-appointment-action
Getting your customers to book an appointment requires one thing more than anything: timing! A great way to approach this around the clock is by using workflows to automate the appointment setting process based on customer responses or actions. To do so, you need to use the “Book Appointment" action. Follow along to see how!
***
## How It Works
Start by creating a workflow in your account, then define the trigger that will initiate the workflow according to your specific requirements. This trigger determines when and how the workflow will begin.
 Next, click the plus icon and select the “Book Appointment” action from the actions menu.
 ### Calendar
From the Calendar dropdown, select the calendar to which the appointment should be booked.
### Calendar
From the Calendar dropdown, select the calendar to which the appointment should be booked.
 If you select a calendar with multiple team members in it, you must pick whom you want the appointment to be scheduled with or keep it as Calendar Default.
 ### Appointment Time
Click the three-dot icon next to the “Start Date & Time” to select how you want the booking time to be selected. You have two options:
* Standard: This lets you select a specific calendar date and time for the appointment.
* Dynamic: You can use this option along with custom values to create a flexible appointment time.
### Appointment Time
Click the three-dot icon next to the “Start Date & Time” to select how you want the booking time to be selected. You have two options:
* Standard: This lets you select a specific calendar date and time for the appointment.
* Dynamic: You can use this option along with custom values to create a flexible appointment time.
 You can enable the Override Availability option to have this action ignore calendar conflicts.
 Once satisfied, click Save Action to include it in your workflow. Complete your workflow, then publish it to start booking customer appointments. This action is great to fill spaces left by cancellations and manage on-the-day scheduling, so we know it will help you manage appointments smoothly!
### update-appointment-status
The Update Appointment Status workflow action allows users to change the status of an appointment. If a contact was added to the workflow via an appointment-related trigger such as Appointment or Customer Book Appointment, the status of that appointment will be updated. However, if a contact is added through another method, the status of the most recent appointment they scheduled will be updated instead.
To begin, add an appropriate trigger to the workflow, select the\*\*\*\* “+” \*\*\*\*button, then search and select the ****“Update Appointment Status”**** action.
Once satisfied, click Save Action to include it in your workflow. Complete your workflow, then publish it to start booking customer appointments. This action is great to fill spaces left by cancellations and manage on-the-day scheduling, so we know it will help you manage appointments smoothly!
### update-appointment-status
The Update Appointment Status workflow action allows users to change the status of an appointment. If a contact was added to the workflow via an appointment-related trigger such as Appointment or Customer Book Appointment, the status of that appointment will be updated. However, if a contact is added through another method, the status of the most recent appointment they scheduled will be updated instead.
To begin, add an appropriate trigger to the workflow, select the\*\*\*\* “+” \*\*\*\*button, then search and select the ****“Update Appointment Status”**** action.
 ### How to Update an Appointment Status
To modify a contact's appointment status within a workflow, start by choosing the preferred status from the available options, which include:
* New
* Confirmed
* Cancelled
* Showed
* No-show
* Invalid
By selecting the appropriate status, you can maintain an accurate and up-to-date record of your contact's appointment history, ensuring effective communication and streamlined management of appointments for both parties involved.
### How to Update an Appointment Status
To modify a contact's appointment status within a workflow, start by choosing the preferred status from the available options, which include:
* New
* Confirmed
* Cancelled
* Showed
* No-show
* Invalid
By selecting the appropriate status, you can maintain an accurate and up-to-date record of your contact's appointment history, ensuring effective communication and streamlined management of appointments for both parties involved.
 Click the\*\*\*\* Save Action\*\*\*\* button to continue.
 To wrap up, keeping appointment statuses updated within workflows helps you stay organized and ensures smooth communication with your clients. By using this feature effectively, you can maintain clear records and manage appointments more efficiently.
### create-appointment-note-action
Manually adding notes to appointments can be tedious and easy to forget. Automating this process ensures important details are recorded instantly, keeping everything organized without extra effort.
### Why Automate Appointment Notes?
* ****Eliminates Manual Entry:**** Automatically record important details without human intervention.
* ****Enhanced Organization:**** Keep appointment notes structured and easily accessible.
* ****Customizable Input:**** Use predefined messages or dynamic content to tailor each note.
* ****Seamless Integration:**** Works with multiple triggers and external webhook data to capture relevant information instantly.
To get started, select an appointment-based trigger to determine when the appointment note should be created. Common options include:
* Appointment Status.
* Customer Booked Appointment.
* Inbound Webhook Trigger. (if integrating with external systems)
To wrap up, keeping appointment statuses updated within workflows helps you stay organized and ensures smooth communication with your clients. By using this feature effectively, you can maintain clear records and manage appointments more efficiently.
### create-appointment-note-action
Manually adding notes to appointments can be tedious and easy to forget. Automating this process ensures important details are recorded instantly, keeping everything organized without extra effort.
### Why Automate Appointment Notes?
* ****Eliminates Manual Entry:**** Automatically record important details without human intervention.
* ****Enhanced Organization:**** Keep appointment notes structured and easily accessible.
* ****Customizable Input:**** Use predefined messages or dynamic content to tailor each note.
* ****Seamless Integration:**** Works with multiple triggers and external webhook data to capture relevant information instantly.
To get started, select an appointment-based trigger to determine when the appointment note should be created. Common options include:
* Appointment Status.
* Customer Booked Appointment.
* Inbound Webhook Trigger. (if integrating with external systems)
 Click the\*\*\*\* “+”\*\*\*\* icon and search for and add ****Create Appointment Note**** action.
 ### Appointment ID
If using an ****Inbound Webhook Trigger****, provide the `appointmentId` and `body`. If using an ****appointment-based trigger****, there is no need to input an Appointment ID, as the system automatically links it to the relevant appointment.
### Appointment ID
If using an ****Inbound Webhook Trigger****, provide the `appointmentId` and `body`. If using an ****appointment-based trigger****, there is no need to input an Appointment ID, as the system automatically links it to the relevant appointment.
 ****📌NOTE:**** This field is required unless you're using an appointment-based trigger like Appointment Status or Customer Booked Appointment.
### Add Note
Input the note manually or use ****Custom Values**** to pass information from webhook data dynamically. The appointment note cannot exceed 5000 characters.
****📌NOTE:**** This field is required unless you're using an appointment-based trigger like Appointment Status or Customer Booked Appointment.
### Add Note
Input the note manually or use ****Custom Values**** to pass information from webhook data dynamically. The appointment note cannot exceed 5000 characters.
 ### Save Action
Click ****Save Action**** to confirm your changes.
### Save Action
Click ****Save Action**** to confirm your changes.
 Ensure that the workflow has both a trigger and an action before publishing. Click ****Publish and Save**** to activate the workflow.
 By automating appointment notes, you can improve efficiency, reduce errors, and ensure all crucial details are documented consistently.
### generate-one-time-booking-link-action
A one-time link is a unique scheduling link that automatically expires after it's used to book an appointment. With the "Generate One-Time Booking Link" action, you can now easily create these links as part of your workflow.
***
## How It Works
Start by creating a workflow in your account, then define the trigger that will initiate the workflow according to your specific requirements. This trigger determines when and how the workflow will begin.
Next, click the plus icon and select the “Generate One Time Booking Link” action from the actions menu.
By automating appointment notes, you can improve efficiency, reduce errors, and ensure all crucial details are documented consistently.
### generate-one-time-booking-link-action
A one-time link is a unique scheduling link that automatically expires after it's used to book an appointment. With the "Generate One-Time Booking Link" action, you can now easily create these links as part of your workflow.
***
## How It Works
Start by creating a workflow in your account, then define the trigger that will initiate the workflow according to your specific requirements. This trigger determines when and how the workflow will begin.
Next, click the plus icon and select the “Generate One Time Booking Link” action from the actions menu.
 ### Action Name
Rename the action to better suit your needs.
### Action Name
Rename the action to better suit your needs.
 ### Calendar
From the Calendar dropdown, select the calendar to which the appointment should be booked. For complex appointment scheduling, use conditional actions to assign the contact to the correct calendar.
### Calendar
From the Calendar dropdown, select the calendar to which the appointment should be booked. For complex appointment scheduling, use conditional actions to assign the contact to the correct calendar.
 To share the link with your contact, add a communication action, such as an email or SMS, to your workflow. This ensures the one-time booking link is automatically sent when the workflow is triggered.
 Insert the unique one-time link into the email body by using a custom value. Each time the workflow trigger is activated, a new link will be generated. To do this, select the 'Generate One-Time Booking Link' action and choose 'One Time Link' as the custom value to include in your message.
 Once your workflow is fully set up, publish it to activate the automation. From that point on, each time a contact enters the workflow based on your defined trigger, a unique one-time booking link will be generated and automatically sent to them via email.
That's all there is to it. Check out the other articles in this section to learn more about the various actions you can use to make your processes even smoother.
### eliza-ai-appointment-booking
Do you wish you could have an assistant who could handle your appointment setting but lack the budget? With the "AI Appointment Booking Bot" that's not a problem! This action hands the contacts over to an AI Bot, the bot will chat with the user and try to book the appointment on the selected calendar.
Sounds interesting? Let's learn how to set it up step by step.
### Creating The Workflow
Start by adding any workflow trigger, such as Customer Replied.
Once your workflow is fully set up, publish it to activate the automation. From that point on, each time a contact enters the workflow based on your defined trigger, a unique one-time booking link will be generated and automatically sent to them via email.
That's all there is to it. Check out the other articles in this section to learn more about the various actions you can use to make your processes even smoother.
### eliza-ai-appointment-booking
Do you wish you could have an assistant who could handle your appointment setting but lack the budget? With the "AI Appointment Booking Bot" that's not a problem! This action hands the contacts over to an AI Bot, the bot will chat with the user and try to book the appointment on the selected calendar.
Sounds interesting? Let's learn how to set it up step by step.
### Creating The Workflow
Start by adding any workflow trigger, such as Customer Replied.
 Next, select the "Eliza AI appointment Booking" action.
 ### Configuring The Action
Select a calendar from the drop-down menu. When customers respond positively the Appointment Bot will schedule them in that calendar.
### Configuring The Action
Select a calendar from the drop-down menu. When customers respond positively the Appointment Bot will schedule them in that calendar.
 Set the “Total Bot Processing Duration (in Hours)," this defines the maximum time the bot will engage with a contact before timing out.
 If you want a proactive bot check the “Send First Message?” box, this will allow it to start the conversation. Otherwise, leave it unchecked and the bot will be limited to responding.
 You can use a template for your messages or create a new one here.
 Check the box if you want the bot to send a confirmation message upon successfully booking the appointment. Once you check the Confirmation Message box, you get another box to configure the success message to be sent.
 📌Note: If you do not configure a message, the bot will stop processing messages upon successfully booking the appointment.
### How an AI Appointment Conversation Ends
The AI Conversation can end in either of these three (3) ways;
1. When the Bot successfully books an appointment
2. The Bot timed out: The booking was unsuccessful because the lead didn't respond to the Bot's messages.
3. Other Reasons: For different reasons, such as; no available slots, technical issues, or the Bot couldn't comprehend the lead's query.
You'll see these three outcomes reflected in an If/Else action that will be created automatically, you can add any actions you want after it to have a robust booking system.
📌Note: If you do not configure a message, the bot will stop processing messages upon successfully booking the appointment.
### How an AI Appointment Conversation Ends
The AI Conversation can end in either of these three (3) ways;
1. When the Bot successfully books an appointment
2. The Bot timed out: The booking was unsuccessful because the lead didn't respond to the Bot's messages.
3. Other Reasons: For different reasons, such as; no available slots, technical issues, or the Bot couldn't comprehend the lead's query.
You'll see these three outcomes reflected in an If/Else action that will be created automatically, you can add any actions you want after it to have a robust booking system.
 You can add a message or more branches down each path for additional conditions you created if you wish. That way, even with the bot attending to your customers your business personality can still shine through.
### add-to-workflow-action
Through the ****Add to Workflow**** action, users can add a contact to another workflow from their current workflow. This workflow action is useful for adding a contact to another workflow once they’ve reached a certain step in the current workflow, allowing for seamless movement.
Start by adding a suitable Trigger to the Workflow, click the\*\*\*\* “+” \*\*\*\*icon to search, and add the \*\*\*\*“Add To Workflow” \*\*\*\*action.
You can add a message or more branches down each path for additional conditions you created if you wish. That way, even with the bot attending to your customers your business personality can still shine through.
### add-to-workflow-action
Through the ****Add to Workflow**** action, users can add a contact to another workflow from their current workflow. This workflow action is useful for adding a contact to another workflow once they’ve reached a certain step in the current workflow, allowing for seamless movement.
Start by adding a suitable Trigger to the Workflow, click the\*\*\*\* “+” \*\*\*\*icon to search, and add the \*\*\*\*“Add To Workflow” \*\*\*\*action.
 ### Select a Workflow
In the Add To workflow action, simply select the appropriate workflow where you want to add the contact.
### Select a Workflow
In the Add To workflow action, simply select the appropriate workflow where you want to add the contact.
 ****📌NOTE:**** This can be any workflow, and users can even duplicate this step to add the contact to multiple workflows.
### Pass Input Trigger Parameters
This option allows you to toggle the input trigger parameters based on your workflow requirements.
* When toggled ****on****, the parameters from the initial trigger will be passed to the new workflow, ensuring continuity and allowing the next workflow to use the same input data.
* When toggled ****off****, no parameters from the trigger will be transferred, creating a clean slate for the new workflow. Select the appropriate setting based on whether you need to retain trigger data or start fresh.
****📌NOTE:**** This can be any workflow, and users can even duplicate this step to add the contact to multiple workflows.
### Pass Input Trigger Parameters
This option allows you to toggle the input trigger parameters based on your workflow requirements.
* When toggled ****on****, the parameters from the initial trigger will be passed to the new workflow, ensuring continuity and allowing the next workflow to use the same input data.
* When toggled ****off****, no parameters from the trigger will be transferred, creating a clean slate for the new workflow. Select the appropriate setting based on whether you need to retain trigger data or start fresh.
 Click the ****Save Action**** button to save and continue.
 The Add to Workflow action ensures easy transitions between workflows, improving efficiency and maintaining continuity. Whether you're passing trigger parameters or starting fresh, this feature offers flexibility to meet your needs.
### remove-from-workflow-action
Workflows allow you to streamline your processes and maintain contacts engaged with your business. However, there might be points where you want to remove a contact from a certain workflow. With the Remove From Workflow action, you gain the ability to exclude contacts from any given workflow. This functionality provides enhanced control over contact management in workflows, enabling you to maintain organized and streamlined processes by removing specific contacts based on certain criteria or actions.
###
***
## How It Works
Inside the workflow builder, click the plus sign icon to add an action.
The Add to Workflow action ensures easy transitions between workflows, improving efficiency and maintaining continuity. Whether you're passing trigger parameters or starting fresh, this feature offers flexibility to meet your needs.
### remove-from-workflow-action
Workflows allow you to streamline your processes and maintain contacts engaged with your business. However, there might be points where you want to remove a contact from a certain workflow. With the Remove From Workflow action, you gain the ability to exclude contacts from any given workflow. This functionality provides enhanced control over contact management in workflows, enabling you to maintain organized and streamlined processes by removing specific contacts based on certain criteria or actions.
###
***
## How It Works
Inside the workflow builder, click the plus sign icon to add an action.
 Select the Remove From Workflow action then open the drop-down menu, here you'll have several options.
 ### Current Workflow
Selecting this option will exclude contacts from the workflow you are currently editing.
### Current Workflow
Selecting this option will exclude contacts from the workflow you are currently editing.
 ### Another Workflow
With another workflow, you can remove contacts from specific workflows of your choice among all the available ones in your CRM.
### Another Workflow
With another workflow, you can remove contacts from specific workflows of your choice among all the available ones in your CRM.
 To add the workflows, click on the drop-down menu and select the workflows you'd like to remove the contact from.
 ### All Workflows Except Current Workflow
This option will remove the contact from all workflows they are active on, except for the workflow in which the action was included and triggered.
### All Workflows Except Current Workflow
This option will remove the contact from all workflows they are active on, except for the workflow in which the action was included and triggered.
 ### All Workflows
This option will remove the contact from all workflows they are active on, including the workflow in which the action was included and triggered.
### All Workflows
This option will remove the contact from all workflows they are active on, including the workflow in which the action was included and triggered.
 Once you've selected your preferred option click on save action.
 Complete your workflow as normal, then click Save, and you're done, no worrying about contacts becoming stuck in a workflow they are no longer part of or removing them manually. Just by using the action Remove from Workflow, you can ensure your processes maintain their efficiency and keep the contact experience streamlined.
### go-to-action
In workflows, the ****Go-To Action**** simplifies transitioning contacts from one step to another. It's an essential tool for managing complex workflows with multiple branches, ensuring seamless movement through the process without duplicating actions.
To begin, click on the ****“+” ****icon, search and select the**** “Go To” ****Action, save the action, and then click on any action within the workflow to want the**** “Go To”**** destination to be connected.
Complete your workflow as normal, then click Save, and you're done, no worrying about contacts becoming stuck in a workflow they are no longer part of or removing them manually. Just by using the action Remove from Workflow, you can ensure your processes maintain their efficiency and keep the contact experience streamlined.
### go-to-action
In workflows, the ****Go-To Action**** simplifies transitioning contacts from one step to another. It's an essential tool for managing complex workflows with multiple branches, ensuring seamless movement through the process without duplicating actions.
To begin, click on the ****“+” ****icon, search and select the**** “Go To” ****Action, save the action, and then click on any action within the workflow to want the**** “Go To”**** destination to be connected.
 ### Create a Path
To establish a Go To path, identify the steps in your workflow where you want to create a connection. Highlighted in light green, these steps can be easily linked. Either drag the light green dot to the target dark green dot or click directly on the target step to create the path automatically.
### Create a Path
To establish a Go To path, identify the steps in your workflow where you want to create a connection. Highlighted in light green, these steps can be easily linked. Either drag the light green dot to the target dark green dot or click directly on the target step to create the path automatically.
 Once the dots are connected, the path is created, and contacts reaching the ****“Go To”**** step will automatically shift to the target event connected by the dotted line. For example, contacts will go directly to the ****"Create or Update Opportunity"**** action upon reaching the ****"GoTo"**** step.
 ### Delete a Path
To remove a path, click on the unlink icon associated with the connection and select ****Remove Path**** to delete the connection. This ensures workflows remain clear and flexible, even as your processes evolve.
### Delete a Path
To remove a path, click on the unlink icon associated with the connection and select ****Remove Path**** to delete the connection. This ensures workflows remain clear and flexible, even as your processes evolve.
 The ****Go-To Action**** is a powerful feature for creating streamlined, efficient workflows. Whether you're connecting steps, adjusting paths, or removing outdated links, this action provides the tools to design workflows tailored to your needs. With clear connections and intuitive functionality, the Go-To Action ensures smooth transitions and organized processes every time.
### wait-event-action
Wait is a unique type of workflow action designed to pause the contact at a specific step in the workflow until a desired condition is met. This useful tool is handy when waiting for a certain time, contact reply, or event that needs to be completed before moving the contact forward in the workflow.
To insert this action between workflow steps, click the plus sign between the steps and select\*\*\*\* "Wait"\*\*\*\* from the options.
The ****Go-To Action**** is a powerful feature for creating streamlined, efficient workflows. Whether you're connecting steps, adjusting paths, or removing outdated links, this action provides the tools to design workflows tailored to your needs. With clear connections and intuitive functionality, the Go-To Action ensures smooth transitions and organized processes every time.
### wait-event-action
Wait is a unique type of workflow action designed to pause the contact at a specific step in the workflow until a desired condition is met. This useful tool is handy when waiting for a certain time, contact reply, or event that needs to be completed before moving the contact forward in the workflow.
To insert this action between workflow steps, click the plus sign between the steps and select\*\*\*\* "Wait"\*\*\*\* from the options.
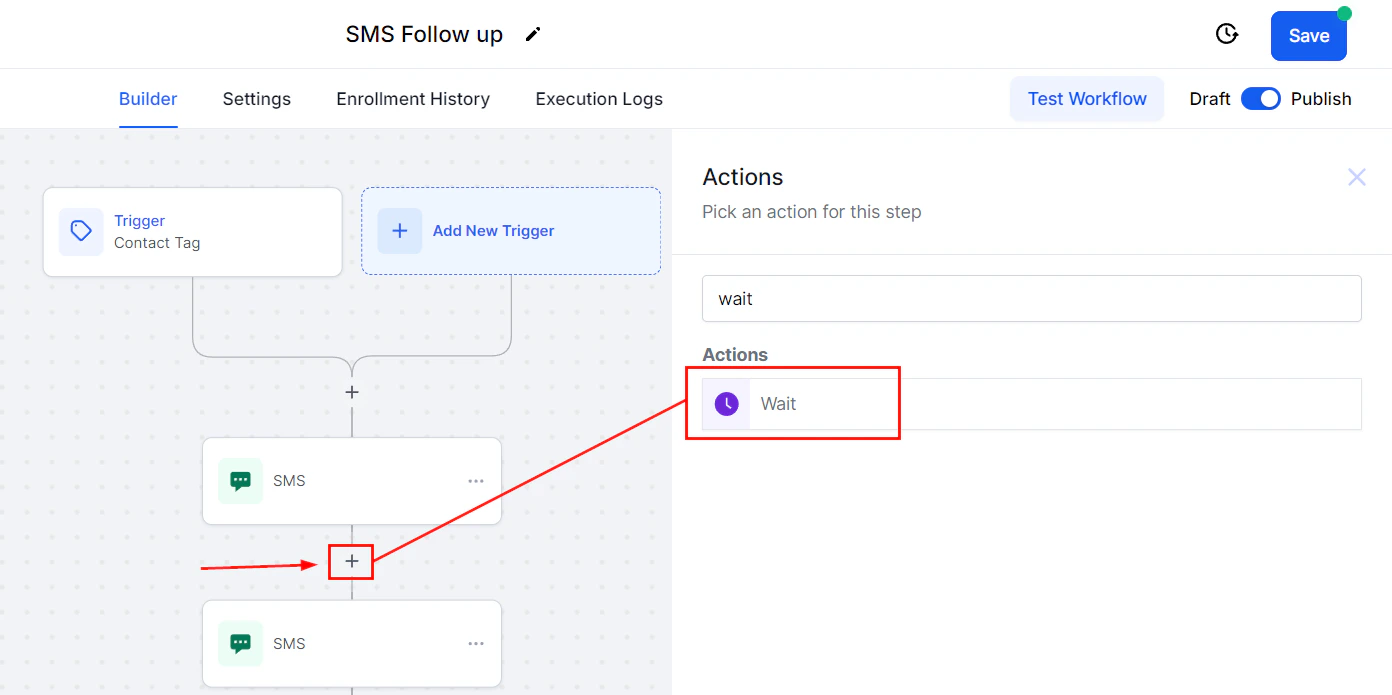 ****📌NOTE:**** The Wait Step can be set up using two distinct types of events—let's take a closer look!t!
***
## Time-based
These will be for things that need to happen in a specific time frame, the available options for time-based events are:
****📌NOTE:**** The Wait Step can be set up using two distinct types of events—let's take a closer look!t!
***
## Time-based
These will be for things that need to happen in a specific time frame, the available options for time-based events are:
 ### Time Delay
This allows you to set a determinate amount of time before the contact moves to the next step. To set it up, add the amount of time the workflow should wait before moving the contact forward.
### Time Delay
This allows you to set a determinate amount of time before the contact moves to the next step. To set it up, add the amount of time the workflow should wait before moving the contact forward.
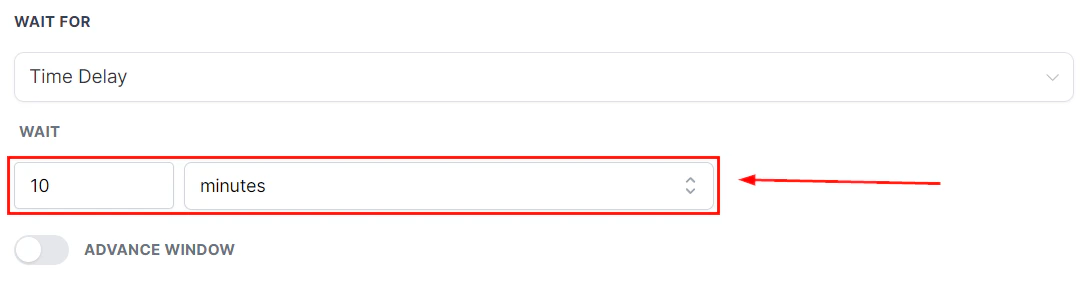 ### Event/Appointment Time
This allows you to make the workflow send the messages in a determinate amount of time concerning an event or appointment, for example, one day before an appointment. When setting a Wait step for an event add the action Set Event Start Date first. Set the time you want the contact to move forward in the workflow.
### Event/Appointment Time
This allows you to make the workflow send the messages in a determinate amount of time concerning an event or appointment, for example, one day before an appointment. When setting a Wait step for an event add the action Set Event Start Date first. Set the time you want the contact to move forward in the workflow.
 ### Overdue
This feature enables you to schedule messages to be sent a specific amount of time after an invoice’s payment date. When configuring this Wait step, ensure that you have included a trigger or action that guarantees the contacts receive the invoice; otherwise, they may get stuck at this step.
### Overdue
This feature enables you to schedule messages to be sent a specific amount of time after an invoice’s payment date. When configuring this Wait step, ensure that you have included a trigger or action that guarantees the contacts receive the invoice; otherwise, they may get stuck at this step.
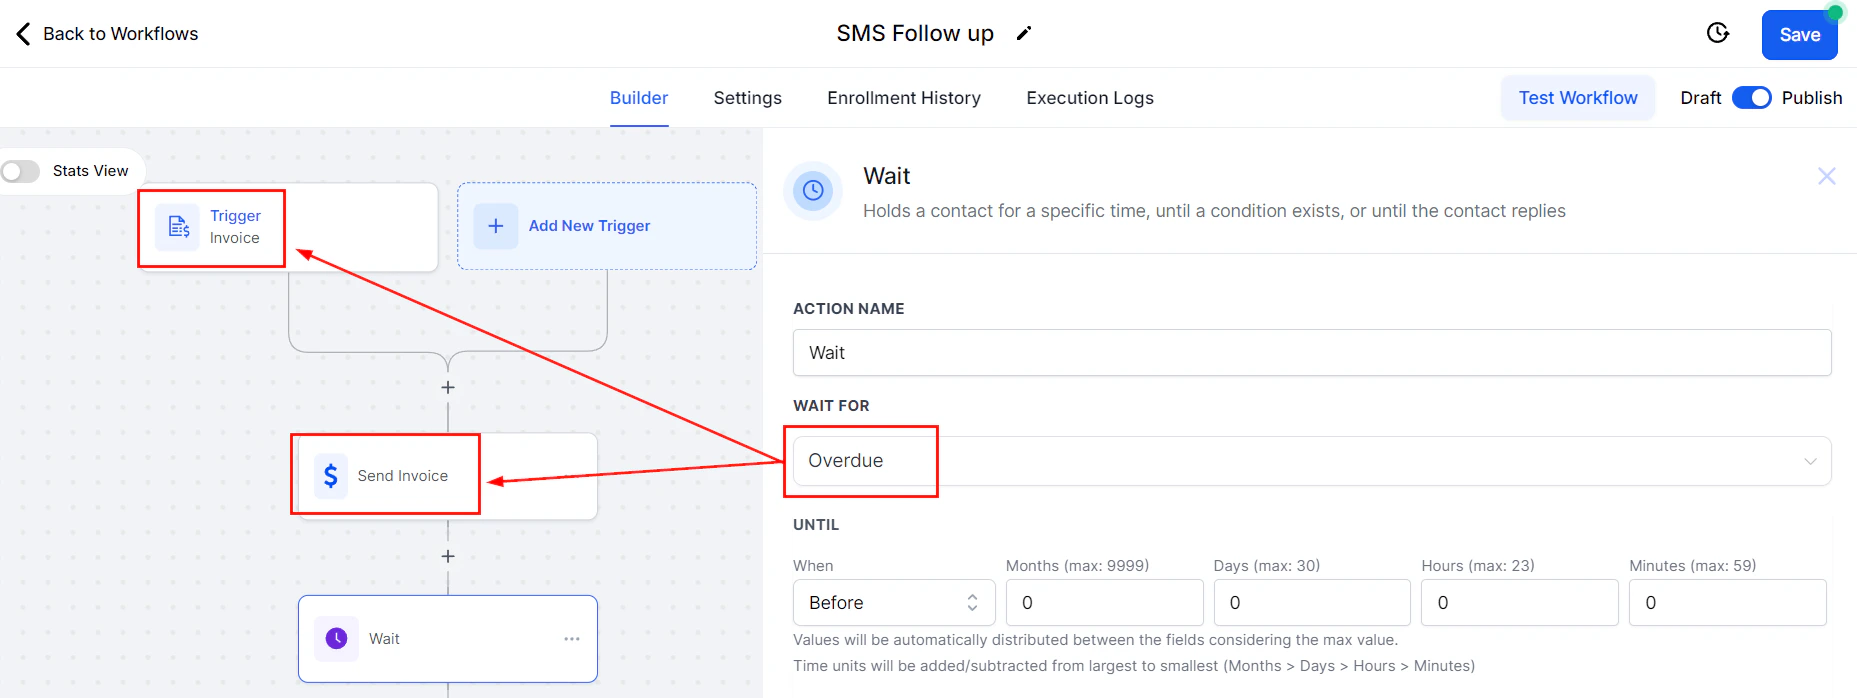 ### Setting an Event/Appointment Time or Overdue Wait Step
Select when you want the next step to happen. Here you can choose between before, after, or an exact time concerning the event.
### Setting an Event/Appointment Time or Overdue Wait Step
Select when you want the next step to happen. Here you can choose between before, after, or an exact time concerning the event.
 Once set, pick an option for what the Workflow should do if the contact enters the automation after that time has passed.
 ### Advance Window
If you'd like to limit the days or hours in which the contact will advance enable Advance Window.
### Advance Window
If you'd like to limit the days or hours in which the contact will advance enable Advance Window.
 ***
## CRM Events
These options are designed for scenarios where user or contact actions are required to progress through the automation. The available options include:
***
## CRM Events
These options are designed for scenarios where user or contact actions are required to progress through the automation. The available options include:
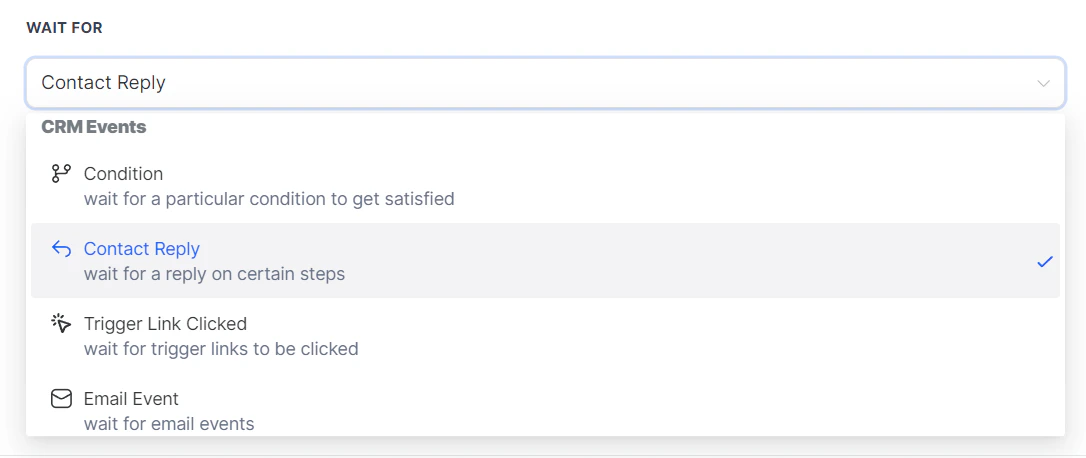 ### Condition
This feature allows you to pause the automation until the contact completes or updates a specific field of information. To configure this, select the contact detail you wish to monitor.
### Condition
This feature allows you to pause the automation until the contact completes or updates a specific field of information. To configure this, select the contact detail you wish to monitor.
 Select the operator then add the response you want.
 ### Contact Reply
This option will keep the contact in the wait step until they respond to a previously sent message. To use it select the step you want the contact to have replied to.
### Contact Reply
This option will keep the contact in the wait step until they respond to a previously sent message. To use it select the step you want the contact to have replied to.
 ### Trigger Link Clicked
This option will keep the contact in the wait step until they click the selected Trigger Link.
### Trigger Link Clicked
This option will keep the contact in the wait step until they click the selected Trigger Link.
 ### Email Event
This option will keep the contact in the wait step until a contact interacts a certain way with a previously sent email. To use it first select the Email Step you want the contact to interact with.
### Email Event
This option will keep the contact in the wait step until a contact interacts a certain way with a previously sent email. To use it first select the Email Step you want the contact to interact with.
 Then select the action you want the contact to have performed for the email.
 ### Timeout
If the condition needs to be met in a specific schedule you can set a timeout by toggling the option and setting the timeframe.
### Timeout
If the condition needs to be met in a specific schedule you can set a timeout by toggling the option and setting the timeframe.
 Doing so will result in two branches, one for cases when the condition is met and one for when the timeframe expires.
 ### Saving The Wait Action
Once you've set the conditions for your Wait action you can click Save action and you're done.
### Saving The Wait Action
Once you've set the conditions for your Wait action you can click Save action and you're done.
 Now you can set up Wait steps whenever needed, ensuring that the contact goes through the workflow actions in a precise and convenient time, maximizing the effectiveness of your communications and streamlining your process.
### if-else-action
The If/Else action allows you to separate contacts who trigger a workflow based on conditions you want them to meet. This helps you fine-tune your workflow and automate common actions that your customers perform. Meaning if there's any point where you want to split a workflow into different paths, this action will allow you to do so. Let's check how it works!
Now you can set up Wait steps whenever needed, ensuring that the contact goes through the workflow actions in a precise and convenient time, maximizing the effectiveness of your communications and streamlining your process.
### if-else-action
The If/Else action allows you to separate contacts who trigger a workflow based on conditions you want them to meet. This helps you fine-tune your workflow and automate common actions that your customers perform. Meaning if there's any point where you want to split a workflow into different paths, this action will allow you to do so. Let's check how it works!
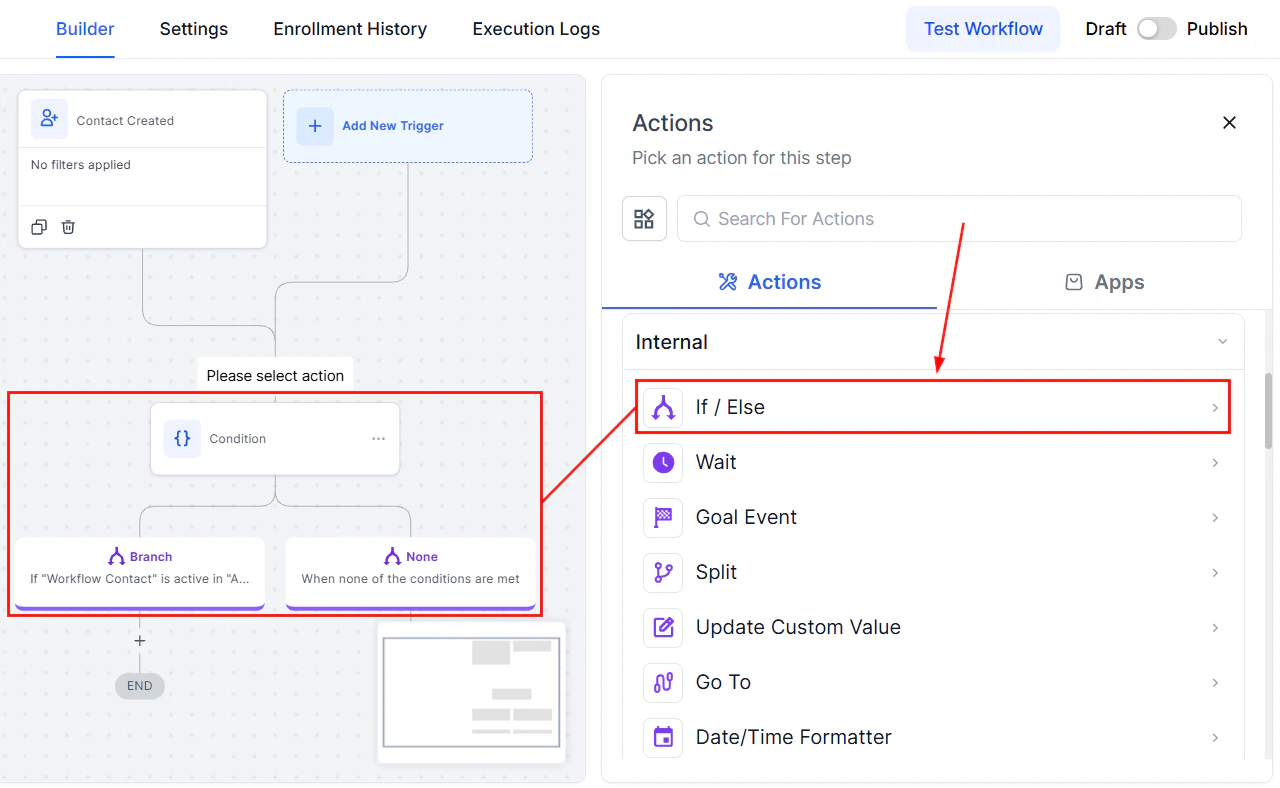 ****📌NOTE:**** When adding a Conditional branch to your workflow, you can select between prebuilt templates or create your own from scratch.
***
## Using Scenario Recipes
Scenario Recipes are prebuilt If/Else action templates to simplify the set-up process; some will have a few requisites you'll need to add into the workflow for the recipe to function. These will be displayed under its name.
****📌NOTE:**** When adding a Conditional branch to your workflow, you can select between prebuilt templates or create your own from scratch.
***
## Using Scenario Recipes
Scenario Recipes are prebuilt If/Else action templates to simplify the set-up process; some will have a few requisites you'll need to add into the workflow for the recipe to function. These will be displayed under its name.
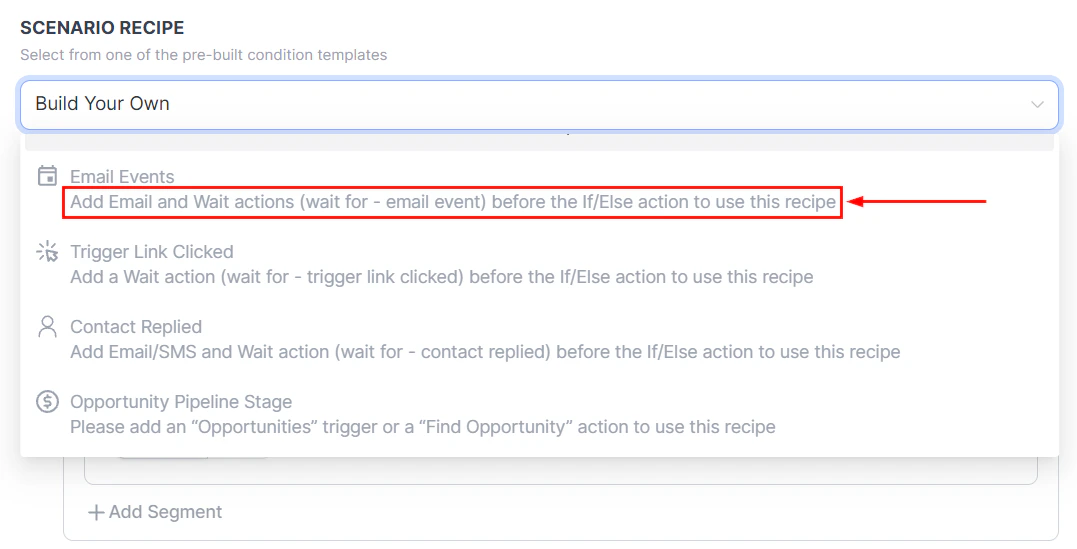 Selecting a scenario will result in prepopulated branches for you to customize to your business needs.
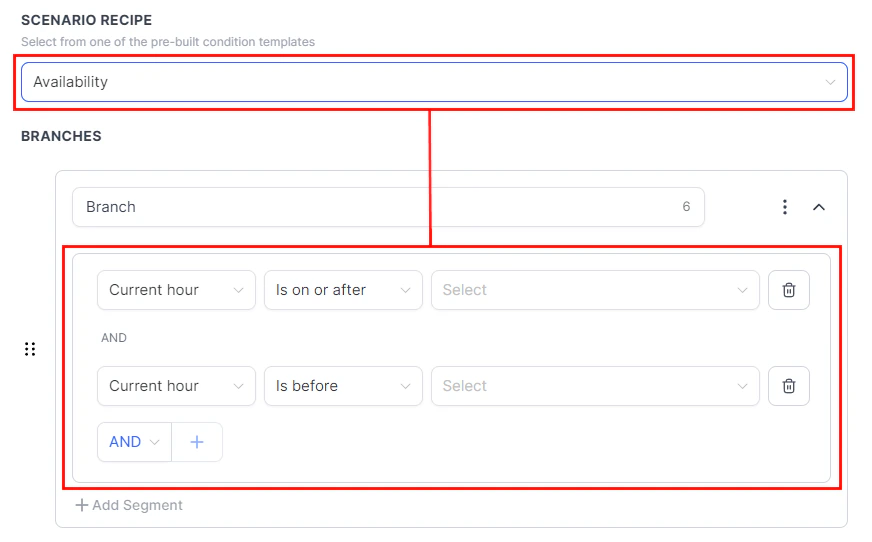 Once the premade branches are filled out, you can add any additional conditions, segments, or branches needed.
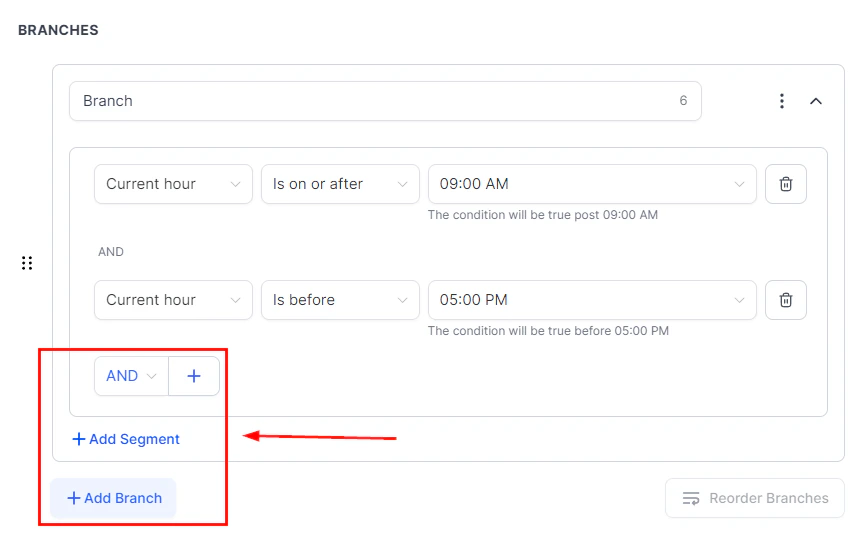 ***
## Build Your Own
This blank format allows you to build a conditional action that suits your needs. To use it, start by naming the action for easy identification.
***
## Build Your Own
This blank format allows you to build a conditional action that suits your needs. To use it, start by naming the action for easy identification.
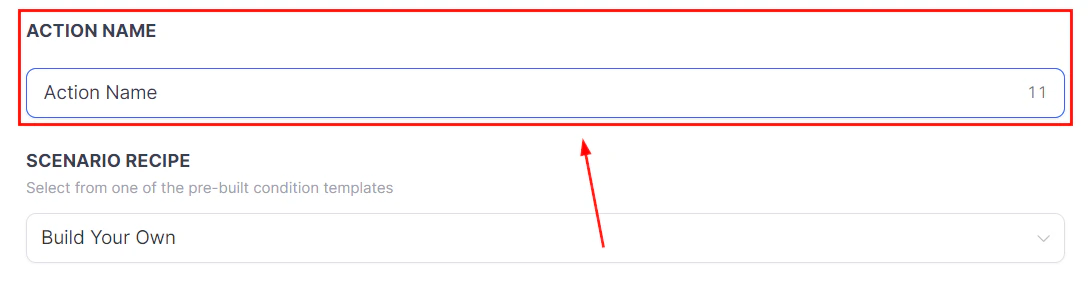 ### Setting Up a Branch
These will be the conditions the contact needs to meet to qualify for the branch. The available conditions are organized into folders for you to select the specific value or action the contact needs to meet before moving to the next step.
### Setting Up a Branch
These will be the conditions the contact needs to meet to qualify for the branch. The available conditions are organized into folders for you to select the specific value or action the contact needs to meet before moving to the next step.
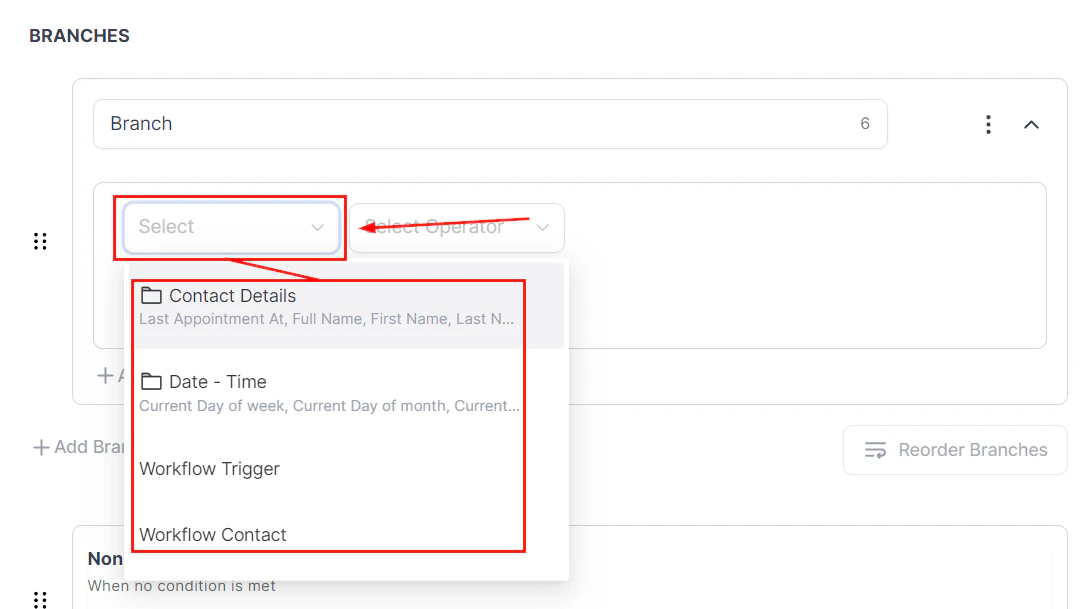 You can add multiple conditions for the same branch. Keep in mind that you will have to select between the And/Or operators to define the conditional behavior.
* ****AND option:**** When selecting this option, the contact has to meet all conditions added to qualify.
* \*\*\*\*OR option: \*\*\*\*When selecting this option, the contact will qualify for this branch if one of the conditions is met.
You can add multiple conditions for the same branch. Keep in mind that you will have to select between the And/Or operators to define the conditional behavior.
* ****AND option:**** When selecting this option, the contact has to meet all conditions added to qualify.
* \*\*\*\*OR option: \*\*\*\*When selecting this option, the contact will qualify for this branch if one of the conditions is met.
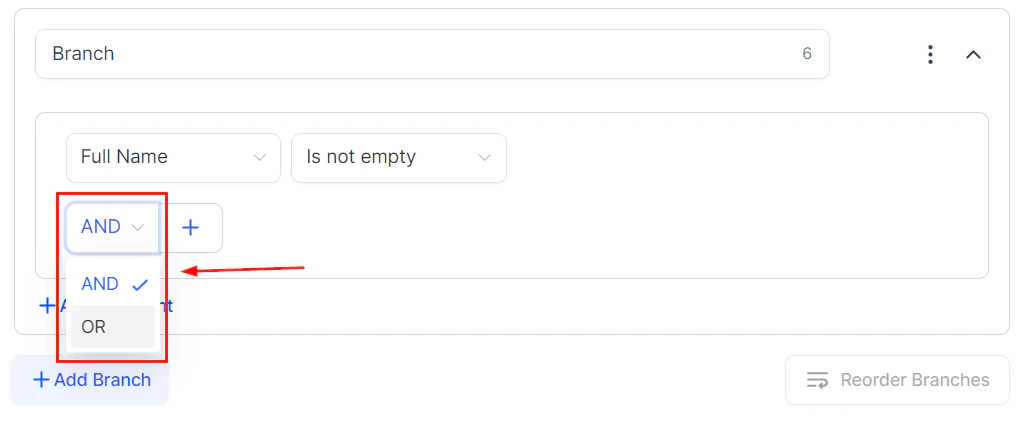 If you're looking to mix-and-match “and/or”\*\*\*\* \*\*\*\*conditions under the same branch, you can do so by clicking +Add Segment.
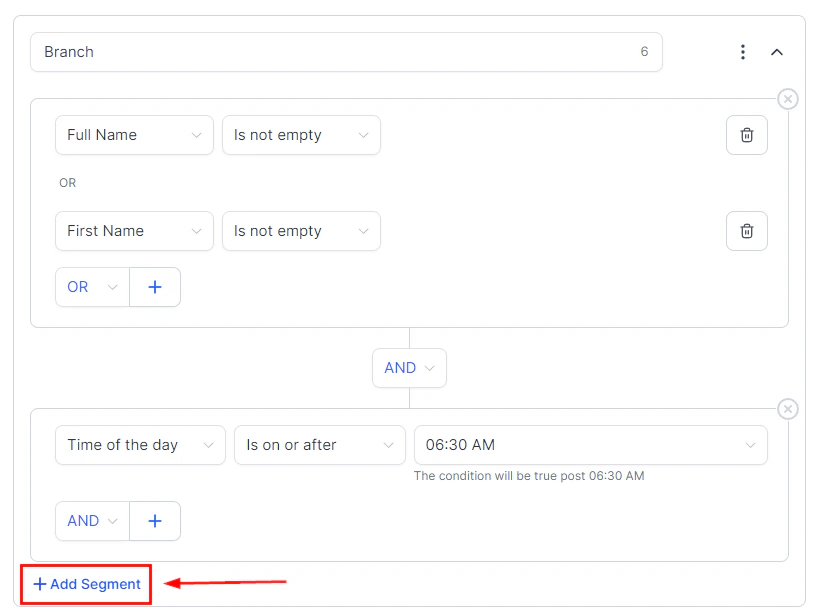 ### Creating Multiple Branches
You can add up to 10 branches under one If/Else action. To do so, click the +Add Branch button.
### Creating Multiple Branches
You can add up to 10 branches under one If/Else action. To do so, click the +Add Branch button.
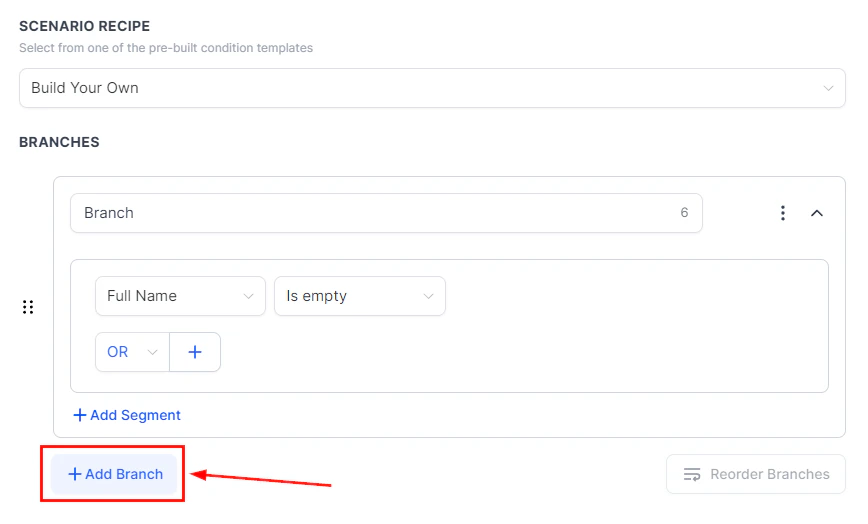 You can reorganize the branches by dragging and dropping them with the 6-dot icon.
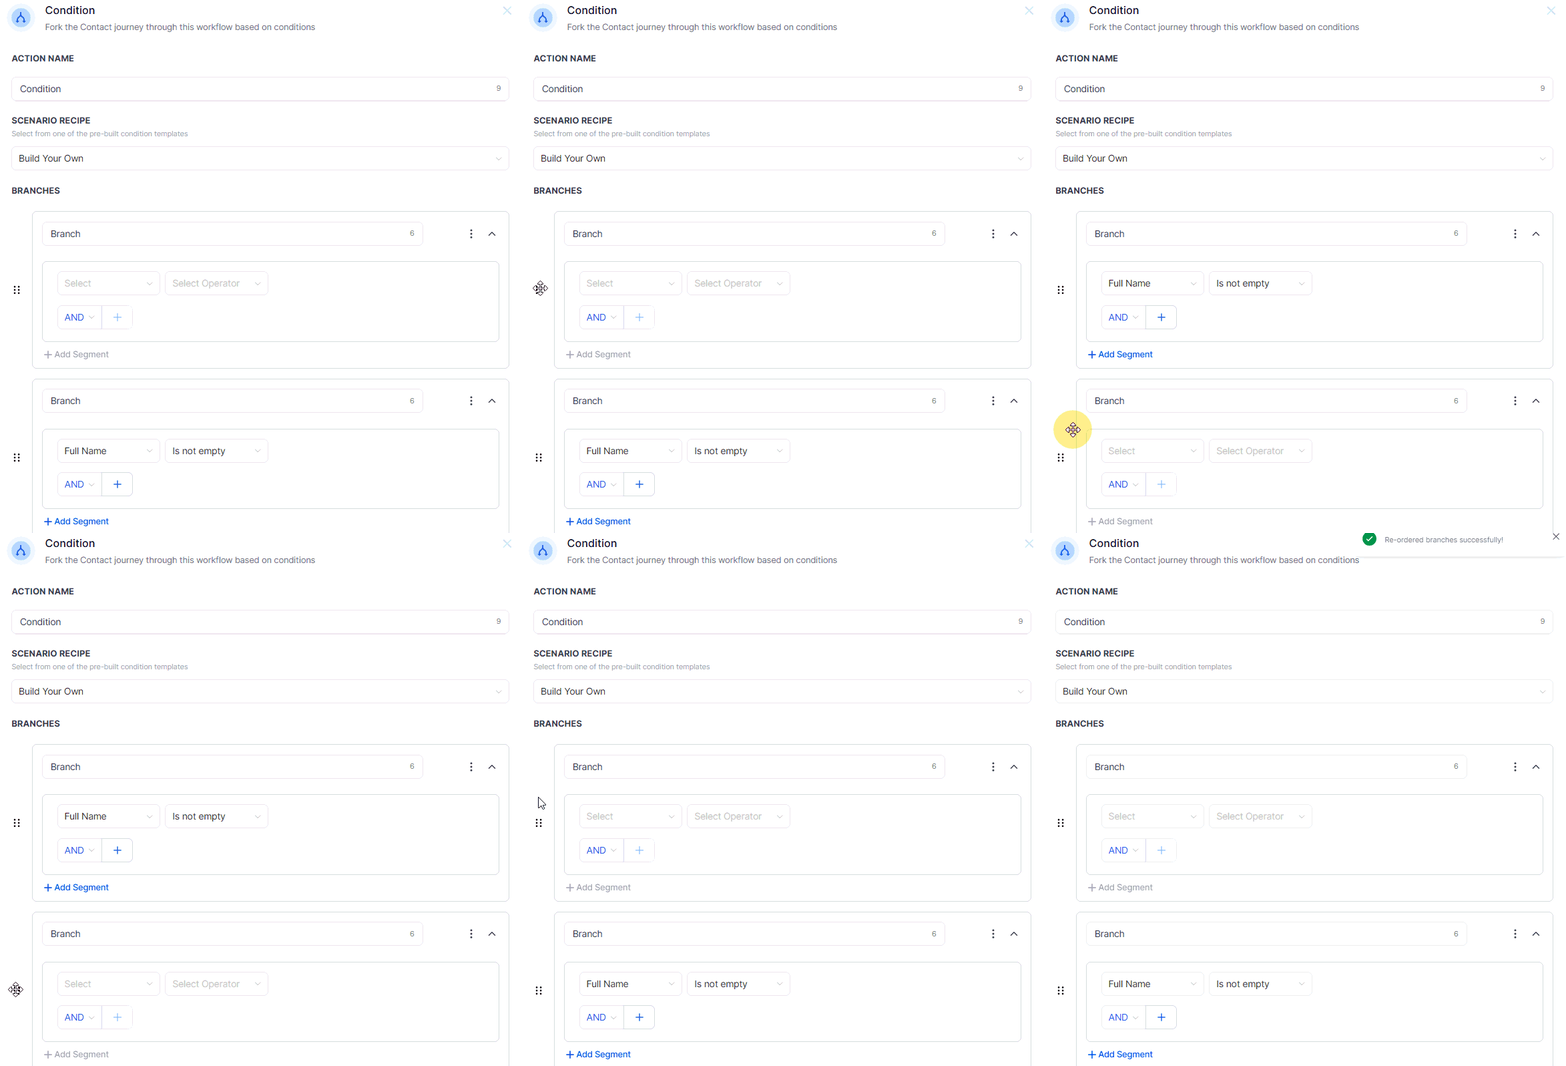 \*\*
### Duplicating Branches
Branches can be duplicated within the same conditional action by clicking the three dots menu on a branch and selecting **“Duplicate Branch.”**\*\* The duplicate will appear below the original with ****"(copy)"**** added to its name. However, different branches need different conditions, or the contacts will be assigned to only the first available branch. Therefore, we recommend using this option as a base to add extra conditions to.
\*\*
### Duplicating Branches
Branches can be duplicated within the same conditional action by clicking the three dots menu on a branch and selecting **“Duplicate Branch.”**\*\* The duplicate will appear below the original with ****"(copy)"**** added to its name. However, different branches need different conditions, or the contacts will be assigned to only the first available branch. Therefore, we recommend using this option as a base to add extra conditions to.
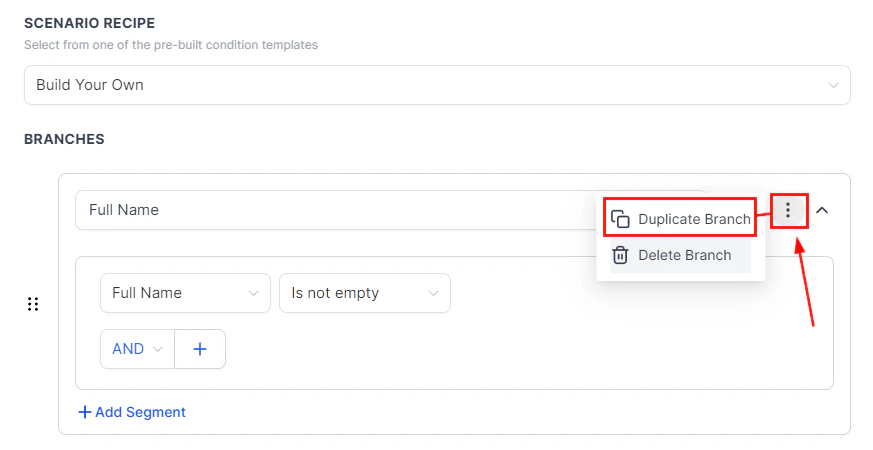 ### None Branch
In conditional actions, an additional branch will be automatically added to perform a series of tasks if the added conditions fail. This branch is called the ****“None Branch"****. This branch can be renamed but no conditions can be added to it, and it will always be the last branch.
### None Branch
In conditional actions, an additional branch will be automatically added to perform a series of tasks if the added conditions fail. This branch is called the ****“None Branch"****. This branch can be renamed but no conditions can be added to it, and it will always be the last branch.
 Once you've created your branches, click Save Action to maintain the changes.
 ### Adding Follow-up Actions
After setting up your branches, you can add actions for each branch, including adding other If/Else actions.
### Adding Follow-up Actions
After setting up your branches, you can add actions for each branch, including adding other If/Else actions.
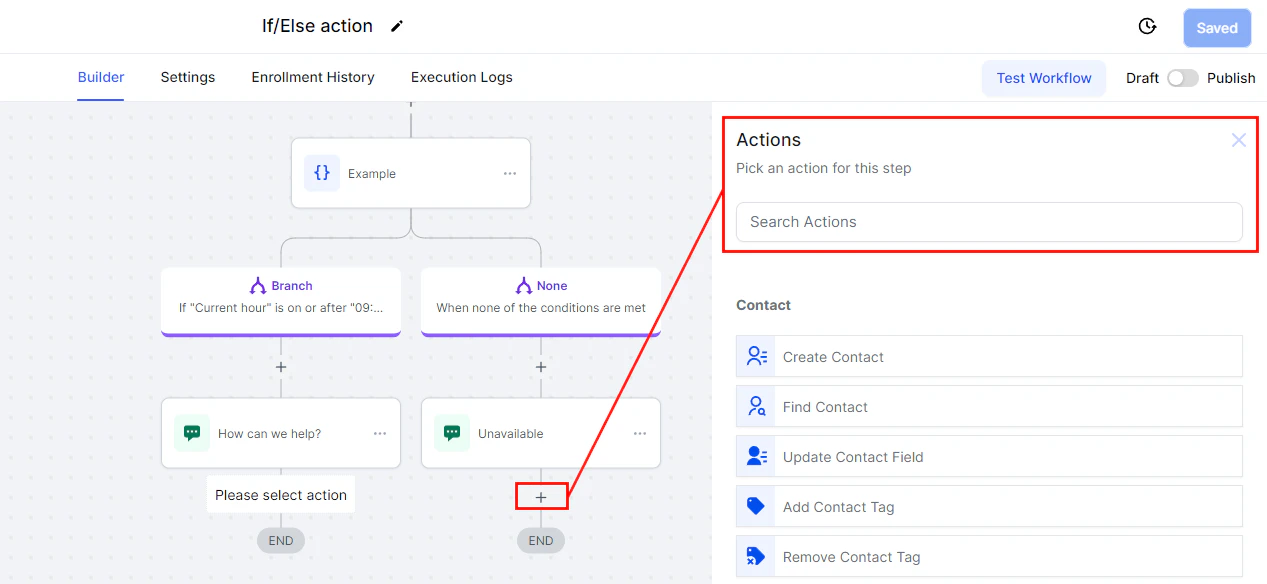 And there you have it! Those are the basis of the If/Else action. Now, for a quick recap, the If/Else action allows you to separate contacts into different action paths depending on the conditions they meet. You can build them up from scratch or use a Scenario Recipe to have a base, allowing you to automate commonly recurring processes and vary your automation's behavior.
### goal-event-action
The Goal Event feature automatically advances contacts to the next step in the workflow once they meet the goal conditions specified by the user. This can occur regardless of the contact's position in the workflow. This workflow action is great for ending a stream of workflow actions once a customer has met your goal, such as completing a Purchase.
And there you have it! Those are the basis of the If/Else action. Now, for a quick recap, the If/Else action allows you to separate contacts into different action paths depending on the conditions they meet. You can build them up from scratch or use a Scenario Recipe to have a base, allowing you to automate commonly recurring processes and vary your automation's behavior.
### goal-event-action
The Goal Event feature automatically advances contacts to the next step in the workflow once they meet the goal conditions specified by the user. This can occur regardless of the contact's position in the workflow. This workflow action is great for ending a stream of workflow actions once a customer has met your goal, such as completing a Purchase.
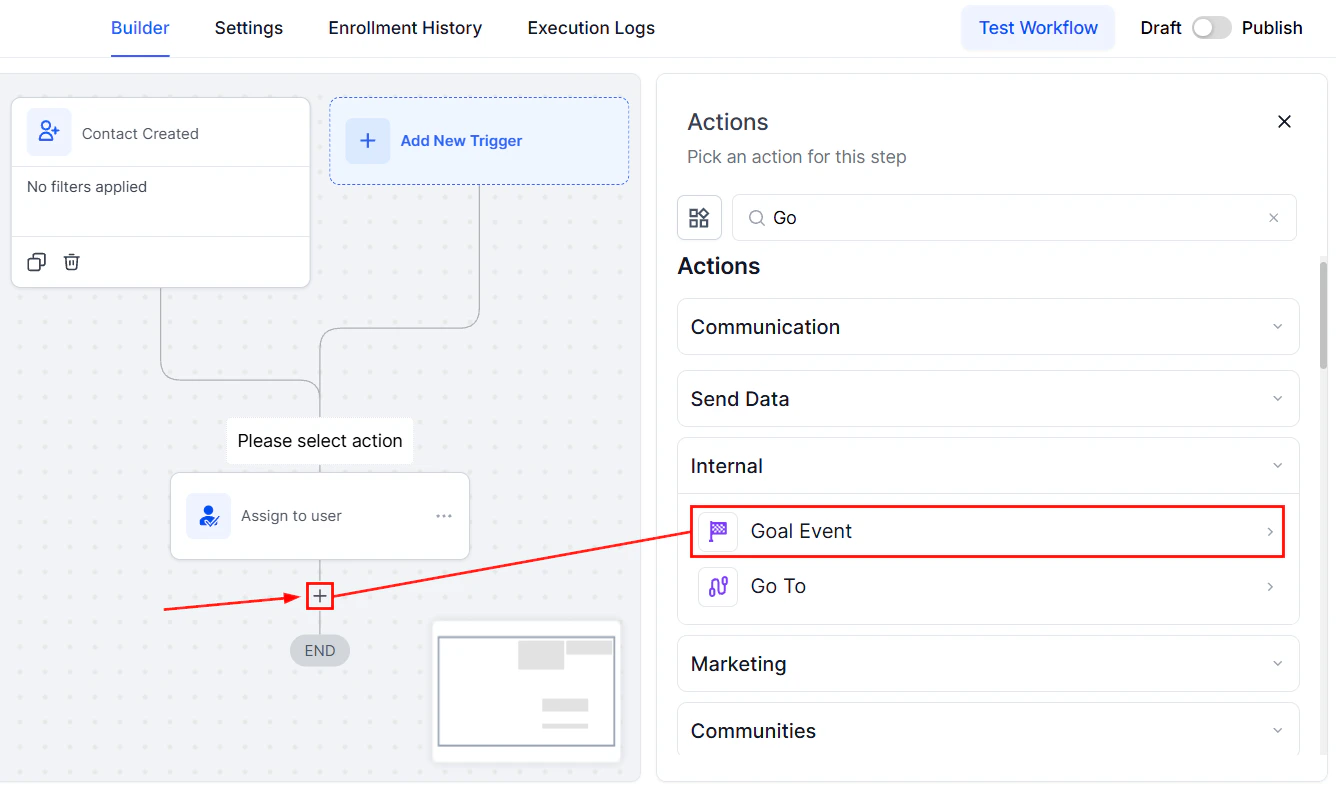 ### Action Name
The user can customize the name of the Goal Event according to the objective or leave it as the original conventional name.
### Action Name
The user can customize the name of the Goal Event according to the objective or leave it as the original conventional name.
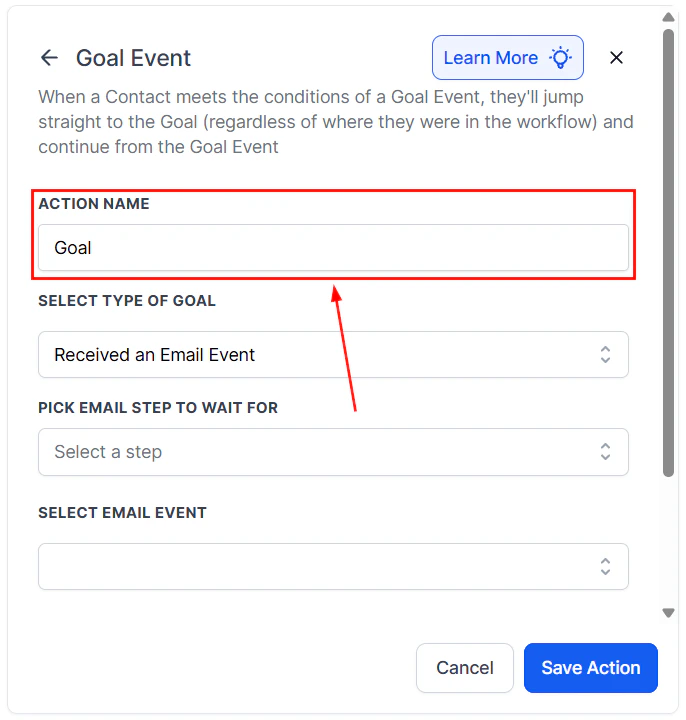 ***
## Select the type of Goal
Goal Events can be chosen to establish a contact Goal for a workflow. Once a contact joins the workflow, the system starts monitoring the specified Goal Event to occur regardless of the current step of the contact.
* \*\*\*\*Received an Email Event: \*\*\*\*The Email event enables the system to pull prospects into the workflow, irrespective of their current step, when certain conditions relating to the email event occur. Users can select the specific email event they want the system to recognize, such as email opened or unsubscribed.
* ****Clicked a Trigger Link:**** Once the prospect clicks on a trigger link, they will be pulled into the workflow regardless of where they are in the step.
* \*\*\*\*Added a Contact Tag: \*\*\*\*When a specific tag is added to a contact, the system triggers the goal and moves the contact to the next step of the workflow.
* \*\*\*\*Removed a Contact Tag: \*\*\*\*If a tag is removed from a contact, it serves as the goal condition, advancing the contact through the workflow.
* ****Appointment Status:**** When a specific appointment status is updated (e.g., booked, canceled, or no-show), the system recognizes this as the goal and takes appropriate action based on the workflow setup.
* ****Payment Received****: When a payment is successfully processed, the system triggers the goal, allowing the contact to advance in the workflow or initiate subsequent automated actions as defined in the setup.
* ****Form Submitted****: When a contact submits a designated form, the system recognizes this submission as the goal condition and moves the contact to the next relevant step in the workflow.
* ****Document Status****: When the status of a document changes (e.g., sent, viewed, signed, or declined), the system identifies this update as the goal event and progresses the contact through the workflow accordingly.
***
## Select the type of Goal
Goal Events can be chosen to establish a contact Goal for a workflow. Once a contact joins the workflow, the system starts monitoring the specified Goal Event to occur regardless of the current step of the contact.
* \*\*\*\*Received an Email Event: \*\*\*\*The Email event enables the system to pull prospects into the workflow, irrespective of their current step, when certain conditions relating to the email event occur. Users can select the specific email event they want the system to recognize, such as email opened or unsubscribed.
* ****Clicked a Trigger Link:**** Once the prospect clicks on a trigger link, they will be pulled into the workflow regardless of where they are in the step.
* \*\*\*\*Added a Contact Tag: \*\*\*\*When a specific tag is added to a contact, the system triggers the goal and moves the contact to the next step of the workflow.
* \*\*\*\*Removed a Contact Tag: \*\*\*\*If a tag is removed from a contact, it serves as the goal condition, advancing the contact through the workflow.
* ****Appointment Status:**** When a specific appointment status is updated (e.g., booked, canceled, or no-show), the system recognizes this as the goal and takes appropriate action based on the workflow setup.
* ****Payment Received****: When a payment is successfully processed, the system triggers the goal, allowing the contact to advance in the workflow or initiate subsequent automated actions as defined in the setup.
* ****Form Submitted****: When a contact submits a designated form, the system recognizes this submission as the goal condition and moves the contact to the next relevant step in the workflow.
* ****Document Status****: When the status of a document changes (e.g., sent, viewed, signed, or declined), the system identifies this update as the goal event and progresses the contact through the workflow accordingly.
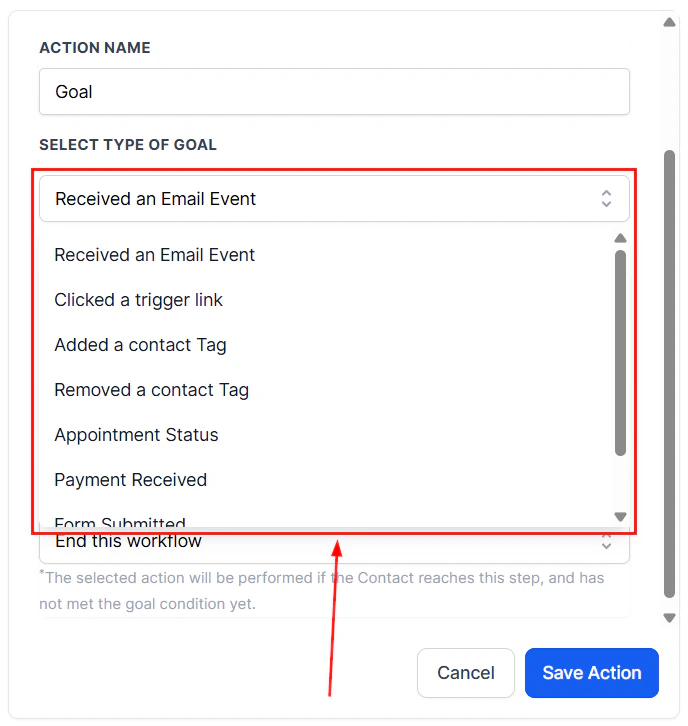 \*\*\*\*📌NOTE: \*\*\*\*Currently, only one goal event can be added per workflow. Each goal configuration may vary, but this guide will focus specifically on setting up the Email Event goal.
***
## Pick The Event To Wait For
Users can select the step for the email, trigger link, tag, or form interaction event using the Pick email/Select step to wait for the option.
\*\*\*\*📌NOTE: \*\*\*\*Currently, only one goal event can be added per workflow. Each goal configuration may vary, but this guide will focus specifically on setting up the Email Event goal.
***
## Pick The Event To Wait For
Users can select the step for the email, trigger link, tag, or form interaction event using the Pick email/Select step to wait for the option.
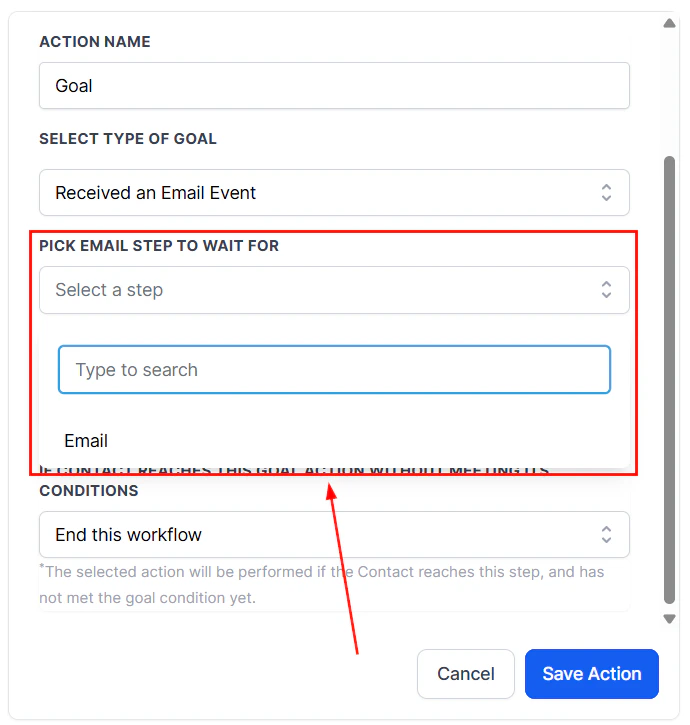 ### Selecting Email Event
From the options below, you can select the email event depending on your objective. From the checkboxes, you can select one or more events as per your goal.
* \*\*\*\*Opened: \*\*\*\*Use this to activate the goal event after the email is opened.
* ****Clicked:**** Use this when you need the goal event after the prospect has clicked on the link.
* \*\*\*\*Unsubscribed: \*\*\*\*Use this when you have several goal actions after the prospect clicks on the unsubscribe link.
* ****Complained:**** This is used to perform the actions when the client has marked your email as spam, and you have already created the actions to be performed in such events.
* ****Bounced:**** In case one of your emails was bounced, you will have the ability to remove such emails from the list.\*\*
### Selecting Email Event
From the options below, you can select the email event depending on your objective. From the checkboxes, you can select one or more events as per your goal.
* \*\*\*\*Opened: \*\*\*\*Use this to activate the goal event after the email is opened.
* ****Clicked:**** Use this when you need the goal event after the prospect has clicked on the link.
* \*\*\*\*Unsubscribed: \*\*\*\*Use this when you have several goal actions after the prospect clicks on the unsubscribe link.
* ****Complained:**** This is used to perform the actions when the client has marked your email as spam, and you have already created the actions to be performed in such events.
* ****Bounced:**** In case one of your emails was bounced, you will have the ability to remove such emails from the list.\*\*
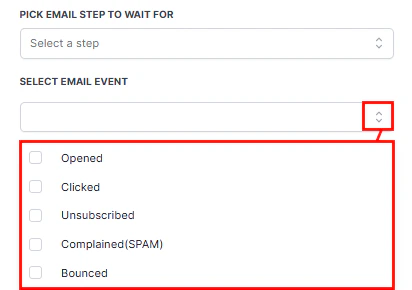 ### Appointment Status
For the Appointment Status option, select the calendar (1) you want the appointment to be from, then select your desired status (2).
### Appointment Status
For the Appointment Status option, select the calendar (1) you want the appointment to be from, then select your desired status (2).
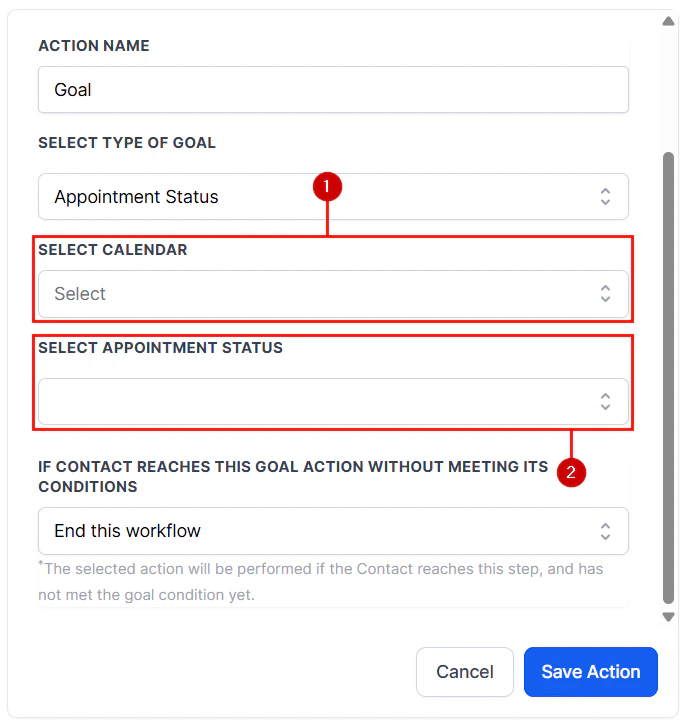 ### Payment Received
For the Payment Received option, select the Global product (1) you want the payment to be for, then select your desired status (2).
### Payment Received
For the Payment Received option, select the Global product (1) you want the payment to be for, then select your desired status (2).
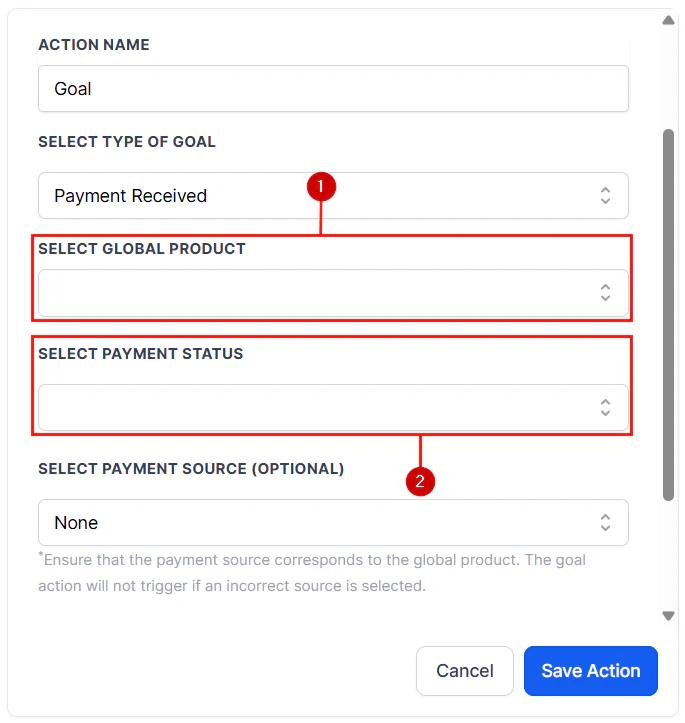 Additionally, you can select a Payment Source to limit the triggering sources.
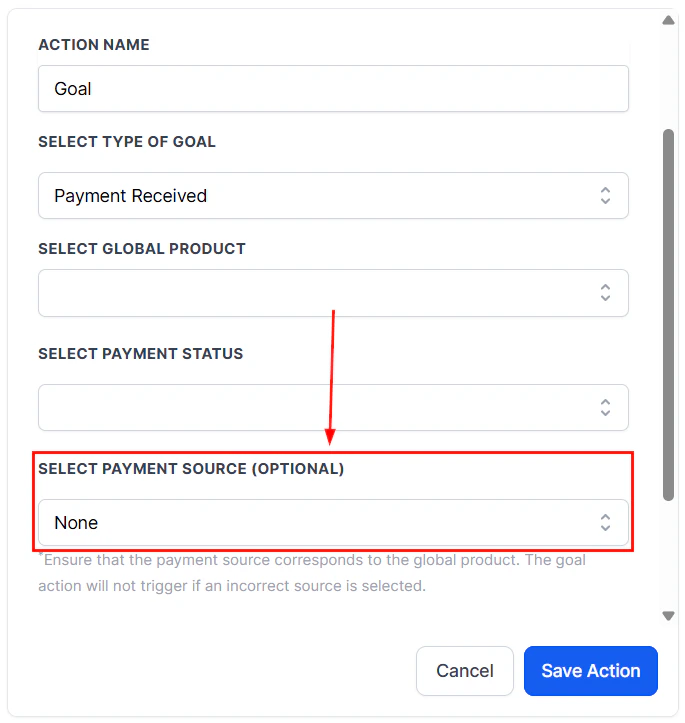 ### Document Status
For the Document Status option, open the dropdown menu and select the statuses you want to trigger this action.
### Document Status
For the Document Status option, open the dropdown menu and select the statuses you want to trigger this action.
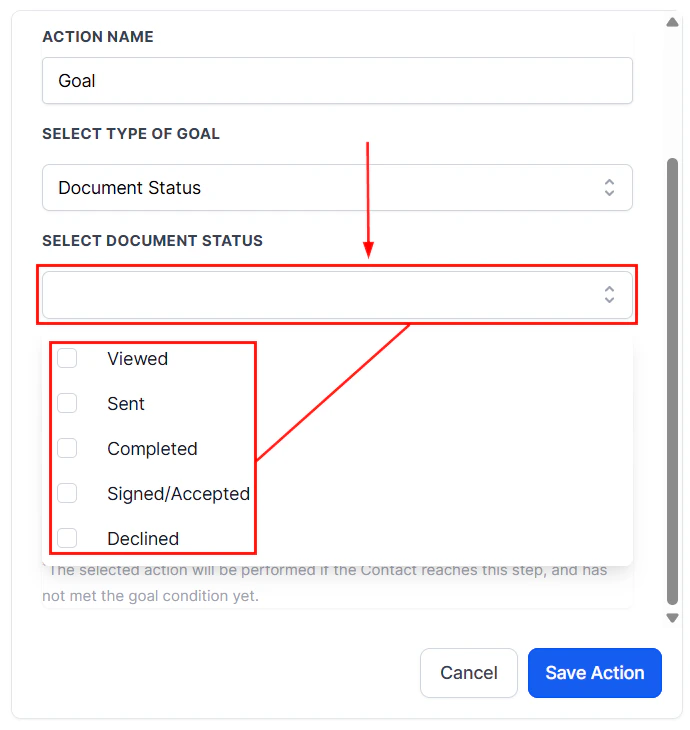 Additionally, you can select a Document Template to limit the triggering sources.
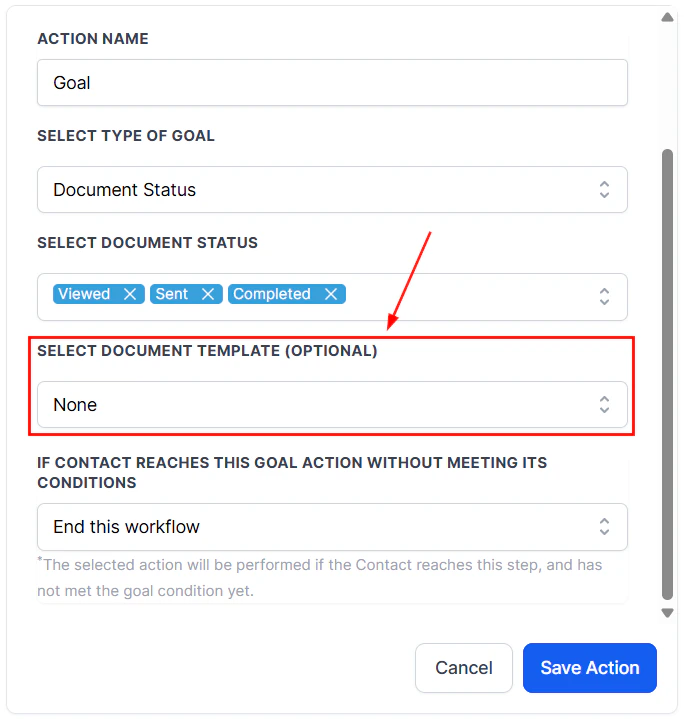 ***
## Action When The Contact Reaches the Goal Without Meeting Its Conditions
If the Goal event was not reached by the time the contact reaches the goal action in your automation, there will be 3 options to select from:
* \*\*End this workflow: \*\*\*\*This allows you to end the workflow even if the contact has not met the goal condition yet.
* \*\*\*\*Continue Anyway: \*\*\*\*If you need the system to perform several actions when the contact has not met the goal condition, you can use this
* ****Wait until the Goal is met:**** With this option, you can let the system wait until the goal conditions are met.
***
## Action When The Contact Reaches the Goal Without Meeting Its Conditions
If the Goal event was not reached by the time the contact reaches the goal action in your automation, there will be 3 options to select from:
* \*\*End this workflow: \*\*\*\*This allows you to end the workflow even if the contact has not met the goal condition yet.
* \*\*\*\*Continue Anyway: \*\*\*\*If you need the system to perform several actions when the contact has not met the goal condition, you can use this
* ****Wait until the Goal is met:**** With this option, you can let the system wait until the goal conditions are met.
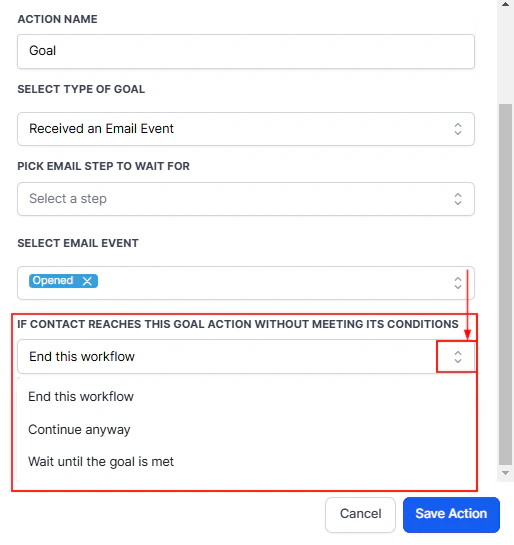 ### Save Actions
Click the ****Save Action**** button to save the changes you have made in your goal event.
### Save Actions
Click the ****Save Action**** button to save the changes you have made in your goal event.
 The Goal Event feature is a powerful action for streamlining workflows by intuitively advancing contacts based on specific conditions. Whether your objective is to track email interactions, link clicks, or other key actions, this feature ensures that your workflows are responsive and efficient. By customizing goal types and subsequent actions, you can tailor the system to align with your business needs.
### split
Split Testing, also known as A/B testing, allows you to compare different versions of your email campaigns to determine which one performs better. Let's learn how to use it!
### Adding the Split Action
Navigate to the desired workflow in the Automation > Workflows section of your account or create a new workflow with the relevant trigger(s), then select the “Split” action from the actions list.
The Goal Event feature is a powerful action for streamlining workflows by intuitively advancing contacts based on specific conditions. Whether your objective is to track email interactions, link clicks, or other key actions, this feature ensures that your workflows are responsive and efficient. By customizing goal types and subsequent actions, you can tailor the system to align with your business needs.
### split
Split Testing, also known as A/B testing, allows you to compare different versions of your email campaigns to determine which one performs better. Let's learn how to use it!
### Adding the Split Action
Navigate to the desired workflow in the Automation > Workflows section of your account or create a new workflow with the relevant trigger(s), then select the “Split” action from the actions list.
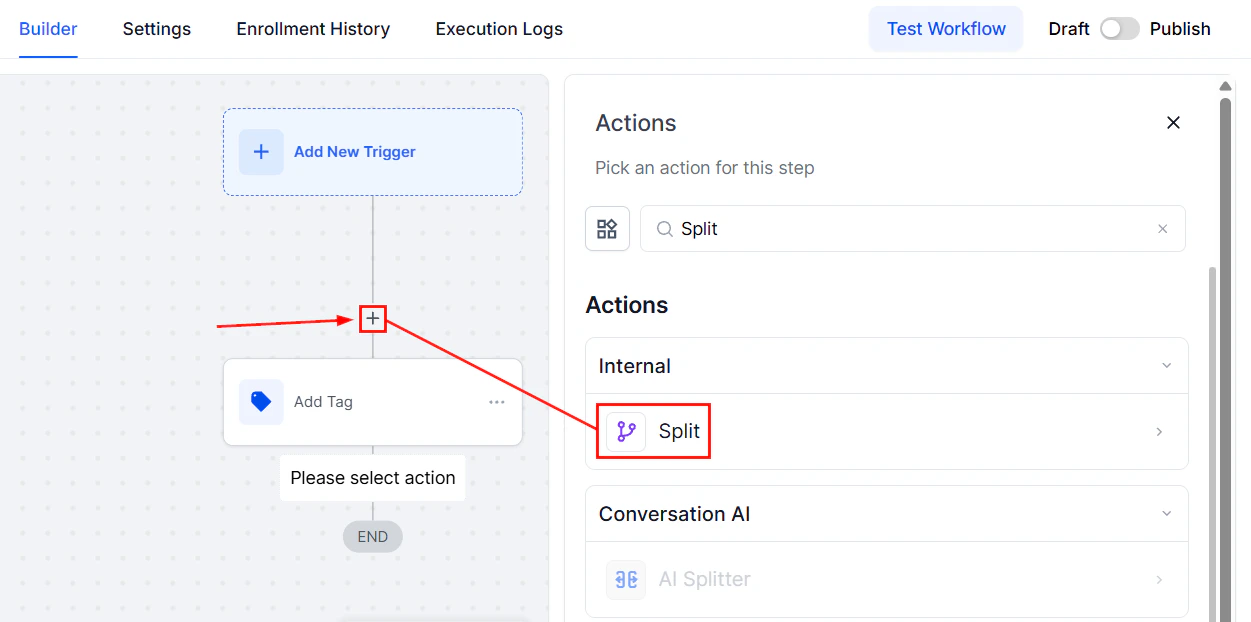 ### Action Name
Rename the action to reflect its intended purpose.
### Action Name
Rename the action to reflect its intended purpose.
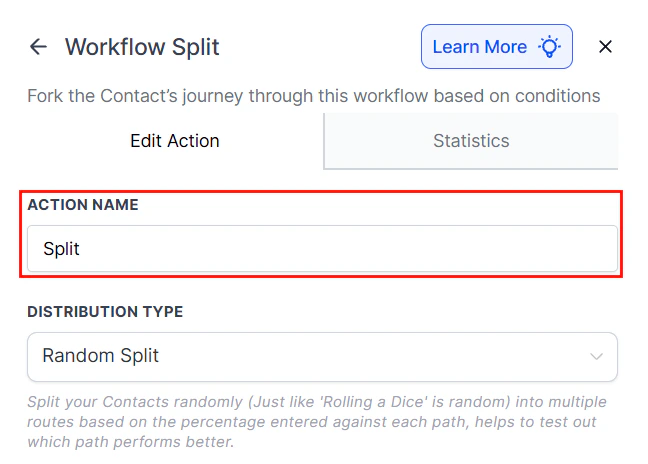 ### Distribution Type
Select the desired method for distributing contacts from the dropdown menu. Currently, Random Split is the only available option, with additional distribution methods to be introduced in future updates.
### Distribution Type
Select the desired method for distributing contacts from the dropdown menu. Currently, Random Split is the only available option, with additional distribution methods to be introduced in future updates.
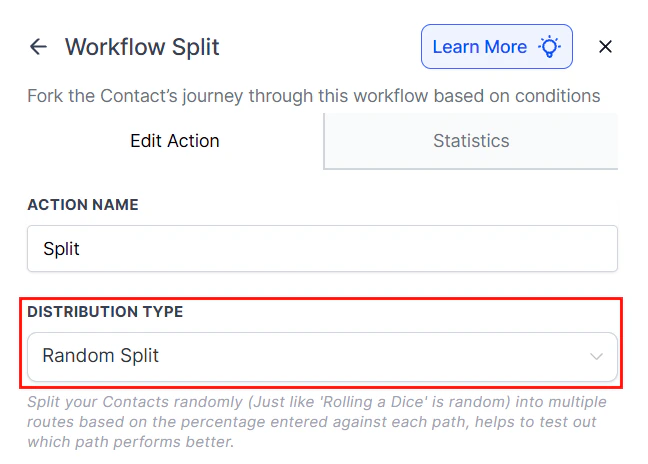 ### Paths
Rename “Path A” and “Path B” to reflect your test variations and set the distribution percentage for each path.
### Paths
Rename “Path A” and “Path B” to reflect your test variations and set the distribution percentage for each path.
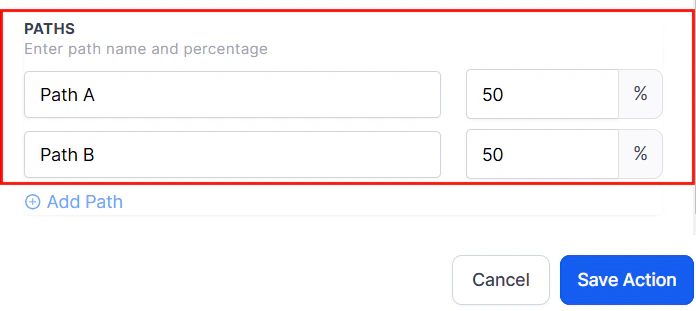 Add more paths by clicking the “Add Path” button, with a maximum of five paths allowed.
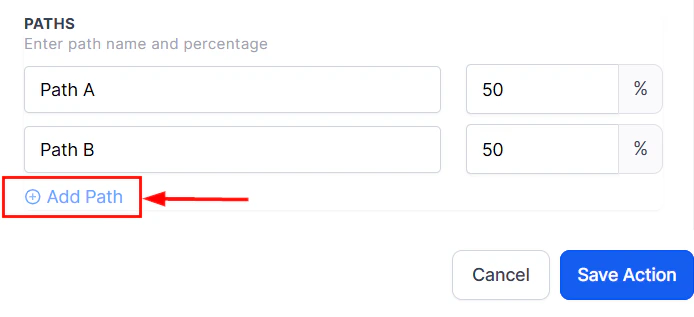 ��****Note****: Ensure that the total for the distribution percentages adds up to 100%.
Save the action to add it to your workflow, then add the actions that should be completed in each path.
��****Note****: Ensure that the total for the distribution percentages adds up to 100%.
Save the action to add it to your workflow, then add the actions that should be completed in each path.
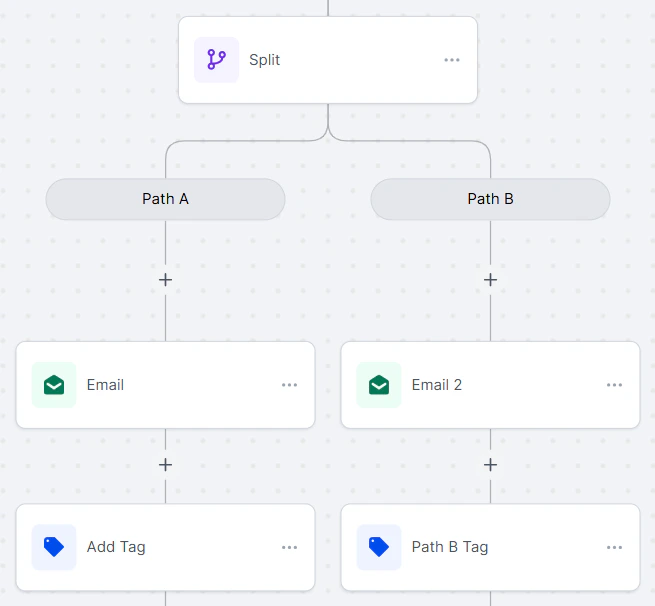 Finally, test the workflow to ensure that it works as intended, then publish and save the workflow once you are satisfied to make the changes live.
### Statistics
Check the Statistics of the action by navigating to the Statistics tab to see the distribution of contacts across paths.
Finally, test the workflow to ensure that it works as intended, then publish and save the workflow once you are satisfied to make the changes live.
### Statistics
Check the Statistics of the action by navigating to the Statistics tab to see the distribution of contacts across paths.
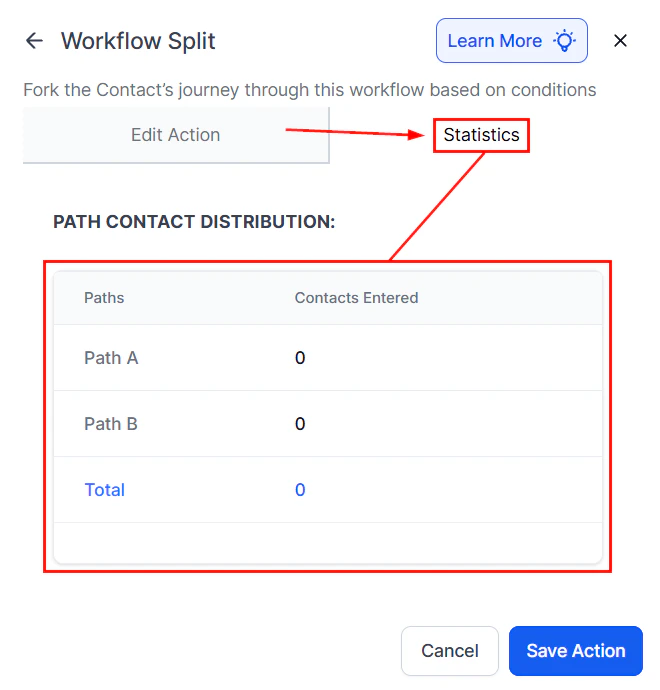 Moreover, enable “Stats View” in the builder to see stats directly in the workflow.
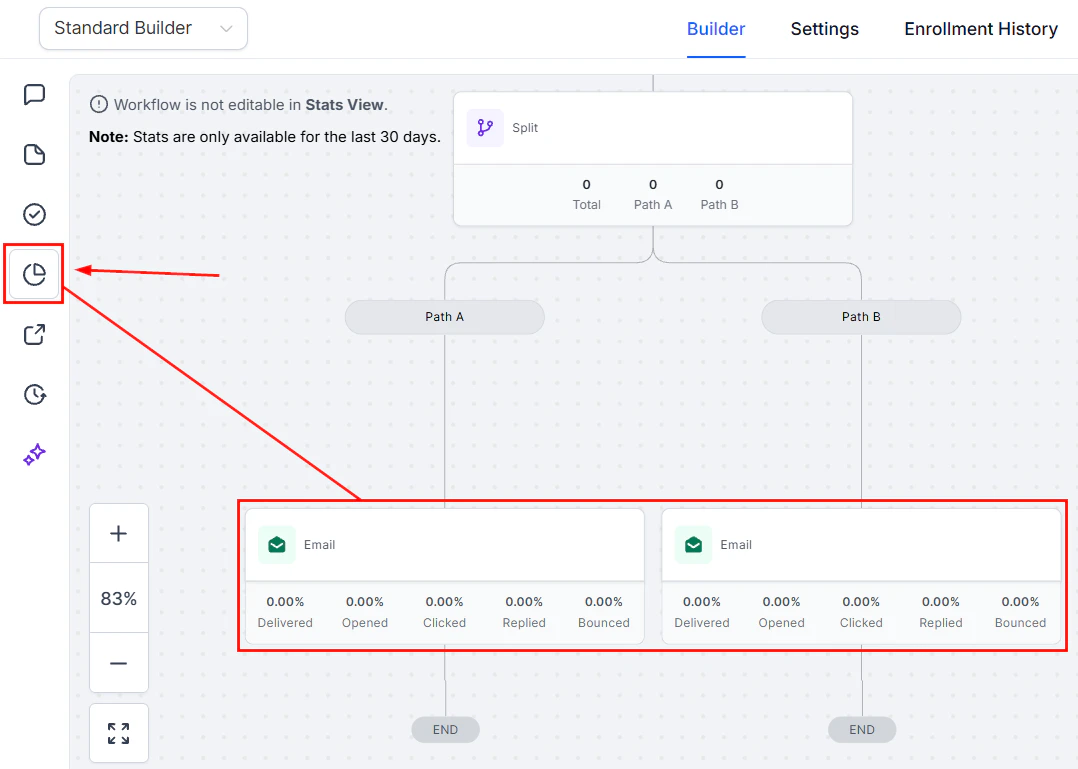 With the ability to test different variations and track real-time results, you’re empowered to continually improve and refine your campaigns for the best outcomes. By integrating split testing directly into your workflows, you can:
* ****Enhance Campaign Optimization****: Test variations of subject lines, email content, or Calls to Action (CTAs) to find the most effective approach.
* ****Save Time****: Eliminate the need for external tools and streamline your marketing processes.
* ****Make Informed Decisions****: Access real-time statistics to guide your marketing strategy, ensuring that every decision is data-driven.
Start using Split Testing today to take your email marketing efforts to the next level.
### Practical Example
Imagine you own an e-commerce store and can't decide between two email subject lines.
* ****Solution****: Use the Split action to divide your mailing list, sending 75% the Path A email and 25% the Path B email.
* ****Outcome****: Track key metrics such as website visits and purchase rates for each path. After analyzing the results, you will know which subject line performs better, allowing you to apply this insight to future campaigns.
### Frequently Asked Questions
Readjust the distribution percentages so their sum equals 100% to avoid errors in your workflow.
Yes; however, it is best to finalize your paths before activating the workflow to ensure accurate data collection and analysis.
### action-drip
The Drip Action is designed to regulate the flow of contacts through a workflow, preventing the simultaneous execution of numerous steps. By setting parameters such as batch size and drip interval, you can maintain control over the pace of contact progression, ensuring that the workflow runs smoothly and efficiently without overwhelming the system or causing a bottleneck.
Head to the Automation > Workflows section in your account to create a new workflow or select an existing workflow to edit it.
### Select the Drip Action
Begin by selecting the Drip action from the available workflow actions.
With the ability to test different variations and track real-time results, you’re empowered to continually improve and refine your campaigns for the best outcomes. By integrating split testing directly into your workflows, you can:
* ****Enhance Campaign Optimization****: Test variations of subject lines, email content, or Calls to Action (CTAs) to find the most effective approach.
* ****Save Time****: Eliminate the need for external tools and streamline your marketing processes.
* ****Make Informed Decisions****: Access real-time statistics to guide your marketing strategy, ensuring that every decision is data-driven.
Start using Split Testing today to take your email marketing efforts to the next level.
### Practical Example
Imagine you own an e-commerce store and can't decide between two email subject lines.
* ****Solution****: Use the Split action to divide your mailing list, sending 75% the Path A email and 25% the Path B email.
* ****Outcome****: Track key metrics such as website visits and purchase rates for each path. After analyzing the results, you will know which subject line performs better, allowing you to apply this insight to future campaigns.
### Frequently Asked Questions
Readjust the distribution percentages so their sum equals 100% to avoid errors in your workflow.
Yes; however, it is best to finalize your paths before activating the workflow to ensure accurate data collection and analysis.
### action-drip
The Drip Action is designed to regulate the flow of contacts through a workflow, preventing the simultaneous execution of numerous steps. By setting parameters such as batch size and drip interval, you can maintain control over the pace of contact progression, ensuring that the workflow runs smoothly and efficiently without overwhelming the system or causing a bottleneck.
Head to the Automation > Workflows section in your account to create a new workflow or select an existing workflow to edit it.
### Select the Drip Action
Begin by selecting the Drip action from the available workflow actions.
 ### Action Name
Enter a descriptive name for the action to convey its intended purpose and facilitate easy identification in the workflow builder.
### Action Name
Enter a descriptive name for the action to convey its intended purpose and facilitate easy identification in the workflow builder.
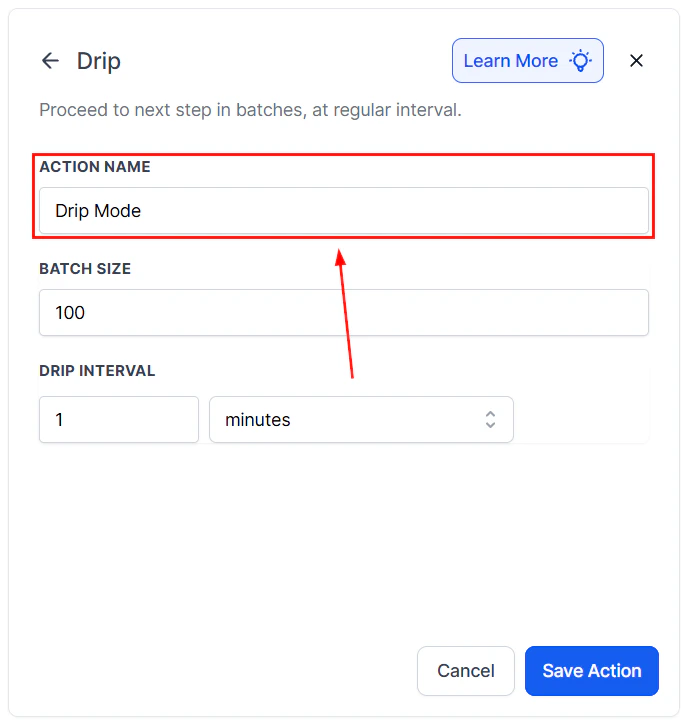 ### Batch Size
Define the number of executions allowed per batch. The range for this setting is from a minimum of one to a maximum of ten thousand contacts per batch.
### Batch Size
Define the number of executions allowed per batch. The range for this setting is from a minimum of one to a maximum of ten thousand contacts per batch.
 ### Drip Interval
Set the time interval for the drip action. You can choose between minutes, hours, or days, with intervals ranging from one minute to seven days.
### Drip Interval
Set the time interval for the drip action. You can choose between minutes, hours, or days, with intervals ranging from one minute to seven days.
 Save the action to add it to your workflow, and be sure to save the workflow to maintain your changes!
### Practical Example
Consider a scenario where 10,000 contacts enter a workflow, or 5,000 contacts progress from a wait step to the next stage. To prevent a surge in executions and maintain a steady flow, you can configure the Drip Action as follows:
* Batch Size: Set to 50 contacts per batch.
* Drip Interval: Configure an interval of 10 minutes.
This configuration ensures that only 50 contacts move to the next step every 10 minutes, thereby controlling the pace of the workflow and avoiding overwhelming system resources.
By using the Drip Action, you can achieve precise control over workflow execution, improving system performance and ensuring that contacts progress through the workflow at a manageable rate. This feature is particularly valuable when handling large volumes of contacts or when a steady pace is required for optimal engagement and results.
### event-start-date-action
The ****Set Event Start Date**** action allows you to define a specific day, date, and time for an event to commence. This guide will walk you through the Set Event Start Date action, explaining its purpose and how to configure it effectively for your needs.
***
## How to Set Event Start Date
The ****Set Event Start Date**** workflow action provides you with the ability to define the exact timing for the commencement of an event. This is especially useful when paired with ****Wait steps****, as it keeps contacts on hold until the predefined day, date, or time. Ensuring effective communication and better coordination, especially for time-sensitive events.
In a workflow, add your preferred trigger, then click the\*\*\*\* “+”\*\*\*\* to search and add the “****Set Event Start Date”**** action.
Save the action to add it to your workflow, and be sure to save the workflow to maintain your changes!
### Practical Example
Consider a scenario where 10,000 contacts enter a workflow, or 5,000 contacts progress from a wait step to the next stage. To prevent a surge in executions and maintain a steady flow, you can configure the Drip Action as follows:
* Batch Size: Set to 50 contacts per batch.
* Drip Interval: Configure an interval of 10 minutes.
This configuration ensures that only 50 contacts move to the next step every 10 minutes, thereby controlling the pace of the workflow and avoiding overwhelming system resources.
By using the Drip Action, you can achieve precise control over workflow execution, improving system performance and ensuring that contacts progress through the workflow at a manageable rate. This feature is particularly valuable when handling large volumes of contacts or when a steady pace is required for optimal engagement and results.
### event-start-date-action
The ****Set Event Start Date**** action allows you to define a specific day, date, and time for an event to commence. This guide will walk you through the Set Event Start Date action, explaining its purpose and how to configure it effectively for your needs.
***
## How to Set Event Start Date
The ****Set Event Start Date**** workflow action provides you with the ability to define the exact timing for the commencement of an event. This is especially useful when paired with ****Wait steps****, as it keeps contacts on hold until the predefined day, date, or time. Ensuring effective communication and better coordination, especially for time-sensitive events.
In a workflow, add your preferred trigger, then click the\*\*\*\* “+”\*\*\*\* to search and add the “****Set Event Start Date”**** action.
 ***
## Action Type
The Action Type provides different options and use cases within the Event Start Date. Here you can select from a ****Custom field****, a ****Specific date/time****, or a ****Specific day****.
***
## Action Type
The Action Type provides different options and use cases within the Event Start Date. Here you can select from a ****Custom field****, a ****Specific date/time****, or a ****Specific day****.
 ### Custom Field
When using the Custom Field option, select a custom value or contact that will serve as the Event Start Date. By clicking on the ****tag icon****, you can also select a custom field that is either in date or a text type field from the Select Custom Fields option.
### Custom Field
When using the Custom Field option, select a custom value or contact that will serve as the Event Start Date. By clicking on the ****tag icon****, you can also select a custom field that is either in date or a text type field from the Select Custom Fields option.
 ### Specific Date/Time
The ****Specific Date/Time**** option allows you to manually choose an exact date and time for your event. This is ideal for fixed events, such as webinars, appointments, or promotional launches.
With this setup, you can also incorporate ****Wait steps**** to hold contacts until the specified moment.
### Specific Date/Time
The ****Specific Date/Time**** option allows you to manually choose an exact date and time for your event. This is ideal for fixed events, such as webinars, appointments, or promotional launches.
With this setup, you can also incorporate ****Wait steps**** to hold contacts until the specified moment.
 ### Specific Day
The ****Specific Day**** option lets you set an event based on recurring days, such as specific weekdays or days of the month.
* ****Current Day of the Month****: Select specific days of the month, such as the 15th or the last day. This is great for monthly billing reminders or progress reports.
### Specific Day
The ****Specific Day**** option lets you set an event based on recurring days, such as specific weekdays or days of the month.
* ****Current Day of the Month****: Select specific days of the month, such as the 15th or the last day. This is great for monthly billing reminders or progress reports.
 * ****Current Day of the Week****: Choose from options like Monday-Friday or select a particular day, such as every Monday. This is useful for recurring weekly meetings or follow-ups.
 The ****Set Event Start Date**** workflow action is an essential tool for organizing time-sensitive tasks and ensuring your workflows run efficiently. Whether you're using custom fields for dynamic scheduling, fixed dates for specific events, or recurring days for ongoing tasks, this feature allows you to tailor your workflows to meet your business goals. With the right setup, your workflows will keep you ahead of schedule and your contacts engaged at every step.
### math-operation-action
The Math Operation action makes the system seamlessly handle any calculations needed by adding them to a workflow where they can be used to maintain score metrics or total fields. For example, this function can be used to give scores to leads based on their responses and activities in a marketing campaign.
The ****Set Event Start Date**** workflow action is an essential tool for organizing time-sensitive tasks and ensuring your workflows run efficiently. Whether you're using custom fields for dynamic scheduling, fixed dates for specific events, or recurring days for ongoing tasks, this feature allows you to tailor your workflows to meet your business goals. With the right setup, your workflows will keep you ahead of schedule and your contacts engaged at every step.
### math-operation-action
The Math Operation action makes the system seamlessly handle any calculations needed by adding them to a workflow where they can be used to maintain score metrics or total fields. For example, this function can be used to give scores to leads based on their responses and activities in a marketing campaign.
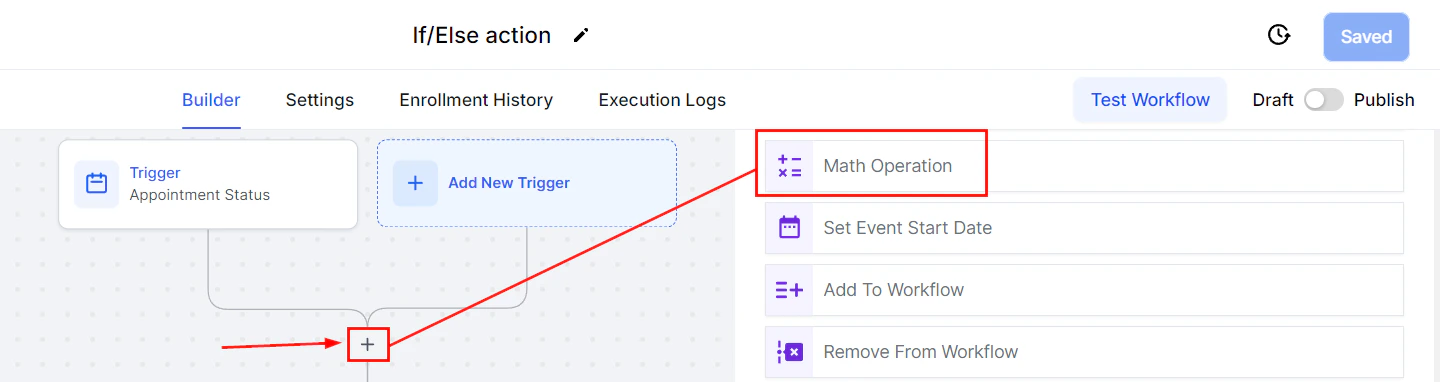 ***
## Setting it Up
Select the field you want to apply the Math Operation on, this can be any numeric field in the system including dates and custom values.
***
## Setting it Up
Select the field you want to apply the Math Operation on, this can be any numeric field in the system including dates and custom values.
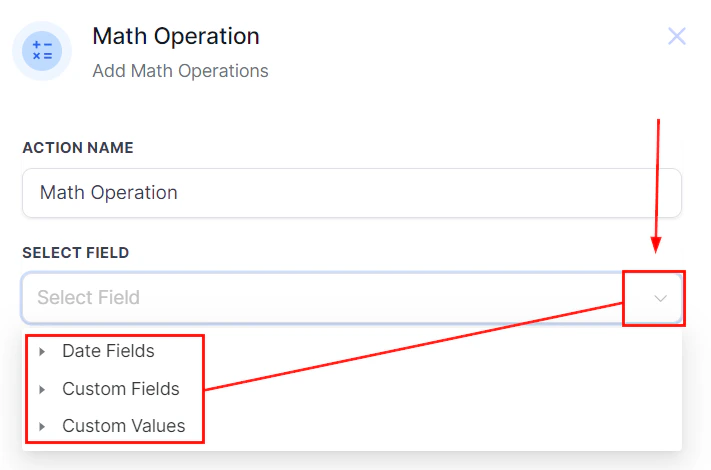 Select the operation you want to apply, in this case, the operations refer to the math function to apply i.e. subtraction, addition, etc.
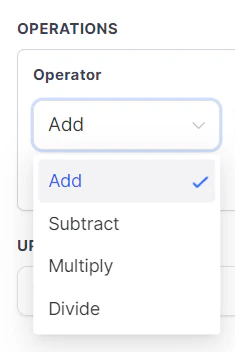 Add the value to perform the operation, the tag icon will allow you to choose the custom values you have created inside of your system for this field.
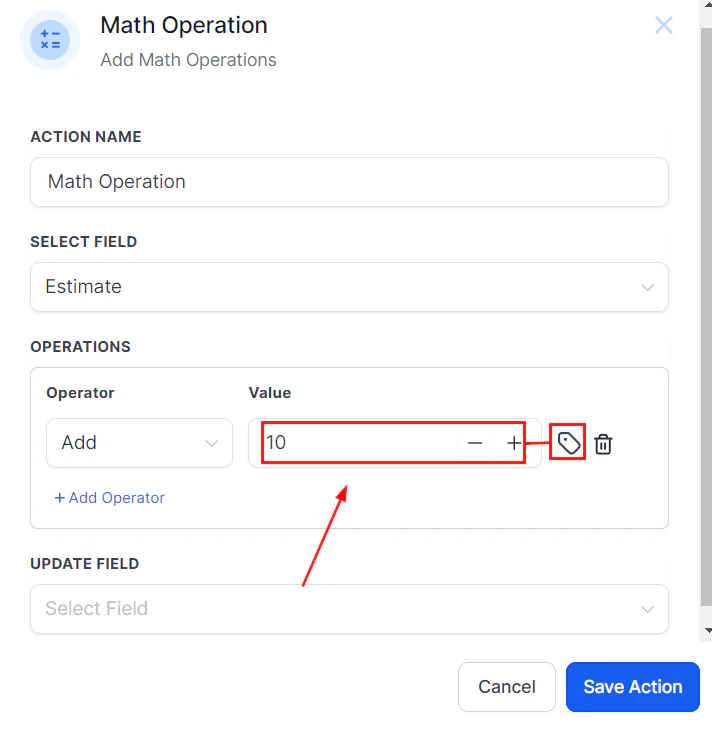 Select the desired field to update with the math operation from the Update Field dropdown menu.
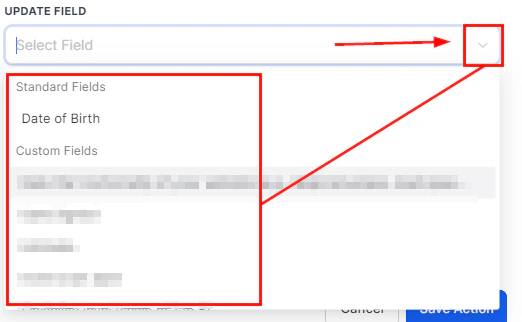 Once you've selected a field, click on Save action to keep the changes.
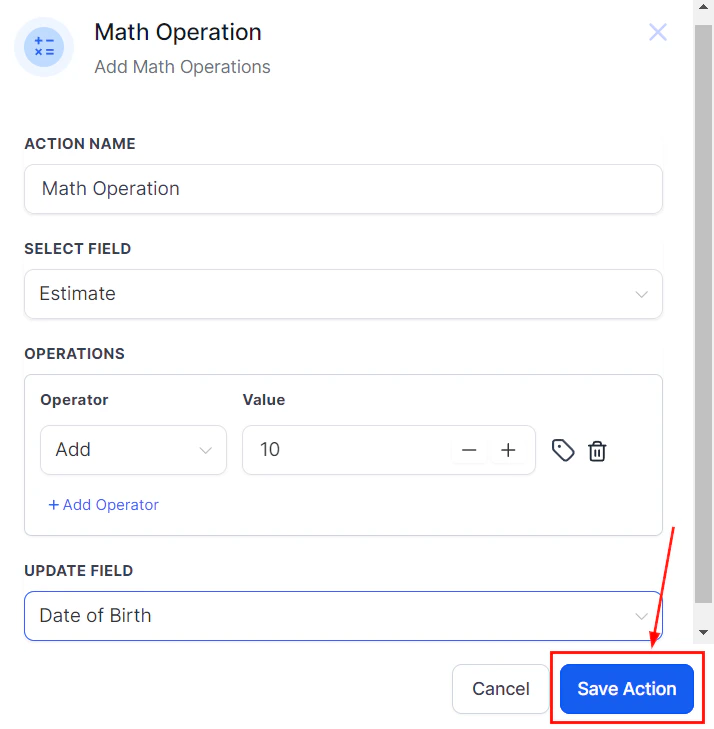 There are a few minor differences between using Date or Numeric fields, so let's give them a check!
### Date Fields
For date fields, the operations will be limited to Adding or Subtracting, once the operator is selected enter the total days, months, and/or years.
There are a few minor differences between using Date or Numeric fields, so let's give them a check!
### Date Fields
For date fields, the operations will be limited to Adding or Subtracting, once the operator is selected enter the total days, months, and/or years.
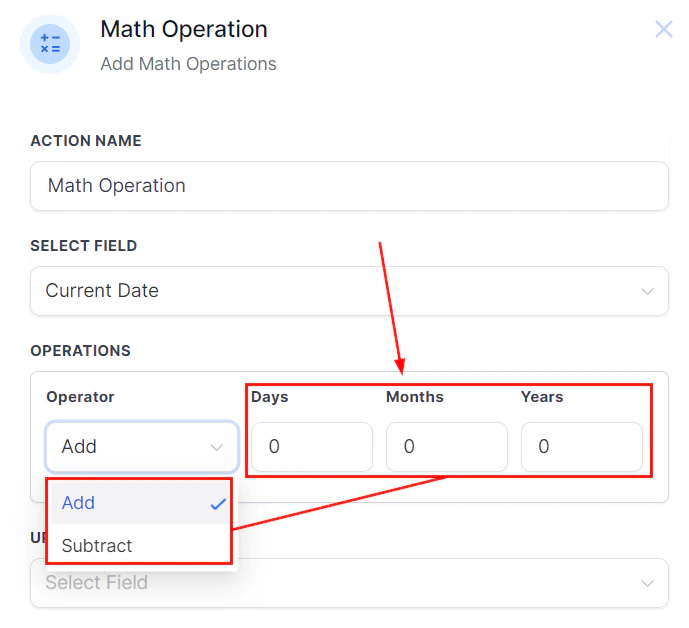 ### Number Fields
For Numerics fields you can Add, Subtract, Multiply, or Divide as well as add multiple operations for the system to run.
### Number Fields
For Numerics fields you can Add, Subtract, Multiply, or Divide as well as add multiple operations for the system to run.
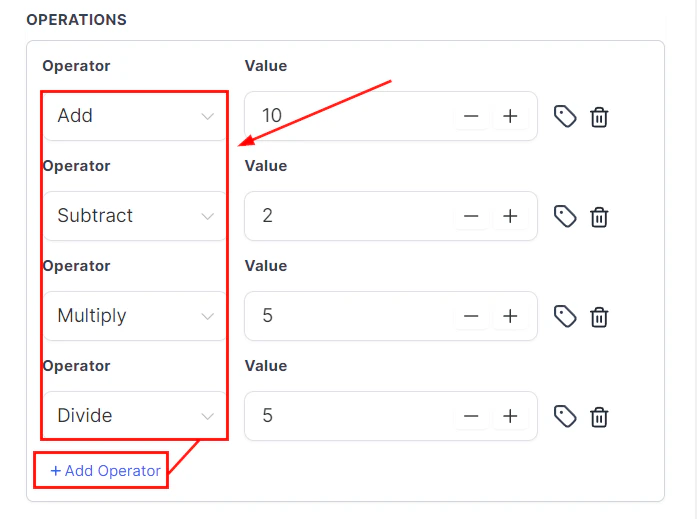 If you've added an Operator you'd like to remove click the trash can icon next to it.
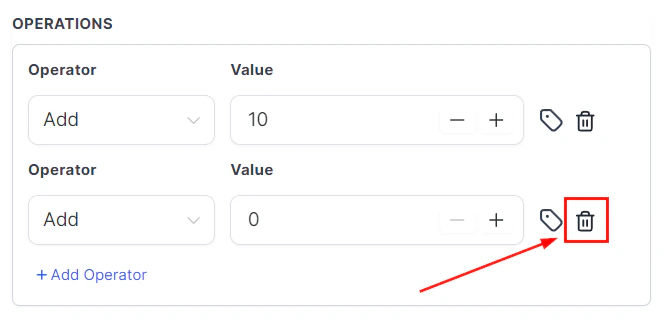 And there you go! This action will help you perform any needed calculations related to a contact inside the system, allowing you to easily qualify, actualize and evaluate customers and opportunities as they interact with your business.
### number-formatter-action
The Number Formatter Premium Action is a versatile tool that simplifies handling and reformatting numerical data across various business scenarios. Whether you need to convert text to numbers, format currencies, or generate random numbers, this feature enhances workflows with precision and efficiency.
In the workflow, add a suitable Trigger, click the ****“+”**** icon, then in the actions menu, search for and add "\*\*\*\*Number Formatter" \*\*\*\*to the workflow.
And there you go! This action will help you perform any needed calculations related to a contact inside the system, allowing you to easily qualify, actualize and evaluate customers and opportunities as they interact with your business.
### number-formatter-action
The Number Formatter Premium Action is a versatile tool that simplifies handling and reformatting numerical data across various business scenarios. Whether you need to convert text to numbers, format currencies, or generate random numbers, this feature enhances workflows with precision and efficiency.
In the workflow, add a suitable Trigger, click the ****“+”**** icon, then in the actions menu, search for and add "\*\*\*\*Number Formatter" \*\*\*\*to the workflow.
 ***
## How to Use Different Number Formatter Action Types
### Text to Number Action
This action is ideal for extracting numeric information from text fields. It is commonly used for order calculations, transforming revenue figures from text, or analyzing survey responses in numerical form.
Select ****Text to Number**** in the Action Type dropdown.
***
## How to Use Different Number Formatter Action Types
### Text to Number Action
This action is ideal for extracting numeric information from text fields. It is commonly used for order calculations, transforming revenue figures from text, or analyzing survey responses in numerical form.
Select ****Text to Number**** in the Action Type dropdown.
 Select a suitable field for text-to-number conversion.
 Define the Decimal Mark for precision.
 Use the result in subsequent actions (e.g. Send Email) with `{{number_formatter.1.result}}`.
 ***
## Format Number Action
Formatting numbers ensure clarity for international audiences or reporting requirements. This is crucial for generating invoices, exporting data, or updating e-commerce prices in region-specific formats
Select ****Format Number**** in the Action Type dropdown.
***
## Format Number Action
Formatting numbers ensure clarity for international audiences or reporting requirements. This is crucial for generating invoices, exporting data, or updating e-commerce prices in region-specific formats
Select ****Format Number**** in the Action Type dropdown.
 Select a suitable field for number formatting.
 Define the decimal mark for the number.
 Choose the required format from the list.
 Utilize the result in further actions (e.g. Send Email) with `{{number_formatter.1.result}}`.
 ***
## Format Phone Number Action
This action standardizes phone numbers for improved communication and lead management. It integrates country codes, verifies CRM phone fields, and tailors phone formats for regional preferences.
Select ****Format Phone Number**** in the Action Type dropdown.
***
## Format Phone Number Action
This action standardizes phone numbers for improved communication and lead management. It integrates country codes, verifies CRM phone fields, and tailors phone formats for regional preferences.
Select ****Format Phone Number**** in the Action Type dropdown.
 Choose a suitable field for phone number formatting.
 Select the desired format.
 Add the country code.
 Utilize the result in further actions (e.g. Send Email) with `{{number_formatter.1.result}}`.
 ***
## Format Currency Action
Increase the customer experience by displaying prices in local currencies. This is essential for creating region-specific invoices, marketing materials, and financial reports.
Select Format Currency in the Action Type dropdown.
***
## Format Currency Action
Increase the customer experience by displaying prices in local currencies. This is essential for creating region-specific invoices, marketing materials, and financial reports.
Select Format Currency in the Action Type dropdown.
 Select a suitable field for currency formatting.
 Choose the required currency format from the list.
 Choose the required currency locale format from the list.
 Utilize the result in further actions (e.g. Send Email) with `{{number_formatter.1.result}}`.
 ***
## Random Number Action
Random numbers are useful for creating unique discount codes, managing giveaways, or running A/B testing for unbiased results.
Select ****Random Number**** in the Action Type dropdown.
***
## Random Number Action
Random numbers are useful for creating unique discount codes, managing giveaways, or running A/B testing for unbiased results.
Select ****Random Number**** in the Action Type dropdown.
 Specify the Lower Range, Upper Range, and Decimal Points.
 Use the generated random number in further actions (e.g. Send Email) in your workflow with `{{number_formatter.1.result}}`.
 Remember to\*\*\*\* Save\*\*\*\* the Action to ensure that the workflow performs properly.
 The Number Formatter Premium Action is a robust tool for transforming data into actionable formats. By integrating this feature into your workflows, you can streamline processes, enhance data precision, and deliver personalized experiences across various business operations.
### text-formatter-action
Data comes in many forms, sometimes in numbers, sometimes in checkboxes that your customers selected, and sometimes that data is weirdly formatted text. Luckily you have an awesome tool at your disposal.
The\*\*\*\* “Text Formatter”\*\*\*\* Action lets you grab text from any field and change it to match your needs. There are a few options to cover, so let's start by clicking the ****"+"**** sign to add the action. You can look it up by scrolling down to internal tools or looking for it in the search bar.
The Number Formatter Premium Action is a robust tool for transforming data into actionable formats. By integrating this feature into your workflows, you can streamline processes, enhance data precision, and deliver personalized experiences across various business operations.
### text-formatter-action
Data comes in many forms, sometimes in numbers, sometimes in checkboxes that your customers selected, and sometimes that data is weirdly formatted text. Luckily you have an awesome tool at your disposal.
The\*\*\*\* “Text Formatter”\*\*\*\* Action lets you grab text from any field and change it to match your needs. There are a few options to cover, so let's start by clicking the ****"+"**** sign to add the action. You can look it up by scrolling down to internal tools or looking for it in the search bar.
 ***
## Action Type
After clicking on it, you'll need to select the Action type, which determines how the text will be formatted. The available actions include:
### Case Types
These change the way the text case shows. It consists of 4 options that, once selected, give you a small example of how the text will look.
1. \*\*\*\*Upper Case: \*\*\*\*Converts all characters in the text to uppercase
2. ****Lower Case:**** Converts all characters in the text to lowercase.
3. ****Title Case:**** This capitalizes the first letter of each word.
4. ****Capitalize:**** This capitalizes the first letter of the text.
***
## Action Type
After clicking on it, you'll need to select the Action type, which determines how the text will be formatted. The available actions include:
### Case Types
These change the way the text case shows. It consists of 4 options that, once selected, give you a small example of how the text will look.
1. \*\*\*\*Upper Case: \*\*\*\*Converts all characters in the text to uppercase
2. ****Lower Case:**** Converts all characters in the text to lowercase.
3. ****Title Case:**** This capitalizes the first letter of each word.
4. ****Capitalize:**** This capitalizes the first letter of the text.
 ### Substitution Types
Substitution tools allow you to replace, supplement, or clean up text fields. They include:
* ****Default Value:**** If the text you added is empty it returns it to the value you set as default.\*\*
### Substitution Types
Substitution tools allow you to replace, supplement, or clean up text fields. They include:
* ****Default Value:**** If the text you added is empty it returns it to the value you set as default.\*\*
 * \*\*Replace Text: \*\***Replaces occurrences of specified text with a new value.**
 * **Remove HTML Tags:**\*\* Strips HTML tags from the text converting them into plain text.
 ### Length Reduction Types
Length reduction options help you manage text size to fit specific limits or display requirements.
* \*\*\*\*Trim: \*\*\*\*Shortens the text to a specified length, this can remove characters from the beginning or replace the text after a certain point with ellipses.
### Length Reduction Types
Length reduction options help you manage text size to fit specific limits or display requirements.
* \*\*\*\*Trim: \*\*\*\*Shortens the text to a specified length, this can remove characters from the beginning or replace the text after a certain point with ellipses.
 * \*\*\*\*Trim Whitespaces: \*\***Remove whitespace from the beginning and end of text.**
 * \*\*Split: \*\***Splits the text into multiple segments based on a specified delimiter, the segment you select will be the new text in the field.**
 ### Length Counting Types
Length counting tools provide metrics for text, helping you understand its structure and use it effectively.
* \*\*Word Count: \*\*\*\*Provides the count of words in the text.
### Length Counting Types
Length counting tools provide metrics for text, helping you understand its structure and use it effectively.
* \*\*Word Count: \*\*\*\*Provides the count of words in the text.
 * \*\*\*\*Length: \*\*\*\*Provides the character count of the text.
 ### Information Retrievers Types
These features help you retrieve specific details from your text fields.
* \*\*\*\*Find: \*\***Locates the first occurrence of a specific text pattern within the text and returns its position.**
### Information Retrievers Types
These features help you retrieve specific details from your text fields.
* \*\*\*\*Find: \*\***Locates the first occurrence of a specific text pattern within the text and returns its position.**
 * **Extract Email:**\*\* Retrieves the first email address from the text.
 * \*\*\*\*Extract URL: \*\*\*\*Retrieves the first URL from the text.
 The ****Text Formatter Action**** is a great feature for transforming raw data into actionable information. Whether reformatting text, counting words, or extracting critical details, this feature simplifies your workflows and enhances your data handling capabilities.
### how-to-use-the-datetime-formatter-workflow-action
The ****Date/Time Formatter Workflow Action**** is a versatile feature designed to simplify date and time management in workflows. This feature allows users to reformat date structures, compare dates, and automate date-related calculations, saving time and ensuring consistency. In this guide, we will explore its capabilities, benefits, and practical applications across various industries.
Start by selecting a preferred trigger and then click the\*\*\*\* “+”\*\*\*\* icon to add the ****Date/Time Formatter**** Action.
The ****Text Formatter Action**** is a great feature for transforming raw data into actionable information. Whether reformatting text, counting words, or extracting critical details, this feature simplifies your workflows and enhances your data handling capabilities.
### how-to-use-the-datetime-formatter-workflow-action
The ****Date/Time Formatter Workflow Action**** is a versatile feature designed to simplify date and time management in workflows. This feature allows users to reformat date structures, compare dates, and automate date-related calculations, saving time and ensuring consistency. In this guide, we will explore its capabilities, benefits, and practical applications across various industries.
Start by selecting a preferred trigger and then click the\*\*\*\* “+”\*\*\*\* icon to add the ****Date/Time Formatter**** Action.
 ***
## Date/Time Formatter Action Type
### Format Date
The Date/Time Formatter makes it easy to modify date formats. Select a date, and the feature will auto-detect its format. Once identified, you can choose a new format from the provided list, and the feature will apply the changes.
***
## Date/Time Formatter Action Type
### Format Date
The Date/Time Formatter makes it easy to modify date formats. Select a date, and the feature will auto-detect its format. Once identified, you can choose a new format from the provided list, and the feature will apply the changes.
 ### Format Date and Time
For workflows involving both date and time, the formatter supports full reformatting. Select the field to modify, allow the feature to detect the current format, and select the desired format for better updates.
### Format Date and Time
For workflows involving both date and time, the formatter supports full reformatting. Select the field to modify, allow the feature to detect the current format, and select the desired format for better updates.
 ### Compare Dates
This option simplifies date comparisons, such as calculating the number of days between two dates. Select a start and end date, and the formatter will determine the difference, enabling data-driven decisions.
### Compare Dates
This option simplifies date comparisons, such as calculating the number of days between two dates. Select a start and end date, and the formatter will determine the difference, enabling data-driven decisions.
 ****📌 NOTE:**** When comparing dates, the follow-up dropdowns will include the Start date, Start date format, End Date, and End date format.
 ### Field Selection
In the field selection dropdown choose the date and time field you want to format.
### Field Selection
In the field selection dropdown choose the date and time field you want to format.
 \*\*\*\*📌NOTE: \*\*\*\*This option is available for the Format date and Format date and time action types.
### Select From and To Format
Choose the desired format in which you want the date to appear.
\*\*\*\*📌NOTE: \*\*\*\*This option is available for the Format date and Format date and time action types.
### Select From and To Format
Choose the desired format in which you want the date to appear.
 Remember to save the action once you are satisfied with your selections.
 The Date/Time Formatter Workflow Action is an essential feature for anyone managing date and time data. With its automation capabilities, flexibility, and a broad range of use cases, it optimizes workflows and boosts efficiency across teams and industries. Whether you're organizing events, analyzing data, or enhancing customer communications, this feature ensures your workflows are both accurate and effective.
### action-update-custom-value
The Update Custom Value Action is a great way to update custom values, enabling businesses to manage data more effectively and drive actionable insights. Below are some practical use cases that demonstrate the utility of this action:
* ****Lead Source Tracking****: Automatically update custom values to track the performance of different lead sources such as Facebook Ads, Google Ads, or email campaigns, allowing businesses to identify the most effective channels for lead generation.
* ****Sales Performance Tracking:**** Track and update custom values related to individual sales representatives, offering insights into their performance and helping to identify areas for improvement or recognition.
* ****Subscription Management****: Automate subscription updates for recurring services by modifying custom values based on customer subscription status, such as renewals, cancellations, or upgrades.
***
## How to Use the Update Custom Value Action
### Create or Edit a Workflow
Head to the Automation > Workflows section in your account. Start a new workflow or edit an existing one to incorporate the Update Custom Value action.
The Date/Time Formatter Workflow Action is an essential feature for anyone managing date and time data. With its automation capabilities, flexibility, and a broad range of use cases, it optimizes workflows and boosts efficiency across teams and industries. Whether you're organizing events, analyzing data, or enhancing customer communications, this feature ensures your workflows are both accurate and effective.
### action-update-custom-value
The Update Custom Value Action is a great way to update custom values, enabling businesses to manage data more effectively and drive actionable insights. Below are some practical use cases that demonstrate the utility of this action:
* ****Lead Source Tracking****: Automatically update custom values to track the performance of different lead sources such as Facebook Ads, Google Ads, or email campaigns, allowing businesses to identify the most effective channels for lead generation.
* ****Sales Performance Tracking:**** Track and update custom values related to individual sales representatives, offering insights into their performance and helping to identify areas for improvement or recognition.
* ****Subscription Management****: Automate subscription updates for recurring services by modifying custom values based on customer subscription status, such as renewals, cancellations, or upgrades.
***
## How to Use the Update Custom Value Action
### Create or Edit a Workflow
Head to the Automation > Workflows section in your account. Start a new workflow or edit an existing one to incorporate the Update Custom Value action.
 ### Add the Update Custom Value Action
Select the Update Custom Value action from the list of available actions in your workflow.
### Add the Update Custom Value Action
Select the Update Custom Value action from the list of available actions in your workflow.
 ### Action Name
Enter the name you wish to associate with the action.
### Action Name
Enter the name you wish to associate with the action.
 ### Custom Value
Identify the specific custom value that needs to be updated from the available options.
### Custom Value
Identify the specific custom value that needs to be updated from the available options.
 ### Current Value
Enter the value that is currently associated with the custom value.
### Current Value
Enter the value that is currently associated with the custom value.
 ### New Value
Define the new value for the custom value, selecting between static values or dynamically generated values based on your needs.
### New Value
Define the new value for the custom value, selecting between static values or dynamically generated values based on your needs.
 Save the action, then proceed to save your workflow and test it with a sample contact to ensure that the custom value updates correctly and that the workflow functions as intended.
By leveraging this action, you can enhance your ability to track key metrics, improve decision-making, and optimize business processes.
### stripe-one-time-charge
Automated charges are the bread and butter of recurring purchases and subscription-based services, for customers that use Stripe as their main form of payment you can use this feature, which charges the specified amount to the customer's account.
To begin, click the + icon and choose Stripe One Time Charge.
Save the action, then proceed to save your workflow and test it with a sample contact to ensure that the custom value updates correctly and that the workflow functions as intended.
By leveraging this action, you can enhance your ability to track key metrics, improve decision-making, and optimize business processes.
### stripe-one-time-charge
Automated charges are the bread and butter of recurring purchases and subscription-based services, for customers that use Stripe as their main form of payment you can use this feature, which charges the specified amount to the customer's account.
To begin, click the + icon and choose Stripe One Time Charge.
 ### Actions for Stripe One-Time Charge
In the designated areas provided users can input essential information when implementing the Stripe payment feature.
1. Action Name: You can type in the action name here.
2. Stripe Customer ID: Enter your customer's stripe ID, this ensures you're sending the payment request to the specific contact you need.
3. Description: Here you can add a brief message about the contacts and the payment you're collecting. This will help other assigned users understand the action.
4. Amount: Type in the amount you will charge the contact in this space provided.
5. Currency: Select the currency you want here.
### Actions for Stripe One-Time Charge
In the designated areas provided users can input essential information when implementing the Stripe payment feature.
1. Action Name: You can type in the action name here.
2. Stripe Customer ID: Enter your customer's stripe ID, this ensures you're sending the payment request to the specific contact you need.
3. Description: Here you can add a brief message about the contacts and the payment you're collecting. This will help other assigned users understand the action.
4. Amount: Type in the amount you will charge the contact in this space provided.
5. Currency: Select the currency you want here.
 Once you've completed filling out the required fields click “Save Action". Now, you can complete your workflow as desired with the assurance that your workflow can charge customers directly through Stripe.
### send-invoice-action
What's better in business than completing a sale? To help you get your customer closer to the finish line and collect their payment, we have the “Send Invoice” Action. This lets you automate the sending process and make it immediate. Check it out with us!
***
## How It Works
Navigate to the workflow builder and click the plus sign icon to select the “Send Invoice” action, which you can find under the Payments section.
Once you've completed filling out the required fields click “Save Action". Now, you can complete your workflow as desired with the assurance that your workflow can charge customers directly through Stripe.
### send-invoice-action
What's better in business than completing a sale? To help you get your customer closer to the finish line and collect their payment, we have the “Send Invoice” Action. This lets you automate the sending process and make it immediate. Check it out with us!
***
## How It Works
Navigate to the workflow builder and click the plus sign icon to select the “Send Invoice” action, which you can find under the Payments section.
 ### Fields for Invoicing
In the designated areas, you must input essential information to send the Invoice.
1. Action Name: Assign a descriptive name for the action here.
2. From User: Select a teammate to serve as the invoice sender.
3. Invoice Template: Select the template you'd like to use from this drop-down menu.
4. Payment Mode: Pick between Live or Test payment for your invoice.
### Fields for Invoicing
In the designated areas, you must input essential information to send the Invoice.
1. Action Name: Assign a descriptive name for the action here.
2. From User: Select a teammate to serve as the invoice sender.
3. Invoice Template: Select the template you'd like to use from this drop-down menu.
4. Payment Mode: Pick between Live or Test payment for your invoice.
 Finally, select the communication channels you want to use to deliver the invoice from the drop-down. You can send it by email or text only, or maximize your chances of the invoice being received by sending it to both.
 Once you've completed filling out the required fields, click “Save Action". Now, you can complete your workflow as desired. The workflow will use the template to send an Invoice to the triggering contact, filling out any custom values with their information.
### send-recurring-invoice-action
Recurring invoices help you keep track of transactions for courses and subscriptions. Managing them from your workflows helps you connect with customers immediately while keeping your invoicing process consistent and efficient. So, let's check how to use the “Send Recurring Invoice” to do it.
### Adding The Action
Navigate to the Workflows tab inside the Automation section and create or edit a workflow.
Once you've completed filling out the required fields, click “Save Action". Now, you can complete your workflow as desired. The workflow will use the template to send an Invoice to the triggering contact, filling out any custom values with their information.
### send-recurring-invoice-action
Recurring invoices help you keep track of transactions for courses and subscriptions. Managing them from your workflows helps you connect with customers immediately while keeping your invoicing process consistent and efficient. So, let's check how to use the “Send Recurring Invoice” to do it.
### Adding The Action
Navigate to the Workflows tab inside the Automation section and create or edit a workflow.
 In the workflow builder, click the plus sign icon to add an action and select Send Recurring Invoice.
 Set the basic information for your Invoice, which includes the sending user (1), template (2), and payment mode (3).
 Select a Start Date for the invoice billing, which can be when the action is executed (1) or a calendar date of your choosing (2).
 Set when the billing should stop. You can choose between never and after a certain number of occurrences. If selecting this option, you must enter the total invoices to send.
 Define your billing frequency by selecting one of the options from the drop-down menu.
 Set the frequency details for your invoice (1), how far in advance you want the invoice to be sent (2), and enable auto-payment (3) to charge the card used for the first charge in the future.
 From the drop-down, choose the channel by which the recurring invoice should be sent. This allows you to target the right communication channel without extra branches.
 Once you've filled out the details, click Save Action to add it to your workflow.
 Now, you can finish your workflow as desired. Enjoy smoother Invoice management thanks to this feature, making your accountant and customers equally happy with precise record-keeping and transparent communications!
### send-estimates-action
The Send Estimate action enables you to automatically send personalized estimates to your customers in response to specific events, such as the creation of opportunities or transitions between stages. This ensures a seamless and timely delivery of estimates based on key triggers in your workflow.
To add this action to your workflows, go to the Automation tab and select Workflows in your account. From there, either choose an existing workflow or create a new one.
Now, you can finish your workflow as desired. Enjoy smoother Invoice management thanks to this feature, making your accountant and customers equally happy with precise record-keeping and transparent communications!
### send-estimates-action
The Send Estimate action enables you to automatically send personalized estimates to your customers in response to specific events, such as the creation of opportunities or transitions between stages. This ensures a seamless and timely delivery of estimates based on key triggers in your workflow.
To add this action to your workflows, go to the Automation tab and select Workflows in your account. From there, either choose an existing workflow or create a new one.
 Configure the necessary trigger by selecting an option from the Trigger list.
 Proceed to add an action and select the Send Estimate action from the available options.
 Assign a clear, descriptive name to the action in the Action Name field for easy identification.
 From the User dropdown, select the individual designated to send the estimate. This ensures that the appropriate team member is accountable for the communication, allowing for a more personalized touch in the interaction with the customer.
 Select the appropriate template to format the content of the estimate from the Estimate Template dropdown menu.
 Choose Live for actual estimates or Test for trials within the Estimate Mode field.
 Select an option from the Sending Mode dropdown: either Send Directly to dispatch immediately or Create as Draft for internal review.
 Finally, select the communication channels you want to use to deliver the estimate from the drop-down. You can send it by email or text only, or maximize your chances of the estimate being received by sending it to both.
 Confirm your selections and click the “Save Action” button to add the action to your workflow.
With this setup, you can ensure that estimates are sent automatically, allowing you to focus on other important aspects of your business while maintaining high levels of customer engagement.
### membership-grant-offer
The Course Grant Offer action is designed to provide access to a course after a contact meets certain criteria such as purchasing a product, completing another course, or filling out a form. Read on to find out how to configure the action.
### Adding the Course Grant Offer Action
Begin by accessing the desired workflow from the Automation > Workflows section of your account.
Next, click on the + symbol to add a new workflow action, and choose Course Grant Offer.
Confirm your selections and click the “Save Action” button to add the action to your workflow.
With this setup, you can ensure that estimates are sent automatically, allowing you to focus on other important aspects of your business while maintaining high levels of customer engagement.
### membership-grant-offer
The Course Grant Offer action is designed to provide access to a course after a contact meets certain criteria such as purchasing a product, completing another course, or filling out a form. Read on to find out how to configure the action.
### Adding the Course Grant Offer Action
Begin by accessing the desired workflow from the Automation > Workflows section of your account.
Next, click on the + symbol to add a new workflow action, and choose Course Grant Offer.
 ### Action Name
Optionally, update the name of the action to reflect its function and purpose.
### Action Name
Optionally, update the name of the action to reflect its function and purpose.
 ### Offer
Select the desired offer from the drop-down menu to which you want to give contact access within this specific workflow.
### Offer
Select the desired offer from the drop-down menu to which you want to give contact access within this specific workflow.
 Once you’ve selected the offer, click the Save button in the bottom right.
By leveraging the Course Grant Offer workflow action, you can streamline and automate the process of providing customers with access to a course.
### ✍️Important Notes
If you have enabled the Welcome email and Offer Access email in the Membership Settings, you will not need to add an email action to the workflow to perform the same functions. For further guidance, please refer to the “Membership Settings” and “How to Send Custom Welcome Emails for Membership Login Credentials” articles.
### membership-revoke-offer
The Course Revoke Offer workflow action allows you to remove a contact's access from a particular course product. This action is particularly useful in situations where contacts should be removed from a product after gaining/losing access to another related product or offer.
Relevant triggers for this situation include "Offer Access Granted/Removed," "Product Access Granted/Removed," and "Tag Added/Removed." Select the trigger that best aligns with your requirements from the available options in the Triggers list. Note that the action is not limited to the aforementioned triggers.
To initiate the process of removing access, start by clicking on the + symbol to add a new workflow action and selecting Course Revoke Offer from the list.
Once you’ve selected the offer, click the Save button in the bottom right.
By leveraging the Course Grant Offer workflow action, you can streamline and automate the process of providing customers with access to a course.
### ✍️Important Notes
If you have enabled the Welcome email and Offer Access email in the Membership Settings, you will not need to add an email action to the workflow to perform the same functions. For further guidance, please refer to the “Membership Settings” and “How to Send Custom Welcome Emails for Membership Login Credentials” articles.
### membership-revoke-offer
The Course Revoke Offer workflow action allows you to remove a contact's access from a particular course product. This action is particularly useful in situations where contacts should be removed from a product after gaining/losing access to another related product or offer.
Relevant triggers for this situation include "Offer Access Granted/Removed," "Product Access Granted/Removed," and "Tag Added/Removed." Select the trigger that best aligns with your requirements from the available options in the Triggers list. Note that the action is not limited to the aforementioned triggers.
To initiate the process of removing access, start by clicking on the + symbol to add a new workflow action and selecting Course Revoke Offer from the list.
 ### Action Name
Rename your workflow action, if required.
### Action Name
Rename your workflow action, if required.
 ### Offer
Next, select the desired offer from the drop-down menu to which you want to revoke contact access within this specific workflow.
### Offer
Next, select the desired offer from the drop-down menu to which you want to revoke contact access within this specific workflow.
 Review your choice, then click the Save button to add the action to your workflow.
 With those simple steps, you can automate the removal of your contacts from an offer once the chosen trigger criteria are met. Happy automating!
### issue-certificate-action
Certificates are one of the most important parts of courses, and there are plenty of ways to deliver them; one is by automating the sending process with workflows. Using workflows, you can seamlessly issue certificates when tasks are completed or products are finalized.\*\*
To begin, click on the **“+” icon**\*\* in your workflow builder. From there, search and select the ****Issue Certificate**** Action.
With those simple steps, you can automate the removal of your contacts from an offer once the chosen trigger criteria are met. Happy automating!
### issue-certificate-action
Certificates are one of the most important parts of courses, and there are plenty of ways to deliver them; one is by automating the sending process with workflows. Using workflows, you can seamlessly issue certificates when tasks are completed or products are finalized.\*\*
To begin, click on the **“+” icon**\*\* in your workflow builder. From there, search and select the ****Issue Certificate**** Action.
 Once selected you will be prompted to choose from your ****Certificate Templates**** for the one you will be sending out. Remember that if the contact who triggered the workflow doesn't have fields used by the template a blank space will replace them.
 \*\*\*\*Save \*\*\*\*the action after selecting the template and you are done! Now you can send certificates left and right without lifting a finger.
 With just a few clicks, you can set up a system that sends certificates without manual intervention, making the process efficient and hassle-free, and allowing you to recognize learners' achievements effortlessly.
### grant-group-access-action
Your membership groups help you connect with customers, so having a quick way to add interested parties is key in improving their interaction and maintaining interest. Let's check how to use workflows to automate this process.
***
## Setting the Workflow
Navigate to the Workflows tab inside the Automation Section and create or edit a workflow.
Add the relevant trigger(s), then click the plus icon to add a new workflow action. Locate and select “Grant Group Access.”
With just a few clicks, you can set up a system that sends certificates without manual intervention, making the process efficient and hassle-free, and allowing you to recognize learners' achievements effortlessly.
### grant-group-access-action
Your membership groups help you connect with customers, so having a quick way to add interested parties is key in improving their interaction and maintaining interest. Let's check how to use workflows to automate this process.
***
## Setting the Workflow
Navigate to the Workflows tab inside the Automation Section and create or edit a workflow.
Add the relevant trigger(s), then click the plus icon to add a new workflow action. Locate and select “Grant Group Access.”
 Use the dropdown menu to select the group you want to add the contact to.
 Click “Save Action” to finish.
 Add any extra actions you see fit, such as a welcome email, and you're ready to go! This will greatly help you onboard customers to your groups, keeping management smooth and simplifying communications.
### revoke-group-access-action
Monitoring your Groups is key in ensuring all members are comfortable and your guidelines are followed. However, some situations need immediate attention, and you may not be able to provide it manually. Let's check how to use workflows to remove unwanted contacts from your Membership Groups.
### Setting the Workflow
Navigate to the Workflows tab inside the Automation Section and create or edit a workflow.
Add the relevant trigger(s), then click the plus icon to add a new workflow action. Locate and select “Revoke Group Access.”
Add any extra actions you see fit, such as a welcome email, and you're ready to go! This will greatly help you onboard customers to your groups, keeping management smooth and simplifying communications.
### revoke-group-access-action
Monitoring your Groups is key in ensuring all members are comfortable and your guidelines are followed. However, some situations need immediate attention, and you may not be able to provide it manually. Let's check how to use workflows to remove unwanted contacts from your Membership Groups.
### Setting the Workflow
Navigate to the Workflows tab inside the Automation Section and create or edit a workflow.
Add the relevant trigger(s), then click the plus icon to add a new workflow action. Locate and select “Revoke Group Access.”
 Use the dropdown menu to select the group you want to remove the contact from.
 Click “Save Action” to finish.
 Add any extra actions you see fit, such as a report of why they were removed, and you're done. This will help you keep your communities safe and healthy, helping you remove trolls, bullies, and other unwelcome guests as soon as they violate your terms of service.
### grant-private-channel-access-action
The Grant Private Channel Access action allows you to automatically add users to private channels via workflows, simplifying the onboarding process for group members. To begin, navigate to the Workflows section in your account.
Next, create a new workflow or select a workflow from the list to access its editor and establish the necessary workflow trigger (if necessary).
Add any extra actions you see fit, such as a report of why they were removed, and you're done. This will help you keep your communities safe and healthy, helping you remove trolls, bullies, and other unwelcome guests as soon as they violate your terms of service.
### grant-private-channel-access-action
The Grant Private Channel Access action allows you to automatically add users to private channels via workflows, simplifying the onboarding process for group members. To begin, navigate to the Workflows section in your account.
Next, create a new workflow or select a workflow from the list to access its editor and establish the necessary workflow trigger (if necessary).
 Click the “+” sign to add a new action.
 From the Workflow Actions list, locate and select the Grant Private Channel Access action to begin configuring it.
 Assign a clear, descriptive name to the action in the Action Name field for easy identification.
 From the Group dropdown, select the group associated with the private channel. Once a group is chosen, the Private Channel field will populate, enabling you to select the relevant channel from the list.
 Finally, select the relevant Private channel from the dropdown. Choosing the correct Group and Private Channel is essential for the workflow to function as intended, as it ensures the actions are applied to the appropriate users gaining access to that particular private channel.
 Confirm your selections, and click the “Save Action” button to add the action to your workflow.
 By automating the process of granting private channel access, this workflow action not only saves time but also enhances the user experience, ensuring that members are efficiently added to the correct channels.
📌 ****Note****: When adding a user to a private channel, if they are not already a member of the group, they will automatically be added to both the group and the private channel.
### revoke-private-channel-access-action
If you would like to rescind access to a Private Channel for contacts who meet certain criteria, you can utilize the Revoke Private Channel Access action within workflows. This action allows you to automate the removal of users from private channels, ensuring accurate and timely access control.
To begin, navigate to the Workflows section in your account. Next, create a new workflow or select a workflow from the Workflow list to access its editor and establish the necessary workflow trigger (if necessary).
By automating the process of granting private channel access, this workflow action not only saves time but also enhances the user experience, ensuring that members are efficiently added to the correct channels.
📌 ****Note****: When adding a user to a private channel, if they are not already a member of the group, they will automatically be added to both the group and the private channel.
### revoke-private-channel-access-action
If you would like to rescind access to a Private Channel for contacts who meet certain criteria, you can utilize the Revoke Private Channel Access action within workflows. This action allows you to automate the removal of users from private channels, ensuring accurate and timely access control.
To begin, navigate to the Workflows section in your account. Next, create a new workflow or select a workflow from the Workflow list to access its editor and establish the necessary workflow trigger (if necessary).
 Click the “+” sign to add a new action.
 From the Workflow Actions list, locate and select the Revoke Private Channel Access action to begin configuring it.
 Assign a clear, descriptive name to the action in the Action Name field for easy identification.
 From the Group dropdown, select the group associated with the private channel. Once a group is chosen, the Private Channel field will populate, enabling you to select the relevant channel from the list.
 Finally, select the relevant private channel from the dropdown. Be sure to choose the correct option to avoid unintentionally revoking access to the wrong channels.
 Confirm your selections, and click the “Save Action” button to add the action to your workflow.
 Automating the process enhances accuracy, reduces manual effort, and ensures timely updates to your community or team members' access rights.
📌 ****Note****: Any user removed from a private channel will lose access to its content and communications immediately.
### grant-community-group-leaderboard-points-action
Points are key in your community gamification since they make members move up in rankings and gain levels in the leaderboard. By default, members will receive these points when their posts receive likes or responses, helping you promote interaction. But, to reward members for activities outside the community, you can use the Grant Community Group Leaderboard Points Action.
### How To Set It Up?
Navigate to the Workflows tab inside the Automation section and create or edit a workflow to open the builder.
Automating the process enhances accuracy, reduces manual effort, and ensures timely updates to your community or team members' access rights.
📌 ****Note****: Any user removed from a private channel will lose access to its content and communications immediately.
### grant-community-group-leaderboard-points-action
Points are key in your community gamification since they make members move up in rankings and gain levels in the leaderboard. By default, members will receive these points when their posts receive likes or responses, helping you promote interaction. But, to reward members for activities outside the community, you can use the Grant Community Group Leaderboard Points Action.
### How To Set It Up?
Navigate to the Workflows tab inside the Automation section and create or edit a workflow to open the builder.
 Make sure to set a trigger for your workflow. For this example, we'll use Form Submitted. However, you can use this action to reward members for purchases, timely payments, or social media interaction.
 Click the plus sign icon to add an action and select the Grant Community Group Leaderboard Points Action.
 Select the group and total points to award then save the action.
 And there you have it. You can now set the rest of your workflow as normal and save it.
### add-to-affiliate-manager-action
The Add to Affiliate Manager action enrolls a contact into the Affiliates list within the Affiliate Manager, assigning them an 'Active' status by default. This is particularly useful for converting existing contacts or customers into affiliates.
***
## How It Works
Begin by configuring the trigger that should activate the workflow, then add the preceding actions. Next, click the “+” icon and select the Add to Affiliate Manager option from the list.
And there you have it. You can now set the rest of your workflow as normal and save it.
### add-to-affiliate-manager-action
The Add to Affiliate Manager action enrolls a contact into the Affiliates list within the Affiliate Manager, assigning them an 'Active' status by default. This is particularly useful for converting existing contacts or customers into affiliates.
***
## How It Works
Begin by configuring the trigger that should activate the workflow, then add the preceding actions. Next, click the “+” icon and select the Add to Affiliate Manager option from the list.
 ### Action Name
Optionally, update the name of the action to reflect its intended purpose.
### Action Name
Optionally, update the name of the action to reflect its intended purpose.
 Save the action, then publish the workflow to ensure that all contacts that meet the defined criteria will be added to your affiliates list.
This action streamlines affiliate onboarding by seamlessly integrating eligible contacts into your affiliate program, helping you expand your network and drive more referrals with minimal effort.
### add-to-affiliate-campaign-action
Having a smooth onboarding process for your affiliates goes a long way, helping you minimize complaints and get the best ROI possible. So, let's go over the “Add To Affiliate Campaign” Action and learn to automate the addition process.
Navigate to the Workflows tab inside the Automation Section and create or edit a workflow.
Save the action, then publish the workflow to ensure that all contacts that meet the defined criteria will be added to your affiliates list.
This action streamlines affiliate onboarding by seamlessly integrating eligible contacts into your affiliate program, helping you expand your network and drive more referrals with minimal effort.
### add-to-affiliate-campaign-action
Having a smooth onboarding process for your affiliates goes a long way, helping you minimize complaints and get the best ROI possible. So, let's go over the “Add To Affiliate Campaign” Action and learn to automate the addition process.
Navigate to the Workflows tab inside the Automation Section and create or edit a workflow.
 Add the relevant trigger(s), then click the plus icon to add a new workflow action. Locate and select “Add To Affiliate Campaign.”
 Select the campaign you wish to add the contact to.
 Click “Save Action” to finish.
 Add any extra actions you see fit, such as a welcome email, and you're ready to go! Use this tool to improve your affiliate management and make the process hands-off so you and your team can focus on promoting your brand.
### remove-from-affiliate-campaign-action
Some affiliates will fall out of your programs, whether it stems from a lack of interaction or simply because you no longer work with that person. So, let's check how to easily remove them and keep your campaigns clean by using workflows.
Navigate to the Workflows tab inside the Automation Section and create or edit a workflow.
Add the relevant trigger(s), then click the plus icon to add a new workflow action. Locate and select “Remove From Affiliate Campaign.”Select the campaign you wish to add the contact to.
Add any extra actions you see fit, such as a welcome email, and you're ready to go! Use this tool to improve your affiliate management and make the process hands-off so you and your team can focus on promoting your brand.
### remove-from-affiliate-campaign-action
Some affiliates will fall out of your programs, whether it stems from a lack of interaction or simply because you no longer work with that person. So, let's check how to easily remove them and keep your campaigns clean by using workflows.
Navigate to the Workflows tab inside the Automation Section and create or edit a workflow.
Add the relevant trigger(s), then click the plus icon to add a new workflow action. Locate and select “Remove From Affiliate Campaign.”Select the campaign you wish to add the contact to.
 Select the campaign you wish to remove the contact from.
 Click “Save Action” to finish.
Add any extra actions you see fit, such as an SMS notifying them of their removal, and you're ready to go! Use this tool to enhance your affiliate management and keep your affiliates under control, ensuring commissions and revenue go to the correct people.
### update-affiliate-action
Your affiliate's status can help you monitor a campaign's health, keeping a real number of how many sales it's driving and how many people are engaged with it. However, you can't live in constant vigilance, so a great way to remove affiliates who aren't meeting certain criteria is by using automation. Let's check how you use the Update Affiliate Action to achieve that.
Navigate to the Workflows tab inside the Automation Section and create or edit a workflow.
Add the relevant trigger(s), then click the plus icon to add a new workflow action. Locate and select “Update Affiliate.”
Click “Save Action” to finish.
Add any extra actions you see fit, such as an SMS notifying them of their removal, and you're ready to go! Use this tool to enhance your affiliate management and keep your affiliates under control, ensuring commissions and revenue go to the correct people.
### update-affiliate-action
Your affiliate's status can help you monitor a campaign's health, keeping a real number of how many sales it's driving and how many people are engaged with it. However, you can't live in constant vigilance, so a great way to remove affiliates who aren't meeting certain criteria is by using automation. Let's check how you use the Update Affiliate Action to achieve that.
Navigate to the Workflows tab inside the Automation Section and create or edit a workflow.
Add the relevant trigger(s), then click the plus icon to add a new workflow action. Locate and select “Update Affiliate.”
 Select the state to apply to the affiliate.
 Click “Save Action” to finish.
Add any extra actions you see fit, and you're ready to go! This can help you redirect referral customers to a more active affiliate and ensure every campaign member is productive, so we hope it boosts your efficiency to the max!
### add-manual-sales-for-an-affiliate-action
The "Add Manual Sales For An Affiliate" action streamlines the commission process for your affiliates by automating the calculation based on the campaign's default settings. This ensures timely and accurate rewards for your affiliates, eliminating the need for constant manual verification. By integrating this action into your workflow, you can efficiently manage affiliate-driven sales and maintain a steady flow of rewards for lead generation.
To implement this, simply add a new action to your workflow and select "Add Manual Sales For An Affiliate" from the action menu.
Click “Save Action” to finish.
Add any extra actions you see fit, and you're ready to go! This can help you redirect referral customers to a more active affiliate and ensure every campaign member is productive, so we hope it boosts your efficiency to the max!
### add-manual-sales-for-an-affiliate-action
The "Add Manual Sales For An Affiliate" action streamlines the commission process for your affiliates by automating the calculation based on the campaign's default settings. This ensures timely and accurate rewards for your affiliates, eliminating the need for constant manual verification. By integrating this action into your workflow, you can efficiently manage affiliate-driven sales and maintain a steady flow of rewards for lead generation.
To implement this, simply add a new action to your workflow and select "Add Manual Sales For An Affiliate" from the action menu.
 ### Action Name
Adjust the name of the action in this section to better align with its intended purpose.
### Action Name
Adjust the name of the action in this section to better align with its intended purpose.
 ### Auto-Track Affiliate Via Attribution
Enable this option to automatically allocate revenue to the correct affiliate by using the affiliate ID in the passed URL, removing the need to create separate branches for each affiliate.
### Auto-Track Affiliate Via Attribution
Enable this option to automatically allocate revenue to the correct affiliate by using the affiliate ID in the passed URL, removing the need to create separate branches for each affiliate.
 This feature enhances workflow efficiency by automatically identifying affiliates through their ID in the URL, eliminating the need to create separate branches for each affiliate. Additionally, it ensures accurate commission tracking by calculating and assigning commissions according to the campaign's default settings.
### Attribution Source
If you choose to enable the Auto-Track Affiliate Via Attribution feature, select whether to use the First or Latest Attribution.
✍️Recall:
* First Attribution refers to the initial interaction a contact has with our system. When this occurs, we record attribution data for that specific session. For example, when someone fills out a form, it marks their first interaction.
* Latest Attribution captures the most recent interaction a contact has with us. This data is recorded for the latest session. For instance, if after filling out a form, the contact later purchases a product through a Two-Step Order Form, the latest attribution data will be documented at that time.
This feature enhances workflow efficiency by automatically identifying affiliates through their ID in the URL, eliminating the need to create separate branches for each affiliate. Additionally, it ensures accurate commission tracking by calculating and assigning commissions according to the campaign's default settings.
### Attribution Source
If you choose to enable the Auto-Track Affiliate Via Attribution feature, select whether to use the First or Latest Attribution.
✍️Recall:
* First Attribution refers to the initial interaction a contact has with our system. When this occurs, we record attribution data for that specific session. For example, when someone fills out a form, it marks their first interaction.
* Latest Attribution captures the most recent interaction a contact has with us. This data is recorded for the latest session. For instance, if after filling out a form, the contact later purchases a product through a Two-Step Order Form, the latest attribution data will be documented at that time.
 ### Campaign
Select the affiliate campaign from the drop-down menu.
### Campaign
Select the affiliate campaign from the drop-down menu.
 ### Affiliate
If you do not wish to enable the Auto-Track Affiliate Via Attribution feature, select the affiliate you want to assign the sales to.
### Affiliate
If you do not wish to enable the Auto-Track Affiliate Via Attribution feature, select the affiliate you want to assign the sales to.
 ### Revenue
Set the revenue; this will be used to define the amount the affiliate will receive for this commission.
### Revenue
Set the revenue; this will be used to define the amount the affiliate will receive for this commission.
 ### Event Date
Set the event date (when the sale happened) and event ID. This will help you identify the commission source better. However, you can leave these fields empty, and the action will still work normally.
### Event Date
Set the event date (when the sale happened) and event ID. This will help you identify the commission source better. However, you can leave these fields empty, and the action will still work normally.
 Save the action to complete the process. You can now automate recurring manual commissions, ensure that all sales are tracked—even those occurring offline—and reward affiliate engagement and promotion effectively!
### add-leads-under-an-affiliate-action
We all know the regular affiliate model, you give them a link, they get you a sale and they get a commission for it right? When your business relies more on leads than sales this might become a bit murky especially if you have sales happening offline. With the "Add Leads under an Affiliate" action, you can ease the process for yourself and your team and streamline your lead management. But how does it work?
Add a new action to your workflow, and from the action menu select “Add Leads Under An Affiliate”.
Save the action to complete the process. You can now automate recurring manual commissions, ensure that all sales are tracked—even those occurring offline—and reward affiliate engagement and promotion effectively!
### add-leads-under-an-affiliate-action
We all know the regular affiliate model, you give them a link, they get you a sale and they get a commission for it right? When your business relies more on leads than sales this might become a bit murky especially if you have sales happening offline. With the "Add Leads under an Affiliate" action, you can ease the process for yourself and your team and streamline your lead management. But how does it work?
Add a new action to your workflow, and from the action menu select “Add Leads Under An Affiliate”.
 ### Action Name
Rename the action to align it with its intended purpose.
### Action Name
Rename the action to align it with its intended purpose.
 ### Choose Action Mapping
1. \*\*\*\*Manual Assignment: \*\*\*\*Assign leads directly to a known affiliate within a selected campaign. This is best for form submissions, internal routing, and admin control.
2. \*\*\*\*Auto Assignment (URL Attribution): \*\*\*\*Automatically assign leads based on the am\_id in the URL. Supports first-click or last-click attribution and is best for Affiliate tracking links and marketing campaigns.
3. \*\*\*\*Custom Mapping: \*\*\*\*Use am\_id from a custom field or workflow value for assignment. This is best for API pushes, hidden form fields, third-party systems.
### Choose Action Mapping
1. \*\*\*\*Manual Assignment: \*\*\*\*Assign leads directly to a known affiliate within a selected campaign. This is best for form submissions, internal routing, and admin control.
2. \*\*\*\*Auto Assignment (URL Attribution): \*\*\*\*Automatically assign leads based on the am\_id in the URL. Supports first-click or last-click attribution and is best for Affiliate tracking links and marketing campaigns.
3. \*\*\*\*Custom Mapping: \*\*\*\*Use am\_id from a custom field or workflow value for assignment. This is best for API pushes, hidden form fields, third-party systems.
 ### Manual Action Mapping
Select the campaign from the drop-down menu, then choose affiliate from the list.
### Manual Action Mapping
Select the campaign from the drop-down menu, then choose affiliate from the list.
 ### Auto Assignment
Choose attribution method: First or Last Click. Ensure am\_id is passed earlier in the funnel (e.g., form/page URL).
### Auto Assignment
Choose attribution method: First or Last Click. Ensure am\_id is passed earlier in the funnel (e.g., form/page URL).
 ### Custom Mapping
Map an am\_id or affiliate identifier from a custom field or workflow value. The system will read and map leads to the correct affiliate.
### Custom Mapping
Map an am\_id or affiliate identifier from a custom field or workflow value. The system will read and map leads to the correct affiliate.
 Save the action and you're done. This feature intends to make administrative tasks easier and your affiliate marketing strategy more effective, you can pair it with the “Add Manual Sales For An Affiliate Action” to automate the process further ensuring your affiliates get rewarded for the leads they bring you in and stay motivated.
### add-to-google-analytics
The "Google Analytics" action enables the firing of custom events within your Google Analytics (GA) account. Compatible with Google Analytics 4 (GA4), this action allows tracking specific user interactions or behaviors on your website or app, providing enhanced insights into user activity. Suggested triggers for this action include: Page Visit, Form Submission, Appointment Booked, and Order Form Submission.
Add the action to your workflow by clicking the “+” icon, then select it from the actions list.
Save the action and you're done. This feature intends to make administrative tasks easier and your affiliate marketing strategy more effective, you can pair it with the “Add Manual Sales For An Affiliate Action” to automate the process further ensuring your affiliates get rewarded for the leads they bring you in and stay motivated.
### add-to-google-analytics
The "Google Analytics" action enables the firing of custom events within your Google Analytics (GA) account. Compatible with Google Analytics 4 (GA4), this action allows tracking specific user interactions or behaviors on your website or app, providing enhanced insights into user activity. Suggested triggers for this action include: Page Visit, Form Submission, Appointment Booked, and Order Form Submission.
Add the action to your workflow by clicking the “+” icon, then select it from the actions list.
 ### Action Name
Enter an appropriate name for the action here or use the default name.
### Action Name
Enter an appropriate name for the action here or use the default name.
 ### Action Type
View the measurement type being used. Please note that Google Analytics 4 has replaced Universal Analytics.
### Action Type
View the measurement type being used. Please note that Google Analytics 4 has replaced Universal Analytics.
 ### Measurement ID
Enter the unique ID for your Google Analytics property.
### Measurement ID
Enter the unique ID for your Google Analytics property.
 ### Event Name
Specify the event name that will appear in GA4 (e.g., "purchase", "page\_view").
### Event Name
Specify the event name that will appear in GA4 (e.g., "purchase", "page\_view").
 ### API Secret
Input the API secret key from your GA4 setup to send event data securely.
### API Secret
Input the API secret key from your GA4 setup to send event data securely.
 ### Event Value
Optionally, you can pass a value associated with the event, such as revenue or click data, to further enrich your analytics.
### Event Value
Optionally, you can pass a value associated with the event, such as revenue or click data, to further enrich your analytics.
 Once you are satisfied with the action configuration, hit save. This will add the action to your workflow, allowing you to track specific user interactions or behaviors in GA for better insights.
### add-to-google-ads
When running Google Ads, monitoring what happens after someone interacts with your ad is essential. By carefully tracking user behavior, such as visiting a landing page or completing a form, you can measure how far they progress through your funnel. This process, known as conversion tracking, helps determine the effectiveness of your ads. Conversion data is typically recorded in Google Ads (formerly AdWords) and is sent to the platform using the "Add to Google Ads" action within a workflow.
��****Note****: Ensure your Google Ads account is properly configured to receive conversion data, and make sure the conversion event is pre-set in Google Ads before using this action in your workflow. As of November 26, 2024, this action supports gclid, wbraid, and gbraid parameters.
***
## How It Works
Navigate to the Workflows section in your account, then proceed to create a new workflow, or click an existing workflow to access its builder.
Ensure that the workflow is appropriately named, then proceed to add at least one workflow trigger. Here are some recommended triggers to properly utilize this action:
* ****Form Submitted:**** Track form submissions as conversions in Google Ads.
* ****Appointment Status/ Customer Booked Appointment:**** Log booked appointments as conversion events.
* ****Order Form Submission:**** Capture product purchases resulting from your ads.
* ****Trigger Link Clicked:**** Record specific link clicks to measure engagement.
* ****Funnel/Website PageView:**** Track visits to specific pages (e.g., "Thank You" or "Confirmation" pages) as conversions.
Once you are satisfied with the action configuration, hit save. This will add the action to your workflow, allowing you to track specific user interactions or behaviors in GA for better insights.
### add-to-google-ads
When running Google Ads, monitoring what happens after someone interacts with your ad is essential. By carefully tracking user behavior, such as visiting a landing page or completing a form, you can measure how far they progress through your funnel. This process, known as conversion tracking, helps determine the effectiveness of your ads. Conversion data is typically recorded in Google Ads (formerly AdWords) and is sent to the platform using the "Add to Google Ads" action within a workflow.
��****Note****: Ensure your Google Ads account is properly configured to receive conversion data, and make sure the conversion event is pre-set in Google Ads before using this action in your workflow. As of November 26, 2024, this action supports gclid, wbraid, and gbraid parameters.
***
## How It Works
Navigate to the Workflows section in your account, then proceed to create a new workflow, or click an existing workflow to access its builder.
Ensure that the workflow is appropriately named, then proceed to add at least one workflow trigger. Here are some recommended triggers to properly utilize this action:
* ****Form Submitted:**** Track form submissions as conversions in Google Ads.
* ****Appointment Status/ Customer Booked Appointment:**** Log booked appointments as conversion events.
* ****Order Form Submission:**** Capture product purchases resulting from your ads.
* ****Trigger Link Clicked:**** Record specific link clicks to measure engagement.
* ****Funnel/Website PageView:**** Track visits to specific pages (e.g., "Thank You" or "Confirmation" pages) as conversions.
 ### Adding the Action
With your trigger(s) now in place, proceed to add the Add To Google Ads action by clicking the “+” icon at the desired position in the workflow builder.
### Adding the Action
With your trigger(s) now in place, proceed to add the Add To Google Ads action by clicking the “+” icon at the desired position in the workflow builder.
 ### Action Name
Assign a descriptive name to the action that aligns with its role in your workflow.
### Action Name
Assign a descriptive name to the action that aligns with its role in your workflow.
 ### Conversion
Select the conversion action you created on Google from the dropdown.
### Conversion
Select the conversion action you created on Google from the dropdown.
 ### Currency
This setting determines the currency used for reporting conversions (e.g., USD, EUR, GBP). The default currency is set to USD, but it can be customized based on your preference.
### Currency
This setting determines the currency used for reporting conversions (e.g., USD, EUR, GBP). The default currency is set to USD, but it can be customized based on your preference.
 ### Conversion Value
The conversion value represents the monetary value of a specific conversion action, helping you measure the revenue or impact generated from each ad conversion. It defaults to 1 but supports custom values, enabling dynamic assignment per contact or event.
### Conversion Value
The conversion value represents the monetary value of a specific conversion action, helping you measure the revenue or impact generated from each ad conversion. It defaults to 1 but supports custom values, enabling dynamic assignment per contact or event.
 ### Mapping
Enable this toggle to map custom values for Google Ads conversion parameters (GCLID, GBRAID, or WBRAID). When configured, custom fields will take precedence; otherwise, the system will revert to default values.
### Mapping
Enable this toggle to map custom values for Google Ads conversion parameters (GCLID, GBRAID, or WBRAID). When configured, custom fields will take precedence; otherwise, the system will revert to default values.
 By properly configuring and utilizing the "Add To Google Ads" action, you can streamline your conversion tracking and make data-driven decisions to improve the ROI of your Google Ads campaigns.
### Practical Example
Suppose you are running a Google Ads campaign to drive form submissions. You can use this action to trigger a "Lead Form Submission" conversion event whenever a form is submitted. This helps you track the campaign’s success in generating leads.
### Troubleshooting Tips
If conversion tracking fails:
* Check the workflow execution logs for errors. This will indicate if the action failed and what the response code was.
* Ensure the conversion name in the action matches the name in Google Ads exactly.
### facebook-add-to-custom-audience
The Add to Custom Audience workflow action adds a contact to a particular custom audience on Facebook. This workflow action allows you to add contacts to a custom audience to retarget them with your products/services if you have not yet gained them as a lead, or want to retarget them after a purchase.
Firstly, click on the designated + icon to add a new workflow action and select Facebook - Add to Custom Audience.
By properly configuring and utilizing the "Add To Google Ads" action, you can streamline your conversion tracking and make data-driven decisions to improve the ROI of your Google Ads campaigns.
### Practical Example
Suppose you are running a Google Ads campaign to drive form submissions. You can use this action to trigger a "Lead Form Submission" conversion event whenever a form is submitted. This helps you track the campaign’s success in generating leads.
### Troubleshooting Tips
If conversion tracking fails:
* Check the workflow execution logs for errors. This will indicate if the action failed and what the response code was.
* Ensure the conversion name in the action matches the name in Google Ads exactly.
### facebook-add-to-custom-audience
The Add to Custom Audience workflow action adds a contact to a particular custom audience on Facebook. This workflow action allows you to add contacts to a custom audience to retarget them with your products/services if you have not yet gained them as a lead, or want to retarget them after a purchase.
Firstly, click on the designated + icon to add a new workflow action and select Facebook - Add to Custom Audience.
 Next, choose the appropriate Facebook Account ID from the dropdown menu.
 Once the Facebook Account ID has been selected, the user can then choose the Facebook Customer Audience ID from the dropdown menu, where they want the contacts to be added.
 After selecting the Audience ID save your action to set it in the workflow and finish your set-up as normal.
### facebook-remove-from-custom-audience
The Remove from Custom Audience workflow action allows you to refine your Facebook audience by excluding specific contacts, enabling more precise and effective targeting.
Navigate to the desired workflow in the Automation > Workflows section to add the Remove from Custom Audience action. Once you have added the desired triggers and preceding actions, click on the "+" icon and select the Facebook - Remove from Custom Audience option.
After selecting the Audience ID save your action to set it in the workflow and finish your set-up as normal.
### facebook-remove-from-custom-audience
The Remove from Custom Audience workflow action allows you to refine your Facebook audience by excluding specific contacts, enabling more precise and effective targeting.
Navigate to the desired workflow in the Automation > Workflows section to add the Remove from Custom Audience action. Once you have added the desired triggers and preceding actions, click on the "+" icon and select the Facebook - Remove from Custom Audience option.
 ### Action Name
Update the name of the action, if required, to reflect its function and purpose.
### Action Name
Update the name of the action, if required, to reflect its function and purpose.
 ### Facebook Account ID
Choose the appropriate Facebook Account ID from the dropdown menu.
### Facebook Account ID
Choose the appropriate Facebook Account ID from the dropdown menu.
 ### Facebook Customer Audience ID
After selecting the account, you can then identify and select the specific Facebook Customer Audience ID from which you wish to remove contacts.
### Facebook Customer Audience ID
After selecting the account, you can then identify and select the specific Facebook Customer Audience ID from which you wish to remove contacts.
 Confirm your selections, then add the action to the workflow by clicking the “Save Action” button. Save and publish the workflow to activate it!
By leveraging this feature, you can enhance customer engagement and personalize your advertising campaigns to deliver a tailored user experience.
### meta-conversion-api
Through the Meta Conversion API workflow action, advertisers can transmit web events directly to Meta from their servers. This feature bypasses the third-party block enforced by iOS, as well as Chrome and AdBlocker.
Confirm your selections, then add the action to the workflow by clicking the “Save Action” button. Save and publish the workflow to activate it!
By leveraging this feature, you can enhance customer engagement and personalize your advertising campaigns to deliver a tailored user experience.
### meta-conversion-api
Through the Meta Conversion API workflow action, advertisers can transmit web events directly to Meta from their servers. This feature bypasses the third-party block enforced by iOS, as well as Chrome and AdBlocker.
 ***
## General Settings
### Connection Type
Select the type you'd like to use for the Meta API; keep in mind that this will define the information you need to fill out.
***
## General Settings
### Connection Type
Select the type you'd like to use for the Meta API; keep in mind that this will define the information you need to fill out.
 Select an Event Type; you have three options:
* \*\*\*\*Funnel Events: \*\*\*\*These events are sent from a web server to record when the user interacts with it.
* \*\*\*\*Lead Events: \*\*\*\*These events are triggered when a Lead moves across the pipeline stages.
* \*\*\*\*Instagram DM: \*\*\*\*These events track interactions that happen via Instagram Direct Messages.
Select an Event Type; you have three options:
* \*\*\*\*Funnel Events: \*\*\*\*These events are sent from a web server to record when the user interacts with it.
* \*\*\*\*Lead Events: \*\*\*\*These events are triggered when a Lead moves across the pipeline stages.
* \*\*\*\*Instagram DM: \*\*\*\*These events track interactions that happen via Instagram Direct Messages.
 ### Access Token
To add an Access Token to your workflow for Meta's Conversion API, begin by navigating to the Meta Business Manager section within your Meta account settings. Next, select Generate Access Token within the Conversion API category and copy the token. Finally, paste the token into the designated 'Access Token' field in your workflow.
### Access Token
To add an Access Token to your workflow for Meta's Conversion API, begin by navigating to the Meta Business Manager section within your Meta account settings. Next, select Generate Access Token within the Conversion API category and copy the token. Finally, paste the token into the designated 'Access Token' field in your workflow.
 If the business page is new, it may be necessary to set up Social issue, electoral, or political ads settings to access the token. This process may require confirmation of identity.
### Dataset ID
To set up the Dataset ID for Meta Conversion API in your workflow, go to the Meta Business Manager's settings and copy the ID under the details section. Then, paste the ID into the designated Dataset ID field in your workflow.
If the business page is new, it may be necessary to set up Social issue, electoral, or political ads settings to access the token. This process may require confirmation of identity.
### Dataset ID
To set up the Dataset ID for Meta Conversion API in your workflow, go to the Meta Business Manager's settings and copy the ID under the details section. Then, paste the ID into the designated Dataset ID field in your workflow.
 ### Value
In the Value field, insert the value of the event name selected above. This will create the lead value based on your preferences.
### Value
In the Value field, insert the value of the event name selected above. This will create the lead value based on your preferences.
 ### Currency
Add the appropriate currency type in the provided Currency field. The system will automatically set the currency type to USD, but you can change this to your country's preference.
### Currency
Add the appropriate currency type in the provided Currency field. The system will automatically set the currency type to USD, but you can change this to your country's preference.
 ### Test Code
To test the workflow, go back to the Business Manager account and click on Data Sources, then find the Pixel you have created. Copy the test code in the test event and paste it into the Test Code field.
### Test Code
To test the workflow, go back to the Business Manager account and click on Data Sources, then find the Pixel you have created. Copy the test code in the test event and paste it into the Test Code field.
 ***
## Event Type Specific Settings
For the Funnel Event and Instagram DM types, you'll additionally need to fill out these fields:
### Facebook Event Name
In the Facebook Event Name section, select the appropriate event name from the available options. You can select from items such as contact, lead, add payment info, and more!
***
## Event Type Specific Settings
For the Funnel Event and Instagram DM types, you'll additionally need to fill out these fields:
### Facebook Event Name
In the Facebook Event Name section, select the appropriate event name from the available options. You can select from items such as contact, lead, add payment info, and more!
 ### Facebook Page
Select from your connected Facebook pages to connect to your API.
### Facebook Page
Select from your connected Facebook pages to connect to your API.
 ### Instagram Account
Select from your connected Instagram Accounts to connect to your API.
### Instagram Account
Select from your connected Instagram Accounts to connect to your API.
 Once testing is complete, delete the test code from the field and save the workflow.
### generate-marketing-audit-report-action
Once you have generated a prospect, you can increase the likelihood of conversion by generating and issuing their Marketing Audit Report. You can also pair this action with other triggers, such as the “Form/Survey Submitted” trigger or “Contact Created” trigger, based on how you would like to activate the workflow. Let's go through how you can set this action up.
### How It Works
Start by clicking the plus button to add a new action, then select the “Generate Marketing Audit Report” action from the list.
Once testing is complete, delete the test code from the field and save the workflow.
### generate-marketing-audit-report-action
Once you have generated a prospect, you can increase the likelihood of conversion by generating and issuing their Marketing Audit Report. You can also pair this action with other triggers, such as the “Form/Survey Submitted” trigger or “Contact Created” trigger, based on how you would like to activate the workflow. Let's go through how you can set this action up.
### How It Works
Start by clicking the plus button to add a new action, then select the “Generate Marketing Audit Report” action from the list.
 As usual, you can use the Action Name field to update the action title that is displayed in the builder.
 Next, use custom fields to add the business name and address, including the city, state, and postal code if required.
 Optionally, you can capture their phone number, email, or website to provide a more detailed report.
 Finally, click save to include the action in your workflow.
 With your action in place, audit reports are generated instantly—regardless of whether leads originate from paid ads, funnels, website forms, manual entries, imports, or third-party integrations. The moment a contact enters your system, a comprehensive Marketing Audit Report delivers actionable insights into website performance, local search visibility, reputation, listings accuracy, and overall digital presence. This ensures every lead is met with a clear, data-driven understanding of their business health from day one.
��****Note****: Once created, audit reports can be viewed in your Prospecting dashboard.
### call-action
The Call action is used to connect the triggering contact with one of your team members by placing a call to either the assigned user or the Company Phone number you've designated. This helps you smoothly reach out to customers as they are onboarded. Let's learn how to use it and achieve maximum connection!
***
## Setting Your Action
In the workflow builder, after you've set your desired trigger(s), click the ****“+”**** button to add a new workflow action, then select ****“Call”****.
With your action in place, audit reports are generated instantly—regardless of whether leads originate from paid ads, funnels, website forms, manual entries, imports, or third-party integrations. The moment a contact enters your system, a comprehensive Marketing Audit Report delivers actionable insights into website performance, local search visibility, reputation, listings accuracy, and overall digital presence. This ensures every lead is met with a clear, data-driven understanding of their business health from day one.
��****Note****: Once created, audit reports can be viewed in your Prospecting dashboard.
### call-action
The Call action is used to connect the triggering contact with one of your team members by placing a call to either the assigned user or the Company Phone number you've designated. This helps you smoothly reach out to customers as they are onboarded. Let's learn how to use it and achieve maximum connection!
***
## Setting Your Action
In the workflow builder, after you've set your desired trigger(s), click the ****“+”**** button to add a new workflow action, then select ****“Call”****.
 ***
## Call Whisper
The Call Whisper is a message played to the user receiving the call, letting them know the call's purpose. By default, the whisper is: **"You have a new lead, (Lead's Name), press any button to connect."**
You can modify this message in the ****“Call Whisper”**** field to better suit your needs. To customize it further, use the tag icon on the right-hand side of the field to insert variables such as the contact's name or other custom values. This allows for personalized and dynamic messages that improve context for the user receiving the call.
***
## Call Whisper
The Call Whisper is a message played to the user receiving the call, letting them know the call's purpose. By default, the whisper is: **"You have a new lead, (Lead's Name), press any button to connect."**
You can modify this message in the ****“Call Whisper”**** field to better suit your needs. To customize it further, use the tag icon on the right-hand side of the field to insert variables such as the contact's name or other custom values. This allows for personalized and dynamic messages that improve context for the user receiving the call.
 ***
## Call Timeout
The ****”Call Timeout”**** determines how long the system waits for the user to answer before ending the call. To set this, use the up and down arrow buttons or enter a number directly into the field.
For optimal functionality, set the timeout to ****60 seconds or more****, based on your forwarding number's voicemail response time. For instance, if your voicemail activates after 15 seconds, set the timeout to 10 seconds to prevent the call from being marked as answered by voicemail. This ensures calls only connect to humans, not automated systems.
***
## Call Timeout
The ****”Call Timeout”**** determines how long the system waits for the user to answer before ending the call. To set this, use the up and down arrow buttons or enter a number directly into the field.
For optimal functionality, set the timeout to ****60 seconds or more****, based on your forwarding number's voicemail response time. For instance, if your voicemail activates after 15 seconds, set the timeout to 10 seconds to prevent the call from being marked as answered by voicemail. This ensures calls only connect to humans, not automated systems.
 ***
## Advanced Settings
This section provides additional options to optimize how calls are handled during the Call workflow action. These settings help you fine-tune the call process, ensuring flexibility and effectiveness in managing leads.
### Voicemail Detection
If the lead cannot answer the call, you'll receive a notification that reads, “Couldn't connect with the lead”, and the call will terminate. This means you won't be able to leave a personalized voicemail.
However, you can enable voicemail detection and leave a message by toggling on the ****”Disable Voicemail Detect”**** option under the Call event settings.
***
## Advanced Settings
This section provides additional options to optimize how calls are handled during the Call workflow action. These settings help you fine-tune the call process, ensuring flexibility and effectiveness in managing leads.
### Voicemail Detection
If the lead cannot answer the call, you'll receive a notification that reads, “Couldn't connect with the lead”, and the call will terminate. This means you won't be able to leave a personalized voicemail.
However, you can enable voicemail detection and leave a message by toggling on the ****”Disable Voicemail Detect”**** option under the Call event settings.
 ### Connect Call After Keypress
The ****”Connect Call”**** option bridges the user to the lead once the user presses any number key. This ensures seamless communication and a quick connection between both parties.
### Connect Call After Keypress
The ****”Connect Call”**** option bridges the user to the lead once the user presses any number key. This ensures seamless communication and a quick connection between both parties.
 ***
## Assign To User
To ensure calls are routed effectively, use the ****Assign to User**** workflow action above the Call action.
Click the ****“+” icon**** and select ****”Assign to User”****. Choose the user(s) to assign calls to. If selecting multiple users, you can assign them either ****equally**** (rotating between users) or ****unequally**** (by specifying traffic weightage for each user using the number fields). If you only want to assign calls to unassigned contacts, toggle on the relevant option at the bottom of the settings.
***
## Assign To User
To ensure calls are routed effectively, use the ****Assign to User**** workflow action above the Call action.
Click the ****“+” icon**** and select ****”Assign to User”****. Choose the user(s) to assign calls to. If selecting multiple users, you can assign them either ****equally**** (rotating between users) or ****unequally**** (by specifying traffic weightage for each user using the number fields). If you only want to assign calls to unassigned contacts, toggle on the relevant option at the bottom of the settings.
 The \*\*\*\*Call \*\*\*\*workflow action is a powerful feature that ensures timely and effective communication with leads while offering advanced customization options for voicemail detection, timeout settings, and personalized whisper messages. By integrating the ****Assign User**** action, you can further streamline call management and ensure efficient team collaboration, maximizing engagement opportunities with your leads.
### connect-call-action
The ****Connect Call (IVR)**** action enables real-time call transfers from the IVR system to selected users or phone numbers. You can connect calls to up to 10 users simultaneously and configure advanced options like voicemail detection and call duration limits. This ensures seamless redirection of calls while maintaining high service quality and operational control.
***
## How It Works
Navigate to a workflow with the Start IVR Trigger added, then click the “+" icon to select the Connect Call action from the actions list.
The \*\*\*\*Call \*\*\*\*workflow action is a powerful feature that ensures timely and effective communication with leads while offering advanced customization options for voicemail detection, timeout settings, and personalized whisper messages. By integrating the ****Assign User**** action, you can further streamline call management and ensure efficient team collaboration, maximizing engagement opportunities with your leads.
### connect-call-action
The ****Connect Call (IVR)**** action enables real-time call transfers from the IVR system to selected users or phone numbers. You can connect calls to up to 10 users simultaneously and configure advanced options like voicemail detection and call duration limits. This ensures seamless redirection of calls while maintaining high service quality and operational control.
***
## How It Works
Navigate to a workflow with the Start IVR Trigger added, then click the “+" icon to select the Connect Call action from the actions list.
 ### Action Name
Optionally, enter a descriptive name for the action.
### Action Name
Optionally, enter a descriptive name for the action.
 ### Connect Call To
Define the users or custom phone numbers to transfer the call to. Choose from existing users or manually input custom numbers by selecting the user from the dropdown or clicking the “Add Custom Number” button.
### Connect Call To
Define the users or custom phone numbers to transfer the call to. Choose from existing users or manually input custom numbers by selecting the user from the dropdown or clicking the “Add Custom Number” button.
 ### Advanced Settings
Expand the Advanced Settings to detect if the call is answered by voicemail, which may introduce a delay (1), record the call for quality assurance or compliance (2), set the wait time before the call transfer attempt times out (3), or define the maximum duration of the connected call (4).
****📌Note****: The Timeout and Time Limit fields require you to input the value in seconds and have a maximum limit of 600 seconds and 24 hours, respectively.
### Advanced Settings
Expand the Advanced Settings to detect if the call is answered by voicemail, which may introduce a delay (1), record the call for quality assurance or compliance (2), set the wait time before the call transfer attempt times out (3), or define the maximum duration of the connected call (4).
****📌Note****: The Timeout and Time Limit fields require you to input the value in seconds and have a maximum limit of 600 seconds and 24 hours, respectively.
 ### Save
After verifying your selections, click the Save Action button to load the action to your builder.
### Save
After verifying your selections, click the Save Action button to load the action to your builder.
 By leveraging the configuration options, you can ensure that customers are efficiently connected to the right individuals while maintaining control over call quality, duration, and compliance. This makes it an essential tool for any business seeking to improve call handling and customer service through automated call routing.
### Example Scenario
A customer contacts your IVR system and selects the option to speak with a sales agent. The system then transfers the call to one or more available sales representatives.
* ****Action Name:**** Transfer Call to Sales Agent
* ****Connect Call To:**** Select one or more sales agents or provide custom numbers.
* \*\*\*\*Advanced Settings: \*\*\*\*Enable Record Call, Set Timeout to 30 seconds, and Set Time Limit to 3600 seconds (1 hour).
### gather-input-on-call-action
The ****Gather Input On Call (IVR)**** action collects input from callers using DTMF (Dual Tone Multi-Frequency) keypresses. Based on these responses, the system can trigger different branches within the workflow, allowing for tailored experiences such as directing calls to specific departments or triggering automated responses. For example, callers may be asked to "Press 1 to speak to support" or "Press 2 to leave a message." By capturing these inputs, businesses can direct calls more efficiently and enhance the caller experience.
***
## How It Works
Navigate to a workflow with the Start IVR Trigger added, then click the “+" icon to select the Gather Input On Call action from the actions list.
By leveraging the configuration options, you can ensure that customers are efficiently connected to the right individuals while maintaining control over call quality, duration, and compliance. This makes it an essential tool for any business seeking to improve call handling and customer service through automated call routing.
### Example Scenario
A customer contacts your IVR system and selects the option to speak with a sales agent. The system then transfers the call to one or more available sales representatives.
* ****Action Name:**** Transfer Call to Sales Agent
* ****Connect Call To:**** Select one or more sales agents or provide custom numbers.
* \*\*\*\*Advanced Settings: \*\*\*\*Enable Record Call, Set Timeout to 30 seconds, and Set Time Limit to 3600 seconds (1 hour).
### gather-input-on-call-action
The ****Gather Input On Call (IVR)**** action collects input from callers using DTMF (Dual Tone Multi-Frequency) keypresses. Based on these responses, the system can trigger different branches within the workflow, allowing for tailored experiences such as directing calls to specific departments or triggering automated responses. For example, callers may be asked to "Press 1 to speak to support" or "Press 2 to leave a message." By capturing these inputs, businesses can direct calls more efficiently and enhance the caller experience.
***
## How It Works
Navigate to a workflow with the Start IVR Trigger added, then click the “+" icon to select the Gather Input On Call action from the actions list.
 ### Action Name
Enter a descriptive name for the IVR action.
### Action Name
Enter a descriptive name for the IVR action.
 ### Say or Play Message
Choose between text-to-speech or an uploaded audio file.
### Say or Play Message
Choose between text-to-speech or an uploaded audio file.
 ### Text to Say
If text-to-speech is selected, input the message you want the caller to hear. Enhance the interaction by using custom values from the tag icon.
### Text to Say
If text-to-speech is selected, input the message you want the caller to hear. Enhance the interaction by using custom values from the tag icon.
 ### Language
Select the language for the text-to-speech message.
### Language
Select the language for the text-to-speech message.
 ### Message Voice
Choose between a male or female voice for the message.
### Message Voice
Choose between a male or female voice for the message.
 ### Upload
If the "Play a Message" option was chosen, use the "Upload File" button to insert the audio to be played.
### Upload
If the "Play a Message" option was chosen, use the "Upload File" button to insert the audio to be played.
 ### Number of Loops
Define how many times the message should repeat if no input is received.
### Number of Loops
Define how many times the message should repeat if no input is received.
 ### Match Conditions
Enable this feature to define conditional branches based on keypress values (e.g., 1 = Support).
### Match Conditions
Enable this feature to define conditional branches based on keypress values (e.g., 1 = Support).
 ### Advanced Settings
Expand the Advanced Settings to set a timeout (in seconds) to end input gathering if no response is received (1), activate the switch to stop gathering as soon as a key is pressed (2), or define the number of digits to collect before stopping input (3).
### Advanced Settings
Expand the Advanced Settings to set a timeout (in seconds) to end input gathering if no response is received (1), activate the switch to stop gathering as soon as a key is pressed (2), or define the number of digits to collect before stopping input (3).
 ### Save
After verifying your selections, click the Save Action button to load the action to your builder.
### Save
After verifying your selections, click the Save Action button to load the action to your builder.
 The Gather Input On Call action is a critical component for building intuitive, self-service IVR experiences. It allows businesses to automate call handling, reduce wait times, and route callers efficiently based on their input. By leveraging this feature, you can streamline operations while delivering a responsive and professional caller experience.
### Example Scenario
An institution wants to guide callers to the appropriate department via IVR.
* ****Message****: "Press 1 to hear the date and time of your appointment, Press 2 to connect with an agent, or Press 3 to exit."
* ****Outcomes****:
* ****Pressing 1****: Routes the caller to a flow that plays their appointment details using the Say/Play (IVR) action.
* ****Pressing 2****: Connects the caller directly to a customer support agent using the Connect Call (IVR)\*\*action.
* **Pressing 3**\*\*: Ends the call after a thank-you message.
### say-or-play-message-action
The \*\*\*\*Say or Play Message \*\*\*\*action enables you to configure voice messages that are delivered to callers during a phone interaction. You can either input a message that is converted to speech using text-to-speech technology or upload a pre-recorded audio file. This feature is ideal for greetings, menu prompts, or any type of informational message within an IVR flow.
***
## How It Works
Begin by adding the Say or Play Message action to a workflow containing the Start IVR Trigger.
The Gather Input On Call action is a critical component for building intuitive, self-service IVR experiences. It allows businesses to automate call handling, reduce wait times, and route callers efficiently based on their input. By leveraging this feature, you can streamline operations while delivering a responsive and professional caller experience.
### Example Scenario
An institution wants to guide callers to the appropriate department via IVR.
* ****Message****: "Press 1 to hear the date and time of your appointment, Press 2 to connect with an agent, or Press 3 to exit."
* ****Outcomes****:
* ****Pressing 1****: Routes the caller to a flow that plays their appointment details using the Say/Play (IVR) action.
* ****Pressing 2****: Connects the caller directly to a customer support agent using the Connect Call (IVR)\*\*action.
* **Pressing 3**\*\*: Ends the call after a thank-you message.
### say-or-play-message-action
The \*\*\*\*Say or Play Message \*\*\*\*action enables you to configure voice messages that are delivered to callers during a phone interaction. You can either input a message that is converted to speech using text-to-speech technology or upload a pre-recorded audio file. This feature is ideal for greetings, menu prompts, or any type of informational message within an IVR flow.
***
## How It Works
Begin by adding the Say or Play Message action to a workflow containing the Start IVR Trigger.
 ### Action Name
Enter a descriptive name for the IVR action.
### Action Name
Enter a descriptive name for the IVR action.
 ### Say or Play Message
Choose between text-to-speech or a pre-recorded audio file.
### Say or Play Message
Choose between text-to-speech or a pre-recorded audio file.
 ### Text to Say
If text-to-speech is selected, input the message you want the caller to hear. Enhance the interaction by using custom values from the tag icon.
### Text to Say
If text-to-speech is selected, input the message you want the caller to hear. Enhance the interaction by using custom values from the tag icon.
 ### Language
Select the language for the message. Currently, only English is supported.
### Message Voice
Choose between a male or female voice for the text-to-speech output.
### Upload
If the "Play a Message" option was chosen, use the "Upload File" button to insert the audio to be played.
��****Note****: The recommended audio format is .wav for optimal compatibility.
### Number of Loops
Specify the number of times the message should repeat before proceeding.
### Language
Select the language for the message. Currently, only English is supported.
### Message Voice
Choose between a male or female voice for the text-to-speech output.
### Upload
If the "Play a Message" option was chosen, use the "Upload File" button to insert the audio to be played.
��****Note****: The recommended audio format is .wav for optimal compatibility.
### Number of Loops
Specify the number of times the message should repeat before proceeding.
 ### Save
After verifying your selections, click the Save Action button to load the action to your builder.
### Save
After verifying your selections, click the Save Action button to load the action to your builder.
 The ****Say/Play**** action is an essential tool for delivering professional, automated messages within your IVR system. Whether you're guiding callers through options or sharing important updates, this feature ensures a smooth and informative caller experience.
### Example Configuration
Greeting callers in a customer service IVR flow.
* ****Action Name****: Welcome Message to the Caller
* ****Say or Play Message****: Say a message
* ****Text to Say****: "Hello, welcome to ABC Services. Please press 1 for Sales, 2 for Support."
* ****Language****: English (US)
* ****Message Voice****: Woman
* ****Number of Loops****: 1
### ✍️Additional Notes
* When using pre-recorded audio, ensure the file is in a supported format and is of high audio quality.
* Use the Number of Loops setting to repeat critical information or accommodate longer wait times.
* For consistent branding, consider using the same voice type and tone across all IVR messages.
### end-ivr-call-action
1. The\*\*\*\* "End IVR Call" \*\*\*\*action allows you to terminate IVR calls within the workflow with a text message, a custom voice message, or abruptly, enhancing user experience and control over call duration. This functionality ensures that users are no longer left waiting unnecessarily after IVR actions are completed and provides a more seamless and efficient interaction for users.
***
## Setting Up End IVR Call
To set up the ****"End IVR Call"**** action in your workflow, select the workflow containing the IVR action you want to end or create a new workflow.
The ****Say/Play**** action is an essential tool for delivering professional, automated messages within your IVR system. Whether you're guiding callers through options or sharing important updates, this feature ensures a smooth and informative caller experience.
### Example Configuration
Greeting callers in a customer service IVR flow.
* ****Action Name****: Welcome Message to the Caller
* ****Say or Play Message****: Say a message
* ****Text to Say****: "Hello, welcome to ABC Services. Please press 1 for Sales, 2 for Support."
* ****Language****: English (US)
* ****Message Voice****: Woman
* ****Number of Loops****: 1
### ✍️Additional Notes
* When using pre-recorded audio, ensure the file is in a supported format and is of high audio quality.
* Use the Number of Loops setting to repeat critical information or accommodate longer wait times.
* For consistent branding, consider using the same voice type and tone across all IVR messages.
### end-ivr-call-action
1. The\*\*\*\* "End IVR Call" \*\*\*\*action allows you to terminate IVR calls within the workflow with a text message, a custom voice message, or abruptly, enhancing user experience and control over call duration. This functionality ensures that users are no longer left waiting unnecessarily after IVR actions are completed and provides a more seamless and efficient interaction for users.
***
## Setting Up End IVR Call
To set up the ****"End IVR Call"**** action in your workflow, select the workflow containing the IVR action you want to end or create a new workflow.
 Click the ****"+"**** button after any IVR actions such as Gather, Say/Play a Message, Record, etc. Search for the action ****"End Call"****.
 ***
## Custom Options
### End Abruptly (Default)
Terminate the IVR call instantly by saving the action with the ****“Add Voice Instructions”**** switch toggled off.
***
## Custom Options
### End Abruptly (Default)
Terminate the IVR call instantly by saving the action with the ****“Add Voice Instructions”**** switch toggled off.
 Toggle the\*\*\*\* “Add Voice Instructions”\*\*\*\* switch to access:
### Text Message
Play a custom text message before terminating the call by selecting the ****“Say a Message”**** option from the Say or Play Message dropdown. This option allows you to set the number of loops and choose a message voice and language.
Toggle the\*\*\*\* “Add Voice Instructions”\*\*\*\* switch to access:
### Text Message
Play a custom text message before terminating the call by selecting the ****“Say a Message”**** option from the Say or Play Message dropdown. This option allows you to set the number of loops and choose a message voice and language.
 ### Custom Voice Message
Upload a custom voice message or branded music to be played before terminating the call by using the “Play a Message” option from the Say or Play Message dropdown. This option allows you to set the number of loops.
### Custom Voice Message
Upload a custom voice message or branded music to be played before terminating the call by using the “Play a Message” option from the Say or Play Message dropdown. This option allows you to set the number of loops.
 Click \*\*\*\*"Save Action" \*\*\*\*to apply the settings.
 📌 ****NOTE****: All IVR actions after the \*\*\*\*"End IVR Call" \*\*\*\*action will be skipped. However, non-IVR actions in the workflow will continue to execute as planned.
### FAQs
The "End IVR Call" action enhances the user experience during IVR interactions by preventing users from being indefinitely subjected to elevator music. It reduces IVR call durations once IVR actions are completed, giving workflow owners the flexibility to end calls from their end.
Users can choose from three different custom options: **End Abruptly** terminates the IVR call instantly without any warning or message. **Text Message** allows users to type a message to be played before the call is terminated, with the option to set the number of loops. **Custom Voice Message** lets users upload a custom voice message or branded music to be played before the call is terminated, with the option to set the number of loops.
All IVR actions after the "End IVR Call" action will be skipped. However, non-IVR actions in the workflow will continue to execute as planned.
### Troubleshooting Tips
1. ****Issue:**** The IVR call does not end as expected.
2. * ****Solution:**** Ensure that the "End IVR Call" action is correctly placed in the workflow after the desired IVR actions.
3. ****Issue:**** Custom messages are not playing.
4. * ****Solution:**** Verify that the custom text or voice message is correctly configured and that the number of loops is set appropriately.
5. ****Issue:**** Non-IVR actions are not executing.
6. * ****Solution:**** Confirm that the "End IVR Call" action is only set to terminate IVR actions and that the workflow includes subsequent non-IVR actions.
### log-external-call-action
Changing a business with an established phone number can be challenging since it’s integral to the brand, familiar to clients, and featured in promotional materials. However, a CRM-connected phone number offers significant advantages, such as tracking and logging calls with the Log External Call action. Connecting your phone system via a webhook allows you to retain your existing number while seamlessly managing calls within your CRM.
### How to Set It Up?
Head to the\*\*\*\* ”Workflows”\*\*\*\* Tab inside the ****”Automation”**** section and ****”Create a New Workflow”.****
📌 ****NOTE****: All IVR actions after the \*\*\*\*"End IVR Call" \*\*\*\*action will be skipped. However, non-IVR actions in the workflow will continue to execute as planned.
### FAQs
The "End IVR Call" action enhances the user experience during IVR interactions by preventing users from being indefinitely subjected to elevator music. It reduces IVR call durations once IVR actions are completed, giving workflow owners the flexibility to end calls from their end.
Users can choose from three different custom options: **End Abruptly** terminates the IVR call instantly without any warning or message. **Text Message** allows users to type a message to be played before the call is terminated, with the option to set the number of loops. **Custom Voice Message** lets users upload a custom voice message or branded music to be played before the call is terminated, with the option to set the number of loops.
All IVR actions after the "End IVR Call" action will be skipped. However, non-IVR actions in the workflow will continue to execute as planned.
### Troubleshooting Tips
1. ****Issue:**** The IVR call does not end as expected.
2. * ****Solution:**** Ensure that the "End IVR Call" action is correctly placed in the workflow after the desired IVR actions.
3. ****Issue:**** Custom messages are not playing.
4. * ****Solution:**** Verify that the custom text or voice message is correctly configured and that the number of loops is set appropriately.
5. ****Issue:**** Non-IVR actions are not executing.
6. * ****Solution:**** Confirm that the "End IVR Call" action is only set to terminate IVR actions and that the workflow includes subsequent non-IVR actions.
### log-external-call-action
Changing a business with an established phone number can be challenging since it’s integral to the brand, familiar to clients, and featured in promotional materials. However, a CRM-connected phone number offers significant advantages, such as tracking and logging calls with the Log External Call action. Connecting your phone system via a webhook allows you to retain your existing number while seamlessly managing calls within your CRM.
### How to Set It Up?
Head to the\*\*\*\* ”Workflows”\*\*\*\* Tab inside the ****”Automation”**** section and ****”Create a New Workflow”.****
 Click “\*\*\*\*Add New Trigger” ****search**** \*\*\*\*and select ****”Inbound Webhook”****.
 Copy the link for your Webhook and add it to your phone provider. Once you do, click \*\*\*\*”Fetch Sample Requests”. \*\*\*\*This will give you options to select so you can establish the connection.
 After selecting the payload ****”Save”**** the trigger.
 Click the \*\*\*\*“+” \*\*\*\*sign to add the action ****"Log External Call"****.
 Set the direction for the call (Inbound for incoming, outbound for outgoing), and use custom values to set the rest of the details, such as the ****contact number.****
 ****Save**** the Action, add any additional workflow steps, and then save the entire workflow.
 \*\*\*\*Publish ****and**** Save \*\*\*\*the Workflow, and you're done. Once the setup is complete, calls will appear in the ****Conversations**** section under the respective contact. This allows you to maintain a comprehensive record of all interactions without requiring your clients to adapt to a new phone number.
 With the \*\*\*\*Log External Call \*\*\*\*action, you can keep a thorough record of any calls you have with your customers, even if using a phone number you have externally from the system. No need to confuse your clients with number changes while ensuring no interaction goes missing, and all information is handy whenever needed.
### conversation-ai-action
The ****Conversation AI**** action allows you to ask questions, handle conditional responses, and customize the bot’s personality and instructions. This innovative feature empowers users to create dynamic, personalized interactions with their contacts, leveraging advanced AI technology. This article outlines the key highlights and functionalities of this feature, providing a comprehensive guide on how to utilize it effectively.
### Key Highlights
1. ****Interactive Questioning****: Use this action to ask a specific question to a contact, integrating seamlessly with inbound messages.
2. ****Conditional Branching****: Design branches for conditional flow based on the contact's reply, allowing for tailored responses and actions.
3. ****Customization****: Personalize the bot’s personality and additional instructions to align with your brand and communication style.
4. ****Bot Training Utilization****: Leverage the existing training for the Conversation AI Bot, ensuring consistent and accurate interactions.
### Setting Up the Conversation AI Action
Start by choosing the workflow trigger to initiate the workflow and configure the actions to precede the Conversation AI action to your preference. Next, select the ****"Conversation AI"**** action from the list of available workflow actions.
With the \*\*\*\*Log External Call \*\*\*\*action, you can keep a thorough record of any calls you have with your customers, even if using a phone number you have externally from the system. No need to confuse your clients with number changes while ensuring no interaction goes missing, and all information is handy whenever needed.
### conversation-ai-action
The ****Conversation AI**** action allows you to ask questions, handle conditional responses, and customize the bot’s personality and instructions. This innovative feature empowers users to create dynamic, personalized interactions with their contacts, leveraging advanced AI technology. This article outlines the key highlights and functionalities of this feature, providing a comprehensive guide on how to utilize it effectively.
### Key Highlights
1. ****Interactive Questioning****: Use this action to ask a specific question to a contact, integrating seamlessly with inbound messages.
2. ****Conditional Branching****: Design branches for conditional flow based on the contact's reply, allowing for tailored responses and actions.
3. ****Customization****: Personalize the bot’s personality and additional instructions to align with your brand and communication style.
4. ****Bot Training Utilization****: Leverage the existing training for the Conversation AI Bot, ensuring consistent and accurate interactions.
### Setting Up the Conversation AI Action
Start by choosing the workflow trigger to initiate the workflow and configure the actions to precede the Conversation AI action to your preference. Next, select the ****"Conversation AI"**** action from the list of available workflow actions.
 ### Prompt – Personality and Additional Instructions
Enable the \*\*\*\*"Advanced Bot Configuration" \*\*\*\*toggle to access and customize the bot’s "Personality" and "Additional Instructions." The prompt generated for the bot will combine:
* The defined "Personality".
* Any "Additional Instructions".
* The main question for the contact.
* Context from the bot training conducted for the Conversation AI Bot.
* Previous conversations between the account and the contact.
### Prompt – Personality and Additional Instructions
Enable the \*\*\*\*"Advanced Bot Configuration" \*\*\*\*toggle to access and customize the bot’s "Personality" and "Additional Instructions." The prompt generated for the bot will combine:
* The defined "Personality".
* Any "Additional Instructions".
* The main question for the contact.
* Context from the bot training conducted for the Conversation AI Bot.
* Previous conversations between the account and the contact.
 ### Question for the Contact
The primary question that the bot will ask is set up here. This question is posed along with any reply to an inbound message from the contact, if applicable.
### Question for the Contact
The primary question that the bot will ask is set up here. This question is posed along with any reply to an inbound message from the contact, if applicable.
 ### Time Out
Specify the time frame in which the bot should wait for a response from the contact. When the contact fails to reply in the allotted time, the workflow automatically follows the Time Out branch, enabling you to implement follow-up actions or alternative steps to ensure continued engagement and effective workflow management.
### Time Out
Specify the time frame in which the bot should wait for a response from the contact. When the contact fails to reply in the allotted time, the workflow automatically follows the Time Out branch, enabling you to implement follow-up actions or alternative steps to ensure continued engagement and effective workflow management.
 ### Channel Selection
Select one communication channel from SMS, Facebook, Instagram, WhatsApp, or Live Chat through which the bot will send messages to the contact.
### Channel Selection
Select one communication channel from SMS, Facebook, Instagram, WhatsApp, or Live Chat through which the bot will send messages to the contact.
 ### Skip If Answered
Choose to skip asking a question if the answer already exists in the conversation history. Instead, the bot will bypass the question and direct the contact to the relevant branch or condition based on the existing response.
### Skip If Answered
Choose to skip asking a question if the answer already exists in the conversation history. Instead, the bot will bypass the question and direct the contact to the relevant branch or condition based on the existing response.
 ### Bot Responses Limit
This allows users to define the maximum number of consecutive responses the bot can provide within a single interaction. This limit ensures conversations remain concise and prevents unnecessary back-and-forth interactions.
### Bot Responses Limit
This allows users to define the maximum number of consecutive responses the bot can provide within a single interaction. This limit ensures conversations remain concise and prevents unnecessary back-and-forth interactions.
 ### Wait Time (In Seconds)
This feature allows users to customize the response time for individual bots within workflows, enabling tailored interactions for specific use cases, such as appointment booking or casual conversations.
### Wait Time (In Seconds)
This feature allows users to customize the response time for individual bots within workflows, enabling tailored interactions for specific use cases, such as appointment booking or casual conversations.
 ****📌NOTE:**** The maximum wait time is 300 seconds, with a default value of 10 seconds.
### Branches and Conditions
Two standard branches are automatically created for each action, with the option to create additional branches as needed:
* ****Time Out****: Triggered when the contact does not reply within the specified time frame.
* ****No Condition Met****: Activated when the contact replies within the timeout period, but no specified condition is met.
****📌NOTE:**** The maximum wait time is 300 seconds, with a default value of 10 seconds.
### Branches and Conditions
Two standard branches are automatically created for each action, with the option to create additional branches as needed:
* ****Time Out****: Triggered when the contact does not reply within the specified time frame.
* ****No Condition Met****: Activated when the contact replies within the timeout period, but no specified condition is met.
 ### Creating New Branches
Each new branch must have a unique name and a specific condition based on which the contact will be directed down that branch.
### Creating New Branches
Each new branch must have a unique name and a specific condition based on which the contact will be directed down that branch.
 Once you have confirmed the configuration, select the\*\*\*\* “Save Action”\*\*\*\* button to add the action to your workflow. Remember to save the workflow to maintain your changes.
 ### Mechanism of the Conversation AI Action
Once the ****"Conversation AI"**** action is configured, the following process unfolds when a contact reaches this action:
1. ****Message Generation and Sending****: The prompt is generated and the message is sent from the Conversation AI bot to the contact. If needed, context from the bot training in the Conversation AI Bot account settings is utilized.
2. ****Waiting for a Reply****: The bot waits for a reply from the contact for the duration configured in the action.
3. ****Time-Out Handling****: If the contact fails to reply within the specified time frame, the process follows the "Time Out" branch, allowing for follow-up actions.
4. ****Condition Checking****: When the contact replies within the time frame, the bot evaluates which condition is met based on the reply. If no condition is met, the contact is directed to the "No Condition Met" branch, where further actions can be specified.
5. ****Conditional Branching****: If a condition is met, the contact proceeds down the corresponding branch, ensuring a personalized and relevant interaction.
The Conversation AI action is an easy way to create meaningful and personalized interactions with your contacts. By setting up thoughtful questions, conditions, and responses, you can guide conversations naturally while staying organized.
### FAQs
The maximum wait time is 300 seconds, and the default is 10 seconds.
Yes, you can configure the Bot Responses Limit to control the maximum number of consecutive responses a bot can give.
Ensure the bot is assigned a proper channel (e.g., SMS, Facebook, Email, WhatsApp, or Livechat) to avoid compatibility issues.
Yes, use the Advanced Bot Configuration toggle to define the bot’s personality and additional instructions.
### appointment-booking-conversation-ai-bot-action
The "Appointment Booking Conversation AI Bot" action is designed to automate the appointment booking process through conversational AI. It engages with users, guiding them through the steps of booking an appointment while adapting its responses based on user input. This bot can be customized with specific instructions, tone settings, and timeout configurations to create a dynamic, personalized interaction.
Open the desired workflow in your account, then proceed to add the action.
### Mechanism of the Conversation AI Action
Once the ****"Conversation AI"**** action is configured, the following process unfolds when a contact reaches this action:
1. ****Message Generation and Sending****: The prompt is generated and the message is sent from the Conversation AI bot to the contact. If needed, context from the bot training in the Conversation AI Bot account settings is utilized.
2. ****Waiting for a Reply****: The bot waits for a reply from the contact for the duration configured in the action.
3. ****Time-Out Handling****: If the contact fails to reply within the specified time frame, the process follows the "Time Out" branch, allowing for follow-up actions.
4. ****Condition Checking****: When the contact replies within the time frame, the bot evaluates which condition is met based on the reply. If no condition is met, the contact is directed to the "No Condition Met" branch, where further actions can be specified.
5. ****Conditional Branching****: If a condition is met, the contact proceeds down the corresponding branch, ensuring a personalized and relevant interaction.
The Conversation AI action is an easy way to create meaningful and personalized interactions with your contacts. By setting up thoughtful questions, conditions, and responses, you can guide conversations naturally while staying organized.
### FAQs
The maximum wait time is 300 seconds, and the default is 10 seconds.
Yes, you can configure the Bot Responses Limit to control the maximum number of consecutive responses a bot can give.
Ensure the bot is assigned a proper channel (e.g., SMS, Facebook, Email, WhatsApp, or Livechat) to avoid compatibility issues.
Yes, use the Advanced Bot Configuration toggle to define the bot’s personality and additional instructions.
### appointment-booking-conversation-ai-bot-action
The "Appointment Booking Conversation AI Bot" action is designed to automate the appointment booking process through conversational AI. It engages with users, guiding them through the steps of booking an appointment while adapting its responses based on user input. This bot can be customized with specific instructions, tone settings, and timeout configurations to create a dynamic, personalized interaction.
Open the desired workflow in your account, then proceed to add the action.
 ### Action Name
Enter a clear and descriptive name for your action.
### Action Name
Enter a clear and descriptive name for your action.
 ### Calendar
Select the calendar on which appointments should be booked from the dropdown.
### Calendar
Select the calendar on which appointments should be booked from the dropdown.
 ### Personality
Define the bot’s interaction style, such as friendly, professional, or another tone that suits your brand.
### Personality
Define the bot’s interaction style, such as friendly, professional, or another tone that suits your brand.
 ### Additional Instructions
Provide any additional guidelines or conversational tips for the bot to follow during the interaction.
### Additional Instructions
Provide any additional guidelines or conversational tips for the bot to follow during the interaction.
 ### Message Limit
Set the maximum number of messages the bot will exchange before it ceases further attempts to book the appointment.
### Message Limit
Set the maximum number of messages the bot will exchange before it ceases further attempts to book the appointment.
 ### Timeout (Value)
Specify the time duration the bot will wait for a response from the user before it times out.
### Timeout (Value)
Specify the time duration the bot will wait for a response from the user before it times out.
 ### Timeout (Unit)
Choose the timeout unit -minutes, hours, or days.
### Timeout (Unit)
Choose the timeout unit -minutes, hours, or days.
 ### Channel
Choose the communication channel (e.g., SMS, email, chat) through which the conversation will take place.
### Channel
Choose the communication channel (e.g., SMS, email, chat) through which the conversation will take place.
 ### Disable Confirmation Message
Opt to disable the confirmation message that is typically sent after an appointment is booked.
### Disable Confirmation Message
Opt to disable the confirmation message that is typically sent after an appointment is booked.
 ### Wait Time Before Responding
Define the time (in seconds) for the bot to wait before responding to the contact.
��****Note****: The maximum wait time is 300 seconds, with a default value of 10 seconds for convenience.
### Wait Time Before Responding
Define the time (in seconds) for the bot to wait before responding to the contact.
��****Note****: The maximum wait time is 300 seconds, with a default value of 10 seconds for convenience.
 Save the action once you are satisfied with your selections.
By configuring the Appointment Booking Conversation AI Bot with the right settings, you can significantly enhance the efficiency of your appointment booking process, ensuring a seamless user experience while reducing the potential for missed bookings.
### Use Case
Imagine you're using the bot to book a consultation. You configure the bot to adopt a friendly and persuasive tone to guide the contact toward scheduling the consultation. If the user doesn’t respond within 24 hours (based on the timeout setting), the bot will stop the conversation and mark the appointment as “not booked.”
### ✍️Important Notes
* Ensure that the bot’s personality aligns with your business’s tone and the expectations of your audience.
* Setting a higher message limit allows for more extensive conversations but may lead to slower resolutions.
* If the contact doesn’t respond within the allotted time, the appointment will be marked as "not booked," and the workflow will proceed as planned.
### update-conversation-ai-bot-and-status-action
The "Update Conversation AI Bot and Status" action allows users to assign Conversation AI bots to contacts while managing their status (Active or Inactive) automatically. This functionality optimizes bot interactions, eliminates manual assignments, and ensures efficiency in managing workflows and tailored interactions.
***
## Setting Your Action
To get started, add a suitable trigger to the workflow, then click the “+” icon to search and add the “Update Conversation AI Bot and Status” action.
Save the action once you are satisfied with your selections.
By configuring the Appointment Booking Conversation AI Bot with the right settings, you can significantly enhance the efficiency of your appointment booking process, ensuring a seamless user experience while reducing the potential for missed bookings.
### Use Case
Imagine you're using the bot to book a consultation. You configure the bot to adopt a friendly and persuasive tone to guide the contact toward scheduling the consultation. If the user doesn’t respond within 24 hours (based on the timeout setting), the bot will stop the conversation and mark the appointment as “not booked.”
### ✍️Important Notes
* Ensure that the bot’s personality aligns with your business’s tone and the expectations of your audience.
* Setting a higher message limit allows for more extensive conversations but may lead to slower resolutions.
* If the contact doesn’t respond within the allotted time, the appointment will be marked as "not booked," and the workflow will proceed as planned.
### update-conversation-ai-bot-and-status-action
The "Update Conversation AI Bot and Status" action allows users to assign Conversation AI bots to contacts while managing their status (Active or Inactive) automatically. This functionality optimizes bot interactions, eliminates manual assignments, and ensures efficiency in managing workflows and tailored interactions.
***
## Setting Your Action
To get started, add a suitable trigger to the workflow, then click the “+” icon to search and add the “Update Conversation AI Bot and Status” action.
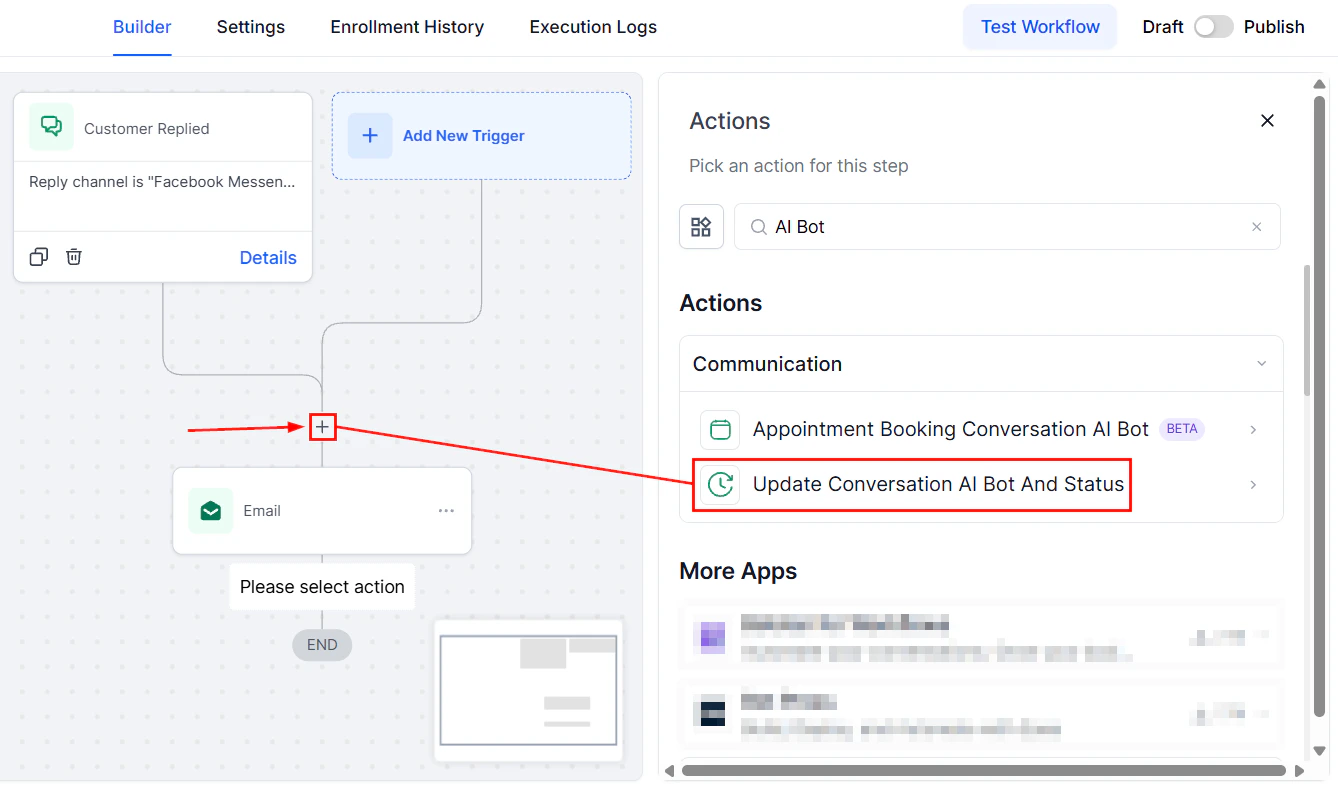 ****📌NOTE:**** A proper channel must be assigned to the bot within the workflow (e.g., SMS, Facebook, Email) for compatibility.
### Change Assigned Conversation AI Bot
You can keep the Same bot currently assigned or choose a different one, such as the General Support Bot, depending on your workflow needs.
****📌NOTE:**** A proper channel must be assigned to the bot within the workflow (e.g., SMS, Facebook, Email) for compatibility.
### Change Assigned Conversation AI Bot
You can keep the Same bot currently assigned or choose a different one, such as the General Support Bot, depending on your workflow needs.
 ### Update Bot's Status
Set the bot's status to ****Active**** or ****Inactive**** to control its availability in the workflow.
### Update Bot's Status
Set the bot's status to ****Active**** or ****Inactive**** to control its availability in the workflow.
 Once you've configured the action, save it to proceed.
 ****📌NOTE:**** To further customize the workflow, consider adding additional actions, such as the ****“If/Else”**** condition, to define specific paths based on user interactions.
After completing the setup, ensure the workflow is functional by publishing and saving it. This step activates the bot and enables it to perform tasks as defined.
****📌NOTE:**** To further customize the workflow, consider adding additional actions, such as the ****“If/Else”**** condition, to define specific paths based on user interactions.
After completing the setup, ensure the workflow is functional by publishing and saving it. This step activates the bot and enables it to perform tasks as defined.
 The ****“Update Conversation AI Bot and Status”**** action is essential for streamlining bot assignments and statuses within workflows. By automating these processes, users can enhance their workflow management, reduce manual tasks, and provide a more seamless experience for their contacts.
### gpt-powered-by-openai
GPT powered by OpenAI, revolutionizes your workflow by integrating advanced AI capabilities with your CRM system. It responds intelligently to triggers and actions, optimizing communication processes with contextually relevant responses. Compatible with platforms like social media, e-commerce, and learning management systems, GPT enhances accuracy, efficiency, and adaptability in your business operations.
***
## Setting Workflow
To begin, create a workflow or open an existing workflow. Add an appropriate Workflow Trigger and the\*\*\*\* “GPT powered by OpenAI” \*\*\*\*Action.
The ****“Update Conversation AI Bot and Status”**** action is essential for streamlining bot assignments and statuses within workflows. By automating these processes, users can enhance their workflow management, reduce manual tasks, and provide a more seamless experience for their contacts.
### gpt-powered-by-openai
GPT powered by OpenAI, revolutionizes your workflow by integrating advanced AI capabilities with your CRM system. It responds intelligently to triggers and actions, optimizing communication processes with contextually relevant responses. Compatible with platforms like social media, e-commerce, and learning management systems, GPT enhances accuracy, efficiency, and adaptability in your business operations.
***
## Setting Workflow
To begin, create a workflow or open an existing workflow. Add an appropriate Workflow Trigger and the\*\*\*\* “GPT powered by OpenAI” \*\*\*\*Action.
 ### Action Name
Update the name of the action to reflect its core purpose.
### Action Name
Update the name of the action to reflect its core purpose.
 ### Model
By default, GPT 5 Mini will be selected. However, you can choose other models by clicking the drop-down menu and selecting your preferred version.
### Model
By default, GPT 5 Mini will be selected. However, you can choose other models by clicking the drop-down menu and selecting your preferred version.
 ***
## Action Type
***
##
If you're unsure which prompt to use, consider trying our pre-made action types. The prompt will auto-populate based on your selection, allowing you to use the action effectively. Available options include:
* Analyze Text Sentiment
* Summarize Text
* Translate Content
* Custom\*\*
***
## Action Type
***
##
If you're unsure which prompt to use, consider trying our pre-made action types. The prompt will auto-populate based on your selection, allowing you to use the action effectively. Available options include:
* Analyze Text Sentiment
* Summarize Text
* Translate Content
* Custom\*\*
 ### Analyze Text Sentiment
Assess whether the received message has positive or negative intent and take appropriate action based on the analysis. Use custom fields for further customization of the input text or start typing directly into the field to modify the input. If you alter the prompt, the action type will automatically update to Custom.
### Analyze Text Sentiment
Assess whether the received message has positive or negative intent and take appropriate action based on the analysis. Use custom fields for further customization of the input text or start typing directly into the field to modify the input. If you alter the prompt, the action type will automatically update to Custom.
 ### Summarize Text
This will help you shorten any text to the length chosen in the max length field. Use custom fields for further customization of the input text or start typing directly into the field to modify the input. If you alter the prompt, the action type will automatically update to Custom.
### Summarize Text
This will help you shorten any text to the length chosen in the max length field. Use custom fields for further customization of the input text or start typing directly into the field to modify the input. If you alter the prompt, the action type will automatically update to Custom.
 ### Translate Content
Select the from and to language for translation. Use custom fields for further customization of the input text or start typing directly into the field to modify the input. If you alter the prompt, the action type will automatically update to Custom.
### Translate Content
Select the from and to language for translation. Use custom fields for further customization of the input text or start typing directly into the field to modify the input. If you alter the prompt, the action type will automatically update to Custom.
 ### Custom
For custom actions, enter a Prompt by typing in this section or using custom fields so the necessary content can be generated.
### Custom
For custom actions, enter a Prompt by typing in this section or using custom fields so the necessary content can be generated.
 ***
## Enable History
When enabled, GPT will leverage insights from previous actions involving the contact to provide more relevant and personalized responses. The history is maintained independently for each contact. Activating **"History"**\*\* will switch to GPT-4 models, allowing for a larger context size.
***
## Enable History
When enabled, GPT will leverage insights from previous actions involving the contact to provide more relevant and personalized responses. The history is maintained independently for each contact. Activating **"History"**\*\* will switch to GPT-4 models, allowing for a larger context size.
 Five types of history can be stored:
1. ****This Account****: Retains all GPT conversations across all workflows within the account.
2. ****This Workflow****: Keeps track of all GPT conversations within the specific workflow.
3. ****Per Execution****: Stores all GPT conversations within the workflow for a single execution.
4. ****This Step****: Remembers all GPT conversations for a specific action across multiple executions.
5. ****Custom****: Allows users to create a custom history type for use within the same workflow or across multiple workflows.
Five types of history can be stored:
1. ****This Account****: Retains all GPT conversations across all workflows within the account.
2. ****This Workflow****: Keeps track of all GPT conversations within the specific workflow.
3. ****Per Execution****: Stores all GPT conversations within the workflow for a single execution.
4. ****This Step****: Remembers all GPT conversations for a specific action across multiple executions.
5. ****Custom****: Allows users to create a custom history type for use within the same workflow or across multiple workflows.
 ***
## Advanced Options
Expand the Advanced Options menu to further customize this action according to your specific requirements. This section provides additional settings and configurations to fine-tune the action's behavior and ensure it aligns with your needs. Selecting GPT-5, GPT-5 mini, GPT-5 nano, and GPT-5.1 will remove the Advanced Options since they don't allow you to set a temperature.
***
## Advanced Options
Expand the Advanced Options menu to further customize this action according to your specific requirements. This section provides additional settings and configurations to fine-tune the action's behavior and ensure it aligns with your needs. Selecting GPT-5, GPT-5 mini, GPT-5 nano, and GPT-5.1 will remove the Advanced Options since they don't allow you to set a temperature.
 ### Temperature
Sampling temperature is a key factor in producing AI text with different degrees of randomness. It operates on a scale from 0 to 1. Setting at higher levels, say 0.8, yields more varied and unpredictable text. Conversely, setting at lower levels, such as 0.2, creates more consistent and expected outcomes. By modifying the sampling temperature, users can tailor the balance between creativity and predictability in AI-generated content. This flexibility enables users to customize the AI's output based on their unique needs and preferences.
### Temperature
Sampling temperature is a key factor in producing AI text with different degrees of randomness. It operates on a scale from 0 to 1. Setting at higher levels, say 0.8, yields more varied and unpredictable text. Conversely, setting at lower levels, such as 0.2, creates more consistent and expected outcomes. By modifying the sampling temperature, users can tailor the balance between creativity and predictability in AI-generated content. This flexibility enables users to customize the AI's output based on their unique needs and preferences.
 ### System Instructions
Users can input additional instructions to provide GPT with more detailed guidance, enhancing the specificity and relevance of the output generated by the action.
### System Instructions
Users can input additional instructions to provide GPT with more detailed guidance, enhancing the specificity and relevance of the output generated by the action.
 ### Exclude Instruction From History
Use this toggle to exclude System Instructions from being stored in the history, ensuring that these instructions do not impact future interactions or analyses.
### Exclude Instruction From History
Use this toggle to exclude System Instructions from being stored in the history, ensuring that these instructions do not impact future interactions or analyses.
 ### Exclude Responses from History
Enabling this option will prevent the responses generated by this action from being stored in the history. This is particularly useful for excluding sentiment analysis results or other analytics outputs from being recorded.
### Exclude Responses from History
Enabling this option will prevent the responses generated by this action from being stored in the history. This is particularly useful for excluding sentiment analysis results or other analytics outputs from being recorded.
 ### Output
Once the ChatGPT has been configured, the outcomes it generates can be incorporated into subsequent steps within your Workflow. For example in the SMS Action within the message box click on Tag Icon which is the ****Custom Value, ****in the dropdown select**** GPT****,\*\*\*\* \*\*\*\*choose ****#1 GPT powered by OpenAI, ****and finally click on**** "Response".****
### Output
Once the ChatGPT has been configured, the outcomes it generates can be incorporated into subsequent steps within your Workflow. For example in the SMS Action within the message box click on Tag Icon which is the ****Custom Value, ****in the dropdown select**** GPT****,\*\*\*\* \*\*\*\*choose ****#1 GPT powered by OpenAI, ****and finally click on**** "Response".****
 In your process, you would reference these results as ****`{{chatgpt.1.response}}`****.
\*\*
In your process, you would reference these results as ****`{{chatgpt.1.response}}`****.
\*\*
 ***
## Usage Cases with Other Workflow Actions and Triggers
* **Social Media Auto-Responder**\*\*: Use Inbound Webhooks from supported social media platforms to trigger a GPT response. The response can be a general appreciation for every new follower or a direct message.
* ****Automated Birthday Wishes****: Utilize the “Birthday Reminder” trigger to activate GPT powered by OpenAI to send contacts a standard birthday wish via email or SMS.
* ****E-Commerce Abandoned Cart Recover****y: Utilize the “Abandoned Checkout” trigger to send clients a GPT-generated reminder email or SMS about their abandoned cart.
* ****Opportunity Management****: Using the “Opportunity Status Changed” trigger, automatically update Google Sheets with new data and send update emails to potential clients via GPT powered by OpenAI.
* ****Course Completion Certificates****: Using the “Product Completion” trigger, GPT powered by OpenAI generates a congratulatory email, SMS, and certificate upon completing a course product.
* ****Automated Booking Confirmation****: Using the “Customer Booked Appointment” trigger, send a GPT-generated confirmation with booking details.
* \*\*\*\*Post-Purchase Survey: \*\*\*\*Using the “Payment Received” trigger, send customers a thank you message and post-purchase survey link via GPT powered by OpenAI.
* ****Form Submission Follow-Up****: Use the “Form Submitted” trigger to create a GPT-generated acknowledgment message to clients when they submit a form on your website.
By combining the power of the GPT powered by OpenAI Action with other Workflow actions and Triggers, you can create intelligent and dynamic workflows that automate processes, personalize interactions, and streamline your business operations.
***
## Frequently Asked Questions
Absolutely. You can configure the GPT powered by OpenAI Action by setting the desired temperature, which controls the randomness of the generated responses. Higher temperatures produce more creative but less predictable responses, while lower temperatures produce more focused and deterministic outputs.
While the GPT powered by OpenAI Action offers powerful capabilities, it relies on the underlying ChatGPT model. The responses generated by the AI may not always be perfect, and it's recommended to review and validate the output before sending it to customers. Additionally, extensive testing and monitoring are crucial to ensure the quality and accuracy of the generated responses.
### smart-push-notification-action
Push notifications are a fantastic way to keep your audience engaged, deliver timely updates, and encourage action. With the Smart Push Notification Action, you can create personalized, actionable notifications that truly resonate with your users.
***
## Setting Your Notification
First, add a trigger to your workflow. This could be something like a user signing up or completing a payment. Once your trigger is in place, click the “+” icon and search for the “Smart Push Notification” action to add it to your workflow.
***
## Usage Cases with Other Workflow Actions and Triggers
* **Social Media Auto-Responder**\*\*: Use Inbound Webhooks from supported social media platforms to trigger a GPT response. The response can be a general appreciation for every new follower or a direct message.
* ****Automated Birthday Wishes****: Utilize the “Birthday Reminder” trigger to activate GPT powered by OpenAI to send contacts a standard birthday wish via email or SMS.
* ****E-Commerce Abandoned Cart Recover****y: Utilize the “Abandoned Checkout” trigger to send clients a GPT-generated reminder email or SMS about their abandoned cart.
* ****Opportunity Management****: Using the “Opportunity Status Changed” trigger, automatically update Google Sheets with new data and send update emails to potential clients via GPT powered by OpenAI.
* ****Course Completion Certificates****: Using the “Product Completion” trigger, GPT powered by OpenAI generates a congratulatory email, SMS, and certificate upon completing a course product.
* ****Automated Booking Confirmation****: Using the “Customer Booked Appointment” trigger, send a GPT-generated confirmation with booking details.
* \*\*\*\*Post-Purchase Survey: \*\*\*\*Using the “Payment Received” trigger, send customers a thank you message and post-purchase survey link via GPT powered by OpenAI.
* ****Form Submission Follow-Up****: Use the “Form Submitted” trigger to create a GPT-generated acknowledgment message to clients when they submit a form on your website.
By combining the power of the GPT powered by OpenAI Action with other Workflow actions and Triggers, you can create intelligent and dynamic workflows that automate processes, personalize interactions, and streamline your business operations.
***
## Frequently Asked Questions
Absolutely. You can configure the GPT powered by OpenAI Action by setting the desired temperature, which controls the randomness of the generated responses. Higher temperatures produce more creative but less predictable responses, while lower temperatures produce more focused and deterministic outputs.
While the GPT powered by OpenAI Action offers powerful capabilities, it relies on the underlying ChatGPT model. The responses generated by the AI may not always be perfect, and it's recommended to review and validate the output before sending it to customers. Additionally, extensive testing and monitoring are crucial to ensure the quality and accuracy of the generated responses.
### smart-push-notification-action
Push notifications are a fantastic way to keep your audience engaged, deliver timely updates, and encourage action. With the Smart Push Notification Action, you can create personalized, actionable notifications that truly resonate with your users.
***
## Setting Your Notification
First, add a trigger to your workflow. This could be something like a user signing up or completing a payment. Once your trigger is in place, click the “+” icon and search for the “Smart Push Notification” action to add it to your workflow.
 ****📌NOTE:**** To publish your workflow, you’ll need both a trigger and an action. Without these, you can only save the workflow—it won’t go live.
### Title
Here, you can write a short, attention-grabbing headline for your notification. This is the first thing users will see, so make it clear and compelling.
****📌NOTE:**** To publish your workflow, you’ll need both a trigger and an action. Without these, you can only save the workflow—it won’t go live.
### Title
Here, you can write a short, attention-grabbing headline for your notification. This is the first thing users will see, so make it clear and compelling.
 ### Message Body
In the Message Body field, write the text for your notification. Keep it short, engaging, and to the point. Use the tag icon to add Custom Values like `{{contact.name}}` or `{{user.email}}`. These automatically pull in personalized details, making your notifications feel more tailored and relevant.
### Message Body
In the Message Body field, write the text for your notification. Keep it short, engaging, and to the point. Use the tag icon to add Custom Values like `{{contact.name}}` or `{{user.email}}`. These automatically pull in personalized details, making your notifications feel more tailored and relevant.
 ### Redirection
Decide where users will go when they click the notification. You can redirect them to Communities or Courses, depending on what you’re promoting. For example, if you’re announcing a new course, send users directly to the enrollment page.
### Redirection
Decide where users will go when they click the notification. You can redirect them to Communities or Courses, depending on what you’re promoting. For example, if you’re announcing a new course, send users directly to the enrollment page.
 Once everything is set up, click ****Save Action**** to apply your changes.
 Then, \*\*\*\*Publish ****and**** Save \*\*\*\*to activate the workflow.
### Example Scenario
Let’s say you’ve just added a brand-new feature to your Client Portal, and you want to let your users know about it. Here’s how you could set up a Smart Push Notification to spread the word:
* ****Title:**** "Something New Just Dropped!"
* ****Message Body:**** "Hey `{{contact.first_name}}`, we’ve added a cool new feature to the portal. Tap here to check it out!"
* ****Redirection:**** Choose Communities to send users straight to the latest discussions about the feature.
When the workflow runs, your users will get a friendly, personalized notification. Tapping it takes them right to the Communities page, where they can explore the new feature and join the conversation.
### Why Use Smart Push Notifications?
* ****Personalized Messaging:**** Custom values let you address users by name or include other personal details, making your notifications feel more engaging and relevant.
* ****Drive Action:**** By redirecting users to specific pages like Communities or Courses, you can encourage them to take meaningful steps, whether it’s joining a discussion or enrolling in a program.
* ****Instant Updates:**** Push notifications deliver real-time updates, ensuring your audience stays in the loop and connected to your content.
By personalizing your messages and directing users to the right pages, you can create notifications that are both effective and meaningful.
### create-company-or-associated-record-action
Business-to-business relationships are a great source of income, opportunities, and growth. So, keeping your Company-related records connected and organized is an essential part of using your CRM effectively. By creating associations between contacts and the company they are related to, you can streamline communications, create automations, and keep records synced across the board. Let's learn how!
***
## Adding Your Action
Start by navigating to the Workflows tab inside the Automation section and creating or editing a Company-based workflow.
***
##
Click the plus sign icon to add an action and select the “Create Company Or Associated Contact” action from the Company menu.
Then, \*\*\*\*Publish ****and**** Save \*\*\*\*to activate the workflow.
### Example Scenario
Let’s say you’ve just added a brand-new feature to your Client Portal, and you want to let your users know about it. Here’s how you could set up a Smart Push Notification to spread the word:
* ****Title:**** "Something New Just Dropped!"
* ****Message Body:**** "Hey `{{contact.first_name}}`, we’ve added a cool new feature to the portal. Tap here to check it out!"
* ****Redirection:**** Choose Communities to send users straight to the latest discussions about the feature.
When the workflow runs, your users will get a friendly, personalized notification. Tapping it takes them right to the Communities page, where they can explore the new feature and join the conversation.
### Why Use Smart Push Notifications?
* ****Personalized Messaging:**** Custom values let you address users by name or include other personal details, making your notifications feel more engaging and relevant.
* ****Drive Action:**** By redirecting users to specific pages like Communities or Courses, you can encourage them to take meaningful steps, whether it’s joining a discussion or enrolling in a program.
* ****Instant Updates:**** Push notifications deliver real-time updates, ensuring your audience stays in the loop and connected to your content.
By personalizing your messages and directing users to the right pages, you can create notifications that are both effective and meaningful.
### create-company-or-associated-record-action
Business-to-business relationships are a great source of income, opportunities, and growth. So, keeping your Company-related records connected and organized is an essential part of using your CRM effectively. By creating associations between contacts and the company they are related to, you can streamline communications, create automations, and keep records synced across the board. Let's learn how!
***
## Adding Your Action
Start by navigating to the Workflows tab inside the Automation section and creating or editing a Company-based workflow.
***
##
Click the plus sign icon to add an action and select the “Create Company Or Associated Contact” action from the Company menu.
 Select whether the created object should be the Company or Contact profile.
 ### Adding Fields
Click “+ Add field” to include fields you want to prepopulate.
### Adding Fields
Click “+ Add field” to include fields you want to prepopulate.
 When selecting Company, you'll be able to pick from the standard fields.
 When selecting Contact, you'll be able to pick from custom values along with standard fields.
 Enter the new value you want for the field. You can use custom values by clicking the tag icon.
 Once you've added all your desired fields and values, click Save Action to close the editor.
 And there you have it! Now you can easily create and connect companies inside your system, helping you simplify your B2B relationship management. This will also allow you to message, update, and automate your processes with other companies, making your process more scalable.
### update-company-or-associated-record-action
Managing your business-to-business relationships requires updating and correcting the information you have about each company. However, just changing the details to a related contact can create confusion and uncertainty. So, let's learn how to use the “Update Company or Associated Record” Action to manage the information across all records in your CRM.
***
## Adding Your Action
Start by navigating to the Workflows tab inside the Automation section and creating or editing a Company-based workflow.
Click the plus sign icon to add an action and select the “Update Company Or Associated Contact” action from the Company menu.
And there you have it! Now you can easily create and connect companies inside your system, helping you simplify your B2B relationship management. This will also allow you to message, update, and automate your processes with other companies, making your process more scalable.
### update-company-or-associated-record-action
Managing your business-to-business relationships requires updating and correcting the information you have about each company. However, just changing the details to a related contact can create confusion and uncertainty. So, let's learn how to use the “Update Company or Associated Record” Action to manage the information across all records in your CRM.
***
## Adding Your Action
Start by navigating to the Workflows tab inside the Automation section and creating or editing a Company-based workflow.
Click the plus sign icon to add an action and select the “Update Company Or Associated Contact” action from the Company menu.
 Select whether the updated object should be the Company or Contact profile.
 ### Adding Fields
Click “+ Add field” to select the fields to update.
### Adding Fields
Click “+ Add field” to select the fields to update.
 When selecting Company, you'll be able to pick from the standard fields.
 When selecting Contact, you'll be able to pick from custom values along with standard fields.
 Enter the new value you want for the field. You can use custom values by clicking the tag icon.
 Once you've added all your desired fields and values, click Save Action to close the editor.
 Add any other actions you want to the workflow and publish it to start using it. By using this action, you can easily keep your company or related contact records updated. Making it easier to manage their data and improve the experience other businesses receive when closing deals with you.
### clear-fields-of-company-or-associated-contact-action
Managing your business-to-business relationships requires updating and correcting the information you have about each company. So, if you have an error in your information or simply need to empty a field, having to go through all connected records is a must. Let's learn how to use automation to make this task smoother.
***
## Adding Your Action
Start by navigating to the Workflows tab inside the Automation section and creating or editing a Company-based workflow.
***
##
Click the plus sign icon to add an action and select the “Clear Fields of Company Or Associated Contact” action from the Company menu.
Add any other actions you want to the workflow and publish it to start using it. By using this action, you can easily keep your company or related contact records updated. Making it easier to manage their data and improve the experience other businesses receive when closing deals with you.
### clear-fields-of-company-or-associated-contact-action
Managing your business-to-business relationships requires updating and correcting the information you have about each company. So, if you have an error in your information or simply need to empty a field, having to go through all connected records is a must. Let's learn how to use automation to make this task smoother.
***
## Adding Your Action
Start by navigating to the Workflows tab inside the Automation section and creating or editing a Company-based workflow.
***
##
Click the plus sign icon to add an action and select the “Clear Fields of Company Or Associated Contact” action from the Company menu.
 Select whether the edited object should be the Company or Contact profile.
 ### Adding Fields
Click “+ Add field” to include the fields you want to clear.
### Adding Fields
Click “+ Add field” to include the fields you want to clear.
 When selecting Company, you'll be able to pick from the standard fields.
When selecting Contact, you'll be able to pick from custom values along with standard fields.
Once you've added all your desired fields to clear, click Save Action to close the editor.
When selecting Company, you'll be able to pick from the standard fields.
When selecting Contact, you'll be able to pick from custom values along with standard fields.
Once you've added all your desired fields to clear, click Save Action to close the editor.
 You can add any additional actions you desire in your workflow, but essentially, you're done! Now you can easily reset fields back to blank automatically. Making it easier to manage their data and improve the experience other businesses receive when closing deals with you.
### create-custom-object-or-associated-record-action
The Create Object or Associated Record action allows you to generate a new Object record or create an associated object record within the system when the trigger criteria are fulfilled. This functionality ensures that records are automatically added as needed, streamlining data management.
***
## How It Works
Begin by creating a new workflow in the Automation section of your account or accessing an existing Objects workflow from the list.
��****Note****: The title of the Custom Object workflow option will vary depending on the Custom Objects you have configured in the Settings > Objects section and will take the format of `{{Custom Object Name}}` based workflow.
In this guide, we will use an Examples Custom Object to demonstrate how you can use the Create Custom Object or Associated Record Action.
You can add any additional actions you desire in your workflow, but essentially, you're done! Now you can easily reset fields back to blank automatically. Making it easier to manage their data and improve the experience other businesses receive when closing deals with you.
### create-custom-object-or-associated-record-action
The Create Object or Associated Record action allows you to generate a new Object record or create an associated object record within the system when the trigger criteria are fulfilled. This functionality ensures that records are automatically added as needed, streamlining data management.
***
## How It Works
Begin by creating a new workflow in the Automation section of your account or accessing an existing Objects workflow from the list.
��****Note****: The title of the Custom Object workflow option will vary depending on the Custom Objects you have configured in the Settings > Objects section and will take the format of `{{Custom Object Name}}` based workflow.
In this guide, we will use an Examples Custom Object to demonstrate how you can use the Create Custom Object or Associated Record Action.
 ### Add New Action
Rename the workflow as needed and add a trigger if applicable. Then, navigate to the Workflow Actions list and select the Create `{{Object}}` or Associated Record option to initiate the action setup process.
### Add New Action
Rename the workflow as needed and add a trigger if applicable. Then, navigate to the Workflow Actions list and select the Create `{{Object}}` or Associated Record option to initiate the action setup process.
 ### Action Name
Update the Workflow Action Name if necessary to give a precise overview of the function of the action.
### Action Name
Update the Workflow Action Name if necessary to give a precise overview of the function of the action.
 ### Object Record
This field will display records created in the Settings > Objects section of your account. Select the Object or Associated Record from the dropdown.
### Object Record
This field will display records created in the Settings > Objects section of your account. Select the Object or Associated Record from the dropdown.
 ### Owner
New objects can be assigned to a team member by selecting the person from the dropdown.
### Owner
New objects can be assigned to a team member by selecting the person from the dropdown.
 ### Followers
If another team member needs to keep tabs on the object, you may add them here.
### Followers
If another team member needs to keep tabs on the object, you may add them here.
 ### Primary Display Field
Input the required value in the primary object field. For greater flexibility, you can also use custom object fields or custom values to tailor the entry to your specific needs.
### Primary Display Field
Input the required value in the primary object field. For greater flexibility, you can also use custom object fields or custom values to tailor the entry to your specific needs.
 ### Fields
Add fields by selecting them from the dropdown menu. This enables you to include additional details in the object record, ensuring the record accurately reflects the required information.
### Fields
Add fields by selecting them from the dropdown menu. This enables you to include additional details in the object record, ensuring the record accurately reflects the required information.
 ### Save
Save the action to include it in your workflow.
### Save
Save the action to include it in your workflow.
 Once all changes are complete, publish and save the workflow to activate it and ensure it functions as intended.
### update-custom-object-or-associated-record-action
The Update Custom Object or Associated Record action allows you to modify an existing Object or associated object record within the system when the trigger criteria are fulfilled. This functionality ensures that records are automatically modified as needed to maintain accurate and up-to-date information.
***
## How It Works
Begin by creating a new workflow in the Automation section of your account or accessing an existing Objects workflow from the list.
��****Note****: The title of the Custom Object workflow option will vary depending on the Custom Objects you have configured in the Settings > Objects section and will take the format of `{{Custom Object Name}}` based workflow.
In this guide, we will use an Examples Custom Object to demonstrate how you can use the Update Custom Object or Associated Record Action.
Once all changes are complete, publish and save the workflow to activate it and ensure it functions as intended.
### update-custom-object-or-associated-record-action
The Update Custom Object or Associated Record action allows you to modify an existing Object or associated object record within the system when the trigger criteria are fulfilled. This functionality ensures that records are automatically modified as needed to maintain accurate and up-to-date information.
***
## How It Works
Begin by creating a new workflow in the Automation section of your account or accessing an existing Objects workflow from the list.
��****Note****: The title of the Custom Object workflow option will vary depending on the Custom Objects you have configured in the Settings > Objects section and will take the format of `{{Custom Object Name}}` based workflow.
In this guide, we will use an Examples Custom Object to demonstrate how you can use the Update Custom Object or Associated Record Action.
 ### Add New Action
Rename the workflow as needed and add a trigger if applicable. Then, click the option to add an action and select the Update `{{Object}}` or Associated Record option to initiate the action setup process.
### Add New Action
Rename the workflow as needed and add a trigger if applicable. Then, click the option to add an action and select the Update `{{Object}}` or Associated Record option to initiate the action setup process.
 ### Action Name
Update the Workflow Action Name if necessary to give a precise overview of the function of the action.
### Action Name
Update the Workflow Action Name if necessary to give a precise overview of the function of the action.
 ### Object to Update
This field displays records created in the Settings > Objects section of your account. Select the Object or Associated Record you wish to update from the dropdown.
### Object to Update
This field displays records created in the Settings > Objects section of your account. Select the Object or Associated Record you wish to update from the dropdown.
 ### Owner
Choose the object owner from this dropdown.
### Owner
Choose the object owner from this dropdown.
 ### Followers
To assign a follower, click this field to see your team members in a list.
### Followers
To assign a follower, click this field to see your team members in a list.
 ### Fields
Once you have chosen the object owner and follower, click + Add Field to choose the fields that should be changed. This enables you to use custom objects and custom values to update details in the object record.
### Fields
Once you have chosen the object owner and follower, click + Add Field to choose the fields that should be changed. This enables you to use custom objects and custom values to update details in the object record.
 ### Save
Save the action to include it in your workflow.
### Save
Save the action to include it in your workflow.
 Once all changes are complete, publish and save the workflow to activate it and ensure it functions as intended.
### clear-fields-of-custom-object-or-associated-record-action
The Clear Fields of Object or Associated Record action enables you to remove specific field values from either a company's record or the contact(s) associated with that company within a workflow. This functionality ensures that records are automatically updated, maintaining data accuracy and ensuring only relevant information is retained.
***
## How It Works
Begin by creating a new workflow in the Automation section of your account or accessing an existing Object-based workflow from the list.
��****Note****: The title of the Custom Object workflow option will vary depending on the Custom Objects you configured in the Settings > Objects section and will take the format of `{{Custom Object Name}}` based workflow.
In this guide, we will use an Examples Custom Object to demonstrate how you can use the Clear Fields of Custom Object or Associated Record Action.
Once all changes are complete, publish and save the workflow to activate it and ensure it functions as intended.
### clear-fields-of-custom-object-or-associated-record-action
The Clear Fields of Object or Associated Record action enables you to remove specific field values from either a company's record or the contact(s) associated with that company within a workflow. This functionality ensures that records are automatically updated, maintaining data accuracy and ensuring only relevant information is retained.
***
## How It Works
Begin by creating a new workflow in the Automation section of your account or accessing an existing Object-based workflow from the list.
��****Note****: The title of the Custom Object workflow option will vary depending on the Custom Objects you configured in the Settings > Objects section and will take the format of `{{Custom Object Name}}` based workflow.
In this guide, we will use an Examples Custom Object to demonstrate how you can use the Clear Fields of Custom Object or Associated Record Action.
 ### Add New Action
Rename the workflow as needed and add a trigger if applicable. Then, click the option to add an action and select the Clear Fields of `{{Object}}` or Associated Record option to initiate its setup process.
### Add New Action
Rename the workflow as needed and add a trigger if applicable. Then, click the option to add an action and select the Clear Fields of `{{Object}}` or Associated Record option to initiate its setup process.
 ### Action Name
Update the Workflow Action Name if necessary to give a precise overview of its function.
### Action Name
Update the Workflow Action Name if necessary to give a precise overview of its function.
 ### Object to Clear Fields
This field displays the records created in the Settings > Objects section of your account, allowing you to select the specific Object or Associated Record you wish to clear from the dropdown menu.
### Object to Clear Fields
This field displays the records created in the Settings > Objects section of your account, allowing you to select the specific Object or Associated Record you wish to clear from the dropdown menu.
 ### Clear Owner & Clear Followers
Choose whether the owner and follower should be cleared.
### Clear Owner & Clear Followers
Choose whether the owner and follower should be cleared.
 ### Fields
Click + Add Field to select the specific fields you wish to reset. To clear multiple fields, click + Add Field and repeat the selection process.
### Fields
Click + Add Field to select the specific fields you wish to reset. To clear multiple fields, click + Add Field and repeat the selection process.
 ### Save
Save the action to include it in your workflow.
Once all changes are complete, publish and save the workflow to activate it and ensure it functions as intended.
### create-an-associated-record-action
The "Create an Associated Record" action allows you to seamlessly create new custom object records and associate them with a specific contact. By streamlining data organization and linking relevant information, this action supports improved efficiency in workflow management.
��****Note****: Before using this feature, you will need to create an association for the object in the Object Settings in your account.
### Save
Save the action to include it in your workflow.
Once all changes are complete, publish and save the workflow to activate it and ensure it functions as intended.
### create-an-associated-record-action
The "Create an Associated Record" action allows you to seamlessly create new custom object records and associate them with a specific contact. By streamlining data organization and linking relevant information, this action supports improved efficiency in workflow management.
��****Note****: Before using this feature, you will need to create an association for the object in the Object Settings in your account.
 For detailed instructions, please refer to the “How to Set Up Contact-to-Contact Association” article.
***
## How It Works
Navigate to Automation > Workflows, and either create a new workflow from scratch or open an existing contact-based workflow.
��****Note****: This feature enhances the ability to manage and track related entities tied to contacts and thus will not appear in Object-based workflows.
For detailed instructions, please refer to the “How to Set Up Contact-to-Contact Association” article.
***
## How It Works
Navigate to Automation > Workflows, and either create a new workflow from scratch or open an existing contact-based workflow.
��****Note****: This feature enhances the ability to manage and track related entities tied to contacts and thus will not appear in Object-based workflows.
 Add the relevant workflow triggers and actions, then add the Create an Associated Record action to generate a new custom object.
 ### Action Name
Update the action name to accurately reflect its intended purpose.
### Action Name
Update the action name to accurately reflect its intended purpose.
 ### Object Record to Create
Choose the appropriate custom object from the dropdown menu.
### Object Record to Create
Choose the appropriate custom object from the dropdown menu.
 After selecting the object, choose the contact owner and follower from the dropdown.
 Next, specify the fields that should be populated. You can define multiple fields for the newly created object record by clicking the “+ Add Field” button.
 Define the appropriate association label to link the record. An association label is used to categorize the relationship between the contact and the custom object.
 Finally, save the action and activate the workflow to automate the process as required.
 By utilizing the "Create Associated Record for Contact" action, you can easily automate the creation of custom object records and establish clear connections between contacts and related data. This functionality simplifies the tracking and management of crucial business processes, contributing to more organized and efficient workflows.
### Practical Example
Consider a company that needs to track important dates. When an Opportunity is marked as "Won," the system should automatically create a custom object record for tracking these dates. When the workflow is triggered, it automatically creates the record and associates it with the contact, allowing seamless tracking of information.
### ✍️Important Notes
* The newly created object record is automatically linked to the contact, using the selected label for categorization.
* You can utilize custom values and merge fields to dynamically populate custom fields in the newly created object.
### update-an-associated-record-action
The Update an Associated Record action allows you to modify specific fields of a custom object associated with a contact. This ensures that key information remains accurate and up-to-date without manual intervention.
��****Note****: Before using this feature, you will need to create an association for the object in the Object Settings in your account.
By utilizing the "Create Associated Record for Contact" action, you can easily automate the creation of custom object records and establish clear connections between contacts and related data. This functionality simplifies the tracking and management of crucial business processes, contributing to more organized and efficient workflows.
### Practical Example
Consider a company that needs to track important dates. When an Opportunity is marked as "Won," the system should automatically create a custom object record for tracking these dates. When the workflow is triggered, it automatically creates the record and associates it with the contact, allowing seamless tracking of information.
### ✍️Important Notes
* The newly created object record is automatically linked to the contact, using the selected label for categorization.
* You can utilize custom values and merge fields to dynamically populate custom fields in the newly created object.
### update-an-associated-record-action
The Update an Associated Record action allows you to modify specific fields of a custom object associated with a contact. This ensures that key information remains accurate and up-to-date without manual intervention.
��****Note****: Before using this feature, you will need to create an association for the object in the Object Settings in your account.
 For detailed instructions, please refer to the “How to Set Up Contact-to-Contact Association” article.
***
## How It Works
Navigate to Automation > Workflows, and either create a new workflow from scratch or open an existing contact-based workflow.
��****Note****: This feature enhances the ability to manage and track related entities tied to contacts and thus will not appear in Object-based workflows.
For detailed instructions, please refer to the “How to Set Up Contact-to-Contact Association” article.
***
## How It Works
Navigate to Automation > Workflows, and either create a new workflow from scratch or open an existing contact-based workflow.
��****Note****: This feature enhances the ability to manage and track related entities tied to contacts and thus will not appear in Object-based workflows.
 Add the relevant workflow triggers and actions, then add the 'Update an Associated Record' action.
 ### Action Name
Update the action name to accurately reflect its intended purpose.
### Action Name
Update the action name to accurately reflect its intended purpose.
 ### Object to Update
Choose the appropriate custom object from the dropdown menu.
### Object to Update
Choose the appropriate custom object from the dropdown menu.
 Once the object is selected, specify the label that needs to be updated. You can update all associated records by selecting All Associated Objects from the dropdown menu.
 Next, choose the team members who should be the object owner and follower.
 To choose the field(s) to update, click the + Add Field button. Leverage custom values and custom fields to dynamically update the object.
 Finally, save the action and activate the workflow to automate the process as required.
 By utilizing the "Update Associated Record for Contact" action, you can easily manage custom object records. This functionality simplifies the tracking and management of crucial business processes, contributing to more organized and efficient workflows.
### clear-fields-of-an-associated-record-action
The Clear Fields of an Associated Record action allows for the reset of specific fields within a custom object associated with a contact. This feature is especially useful for clearing outdated information, resetting form entries, or handling special conditions within workflows, as it ensures that expired or obsolete data is removed without deleting the entire record.
��****Note****: Before using this feature, you will need to create an association for the object in the Object Settings in your account.
By utilizing the "Update Associated Record for Contact" action, you can easily manage custom object records. This functionality simplifies the tracking and management of crucial business processes, contributing to more organized and efficient workflows.
### clear-fields-of-an-associated-record-action
The Clear Fields of an Associated Record action allows for the reset of specific fields within a custom object associated with a contact. This feature is especially useful for clearing outdated information, resetting form entries, or handling special conditions within workflows, as it ensures that expired or obsolete data is removed without deleting the entire record.
��****Note****: Before using this feature, you will need to create an association for the object in the Object Settings in your account.
 For detailed instructions, please refer to the “How to Set Up Contact-to-Contact Association” article.
***
## How It Works
Navigate to Automation > Workflows, and either create a new workflow from scratch or open an existing contact-based workflow.
��****Note****: This feature enhances the ability to manage and track related entities tied to contacts and thus will not appear in Object-based workflows.
For detailed instructions, please refer to the “How to Set Up Contact-to-Contact Association” article.
***
## How It Works
Navigate to Automation > Workflows, and either create a new workflow from scratch or open an existing contact-based workflow.
��****Note****: This feature enhances the ability to manage and track related entities tied to contacts and thus will not appear in Object-based workflows.
 Add the relevant workflow triggers and actions, then add the Clear Fields of an Associated Record action.
 ### Action Name
Update the action name to accurately reflect its intended purpose.
### Action Name
Update the action name to accurately reflect its intended purpose.
 ### Object to Clear Fields
Choose the appropriate custom object from the dropdown menu.
### Object to Clear Fields
Choose the appropriate custom object from the dropdown menu.
 ### Association Label
Once the object is selected, specify the label that should be cleared. Additionally, you have the option to clear all associated records by selecting All Associated Objects from the dropdown menu.
### Association Label
Once the object is selected, specify the label that should be cleared. Additionally, you have the option to clear all associated records by selecting All Associated Objects from the dropdown menu.
 ### Clear Owner & Followers
The object owner and follower fields can also be cleared by choosing “Yes” from the dropdown.
### Clear Owner & Followers
The object owner and follower fields can also be cleared by choosing “Yes” from the dropdown.
 To clear multiple fields, click the + Add Field button.
 Finally, save the action and activate the workflow to automate the process as required.
 By utilizing the "Clear Fields of an Associated Record for Contact" action, you can easily manage custom object records. This functionality simplifies the tracking and management of crucial business processes, contributing to more organized and efficient workflows.
��****Note****: The action does not delete the record itself; it only clears the data within the selected fields.
### add-associated-record-to-workflow-action
Custom object relationships help you keep track of connections between contacts, companies, and objects that represent opportunities and income to your business. However, manually updating and monitoring their information is unsustainable for any business. Let's learn how to use the “Add Associated Record to Workflow” action to automate management and communication with both ends of the connection.
***
## Adding Your Action
Start by navigating to the Workflows tab inside the Automation section and creating or editing a Contact-based workflow.
By utilizing the "Clear Fields of an Associated Record for Contact" action, you can easily manage custom object records. This functionality simplifies the tracking and management of crucial business processes, contributing to more organized and efficient workflows.
��****Note****: The action does not delete the record itself; it only clears the data within the selected fields.
### add-associated-record-to-workflow-action
Custom object relationships help you keep track of connections between contacts, companies, and objects that represent opportunities and income to your business. However, manually updating and monitoring their information is unsustainable for any business. Let's learn how to use the “Add Associated Record to Workflow” action to automate management and communication with both ends of the connection.
***
## Adding Your Action
Start by navigating to the Workflows tab inside the Automation section and creating or editing a Contact-based workflow.
 Click the plus sign icon to add an action and select the “Add Associated Record to Workflow” action from the Custom Objects menu.
 Select the object type you wish to include.
 ### Company Objects
If you select Company as your object, select the Company-based workflow to include it in.
### Company Objects
If you select Company as your object, select the Company-based workflow to include it in.
 ### Contact and Custom Object Fields
If you select Contact or Custom Object as your object, select the association label you want to assign to the object.
### Contact and Custom Object Fields
If you select Contact or Custom Object as your object, select the association label you want to assign to the object.
 Then select the workflow you wish to include the object in.
 To finalize, click Save Action to set your action.
 Add any other actions you see fit to your workflow, and there you have it! Now you can easily create and connect records to represent the relationships between your objects and contacts. This will also allow you to message, update, and automate your processes with other companies or associated contacts, keeping everyone taken care of.
### remove-associated-record-from-workflow-action
The Remove Associated Records from Workflow action allows users to automatically unenroll related records when conditions change. Available in \*\*\*\*Contact-based, Company-based, and Custom Object-based \*\*\*\*workflows, this action helps maintain clean automation processes by removing records associated with the trigger record—based on a selected object and association label—from another workflow.
\*\*\*\*📌Note: \*\*\*\*This action differs from the standard ****Remove from Workflow**** action, which only removes the current record (e.g., a contact) from a workflow. ****Remove Associated Records from Workflow**** instead allows you to target and unenroll associated records, such as Contacts, Companies, or Custom Objects, ensuring seamless automation management across related entities.
***
## How It Works
Start by opening a contact-based, company-based, or custom object-based workflow, then click the plus sign to add the action.
Add any other actions you see fit to your workflow, and there you have it! Now you can easily create and connect records to represent the relationships between your objects and contacts. This will also allow you to message, update, and automate your processes with other companies or associated contacts, keeping everyone taken care of.
### remove-associated-record-from-workflow-action
The Remove Associated Records from Workflow action allows users to automatically unenroll related records when conditions change. Available in \*\*\*\*Contact-based, Company-based, and Custom Object-based \*\*\*\*workflows, this action helps maintain clean automation processes by removing records associated with the trigger record—based on a selected object and association label—from another workflow.
\*\*\*\*📌Note: \*\*\*\*This action differs from the standard ****Remove from Workflow**** action, which only removes the current record (e.g., a contact) from a workflow. ****Remove Associated Records from Workflow**** instead allows you to target and unenroll associated records, such as Contacts, Companies, or Custom Objects, ensuring seamless automation management across related entities.
***
## How It Works
Start by opening a contact-based, company-based, or custom object-based workflow, then click the plus sign to add the action.
 If necessary, update the action name so other users can understand the purpose of the action at a glance.
 ### Select an Object
Choose the type of associated records to remove.
### Select an Object
Choose the type of associated records to remove.
 ### Association Label
Next, select the associated records that should be removed.
��****Note****: This does not apply to Company–Contact associations.
### Association Label
Next, select the associated records that should be removed.
��****Note****: This does not apply to Company–Contact associations.
 ### Workflow
Select the target workflow the associated records will be removed from.
### Workflow
Select the target workflow the associated records will be removed from.
 Finally, save the action.
The Remove Associated Records from Workflow action simplifies automation maintenance by ensuring that only relevant records remain active in workflows. By automatically unenrolling associated entities when conditions change, this feature helps you keep your workflows organized, efficient, and free of redundant or outdated enrollments.
### Edge Cases & Notes
* At least one matching association (by label) must exist; otherwise, no records will be removed.
* Removals occur immediately. To re-enroll records later, use the Add Associated Records to Workflow action or a separate automation.
### Examples
#### Example 1: Car ↔ Dealer (Custom Object Workflow)
****Scenario:**** When a Car record’s status changes to ****Sold****, remove its associated Dealers (label: ****Assigned Dealer****) from the ****Dealer Notification Workflow**** so they no longer receive updates.
* ****Object:**** Dealer
* ****Association Label:**** Assigned Dealer
* ****Workflow:**** Dealer Notification Workflow
#### Example 2: Contact ↔ Contact (Parent–Child Relationship)
****Scenario:**** When a Student Contact graduates, remove all Parent Contacts (label: ****Parent-Child****) from the ****Semester Start Notification**** workflow.
* ****Object:**** Contact (Parent)
* ****Association Label:**** Parent-Child
* ****Workflow:**** Semester Start Notification
#### Example 3: Company ↔ Contact (Company Workflow)
****Scenario:**** When a Company record’s status changes to ****Inactive****, remove all associated Contacts from the ****Active Clients Communication**** workflow.
* ****Object:**** Contact
* ****Workflow:**** Active Clients Communication Workflow
### find-object-record-company-action
The Find Object Record action allows workflows to search your account for a specific custom object record using values passed from an Inbound Webhook trigger. By mapping fields from the webhook payload to corresponding object fields, this action dynamically locates the matching record so you can perform the necessary actions on it.
��****Note****: This action is also available in Company-based workflows as ****Find Company****, enabling users to locate company records using webhook data.
If the workflow begins with the same object as its trigger (e.g., “Car created” or “Company created”), this action is skipped automatically to prevent unnecessary lookups.
***
## How It Works
Navigate to the desired company or object-based workflow in your account. From there, add an Inbound Webhook trigger as the action reads its payload (body and headers) to map incoming values.
Finally, save the action.
The Remove Associated Records from Workflow action simplifies automation maintenance by ensuring that only relevant records remain active in workflows. By automatically unenrolling associated entities when conditions change, this feature helps you keep your workflows organized, efficient, and free of redundant or outdated enrollments.
### Edge Cases & Notes
* At least one matching association (by label) must exist; otherwise, no records will be removed.
* Removals occur immediately. To re-enroll records later, use the Add Associated Records to Workflow action or a separate automation.
### Examples
#### Example 1: Car ↔ Dealer (Custom Object Workflow)
****Scenario:**** When a Car record’s status changes to ****Sold****, remove its associated Dealers (label: ****Assigned Dealer****) from the ****Dealer Notification Workflow**** so they no longer receive updates.
* ****Object:**** Dealer
* ****Association Label:**** Assigned Dealer
* ****Workflow:**** Dealer Notification Workflow
#### Example 2: Contact ↔ Contact (Parent–Child Relationship)
****Scenario:**** When a Student Contact graduates, remove all Parent Contacts (label: ****Parent-Child****) from the ****Semester Start Notification**** workflow.
* ****Object:**** Contact (Parent)
* ****Association Label:**** Parent-Child
* ****Workflow:**** Semester Start Notification
#### Example 3: Company ↔ Contact (Company Workflow)
****Scenario:**** When a Company record’s status changes to ****Inactive****, remove all associated Contacts from the ****Active Clients Communication**** workflow.
* ****Object:**** Contact
* ****Workflow:**** Active Clients Communication Workflow
### find-object-record-company-action
The Find Object Record action allows workflows to search your account for a specific custom object record using values passed from an Inbound Webhook trigger. By mapping fields from the webhook payload to corresponding object fields, this action dynamically locates the matching record so you can perform the necessary actions on it.
��****Note****: This action is also available in Company-based workflows as ****Find Company****, enabling users to locate company records using webhook data.
If the workflow begins with the same object as its trigger (e.g., “Car created” or “Company created”), this action is skipped automatically to prevent unnecessary lookups.
***
## How It Works
Navigate to the desired company or object-based workflow in your account. From there, add an Inbound Webhook trigger as the action reads its payload (body and headers) to map incoming values.
 Next, add the Find Object Record or Find Company action and update the name as desired.
 ### Filter On
Choose one of the following rules to resolve duplicates: Earliest Created Record or Latest Created Record.
### Filter On
Choose one of the following rules to resolve duplicates: Earliest Created Record or Latest Created Record.
 ### Filters
Add one or more filters to define how records are matched.
### Filters
Add one or more filters to define how records are matched.
 ��****Tips****:
* Prefer unique identifiers (Record ID, External ID, Domain) for accurate matching.
* Add extra filters (status, location, or type) to reduce ambiguity.
The Find Object Record action bridges incoming webhook data with CRM automation, ensuring your workflows respond intelligently to real-time events. By dynamically locating or creating records based on webhook payloads, it enhances data integrity, minimizes duplication, and supports cleaner, more efficient workflow automation.
### Best Practices
* Ensure webhook payloads contain clean, structured values (string, number, boolean).
* Normalize data (e.g., casing, whitespace) in the source system for consistent matching.
* Always test the action with sample payloads in a staging environment before deployment.
### Examples
#### Example 1: Find a Pet by Name (Webhook → Lookup)
****Goal:**** Locate a Pet record using the incoming `petname` value.
****Setup****
* ****Filter On:**** Earliest Created Record
* \*\*\*\*Filters: \*\*\*\*Pet Name = `{{inboundWebhookRequest.body.petname}}`
* \*\*\*\*Flow: \*\*\*\*Webhook triggers with `{ "petname": "snowy" }`. Action finds the Pet where Pet Name = “snowy”.
* ****Record Found:**** Update Pet status and notify the owner.
* ****Record Not Found:**** Create a new Pet record named “snowy” and tag it for review.
#### Example 2: Find a Subscription by External Reference
****Goal:**** Identify a Subscription record using the webhook’s `subscription_ref` value.
****Setup****
* ****Filter On:**** Latest Created Record
* \*\*\*\*Filters: \*\*\*\*External Reference = `{{inboundWebhookRequest.body.subscription_ref}}.`Status = Active (optional safety filter)
* \*\*\*\*Flow: \*\*\*\*Webhook arrives with `subscription_ref`. Action finds the latest active Subscription with that reference.
* ****Record Found:**** Update plan fields and enqueue renewal emails.
* ****Record Not Found:**** Create a placeholder Subscription and alert Finance.
#### Example 3: Find a Company by Domain
****Goal:**** Use a lead-generation webhook to match a **Company** by its domain.
****Setup****
* ****Filter On:**** Latest Created Record
* \*\*\*\*Filters: \*\*\*\*Domain = `{{inboundWebhookRequest.body.companyDomain}}`
* \*\*\*\*Flow: \*\*\*\*Webhook triggers with `{ "companyDomain": "acme.com" }`. Action finds the Company record where Domain = “acme.com”.
* ****Record Found:**** Enroll the Company in the **Onboarding** workflow.
* ****Record Not Found:**** Create a new Company record with domain “acme.com”.
### send-documents-contracts-action
Utilize the Send Documents & Contracts action in Workflows to generate contracts for your contacts. With this action, you can send contracts immediately or save the contract as a draft for review. By doing so, only the designated individual will have access to review and finalize the documents before they are sent, ensuring accuracy, compliance, and a streamlined approval process. This feature simplifies contract management, reduces errors, and enhances security by limiting access to sensitive documents. Let's dive in!
***
## How It Works
Navigate to the Automation > Workflows section in your account, then create a new workflow or select an existing one from the list.
Once the builder loads, add the relevant triggers and preceding actions. Next, click the plus icon and add the Send Documents & Contracts action to your workflow.
��****Tips****:
* Prefer unique identifiers (Record ID, External ID, Domain) for accurate matching.
* Add extra filters (status, location, or type) to reduce ambiguity.
The Find Object Record action bridges incoming webhook data with CRM automation, ensuring your workflows respond intelligently to real-time events. By dynamically locating or creating records based on webhook payloads, it enhances data integrity, minimizes duplication, and supports cleaner, more efficient workflow automation.
### Best Practices
* Ensure webhook payloads contain clean, structured values (string, number, boolean).
* Normalize data (e.g., casing, whitespace) in the source system for consistent matching.
* Always test the action with sample payloads in a staging environment before deployment.
### Examples
#### Example 1: Find a Pet by Name (Webhook → Lookup)
****Goal:**** Locate a Pet record using the incoming `petname` value.
****Setup****
* ****Filter On:**** Earliest Created Record
* \*\*\*\*Filters: \*\*\*\*Pet Name = `{{inboundWebhookRequest.body.petname}}`
* \*\*\*\*Flow: \*\*\*\*Webhook triggers with `{ "petname": "snowy" }`. Action finds the Pet where Pet Name = “snowy”.
* ****Record Found:**** Update Pet status and notify the owner.
* ****Record Not Found:**** Create a new Pet record named “snowy” and tag it for review.
#### Example 2: Find a Subscription by External Reference
****Goal:**** Identify a Subscription record using the webhook’s `subscription_ref` value.
****Setup****
* ****Filter On:**** Latest Created Record
* \*\*\*\*Filters: \*\*\*\*External Reference = `{{inboundWebhookRequest.body.subscription_ref}}.`Status = Active (optional safety filter)
* \*\*\*\*Flow: \*\*\*\*Webhook arrives with `subscription_ref`. Action finds the latest active Subscription with that reference.
* ****Record Found:**** Update plan fields and enqueue renewal emails.
* ****Record Not Found:**** Create a placeholder Subscription and alert Finance.
#### Example 3: Find a Company by Domain
****Goal:**** Use a lead-generation webhook to match a **Company** by its domain.
****Setup****
* ****Filter On:**** Latest Created Record
* \*\*\*\*Filters: \*\*\*\*Domain = `{{inboundWebhookRequest.body.companyDomain}}`
* \*\*\*\*Flow: \*\*\*\*Webhook triggers with `{ "companyDomain": "acme.com" }`. Action finds the Company record where Domain = “acme.com”.
* ****Record Found:**** Enroll the Company in the **Onboarding** workflow.
* ****Record Not Found:**** Create a new Company record with domain “acme.com”.
### send-documents-contracts-action
Utilize the Send Documents & Contracts action in Workflows to generate contracts for your contacts. With this action, you can send contracts immediately or save the contract as a draft for review. By doing so, only the designated individual will have access to review and finalize the documents before they are sent, ensuring accuracy, compliance, and a streamlined approval process. This feature simplifies contract management, reduces errors, and enhances security by limiting access to sensitive documents. Let's dive in!
***
## How It Works
Navigate to the Automation > Workflows section in your account, then create a new workflow or select an existing one from the list.
Once the builder loads, add the relevant triggers and preceding actions. Next, click the plus icon and add the Send Documents & Contracts action to your workflow.
 ### Action Name
Update the Action Name to accurately reflect its function and purpose.
### Action Name
Update the Action Name to accurately reflect its function and purpose.
 ### From User
Next, select the user whose name and email address should be associated with the template.
### From User
Next, select the user whose name and email address should be associated with the template.
 ### Template
Select the template you wish to send. Please note that this field will only display templates that have been created in the Payments > Documents & Contracts Templates section of your account. Ensure that your template has been added to that section beforehand.
### Template
Select the template you wish to send. Please note that this field will only display templates that have been created in the Payments > Documents & Contracts Templates section of your account. Ensure that your template has been added to that section beforehand.
 If selecting a template with fillable fields assigned to the sender, select either “From User” if the signer should be the workflow sender, or "Template Owner" if the signer should be the user who last updated the template under “Assign Sender Fields To.”
 ### Sending Mode
Choose whether to send the document to the contact once the workflow step is activated or to save it as a draft for approval.
### Sending Mode
Choose whether to send the document to the contact once the workflow step is activated or to save it as a draft for approval.
 Choose the channel you want to use for sending. You can pick between email, SMS, or both.
 Finally, click save to retain your changes.
 Don't forget to publish and save the workflow to streamline the issuing of your documents & contracts!
### add-task
The Add Task workflow action in your CRM enables users to assign a task to themselves or another active user within the account. This workflow action allows you to automate task creation to remind users to complete important tasks, such as setting up follow-up sales calls or resolving a client's issue that requires manual assistance.
��****Note****: When the ‘Add Task’ step is executed, it will generate a standalone task if no contact is associated at runtime. If a contact is present, the task will be automatically linked to that contact as expected.
***
## Automating Task Creation
To use this feature, start by creating or editing a Workflow to access the builder. Start by adding the Add Task Action by clicking the plus sign icon.
Don't forget to publish and save the workflow to streamline the issuing of your documents & contracts!
### add-task
The Add Task workflow action in your CRM enables users to assign a task to themselves or another active user within the account. This workflow action allows you to automate task creation to remind users to complete important tasks, such as setting up follow-up sales calls or resolving a client's issue that requires manual assistance.
��****Note****: When the ‘Add Task’ step is executed, it will generate a standalone task if no contact is associated at runtime. If a contact is present, the task will be automatically linked to that contact as expected.
***
## Automating Task Creation
To use this feature, start by creating or editing a Workflow to access the builder. Start by adding the Add Task Action by clicking the plus sign icon.
 ### Title
Type the title of the task in the field.
### Title
Type the title of the task in the field.
 ### Description
Describe the task in this field provided. Make sure every necessary info that is needed is provided here to guide the users on the task.
### Description
Describe the task in this field provided. Make sure every necessary info that is needed is provided here to guide the users on the task.
 ### Assign To
Choose the user you want to assign this task to. It could be yourself or other team members.
### Assign To
Choose the user you want to assign this task to. It could be yourself or other team members.
 ### Due In
Select a due date for this task, unlike when creating a task in a contact card here you can select 0 to 5 days from the task creation instead of a specific date. This will help make sure their task is completed efficiently from its creation.
### Due In
Select a due date for this task, unlike when creating a task in a contact card here you can select 0 to 5 days from the task creation instead of a specific date. This will help make sure their task is completed efficiently from its creation.
 Once you've filled in all the needed fields, click Save Action to complete the process. You can continue creating your workflow as normal and publish it when satisfied.
That's all there is to it. Check out the other articles in this section to learn about other available workflow actions.
### send-review-request
Collecting feedback through reviews is essential for understanding customer satisfaction and enhancing the quality of your products or services. The process of sending review requests can be easily implemented through the system by using the Send Review Request Action in workflows. Follow the steps below to add this action to your workflow.
To initiate the process, navigate to the desired workflow in the Automation > Workflows section. Ensure that you have an appropriate trigger, then click on the "+" icon and select the Send Review Request option.
Once you've filled in all the needed fields, click Save Action to complete the process. You can continue creating your workflow as normal and publish it when satisfied.
That's all there is to it. Check out the other articles in this section to learn about other available workflow actions.
### send-review-request
Collecting feedback through reviews is essential for understanding customer satisfaction and enhancing the quality of your products or services. The process of sending review requests can be easily implemented through the system by using the Send Review Request Action in workflows. Follow the steps below to add this action to your workflow.
To initiate the process, navigate to the desired workflow in the Automation > Workflows section. Ensure that you have an appropriate trigger, then click on the "+" icon and select the Send Review Request option.
 ### Action Name
If required, you can update the name of the action to accurately reflect its intended purpose.
### Action Name
If required, you can update the name of the action to accurately reflect its intended purpose.
 ### Review Type
Reviews can be requested through three methods: Email, SMS, or WhatsApp. Choose the preferred method from the dropdown menu. For a more natural approach, you can use separate review request actions, each followed by a wait step, to send requests via multiple methods.
### Review Type
Reviews can be requested through three methods: Email, SMS, or WhatsApp. Choose the preferred method from the dropdown menu. For a more natural approach, you can use separate review request actions, each followed by a wait step, to send requests via multiple methods.
 ��****Note****: Ensure that the review request message is properly configured in the Reputation Settings section to tailor the message to your needs.
### Override Review Link
If you have multiple connected pages that can receive reviews, you can use the “Override Review Link” to request them for a specific one.
��****Note****: Ensure that the review request message is properly configured in the Reputation Settings section to tailor the message to your needs.
### Override Review Link
If you have multiple connected pages that can receive reviews, you can use the “Override Review Link” to request them for a specific one.
 Once you are satisfied with the action, click "Save Action" to add it to your workflow, then save the workflow to maintain your changes!
 By following these steps, you can easily gather essential reviews from your contacts, helping to enhance your business operations and customer satisfaction. Don't forget to configure your review request message in the Reputation Settings to maximize the effectiveness of your feedback requests.
### webhook
Webhooks can capture and export data, such as form submissions or customer interactions, to other software tools or databases. This automatic data transfer enables seamless integration and synchronization across different platforms, enhancing productivity and data management.
***
## Setting Up Webhooks
Within your account, navigate to the Automation or Workflow section and select an existing workflow from the list, or create a new one.
### Identify the Data to Export
Determine which events or actions in your CRM should trigger the webhook. Common triggers include form submissions, new contacts, or updates to existing records.
By following these steps, you can easily gather essential reviews from your contacts, helping to enhance your business operations and customer satisfaction. Don't forget to configure your review request message in the Reputation Settings to maximize the effectiveness of your feedback requests.
### webhook
Webhooks can capture and export data, such as form submissions or customer interactions, to other software tools or databases. This automatic data transfer enables seamless integration and synchronization across different platforms, enhancing productivity and data management.
***
## Setting Up Webhooks
Within your account, navigate to the Automation or Workflow section and select an existing workflow from the list, or create a new one.
### Identify the Data to Export
Determine which events or actions in your CRM should trigger the webhook. Common triggers include form submissions, new contacts, or updates to existing records.
 ### Add the Webhook Action
Click the option to add an action to the workflow, then select the Webhook action.
### Add the Webhook Action
Click the option to add an action to the workflow, then select the Webhook action.
 ### Action Name
Enter a descriptive name for the action to reflect its purpose.
### Action Name
Enter a descriptive name for the action to reflect its purpose.
 ### Method
Select either the POST or GET method depending on your needs. The GET method typically retrieves information, while the POST method usually sends information to another system to make a change.
### Method
Select either the POST or GET method depending on your needs. The GET method typically retrieves information, while the POST method usually sends information to another system to make a change.
 ### URL
Provide the webhook URL of the external application where the data should be sent or received.
### URL
Provide the webhook URL of the external application where the data should be sent or received.
 ### Custom Data
Specify the key-value pair for POST methods, for example- Key: Addr, Value: Address (selected from the value picker)
### Custom Data
Specify the key-value pair for POST methods, for example- Key: Addr, Value: Address (selected from the value picker)
 ### Query String Parameters
Define the data to be transmitted through the webhook in JSON format if you are using the GET method. Utilize merge fields to dynamically populate information such as contact details, opportunity status, or custom fields. For example: "first\_name": "`{{contact.first_name}}`", "last\_name": "`{{contact.last_name}}`", "email": "`{{contact.email}}`", "phone": "`{{contact.phone}}`", "status": “`{{contact.status}}`”.
### Query String Parameters
Define the data to be transmitted through the webhook in JSON format if you are using the GET method. Utilize merge fields to dynamically populate information such as contact details, opportunity status, or custom fields. For example: "first\_name": "`{{contact.first_name}}`", "last\_name": "`{{contact.last_name}}`", "email": "`{{contact.email}}`", "phone": "`{{contact.phone}}`", "status": “`{{contact.status}}`”.
 ### Headers
If the external system requires authentication or specific headers, you can include them here. For instance, you may need to add an API key or specify the content-type header, such as Authorization: Bearer ``; Content-Type: application/json.
### Headers
If the external system requires authentication or specific headers, you can include them here. For instance, you may need to add an API key or specify the content-type header, such as Authorization: Bearer ``; Content-Type: application/json.
 Save the action, then save and publish the workflow.
Perform a test by triggering the event in your CRM and verifying that the data is correctly received and processed by the third-party application. Adjust configurations as necessary to ensure accurate data transfer.
That's it! Now you can use webhooks for the seamless transfer and retrieval of data between an external system and your account.
### Practical Example: Exporting Form Submissions
Imagine you have an opt-in page where visitors can sign up for a free trial. You want to automate the creation of accounts for these new sign-ups in an external dashboard. Here's how you could set up a webhook for this scenario:
* ****Trigger Event****: Form submission on the opt-in page.
* ****Data to Export****: Contact information from the form (e.g., name, email).
* ****Receiving Application****: An external dashboard for account creation.
* ****Webhook Configuration****: Set up the webhook in your CRM to capture the form submission data and send it to the dashboard's webhook URL. Once the data reaches the dashboard, it triggers the creation of a new account for the user.
### Troubleshooting Tips
****Webhook Not Triggering****
* Ensure the trigger event is correctly defined and that the webhook URL is accurately entered in your CRM. Test with different scenarios to isolate the issue.
****Data Not Received****
* Check the receiving application for any errors in processing the webhook data. Verify that the data format sent by the CRM matches the expected format of the receiving application.
### Frequently Asked Questions
Most modern applications support webhooks, but it's essential to check the documentation of the specific software you're integrating with for compatibility and setup instructions.
### troubleshooting-webhooks-in-automation
When using webhooks to import affiliate sign-up information into your CRM, it’s essential to ensure that all necessary data fields are populated. However, incomplete data—such as missing first names, company names, or phone numbers—can disrupt workflows and hinder communication. Often, webhooks only capture the email address, leaving other critical fields empty. This can impact personalization and automation, as these processes rely on complete data.
To address this issue, you can modify your workflow to identify and correct missing information. Focus on the very first step in your workflow where the affiliate sign-up information is captured. This is crucial for ensuring the contact record is as complete as possible before proceeding through the rest of the workflow.
### Create or Update Contact Action
Ensure this action is in place to map the incoming webhook data (email address, business name, phone, full name) to the corresponding fields in the CRM.
Save the action, then save and publish the workflow.
Perform a test by triggering the event in your CRM and verifying that the data is correctly received and processed by the third-party application. Adjust configurations as necessary to ensure accurate data transfer.
That's it! Now you can use webhooks for the seamless transfer and retrieval of data between an external system and your account.
### Practical Example: Exporting Form Submissions
Imagine you have an opt-in page where visitors can sign up for a free trial. You want to automate the creation of accounts for these new sign-ups in an external dashboard. Here's how you could set up a webhook for this scenario:
* ****Trigger Event****: Form submission on the opt-in page.
* ****Data to Export****: Contact information from the form (e.g., name, email).
* ****Receiving Application****: An external dashboard for account creation.
* ****Webhook Configuration****: Set up the webhook in your CRM to capture the form submission data and send it to the dashboard's webhook URL. Once the data reaches the dashboard, it triggers the creation of a new account for the user.
### Troubleshooting Tips
****Webhook Not Triggering****
* Ensure the trigger event is correctly defined and that the webhook URL is accurately entered in your CRM. Test with different scenarios to isolate the issue.
****Data Not Received****
* Check the receiving application for any errors in processing the webhook data. Verify that the data format sent by the CRM matches the expected format of the receiving application.
### Frequently Asked Questions
Most modern applications support webhooks, but it's essential to check the documentation of the specific software you're integrating with for compatibility and setup instructions.
### troubleshooting-webhooks-in-automation
When using webhooks to import affiliate sign-up information into your CRM, it’s essential to ensure that all necessary data fields are populated. However, incomplete data—such as missing first names, company names, or phone numbers—can disrupt workflows and hinder communication. Often, webhooks only capture the email address, leaving other critical fields empty. This can impact personalization and automation, as these processes rely on complete data.
To address this issue, you can modify your workflow to identify and correct missing information. Focus on the very first step in your workflow where the affiliate sign-up information is captured. This is crucial for ensuring the contact record is as complete as possible before proceeding through the rest of the workflow.
### Create or Update Contact Action
Ensure this action is in place to map the incoming webhook data (email address, business name, phone, full name) to the corresponding fields in the CRM.
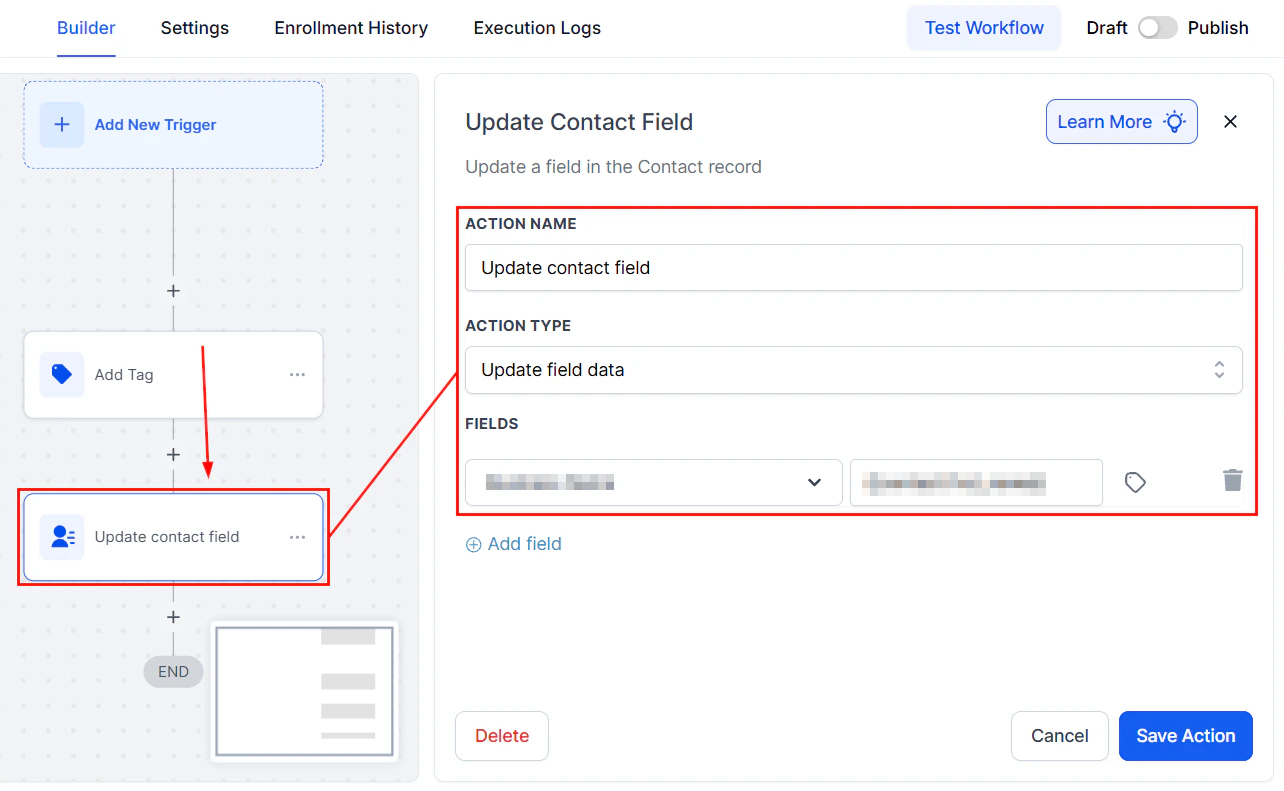 ### Add an If/Else Condition
Introduce a condition to check if essential fields (e.g., first name) are empty:
* ****If the field is not empty:**** The workflow continues as expected.
* ****If the field is empty:**** Trigger a notification for manual intervention.
### Add an If/Else Condition
Introduce a condition to check if essential fields (e.g., first name) are empty:
* ****If the field is not empty:**** The workflow continues as expected.
* ****If the field is empty:**** Trigger a notification for manual intervention.
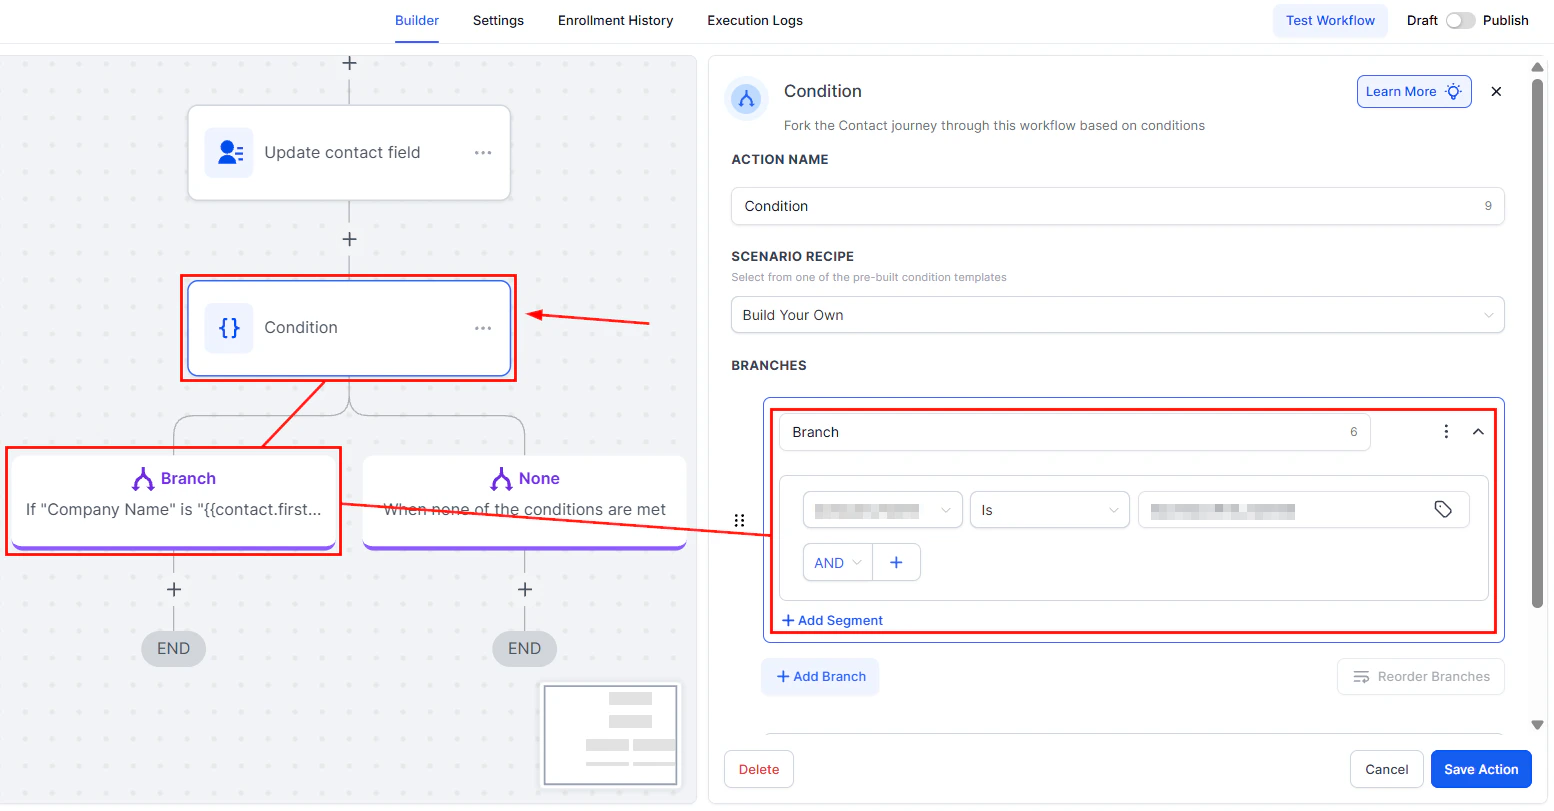 ### Notification for Missing Information
Configure an internal notification (e.g., SMS or email) to alert you or your team about the missing information, prompting a manual update.
### Notification for Missing Information
Configure an internal notification (e.g., SMS or email) to alert you or your team about the missing information, prompting a manual update.
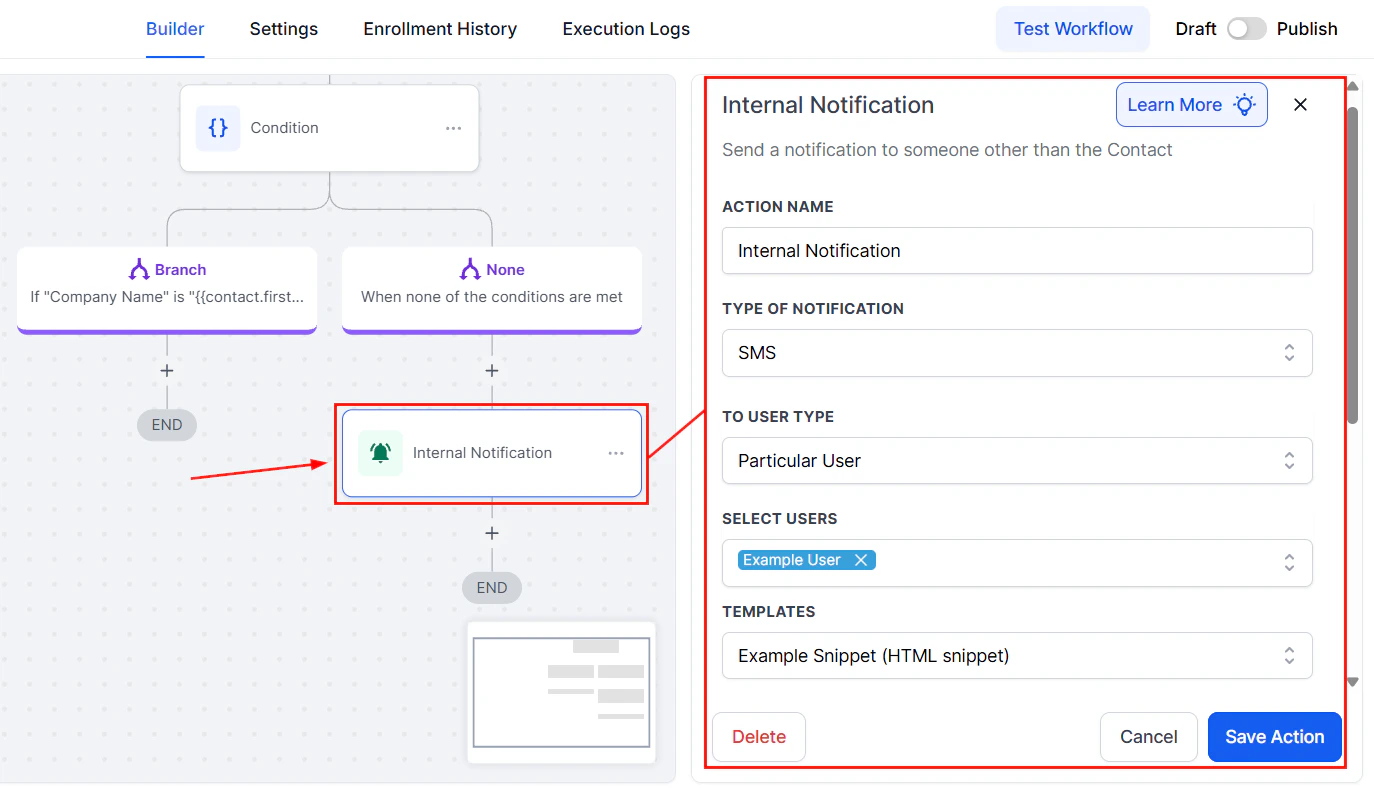 ### Manual Update Process
Access the affiliate platform (e.g., First Promoter) to find the missing information based on the email address provided. Manually update the contact record in the CRM with the retrieved information.
### Pause and Wait
Set a conditional wait step in the workflow, giving you or your team time to update the missing information manually. Configure this step to allow a few days for the manual update to be completed.
### Manual Update Process
Access the affiliate platform (e.g., First Promoter) to find the missing information based on the email address provided. Manually update the contact record in the CRM with the retrieved information.
### Pause and Wait
Set a conditional wait step in the workflow, giving you or your team time to update the missing information manually. Configure this step to allow a few days for the manual update to be completed.
 ### Resume Workflow
Once the missing information is updated, manually move the contact to the next step in the workflow, ensuring they proceed through the remaining actions as intended.
Incomplete data from webhooks can hinder the effectiveness of your workflows, but with the right adjustments, these issues can be managed efficiently. By implementing conditional checks, setting up notifications, and proactively monitoring your data, you can ensure smooth operations. While manual intervention remains the most reliable solution for now, collaborating with your affiliate platform can help minimize such issues in the future.
### Troubleshooting Tips
* ****Regularly Check for Incomplete Data****: Make it a habit to periodically review incoming webhook data for completeness to proactively address any issues.
* ****Collaborate with Your Affiliate Platform****: If missing data becomes a frequent issue, reach out to your affiliate platform's support team for assistance in troubleshooting the webhook configuration.
### FAQs
Automating the update of missing information is challenging without access to a direct source for the missing data. The manual update process is currently the most reliable method.
If the missing information is not available on the affiliate platform, consider reaching out directly to the affiliate for the necessary details.
Yes, this general approach of adding conditional checks and manual intervention steps can be adapted to address various webhook-related data issues.
### how-to-copy-actions-between-workflows
Building a workflow can be a long and repetitive process, so when you have something that works, it’s only natural that you want to replicate it easily. So, let's check how to copy actions between workflows.
***
## Copying The Action
Navigate to the Workflow tab inside the Automation section and edit one of your workflows.
### Resume Workflow
Once the missing information is updated, manually move the contact to the next step in the workflow, ensuring they proceed through the remaining actions as intended.
Incomplete data from webhooks can hinder the effectiveness of your workflows, but with the right adjustments, these issues can be managed efficiently. By implementing conditional checks, setting up notifications, and proactively monitoring your data, you can ensure smooth operations. While manual intervention remains the most reliable solution for now, collaborating with your affiliate platform can help minimize such issues in the future.
### Troubleshooting Tips
* ****Regularly Check for Incomplete Data****: Make it a habit to periodically review incoming webhook data for completeness to proactively address any issues.
* ****Collaborate with Your Affiliate Platform****: If missing data becomes a frequent issue, reach out to your affiliate platform's support team for assistance in troubleshooting the webhook configuration.
### FAQs
Automating the update of missing information is challenging without access to a direct source for the missing data. The manual update process is currently the most reliable method.
If the missing information is not available on the affiliate platform, consider reaching out directly to the affiliate for the necessary details.
Yes, this general approach of adding conditional checks and manual intervention steps can be adapted to address various webhook-related data issues.
### how-to-copy-actions-between-workflows
Building a workflow can be a long and repetitive process, so when you have something that works, it’s only natural that you want to replicate it easily. So, let's check how to copy actions between workflows.
***
## Copying The Action
Navigate to the Workflow tab inside the Automation section and edit one of your workflows.
 Click the three dots next to the first action you want to copy.
 Select "Copy Action" to grab just the action or "Copy All Actions From Here" if you want to duplicate multiple.
 ***
## Pasting The Action
Head to your target workflow. You can do it on a different tab or the same tab you're already using to copy the actions.
***
## Pasting The Action
Head to your target workflow. You can do it on a different tab or the same tab you're already using to copy the actions.
 Look for the plus sign icon upon hovering, and you’ll see the quick paste button. Click it to add your actions.
 Validate Pasted Actions before saving the workflow, and you're done. You can easily recreate workflow actions and their customization. No more rebuilding, just copy-and-paste magic!
***
## FAQs
There is no hard limit on the number of actions in a workflow. However, very large workflows (hundreds of steps) may be harder to maintain and debug. Use folders, If/Else branches, and the Advanced Builder to keep complex automations organised and readable.
Yes. In the workflow builder, hover over any action node and click the Pause icon to disable it. Disabled actions are skipped during execution but remain in the workflow so you can re-enable them at any time.
The Send Email action sends a one-to-one transactional email to the enrolled contact using the connected email address. The Send Email Campaign action sends a marketing campaign email that tracks opens, clicks, and unsubscribes, and is subject to campaign sending limits.
Yes. Click the custom values picker (the curly braces icon) inside any text field to insert dynamic values like the contact's first name, company, appointment time, or any custom field value. The field is replaced with the actual value when the action executes.
Check the Execution Logs tab for the workflow. Common reasons include: the trigger filter didn't match the contact, a preceding If/Else branch routed the contact away from that step, or the action had a configuration error (shown with a red error icon in the builder).
Yes. Open the source workflow, click the three-dot menu on the action, and select Copy Action (or Copy All Actions From Here). Then open the destination workflow and use the quick paste button that appears when you hover over a step position.
Validate Pasted Actions before saving the workflow, and you're done. You can easily recreate workflow actions and their customization. No more rebuilding, just copy-and-paste magic!
***
## FAQs
There is no hard limit on the number of actions in a workflow. However, very large workflows (hundreds of steps) may be harder to maintain and debug. Use folders, If/Else branches, and the Advanced Builder to keep complex automations organised and readable.
Yes. In the workflow builder, hover over any action node and click the Pause icon to disable it. Disabled actions are skipped during execution but remain in the workflow so you can re-enable them at any time.
The Send Email action sends a one-to-one transactional email to the enrolled contact using the connected email address. The Send Email Campaign action sends a marketing campaign email that tracks opens, clicks, and unsubscribes, and is subject to campaign sending limits.
Yes. Click the custom values picker (the curly braces icon) inside any text field to insert dynamic values like the contact's first name, company, appointment time, or any custom field value. The field is replaced with the actual value when the action executes.
Check the Execution Logs tab for the workflow. Common reasons include: the trigger filter didn't match the contact, a preceding If/Else branch routed the contact away from that step, or the action had a configuration error (shown with a red error icon in the builder).
Yes. Open the source workflow, click the three-dot menu on the action, and select Copy Action (or Copy All Actions From Here). Then open the destination workflow and use the quick paste button that appears when you hover over a step position.