> ## Documentation Index
> Fetch the complete documentation index at: https://help.hoopai.com/llms.txt
> Use this file to discover all available pages before exploring further.

# Order forms

> Add a checkout experience to any funnel page — sell products, collect payment, and trigger post-purchase automation using order forms in the HoopAI Platform.

export const CourseTracker = ({courseId, lessonId, videoId}) => {
  const [progress, setProgress] = useState({});
  const [expanded, setExpanded] = useState(false);
  useEffect(() => {
    setProgress(loadProgress());
    document.body.setAttribute("data-academy", "true");
    return () => document.body.removeAttribute("data-academy");
  }, []);
  const course = COURSES[courseId];
  if (!course) return null;
  const lessons = course.lessons;
  const currentIndex = lessons.findIndex(l => l.id === lessonId);
  const completedCount = lessons.filter(l => !!progress[courseId + "/" + l.id]).length;
  const percent = lessons.length > 0 ? Math.round(completedCount / lessons.length * 100) : 0;
  const isCurrentDone = !!progress[courseId + "/" + lessonId];
  const prev = currentIndex > 0 ? lessons[currentIndex - 1] : null;
  const next = currentIndex < lessons.length - 1 ? lessons[currentIndex + 1] : null;
  const totalDuration = formatTotalDuration(lessons);
  const handleToggle = () => {
    const key = courseId + "/" + lessonId;
    const updated = {
      ...progress
    };
    if (updated[key]) {
      delete updated[key];
    } else {
      updated[key] = Date.now();
    }
    setProgress(updated);
    persistProgress(updated);
  };
  const lessonPath = lesson => "/academy/" + course.dir + "/" + lesson.id;
  const videoEmbed = videoId ? <div style={{
    position: "relative",
    width: "100%",
    paddingBottom: "56.25%",
    borderRadius: "var(--ds-radius-lg)",
    overflow: "hidden",
    marginBottom: "24px",
    background: "#000"
  }}>
      <iframe src={"https://www.youtube-nocookie.com/embed/" + videoId + "?rel=0"} title="Lesson video" allow="accelerometer; autoplay; clipboard-write; encrypted-media; gyroscope; picture-in-picture" allowFullScreen style={{
    position: "absolute",
    top: 0,
    left: 0,
    width: "100%",
    height: "100%",
    border: "none"
  }} />
    </div> : null;
  const lessonList = lessons.map(lesson => {
    const isActive = lesson.id === lessonId;
    const isDone = !!progress[courseId + "/" + lesson.id];
    const itemStyle = {
      display: "flex",
      alignItems: "center",
      gap: "8px",
      padding: "10px 16px",
      borderTop: "1px solid var(--academy-border-subtle, #f3f4f6)",
      background: isActive ? "var(--academy-active-bg, #f9fafb)" : "transparent",
      textDecoration: "none",
      cursor: isActive ? "default" : "pointer",
      color: "inherit",
      transition: "background 0.15s"
    };
    const titleStyle = {
      flex: 1,
      fontSize: "13px",
      fontWeight: isActive ? 600 : 400,
      color: isActive ? "var(--academy-text, #111827)" : "var(--academy-text-secondary, #6b7280)",
      overflow: "hidden",
      textOverflow: "ellipsis",
      whiteSpace: "nowrap",
      lineHeight: "1.4"
    };
    const durationStyle = {
      fontSize: "12px",
      color: "var(--academy-text-muted, #9ca3af)",
      whiteSpace: "nowrap"
    };
    const inner = <>
        {isDone ? <CheckCircle /> : <VideoIcon />}
        <span style={titleStyle}>{lesson.title}</span>
        <span style={durationStyle}>{lesson.duration}</span>
      </>;
    if (isActive) {
      return <div key={lesson.id} style={itemStyle}>
          {inner}
        </div>;
    }
    return <a key={lesson.id} href={lessonPath(lesson)} style={itemStyle}>
        {inner}
      </a>;
  });
  return <div className="not-prose" id="academy-course-tracker">
      {videoEmbed}
      <div className="academy-tracker" style={{
    fontFamily: "Inter, -apple-system, BlinkMacSystemFont, sans-serif",
    borderRadius: "var(--ds-radius-lg)",
    border: "1px solid var(--academy-border, #e5e7eb)",
    background: "var(--academy-bg, #ffffff)",
    overflow: "hidden",
    marginBottom: "24px"
  }}>
        {}
        <div style={{
    padding: "16px 16px 0"
  }}>
          <h3 style={{
    margin: 0,
    fontSize: "16px",
    fontWeight: 600,
    lineHeight: "1.4",
    color: "var(--academy-text, #111827)"
  }}>
            {course.title}
          </h3>
          <div style={{
    display: "flex",
    gap: "12px",
    marginTop: "8px"
  }}>
            <span style={{
    display: "flex",
    alignItems: "center",
    gap: "5px",
    fontSize: "12px",
    color: "var(--academy-text-secondary, #6b7280)",
    padding: "3px 8px 3px 6px",
    borderRadius: "var(--ds-radius-sm)",
    border: "1px solid var(--academy-border, #e5e7eb)"
  }}>
              <BookIcon /> {lessons.length} lessons
            </span>
            <span style={{
    display: "flex",
    alignItems: "center",
    gap: "5px",
    fontSize: "12px",
    color: "var(--academy-text-secondary, #6b7280)",
    padding: "3px 8px 3px 6px",
    borderRadius: "var(--ds-radius-sm)",
    border: "1px solid var(--academy-border, #e5e7eb)"
  }}>
              <ClockIcon /> Approx. {totalDuration}
            </span>
          </div>
        </div>

        {}
        <div style={{
    padding: "14px 16px 16px"
  }}>
          <div style={{
    display: "flex",
    justifyContent: "space-between",
    fontSize: "12px",
    color: "var(--academy-text-secondary, #6b7280)"
  }}>
            <span>Your progress</span>
            <span style={{
    fontWeight: 500,
    color: "var(--academy-text, #111827)"
  }}>
              {percent}%
            </span>
          </div>
          <div style={{
    height: "6px",
    borderRadius: "var(--ds-radius-full)",
    background: "var(--academy-track, #f3f4f6)",
    marginTop: "8px",
    overflow: "hidden"
  }}>
            <div style={{
    height: "100%",
    borderRadius: "var(--ds-radius-full)",
    background: "var(--academy-progress, #3b82f6)",
    transition: "width 0.5s cubic-bezier(0.4, 0, 0.2, 1)",
    width: percent + "%"
  }} />
          </div>
        </div>

        {}
        <div className="academy-lessons-desktop">{lessonList}</div>

        {}
        <div className="academy-lessons-mobile">
          <button onClick={() => setExpanded(!expanded)} aria-expanded={expanded} style={{
    display: "flex",
    alignItems: "center",
    justifyContent: "space-between",
    padding: "12px 16px",
    cursor: "pointer",
    borderTop: "1px solid var(--academy-border-subtle, #f3f4f6)",
    background: "transparent",
    border: "none",
    borderTopStyle: "solid",
    borderTopWidth: "1px",
    borderTopColor: "var(--academy-border-subtle, #f3f4f6)",
    width: "100%",
    textAlign: "left",
    color: "var(--academy-text-secondary, #6b7280)",
    fontSize: "13px",
    fontWeight: 500,
    fontFamily: "inherit"
  }}>
            <span>
              {expanded ? "Hide lessons" : "Show all " + lessons.length + " lessons"}
            </span>
            <ChevronDown open={expanded} />
          </button>
          {expanded && lessonList}
        </div>

        {}
        <div style={{
    display: "flex",
    alignItems: "center",
    justifyContent: "space-between",
    borderTop: "1px solid var(--academy-border, #e5e7eb)",
    padding: "10px 16px"
  }}>
          {prev ? <a href={lessonPath(prev)} style={{
    fontSize: "13px",
    color: "var(--academy-text-secondary, #6b7280)",
    textDecoration: "none",
    display: "flex",
    alignItems: "center",
    gap: "4px"
  }}>
              ‹ Previous
            </a> : <div />}
          <button onClick={handleToggle} style={{
    fontSize: "13px",
    fontWeight: 500,
    cursor: "pointer",
    padding: "6px 14px",
    borderRadius: "var(--ds-radius-md)",
    border: isCurrentDone ? "1px solid var(--academy-border, #e5e7eb)" : "none",
    background: isCurrentDone ? "var(--academy-bg, #ffffff)" : "var(--academy-btn-bg, #111827)",
    color: isCurrentDone ? "var(--academy-complete, #10b981)" : "var(--academy-btn-text, #ffffff)",
    display: "flex",
    alignItems: "center",
    gap: "6px",
    transition: "all 0.2s",
    lineHeight: "1.4",
    fontFamily: "inherit"
  }}>
            {isCurrentDone ? <>
                <CheckCircle /> Completed
              </> : "Mark as completed"}
          </button>
          {next ? <a href={lessonPath(next)} style={{
    fontSize: "13px",
    color: "var(--academy-text-secondary, #6b7280)",
    textDecoration: "none",
    display: "flex",
    alignItems: "center",
    gap: "4px"
  }}>
              Next ›
            </a> : <div />}
        </div>
      </div>
    </div>;
};

<CourseTracker courseId="funnels-websites" lessonId="order-forms" />

An order form is a checkout page element that lets visitors purchase products or services directly from your funnels and websites. When a visitor fills in their payment details and clicks buy, the order is processed through your connected payment gateway, a new contact record is created or updated, and any configured automation fires immediately.

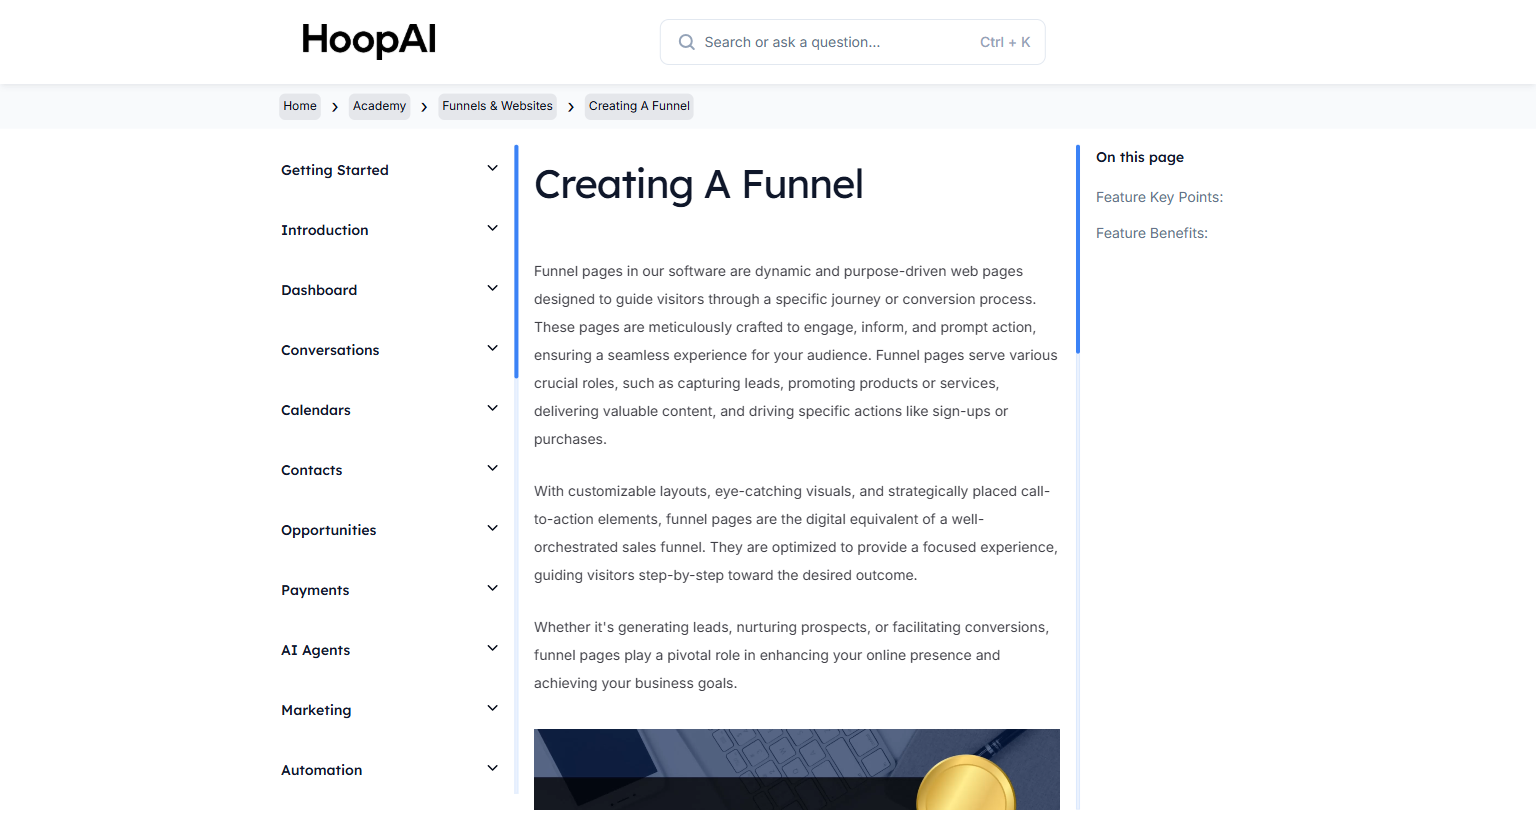
<Frame caption="The Order Forms lesson in the HoopAI Academy Funnels and Websites section">
  <img src="https://mintcdn.com/hoopai-84ec0cdc/gyU98wGhFXcTdqFf/images/academy-funnels-creating.png?fit=max&auto=format&n=gyU98wGhFXcTdqFf&q=85&s=28d21ce2a08059b0dc7abc6e718f221f" alt="Order forms article" width="1536" height="826" data-path="images/academy-funnels-creating.png" />
</Frame>

## Why this matters

A funnel without a checkout is just a lead capture page. An order form turns your funnel into a full sales machine — you can take a prospect from first click to paid customer in a single session, without any manual invoicing or follow-up. Order forms are the fastest way to sell digital products, book paid sessions, collect deposits, and run limited-time offers entirely on autopilot.

<Note>
  Before adding an order form to your funnel, connect your payment processor. Go to **Settings** > **Integrations** > **Stripe** and authorize your Stripe account. Without a connected processor, order forms cannot collect payments.
</Note>

## How to add and configure an order form

<Steps>
  <Step title="Open your funnel in the builder">
    Go to **Sites** > **Funnels** and open the funnel where you want to add checkout functionality. If you do not yet have a funnel, see [Creating a Funnel](/academy/funnels-websites/creating-a-funnel) first.

    <Frame caption="Opening a funnel in the HoopAI drag-and-drop builder">
      <img src="https://mintcdn.com/hoopai-84ec0cdc/gyU98wGhFXcTdqFf/images/academy-funnels-creating.png?fit=max&auto=format&n=gyU98wGhFXcTdqFf&q=85&s=28d21ce2a08059b0dc7abc6e718f221f" alt="Funnel builder view" width="1536" height="826" data-path="images/academy-funnels-creating.png" />
    </Frame>
  </Step>

  <Step title="Add or navigate to your order form step">
    In the funnel step structure, click **Add Step** and choose **Order Form** as the step type — or open an existing page and add the **Order Form** element from the elements panel.

    A typical funnel sequence with an order form:

    1. Landing page (your offer or sales copy)
    2. Order form (checkout page with payment)
    3. Thank you page (post-purchase confirmation and next steps)
  </Step>

  <Step title="Drag the Order Form element onto the page">
    In the page builder, find the **Order Form** element in the left panel (usually under "Forms" or "Payment"). Drag it onto the page canvas in the position where you want the checkout form to appear.

    <Tip>
      Place your order form below your offer copy but above your social proof. This gives visitors enough information to make a decision before they see the form — but keeps the checkout action visible without scrolling past your testimonials.
    </Tip>
  </Step>

  <Step title="Configure the order form settings">
    Click on the order form element to open its settings. Configure:

    * **Products:** Add one or more products from your catalog — the price pulls automatically. You can add multiple products as upsells or bundle options.
    * **Order bump:** Add an optional add-on product that appears as a checkbox below the main product — a low-friction upsell the buyer can add with one click before checkout.
    * **Payment type:** One-time payment or subscription (if the product is a recurring product)
    * **Coupon codes:** Enable or disable coupon code entry on the checkout form

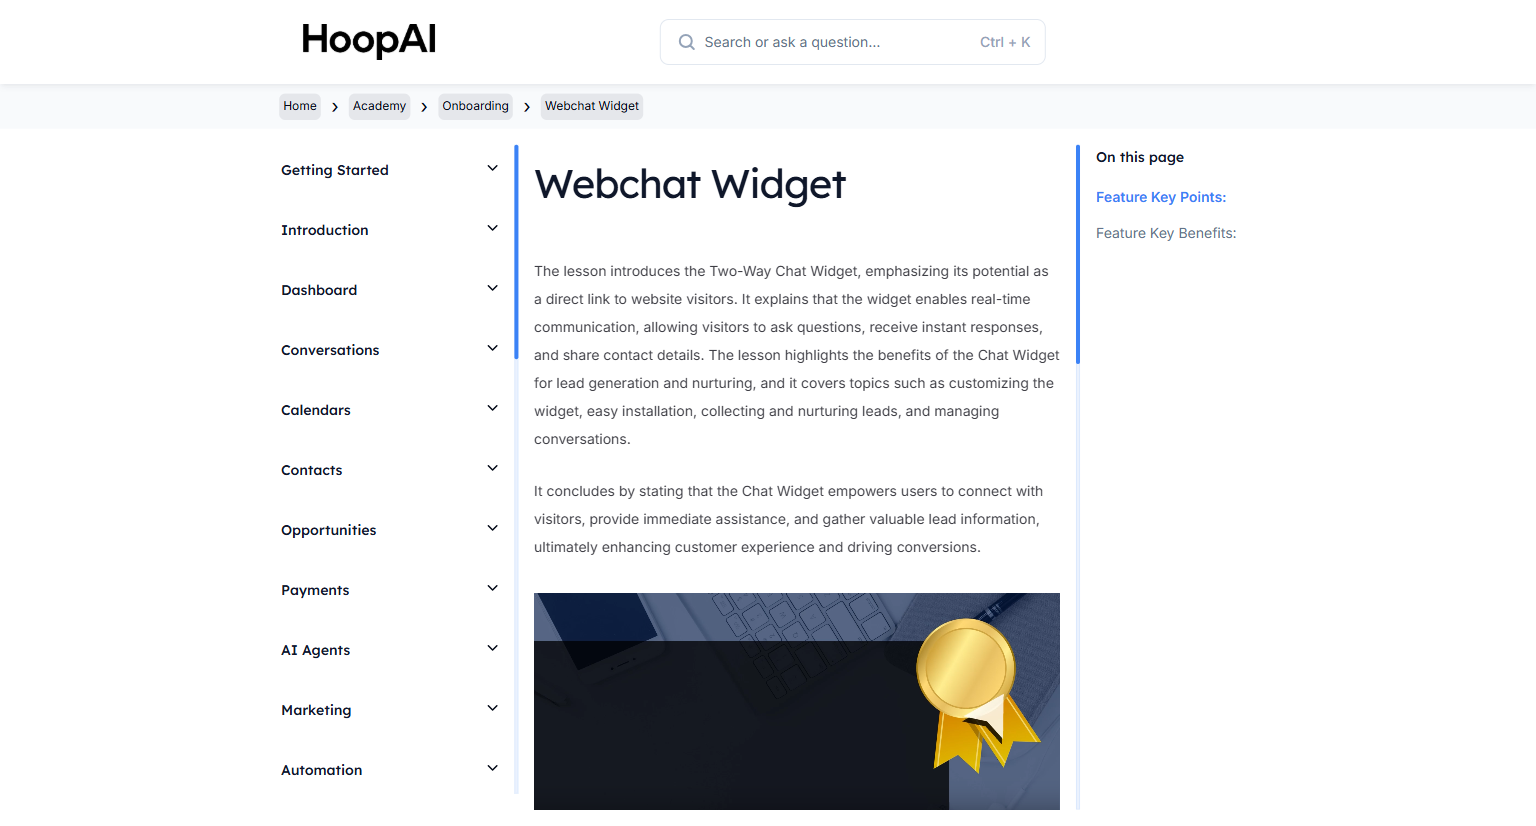
    <Frame caption="Configuring order form products, payment type, and order bump settings">
      <img src="https://mintcdn.com/hoopai-84ec0cdc/gyU98wGhFXcTdqFf/images/academy-funnels-creating.png?fit=max&auto=format&n=gyU98wGhFXcTdqFf&q=85&s=28d21ce2a08059b0dc7abc6e718f221f" alt="Order form product configuration" width="1536" height="826" data-path="images/academy-funnels-creating.png" />
    </Frame>
  </Step>

  <Step title="Customize the form fields">
    Configure which contact information fields appear on the order form. Standard fields include:

    * First name and last name (required)
    * Email address (required — used for order confirmation)
    * Phone number (recommended — enables SMS follow-up)
    * Billing address (required for physical products or tax compliance)

    Keep the form as short as possible — each additional field reduces checkout completion rates.
  </Step>

  <Step title="Set up the thank you page">
    After payment is completed, the customer is sent to the next step in your funnel — your thank you page. Configure the thank you page to:

    * Confirm the purchase and set expectations for what happens next
    * Deliver access instructions for digital products
    * Redirect to a calendar booking page for service-based purchases
    * Include a one-time offer (OTO) for an additional upsell

    <Frame caption="A thank you page configured to deliver access instructions and a post-purchase booking link">
      <img src="https://mintcdn.com/hoopai-84ec0cdc/gyU98wGhFXcTdqFf/images/academy-onboarding-webchat-widget.png?fit=max&auto=format&n=gyU98wGhFXcTdqFf&q=85&s=66e9548553a7c885294aae986c271a46" alt="Thank you page configuration" width="1536" height="826" data-path="images/academy-onboarding-webchat-widget.png" />
    </Frame>
  </Step>

  <Step title="Configure post-purchase automation">
    Connect a workflow to fire immediately after a purchase. Go to **Automation** > **Workflows** and create a workflow triggered by **Order Submitted** or **Payment Received**.

    Post-purchase workflow actions to include:

    * **Send Email:** Deliver a purchase confirmation with access details or receipt
    * **Send SMS:** Follow up immediately with onboarding instructions
    * **Add Tag:** Tag the contact as a "Customer" for segmentation
    * **Update Opportunity:** Move the deal to "Closed Won" in your pipeline
    * **Create Task:** Alert a team member to fulfill the order if manual steps are required

    <Tip>
      Send your purchase confirmation email within seconds of payment — buyers are most engaged in the first few minutes after a purchase. Use this moment to set clear expectations, deliver the product or access instructions, and schedule any next steps.
    </Tip>
  </Step>

  <Step title="Test the checkout flow">
    Before publishing, test the entire checkout process using Stripe's test card numbers (available in your Stripe dashboard). Confirm that:

    * The order form loads and accepts test payment details
    * A contact record is created or updated in your CRM after submission
    * The thank you page loads correctly after payment
    * The post-purchase workflow fires and sends the confirmation message
    * The product appears in the **Payments** > **Transactions** log
  </Step>
</Steps>

## Key points

<AccordionGroup>
  <Accordion title="Order forms vs. invoices vs. payment links">
    Use an **order form** when selling through a funnel or website page — it integrates with your page design and supports upsells, order bumps, and immediate post-purchase automation. Use a **payment link** for quick one-click payments shared via SMS or email. Use an **invoice** for formal billing with net payment terms and line-item breakdowns. Order forms are best for self-service ecommerce and course/service sales.
  </Accordion>

  <Accordion title="Order bumps for higher average order value">
    An order bump is a checkbox add-on product that appears on the checkout form below the main product. It requires no separate checkout step — the buyer simply checks the box. Order bumps typically convert at 15–30% of checkouts, making them one of the highest-ROI ways to increase average order value without any extra sales effort.
  </Accordion>

  <Accordion title="Coupon codes and discounts">
    Enable coupon codes on your order form if you run promotions. Create coupon codes under **Payments** > **Coupons** — set a fixed amount discount or a percentage, and optionally set an expiration date and usage limit. Coupon codes appear as a field on the checkout form when enabled.
  </Accordion>

  <Accordion title="Physical vs. digital products on order forms">
    For digital products, configure the post-purchase workflow to deliver access automatically — no manual fulfillment required. For physical products, enable shipping settings on the product record and include the shipping options on the order form. The platform can generate packing slips for physical order fulfillment.
  </Accordion>
</AccordionGroup>

## Key benefits

<AccordionGroup>
  <Accordion title="Fully automated sales">
    From click to payment to product delivery — the entire transaction can be automated with zero manual steps.
  </Accordion>

  <Accordion title="Integrated CRM">
    Every order creates or updates a contact record, linking payment history directly to your CRM data.
  </Accordion>

  <Accordion title="Higher average order value">
    Order bumps and upsells add revenue to every transaction without adding friction to the buying process.
  </Accordion>

  <Accordion title="Instant follow-up">
    Post-purchase workflows fire the moment payment completes — no delay in confirmation or onboarding.
  </Accordion>

  <Accordion title="No separate checkout tool">
    Everything lives inside the platform — no Shopify, Gumroad, or external checkout integration required.
  </Accordion>
</AccordionGroup>